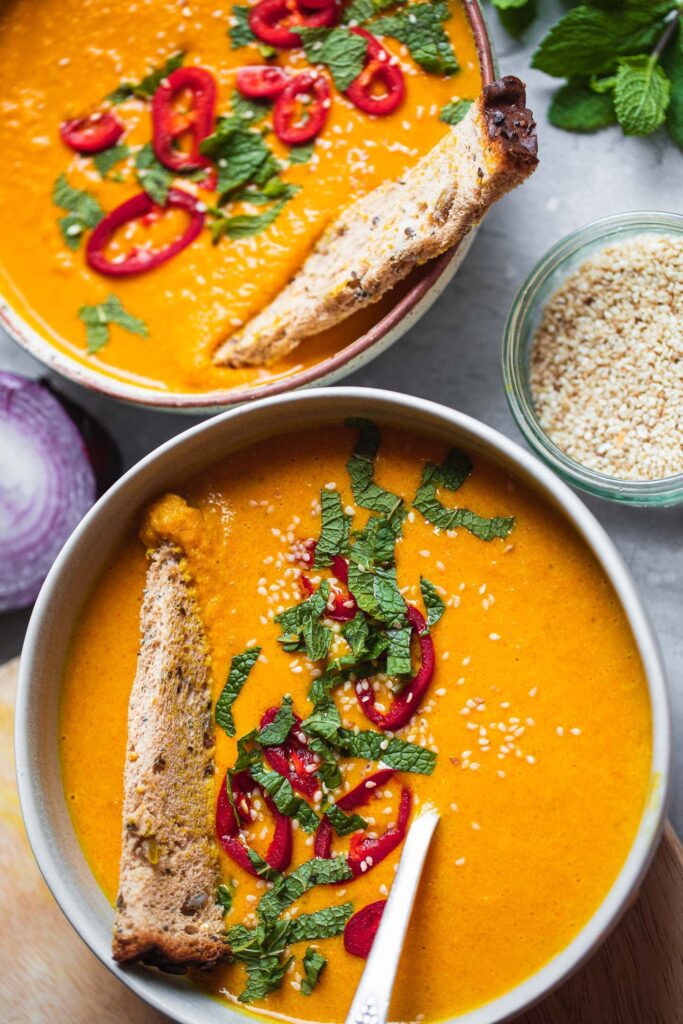
This butternut squash soup is the ultimate fall comfort food! It’s super easy to make, vegan and naturally gluten-free soup which is incredibly cozy and delicious recipe on the whole. This recipe uses a handful of simple, affordable ingredients to create a standout soup that’s more than the sum of its parts.
Thanks to the addition of one apple that it is loaded up with lots of vegetables and seasonings, plus with a hint of sweetness. Most importantly, it’s just incredibly comforting, flavorful, and delicious.
Heat the oil in a large pot on medium flame until shimmering.
Add the onion in the pot and sauté for 5-6 minutes, stirring occasionally, until it becomes golden brown.
Add the garlic and again saute for 1 to 2 minutes, stirring very lightly, until fragrant.
Add the butternut squash, green apple, vegetable stock, and water. Bring it to a boil. Reduce to a simmer, cover, and simmer for 30 minutes or so, until the squash and carrots have softened.
Let cool slightly and pour the soup into a blender, use an immersion blender, working in batches if necessary, and blend until smooth.
If you would like to make your soup thin a bit more, then stir in the remaining cup of broth. Add 1 to 2 tablespoons butter or olive oil, and blend well. Now, taste and add more salt and pepper, if necessary.
Now, season the soup generously with salt and pepper as needed. Serve the hot soup, topped with your desired toppings, and enjoy!
Notes
SAFELY SLICE YOUR BUTTERNUT SQUASH: You’ll need a sharp knife and a slip-free cutting board. Use the knife to cut off the tip-top and the bottom ends of the squash. Stand the squash upright with the thickest flat side as the base. Dividing it into half, carefully slice through it from top to bottom (careful with your finger tips). In the last, use a large spoon to scoop out the seeds and discard them.
MAKE IT DAIRY FREE/VEGAN: Replace high-quality olive oil with butter. It will make your soup taste elegant and lightly herbal.
STORAGE SUGGESTIONS: Let leftover soup cool to room temperature before moving it to a proper storage receptacle and cooling it for up to 4 days (leftovers taste even better the next day!). Or, freeze this soup for up to 3 months.
Nutrition Facts (per serving)
Calories: 154 kcal
Fat: 7g
Carbohydrates: 24.3g
Protein: 7g
Cholesterol: 7.6mg
Sodium: 1244mg
Saturated Fat: 2.4g
Sugar: 6.9g
To Sum Up!
This easy butternut squash soup recipe is truly fantastic on its own, but you can add a touch of heavy cream (or coconut milk or cream to keep it dairy-free) for extra richness, and toasted pumpkin seeds for a little bit of crunch, if desired. This top-rated butternut squash soup is smooth and creamy, it’s sure to warm you up from the inside on a brisk autumn day. Store it in the fridge for up to 4 days, or you can freeze it for up to 2 months.
If you like this soup even half as much as we did, let us know in the comments below!
Breakfast casserole is the right way to initiate the day. If you don’t want to settle for a measly breakfast, then you must give treat yourself to the best breakfast casserole recipes. This has become the best method to feed family & also the best addition to brunch with your beloved friends.
Different kinds of breakfast casserole recipes are out there that are entirely freezer-friendly, so anyone can heat, deforest & eat them before running out of the door.
These kinds of easy casserole recipes are ideal for your family or special Sunday brunch. These are unique recipes that can easily feed anywhere from 6 to 12 guests, so it is sufficient for a complete family. Here are the best breakfast casseroles recipes that can quickly fill your belly with the delight.
Table of Contents
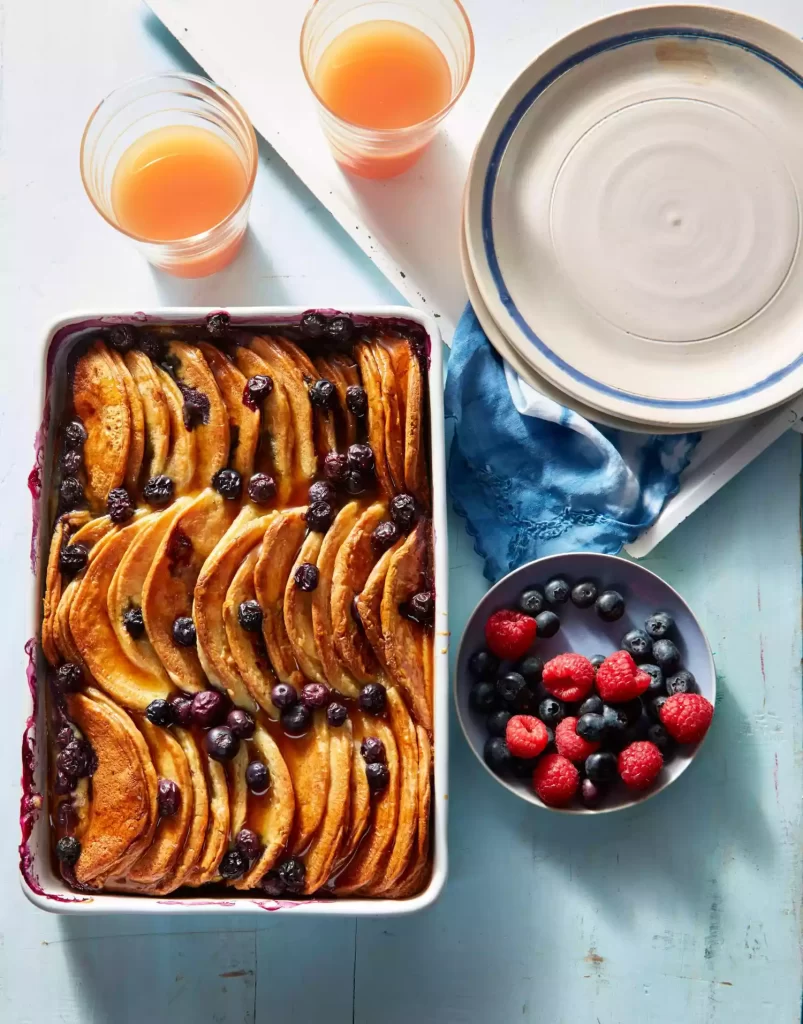
1. Pancake Casserole
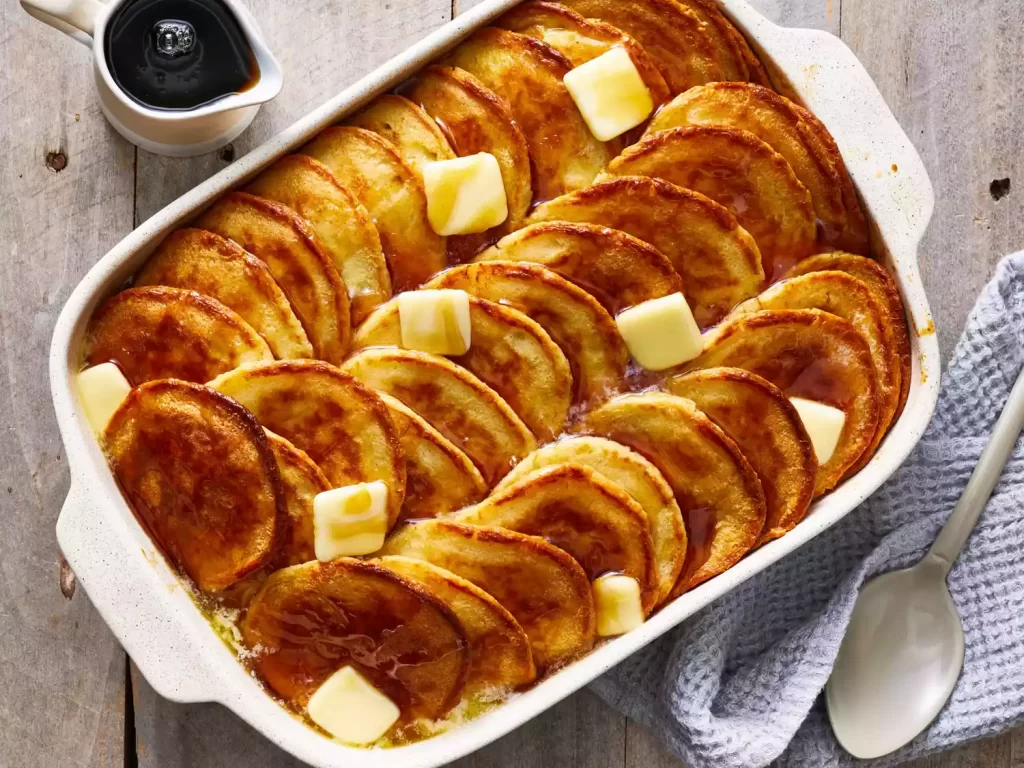
If you want to add the new brunch classic into the routine of the weekend, then Pancake Casserole would be a reliable option for you. It is the most classic pancake where you can also add some fantastic elements of bread pudding, so it will easily make a decadently & beautifully brunch dish.
You will have to let this specific dish sit overnight so it will quickly soak up all the mixture of glorious custard. Everything will automatically get better with butter.
Therefore, if you add the pads of butter on top of the casserole, then it will surely give this dish another dimension of nostalgic & melty flavour.
This is the most popular dish among adults & kids. It is a fantastic recipe which is proof that, with a little bit of determination, any dish will easily be turned into a single-tray classic. You can also top this dish with fresh berries, powdered sugar & vanilla ice cream.
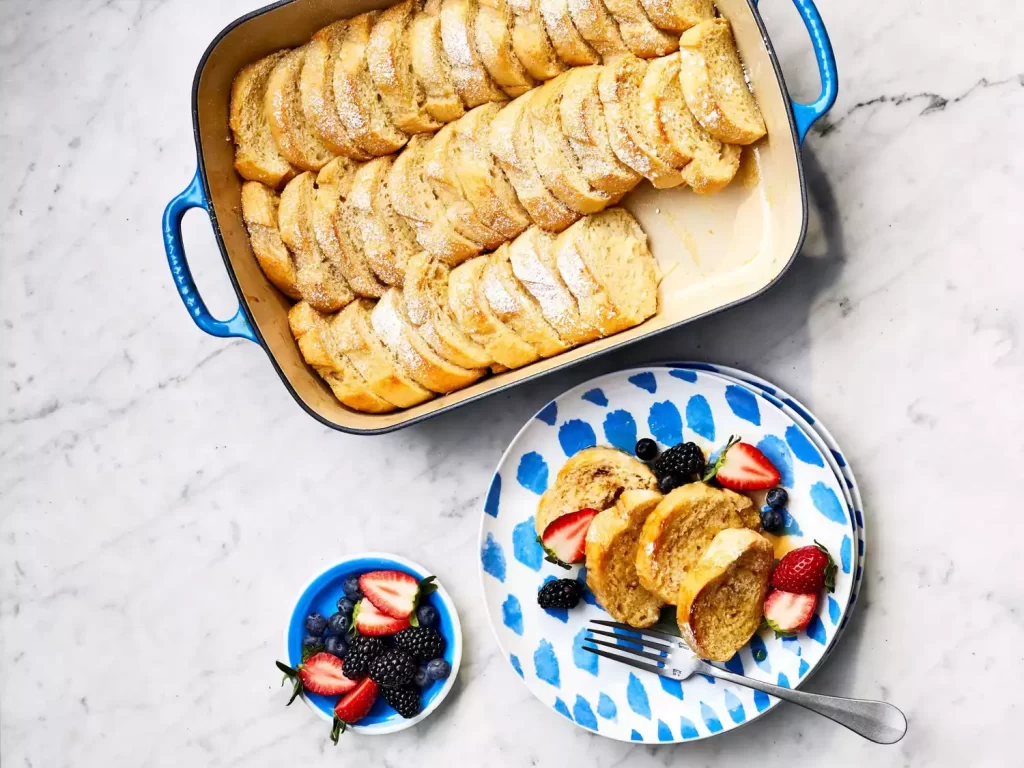
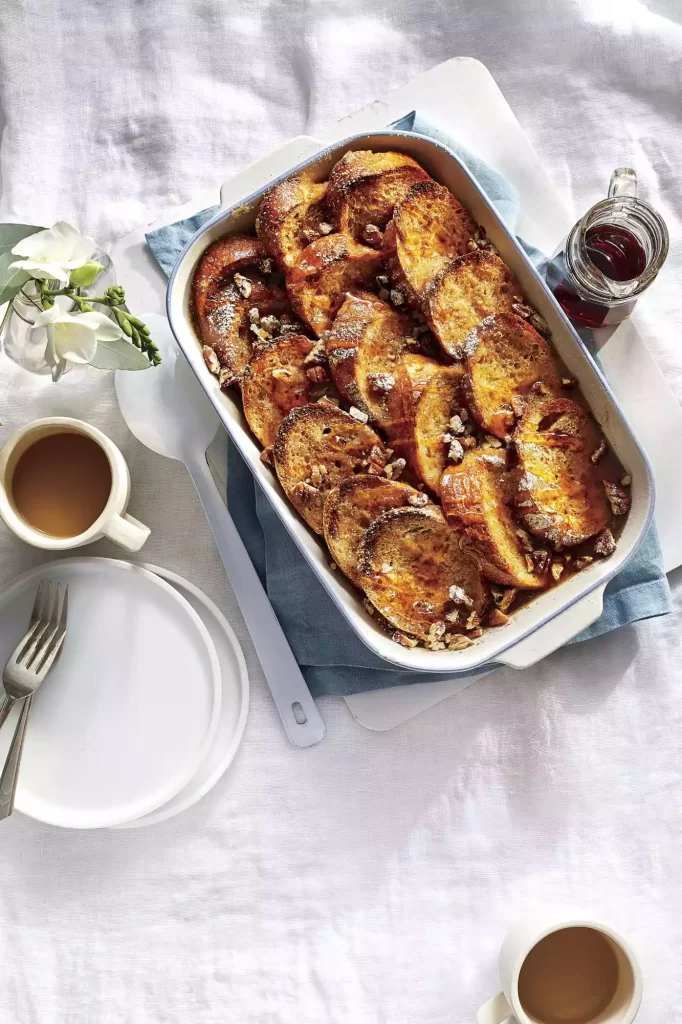
The buttermilk has become the secret to this lemony & light baked recipe of French toast. You need to whisk together the sugar, eggs, buttermilk, cream & other crucial ingredients. After that, you need to dip every slice of the bread in the mixture of eggs and try to saturate both sides.
After placing the slices of bread in the baking dish then, you will have to let them stand for approximately one hour before baking.
Make sure that you are making this delicious & satisfying breakfast casserole ahead of time. You also let the slices of bread soak, covered in the dish of baking almost one day before the serving. You must drizzle this specific French toast casserole with maple syrup or powdered sugar with fresh fruit serving.
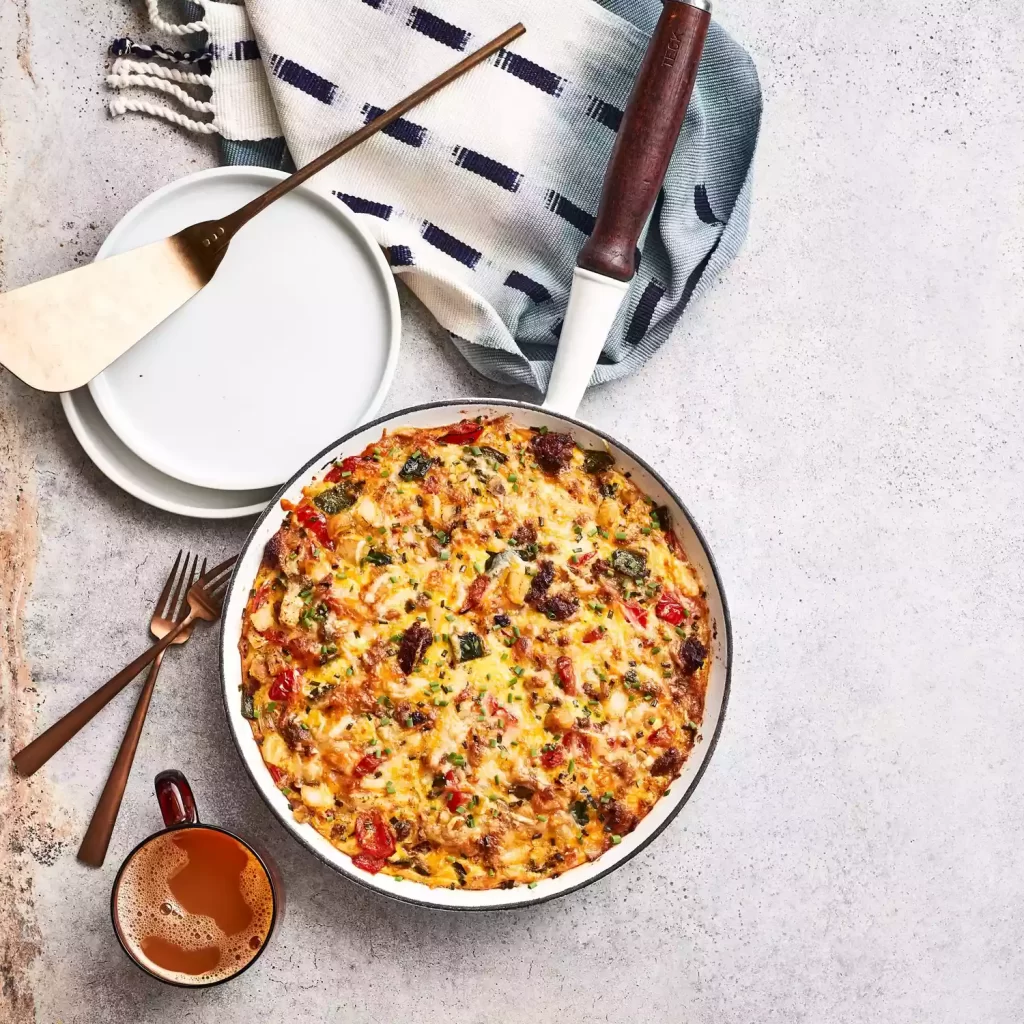
If you are looking for the right breakfast recipe for holiday guests, then you should choose this breakfast recipe. This recipe can feed a complete house; however, it has become the ideal brunch or post-holiday breakfast. It is made with egg, sausage & hash browns.
If you want to bring spice to this specific breakfast casserole, then you must add Poblano chile & bell peppers. Adding cheddar cheeses & Gruyere can be significant that can melt the dish.
You can also use refrigerated diced potatoes in this dish that will easily make this specific hash come together quickly because they are par-cooked & never requires to be thawed.
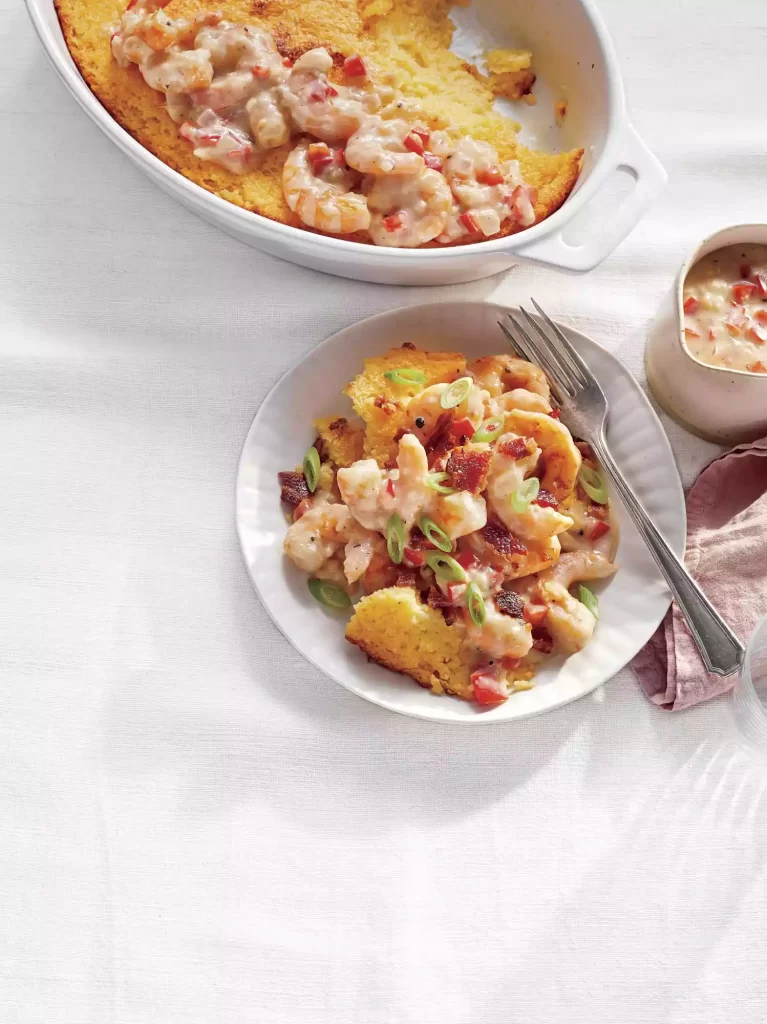
This has become the best family-style dish that you can easily prepare in one hour. It has become the best southern dish, so you can easily enjoy the comfort & flavour of this dish at home.
The most interesting about this recipe is the savoury pan sauce or shrimp gravy. It is the best recipe which is making more than enough for every person. To cook this dish, then, one must pay attention to following essential directions.
If a person is thinking about casserole, then the foremost thing which comes into the mind of every person is scoopable or side dinner entrée. This is a traditional dish that is incorporated with various best ingredients like sausage, hash browns & eggs that are downright delicious. It is the best option for the maple & waffle syrup fans.
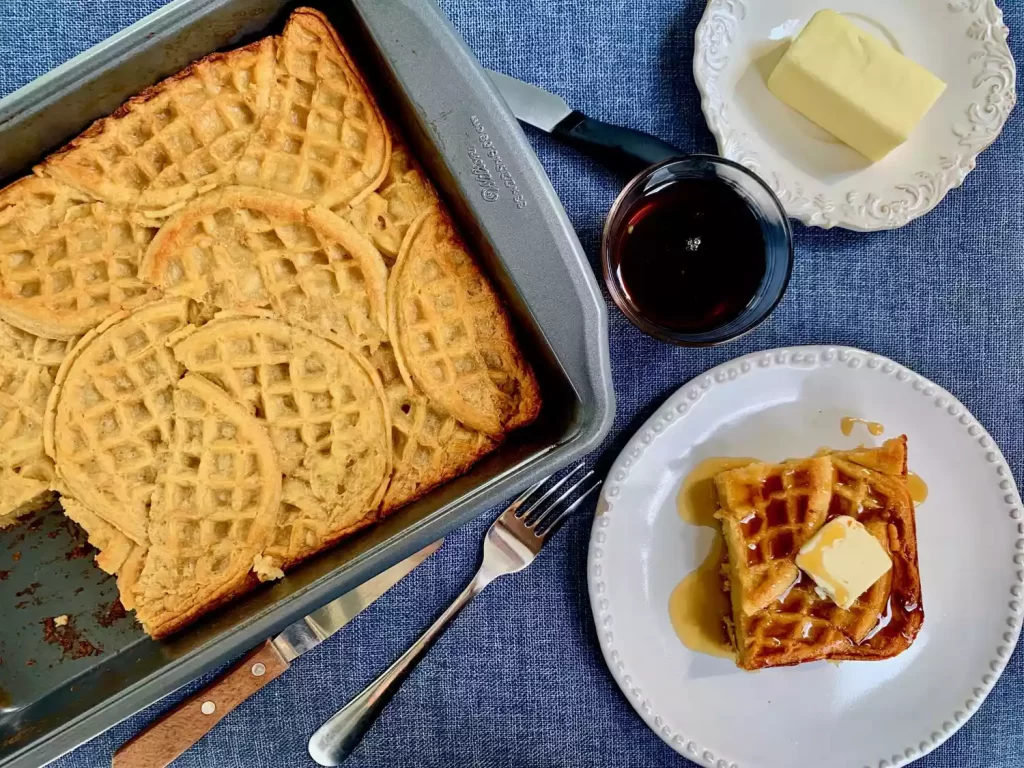
It is considered one of the best options for those who are looking for a sweet breakfast. Frozen waffles are required to toast in the oven before they are stacked inside the baking dish. This is the most delicious dish, which is almost similar to the bread pudding. The custard for this dish is made out of cream, milk, eggs & vanilla.
You will also have to toast the frozen waffles in the oven before you are stacking inside into any baking dish & also drown them into any kind of custard that is created at home and flavoured with maple syrup. Make sure that you are leaving the base of the custard to soak into the waffles overnight.
If you are looking for the best breakfast recipe for your kids, then you must consider a baked oatmeal recipe. This has become one of the healthiest recipes.
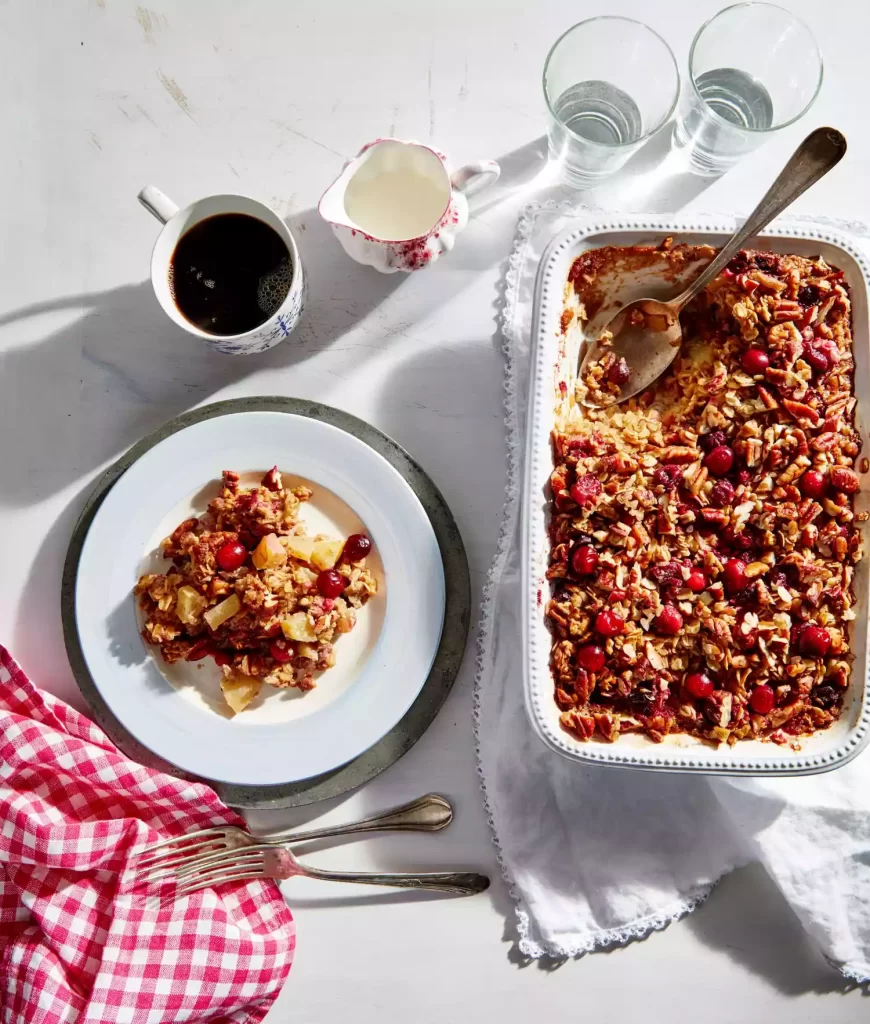
Make sure that you are trying this unique homemade version that is far better for you. It is more delicious & flavorful if you compare it with the regular oatmeal that is created on the stovetop. A single bite of the baked oatmeal will surely remind you about the warm oatmeal.
This is completely different from the oatmeal or cookie bar. To enhance the overall taste of this recipe then, you can also add healthy ingredients in it like pecans, raisins & apples. It is the best recipe which is easily adaptable for a person; however, you can also use seasonal fruit & nuts in it. This is the healthiest recipe that can make your kids happy.
For this baked breakfast, you can use the crunchy pecans & Honeycrisp apples. Make sure that you are also arranging the chopped apples in this dish. You don’t have to use quick-cooking oats; however, regular or traditional rolled oats can quickly work better in this dish. The most exciting part of this particular recipe is that you can make it in advance. You can also enjoy the dish the next day.
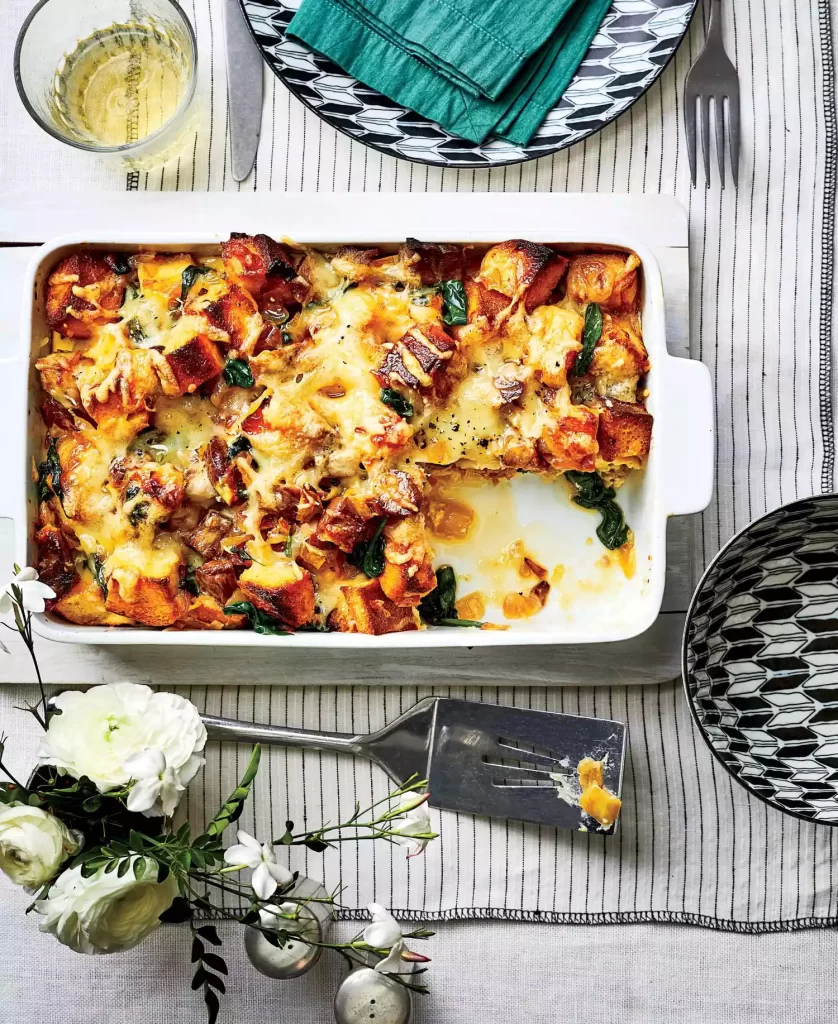
In case you are searching for the best breakfast casserole for your beloved hungry guests, then pork strata would be a reliable option for you. Almost every person loves the combination of creamy cheese, crunchy bread cubes & tender pork.
If you want to create caramelized onion, spinach & pork strata recipe, then you must consider the following things.
To create this recipe then, you are required to combine the sugar, water, mustard seeds & bay leaf in a giant bowl. You will also require adding almost one-third salt cups, and after that, one should whisk until the sugar & salt dissolve. One should also remove the pork from the brine properly.
Make sure that you are heating the oil in a giant skillet over medium-high. After that, you also require to cook the pork chops properly for almost 4 minutes on each side. You must add the onions and apple cider to the dish and cook it until softened.
You need to preheat your dish in the oven to 375F & you are required to preheat the oven for almost 10 minutes.
8. Biscuits-and-Gravy Skillet
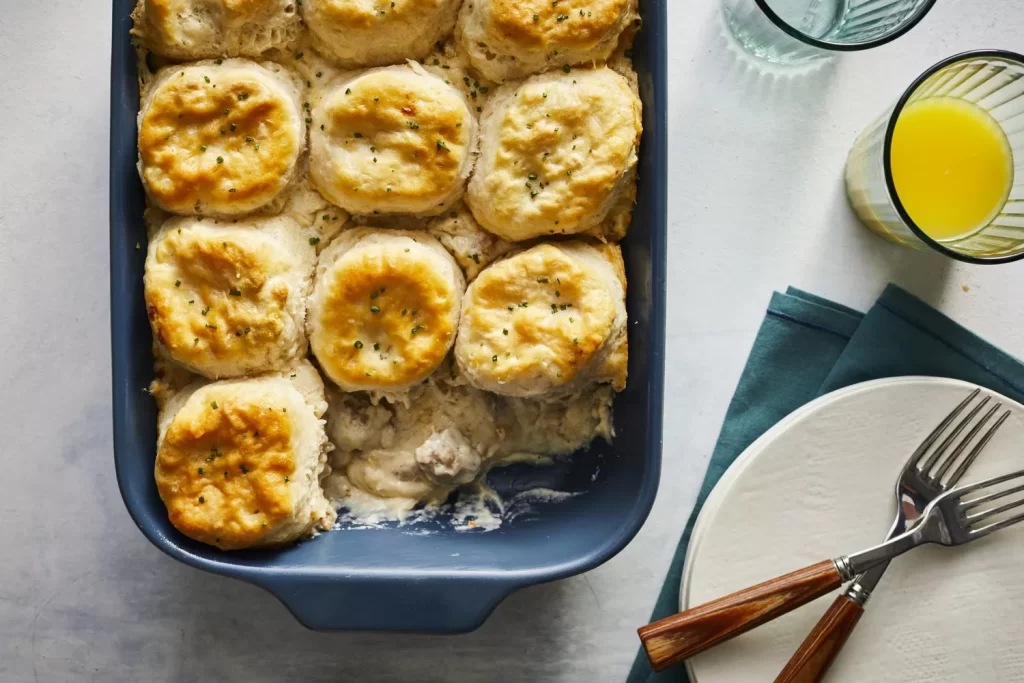
Two things that are popular in the southern traditions are Biscuits & gravy. This has become a perfect dish that can easily feed the whole family. You can create this particular dish in one pan. It has become a warm & cosy recipe; however, the skillet performs all the work.
Make sure that you are making this dish using milk, sausage & southern style biscuits together that can easily do all the work. It has become the best dish that will be ready in almost 45 minutes. If you are looking for a flavorful & rich breakfast dish, then it can be the best option for you.
It is considered one of the best old-fashioned dishes, which always tastes much better than any combination of the biscuit & gravy that you find at any neighbourhood café or diner. You need to create the mixture of the sausage & creamy gravy in the pan before you are topping with any frozen biscuits. The wide skillet will quickly be baked in the oven within 20 to 25 minutes.
This is the most fantastic breakfast casserole recipe that will bring all the festive beverage flavour into a one-dish breakfast. If you don’t want to invest additional time, then this is the best dish for a busy morning.
To create this specific recipe then, you are required to pop the premade casserole in the oven & after that, whip together the decadent maple syrup bourbon sauce so you can accompany the dish. After that, you also need to sprinkle a light dusting of sugar across the sweetened layers of challah.
If you want to make everything easier, then you should make use of a trusty sheet pan so you can quickly cook a specific plate full of crispy bacon. This is going to be a better dish that will make your guests happier. You need to add essential ingredients to it to create the dish, like milk, eggs & bread. If you also want to make this special toast more delicious, then you should add refrigerated eggnog, Turbinado sugar & challah bread.
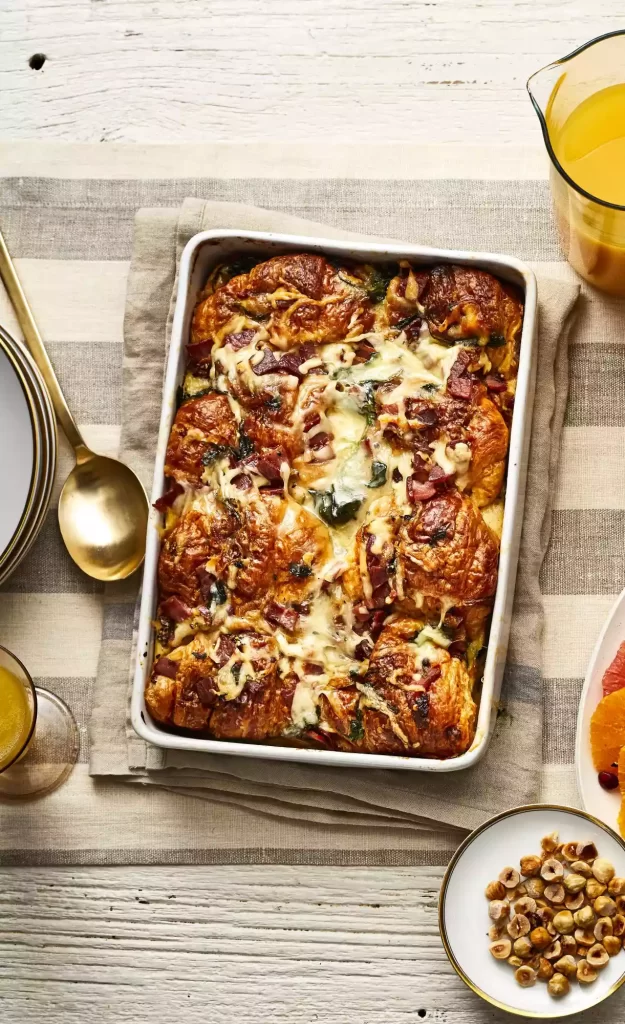
Thousands of breakfast casserole recipes are out there, but this has become the most popular & latest recipe. This is created with the day-old mini croissants, rich & cheesy egg and caramelized onions.
This has become a real crowd-pleaser that will easily be created ahead. All you need to do is assemble the casserole correctly & store it properly.
After that, one needs to be unbaked in the refrigerator overnight. In the early morning, you are required to pop in the oven. You also keep an eye on the casserole while it is baking.
Bear in mind in case this buttery croissant is exposed on the top, then it will automatically get dark, so you will have to be in a tent with the foil while it finishes cooking.
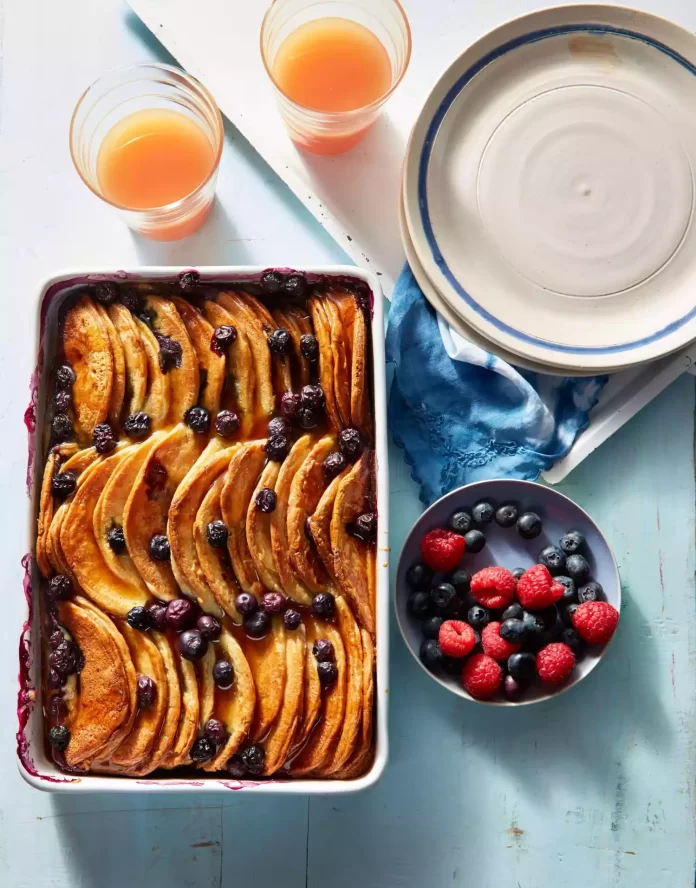
Pancakes have a favourite for almost every member of the family. This has become the most stunning pancake casserole, which was also created ahead of time.
It needs a significant amount of time to get children up & ready before enjoying a specific indulgent brunch. You will need to make this dish a night ahead & after that, you require to pop it in the oven.
If you want to prepare a blueberry pancake, then you will need several ingredients like baking powder, baking soda, salt & sugar in the most enormous bowl.
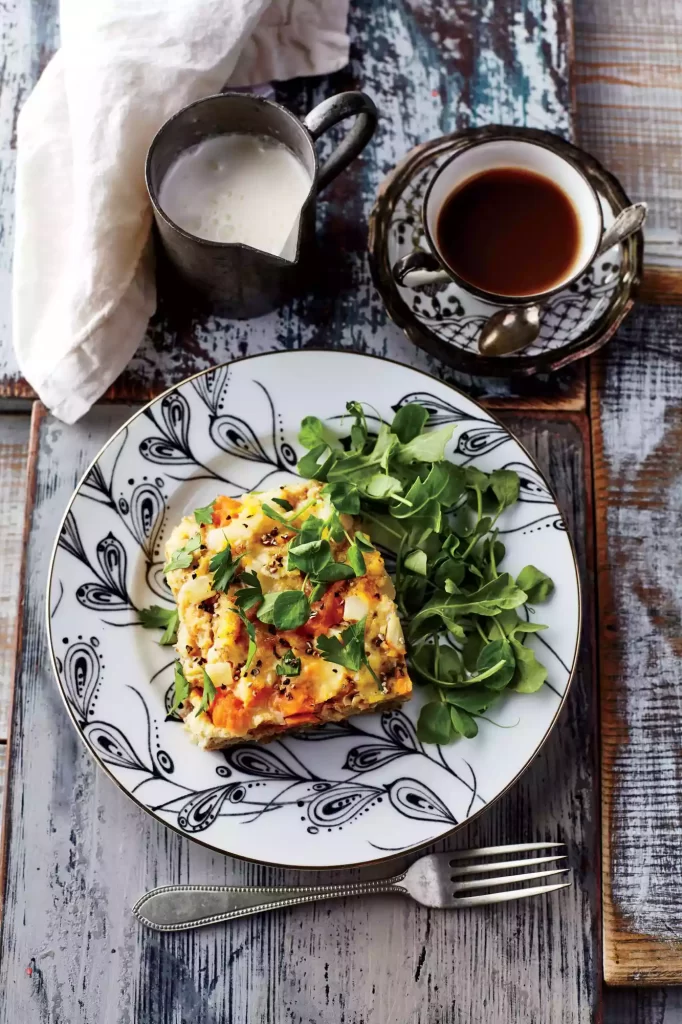
If you want to make this exciting casserole, then you need to use sweet potato, mozzarella cheese & pork sausage. This will help you in making substantial casserole.
All you need to initiate this recipe by tenderizing the potatoes, and after that, you are required to pop the potato in the microwave. Make sure that you are putting spuds in the safe bowl of a microwave with the water.
After that, you need to cover it with plastic wrap & you will need to cook it on the HIGH until they are tender. It takes almost 4 minutes to create this dish. You will have to create the base with Italian seasoning and a mixture of eggs.
Lastly, these are the most delicious breakfast casserole recipes. From bacon to grits, eggs & hash browns, this has become one of the best collections of breakfast casseroles that come with all your morning favourites. These are the best casserole recipes that are an ideal option for the breakfast of a casual family or a special Sunday brunch with your beloved relatives or friends. Make sure that you are following the directions and instructions of recipe that will help you great deal.
No tricks here, just a delicious treat! These spooky cookies are just perfect for the best Halloween party. They’re so easy to make, too.
Try coloring the cookie dough with black or red food coloring; it may not be pretty but it will look scary. Complete with ‘squashed flies’ made from chocolate chips, they’ll be a big hit. Plus, these are so fun to get the kids involved with baking up a spooky treat together.
For the cookies: Beat the butter and sugar together in a large bowl, preferably using an electric mixer, until the mixture is light and fluffy.
Beat in the eggs and vanilla extract. (If the mixture looks a little curdled, add a spoonful of the flour.) If you’re using food coloring, add a few drops to the mix.
Whisk together the flour and baking powder in a separate bowl. Stir the flour into the butter mixture and work into a dough using floured hands. Turn onto a floured work surface and knead into a ball (the dough will be quite watery).
Divide the dough into two portions, wrap in cling film and leave it to chill in the refrigerator for at least 1 hour.
Preheat the oven to 350°F. Line 2 baking trays with greaseproof paper.
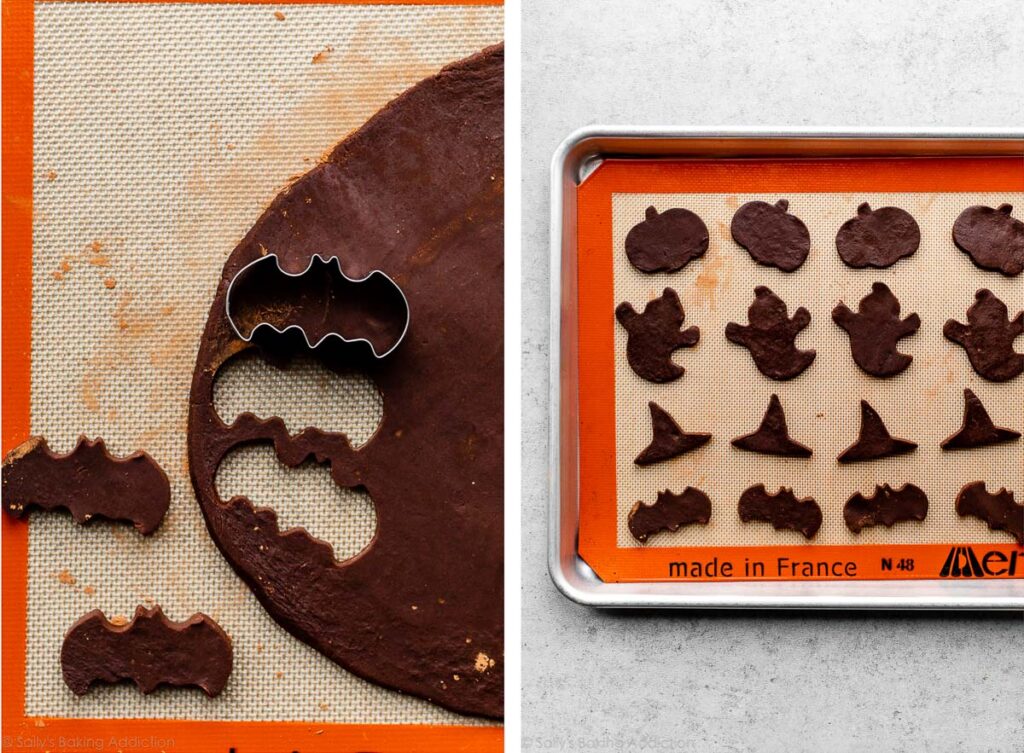
Roll the dough out to 0.5cm/¼ in thickness on a lightly floured work surface. (It’s best to roll out one portion of the dough at a time, leaving the remainder in the fridge.) Cut shapes out with the Halloween cutters. Take a few limbs and heads off the gingerbread man for added gore.
Place the cookies onto the baking tray, leaving a gap between them in case they spread a little.
Bake for 12-15 minutes, leave on the tray for 10 minutes and then move to a wire rack to finalize cooling.
Once cool, let your creative mind run wild. Use the red writing icing along the edges of the missing limbs and heads as blood. For the skeletons and mummies, roll the fondant icing out to a 0.5cm/¼in thickness on a work surface dusted with icing sugar and cut out shapes using the same cutters as the cookies.
Brush the cookies with the warmed apricot jam and stick the icing onto the cookies. Garnish with white and black writing icing.
When measuring flour, spoon it into a dry measuring cup and level off the extra. (Scooping directly from the bag accords the flour, resulting in dry baked goods.)
Plain or garnished sugar cookies freeze well for up to 3 months. Wait for the icing to set entirely before layering it between sheets of parchment paper in a freezer-friendly receptacle. To soften, thaw in the refrigerator or at room temperature.
Roll out the cookie dough directly on a silicon baking mat or parchment paper so you can quickly move it to the refrigerator. If you don’t have enough space for two baking sheets in your fridge, pile the pieces of rolled-out dough on top of each other.
Nutrition Content
Calories: 127kcal
Carbohydrates: 18g
Protein: 1g
Fat: 6g
Saturated Fat: 4g
Cholesterol: 20mg
Sodium: 58mg
Potassium: 19mg
Fiber: 1g
Sugar: 12g
Iron: 1mg
To Sum Up
These cookies are great for gifting or for sending someone. I personally love these sugar cookies because they are just too flavorful and if you don’t overbake accidentally, they will make you remember about brownies.
If you have any questions about the recipe or would like to share your version of sugared cookies, please feel free to comment. Don’t forget to share it with your friends and family, I am sure they’ll love it too.
Halloween is considered one of the favorite festivals for children and adults. It is celebrated with lots of spooky-themed dress parties and some special foods.
If you’re looking to make a few treats for your Halloween party this year, here are some quick and easy recipes that are sure to be perfect. Keep the night spooky with these popular recipes for Halloween-themed appetizers, desserts, and cocktails.
Table of Contents
Popular Recipes For Your Halloween Family Dinner
1. Easy Halloween Cookies
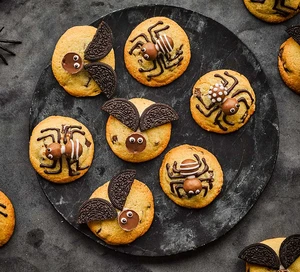
The First recipe on the list is Easy Halloween cookies. As the name suggests, this recipe is simple, and you can make it effortlessly for Halloween recipes. The preparation time of this recipe is about 25 minutes, whereas cooking can take upto 20 minutes.
Ingredients
You will need softened butter, caster sugar, light brown soft sugar, vanilla extract, large eggs, plain flour, baking powder milk, and dark chocolate chips. To decorate the cookie, you can use melted dark chocolate or icing sugar or Maltesers, caramel-filled chocolates, and cream-filled chocolate sandwich cookies.
Steps to Cook
First of all, start heating the ovenand line up the two baking sheets with baking parchment. Next, whisk the butter and sugar till it gets light and fluffy.
Add the vanilla and egg and start beating again to properly mix the ingredients.
The next step is to stir the flour and baking powder to make the stiff dough. Then, finally, sprinkle some chocolate chips on it.
Now you need to make small rolls to make the required quantity of cookies. Put the rolls on the baking sheet with an even distance between them, and now slightly press the dough to settle.
Now start baking your cookie for 10 to 12 minutes until it gets golden. Now get them out of the oven and let them cool down.
Now, to give them the shape of spiders, take the melted chocolate into a piping bag, put royal icing into it, and cut the ends of the bag. Then pipe a royal onto the Maltesers to create the spiders. Finally, decorate your cookie with royal icing and chocolate.
You can also give them the shape of the bat by cutting the cookies into half and adding the stick, royal icing, and chocolate to make it look like the bat.
2. Halloween Cake Pops
This recipe looks like a popped-up eyeball and is very popular among kids during Halloween. It is easy to make chocolate cake pops which can be ready in half an hour. Here are the ingredients that you need and the method to make them.
Ingredients
You will need Madeira cake, an Oreo cookie, a bar of milk chocolate melted, a melted bar of white chocolate, smarties, icing pens, wooden skewers, a small pumpkin, deseeded to stand pops in, etc.
Steps to Cook
For the first step, put all the Madeira cake and cookies into the processor bowl, now pour some melted milk chocolate, and properly mix them with the help of a food processor.
Now transfer the mixture to the bowl and make a small-sized ball. Freeze them for about two hours, and they should remain firm.
Now all you need to do is push a skewer into each ball and then cover the balls with white chocolate to look like eyeballs.
Now stand the cake pops in the pumpkin and then put the Smartie onto the surface. Then chill them so that the chocolate can set properly. Now with the help of icing pens, draw the veins and pupils to the eyeballs to look real.
3. Halloween Slash Cake
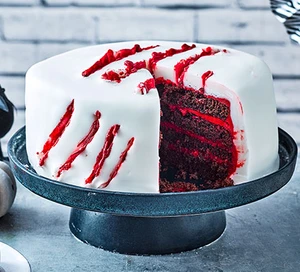
You cannot miss this cake at the Halloween party as this is one of the popular cakes everybody likes to eat. The jam, filling, and toppings make this cake taste amazing and suit the theme too. Here is how you can make this recipe at your home.
Halloween slash cake is easy to cook and takes about 45 minutes of preparation time and 30 minutes of cooking time. So you need to start cooking before the party if you want it to be ready by the time your party starts.
Ingredients
For this cake, you will need unsalted butter grapeseed oil, or another flavorless oil, milk, yogurt vanilla extract, large eggs, light muscovado sugar, plain flour, baking powder, cocoa powder, strawberry jam, and white fondant icing. For the buttercream, softened butter, icing sugar, and red food coloring will be required.
Steps to cook
Heat the oven and butter and line the bases to two sandwich tins. Now put the butter, oil, milk, yogurt, vanilla, and eggs and beat it.
Now mix all the dry ingredients properly and add a pinch of salt, tip the wet ingredients and keep whisking until it gets smooth.
Now put the ready batter into the tins and bake them for 30 minutes until the skewer inserted in it comes out clean. Not after 30 minutes; take them out and let them cool for 10 minutes.
Start making the buttercream; add sugar, butter, few drops of red coloring and beat it. Now add a little bit of boiling water to soften the buttercream.
Use the knife to trim the cake. Now take a layer of the cake and put the buttercream and jam according to your taste on top of it. Repeat the same step with other layers too.
Now roll the fondant icing all over the cake to fully cover it. Now add icing sugar on the top and side of the cake. Cut slashes all over the cake and then pour some buttercream mixed with water to look like the blood.
4. Halloween Doughnuts
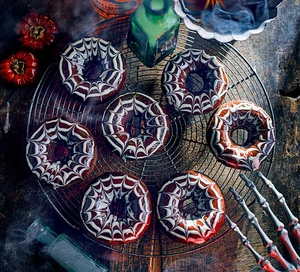
You can make halloween doughnuts and make them look like the spider webs on them by using dark white chocolate. This is one of the kid’s special treats perfect for Halloween. It also saves you time, as it only takes about 30 minutes to make this doughnut.
Ingredients
You will need softened unsalted butter, caster sugar, egg, plain flour, baking powder, cocoa powder, whole milk, and vanilla extract. To decorate the doughnuts, you can have dark chocolate or white chocolate.
Steps to cook
Set the 180 C temperature to your oven and butter the doughnut molds.
Put the butter and sugar in a bowl, and whisk it properly. Beat the egg too.
Add plain flour, baking powder, cocoa powder, salt, milk, and vanilla to it and mix well.
Put the batter into the moulds and bake them for about 10 minutes. Bake them until they start coming out of their moulds.
It is time to take them out of the oven and let them cool. Then, melt the dark chocolate and dip the tops of the doughnuts into the chocolate and place them separately.
Once again, melt the chocolate, and drizzle the white chocolate on the doughnuts to cover it completely. Now use a cocktail stick to make it look like a spider web. Finally, the doughnuts are ready to eat and served fresh for the richness of the taste.
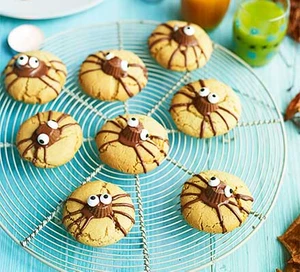
5. Spider Biscuits
The preparation time of the spider biscuits is 25 minutes, whereas it takes 10 minutes to cook. They look good and cute and are the best treat to add to your Halloween party.
Ingredients
You need softened butter, peanut butter, golden caster sugar, medium eggs, vanilla extract, plain flour, bicarbonate of soda, peanut butter cups, rolos or Maltesers, chopped milk chocolate, and icings.
Steps to cook
Line up the two baking sheets with parchment and heat the oven. Use a hand whisk to mix the butter, peanut butter, and sugar until they get light and fluffy. Then add the eggs and vanilla and beat it.
Not add the flour, bicarb, and pinch of salt to the mixture and combine them well.
Now you can make as many biscuits as you like by scooping on the baking sheets and spreading them evenly. Now press over the top of the biscuits using your thumb. Bake them for a few minutes until firm. Then take them out of the oven and let them cool.
Now add some topping to the biscuits. For example, put the peanut butter cup, color, or Malteser.
Now heat the chocolate in the microwave and scrape it into the piping bag. Now pipe them to make the legs of the spider and decorate them to make the eyes and pupils of a spider on the biscuits.
The biscuits are re ady to serve.
6. Halloween Bark
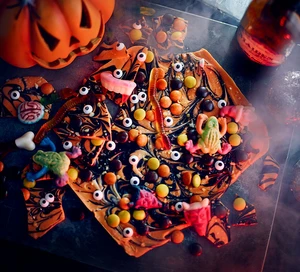
This fusion Halloween dish is great for Halloween, as kids love to see and eat chocolate bark. You can read this recipe in twenty minutes, so it is a simple recipe you can make whenever you are short on time.
Ingredients
The ingredients to make Halloween bark are, white chocolate, orange food coloring, dark chocolate, orange, yellow and brown sweets, shop bought edible eyes.
Steps to cook
The prep’s first step is to ready the baking tray by putting baking parchment in it.
Then melt the white chocolate in a simmering water pan. Stir through the orange food coloring and when ready, keep it aside.
Take a separate bowl, melt the dark chocolate, and mix the black coloring.
Now put some melted orange-colored chocolate into the tray, drizzle the black-colored chocolate, and swirl it with the end of the skewer. Now sprinkle the colored sweets and edible eyes bought from the shop.
Chill them for about an hour or two and break them into shards.
The Halloween bark is ready to eat; make sure you serve it on the same day, but you can also store them for about weeks for further use.
7. Halloween Mocktail Punch
Here is the ghoulish drink that goes perfectly with all the treats for the Halloween party. They are loved by everyone, from kids to adults. You can also be creative with them to make the drink as you like. It is an easy-to-make mocktail that you can serve within 10 minutes. Here is how you can make it.
Ingredients
For this mocktail, you will need can lychees, a jar of cocktail cherries, raisins, a carton of blueberry, blackberry, or grape juice, one carton of cherry or cranberry juice, and sparkling water.
Steps to make Halloween mocktail punch
First, take the disposable gloves, rinse them, and fill each with water. Then tie the knot to make it look like a balloon full of air. You need to then freeze it overnight. Make sure that you have tied it strictly to avoid leakage.
Drain the lychees and cocktail cherries and put the juice in a jug. Put the raising into the end of the cherry and push this cherry into the lychees to make it look like eyeballs.
Now put all the juices, cherries, and cranberries into a large bowl. Also, add the eyeballs into it. Now carefully peel the gloves to add the punch and sparkling water.
Make sure you use chilled water and juices to make it taste better.
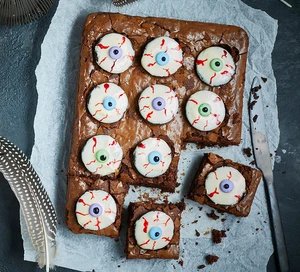
8. Halloween Brownies
What can more sweet be more than tasty brownies? It beast the shop-bought sweets and is a real treat for Halloween. They are loved by everyone. They can take a little bit of time but be ready to as you will enjoy it once it gets ready.
Ingredients
Butter, dark chocolate, large eggs, caster sugar, plain flour, cocoa powder, milk chocolate, white chocolate, crème filled chocolate sandwich cookies, sugar-coated chocolates, and red and black icing pens.
Steps to cook
Melt the butter, add dark chocolate, and stir until they get completely smooth. Then leave them for a few minutes and heat the oven.
Start whisking the eggs and sugar mixture until it gets thick. Now add the dark chocolate mixture to the edges of the bowl, sift over the flour and cocoa, and add milk chocolate to fold everything together. Put the prepared mixture into the tin and bake them for about thirty to forty-five minutes.
Do not forget to make the eyeball; it’s a Halloween recipe. First, heat the chocolate and stir until it gets smooth. Now dip all the cookies in it to cover one side of the cookie with chocolate, and then pour some sugar-coated chocolate in the center. Then leave them to set and when the chocolate fully dries, make the red veins on the eyeballs using an icing pen.
It is time to take out the baking brownies; now, put the eyeball on the surface of the brownies and then cut them into smaller pieces to serve to the guests.
Conclusion
These are some popular Halloween recipes that you can try easily at home for your kids, friends, and family. They are easy to make, and with the help of all the above guides, now you know how to throw a delicious Halloween party.
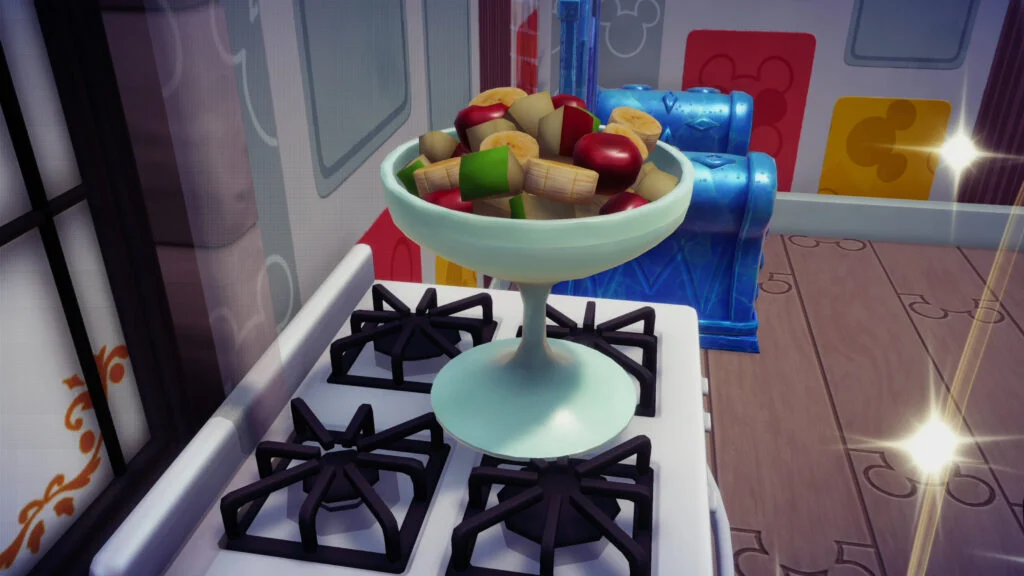
Disney Dreamlight Valley has recently launched a brand new online game. It is launched by Gameloft, one of the popular publishers of online games. This is a new simulation, adventure and fun game in which you will find a lot of Disney and Pixar characters.
You will be challenged with lots of challenges and levels in this game. It is currently a trending game among gamers because of so many activities and explorations to be involved in this game.
And among those activities is eating different food or meals. Yes, here in this game, you need to cook food and meals to be able to eat them so that you can recover your energy to continue exploring the game.
There are so many recipes in this game that you can enjoy cooking and eating only if you know how to do it right. There are hundreds of ingredients, and you can make hundreds of dishes rated from one to five stars. So if you are new to this game and want to learn how to cook a meal and different recipes in this game, then keep reading this guide to learn everything about the recipes and their ingredients.
How To Cook Meals And Dishes In Disney Dreamlight Valley?
Cooking is an important aspect of the game Dreamlight valley, as here you will be able to eat and sell all the cooked recipes. You can easily cook meals in Dreamlight Valley if you know how to do it right.
Selling the recipes will earn you Star coins, or it can help you increase the friendship levels with the different characters present in the game and among other elements.
So you need to know how to cook in Disney Dreamlight Valley so that you can continue to a completely different level of the game can continue your exploration of the Dreamlight Valley.
Here are the easy steps to cook meals :
First of all, you need to locate the recipe in the game you wish to cook
Then you need to gather the ingredients from different places
Then mine coal and go to your house to start with the stove
Now all you have to do is to put in all the ingredients to cook the recipe you want.
You can find different recipes at different places in the Dreamlight Valley, and you can experiment with them as per your choice.
Recipes For Appetizer
To start with the Appetizer, here are some of the names and ingredients of the recipes that you can cook. You also have given the selling price of a particular recipe.
These are all recipes you will find in the Disney Dreamlight Valley for now, and now you know how to cook all of them. You should also make sure that you use the recipe menu on the screen’s upper side to choose the recipe you wish to make. Then, select the fill options button to automatically put all the ingredients in. Also, do not forget to store the ingredients in the inventory for further use.
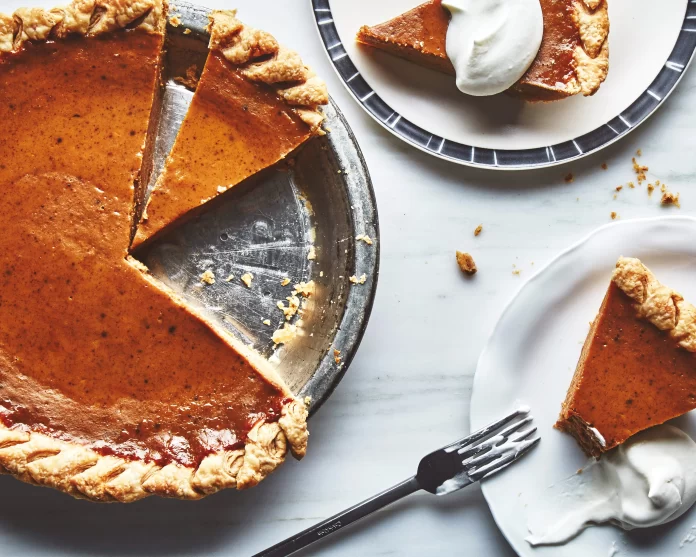
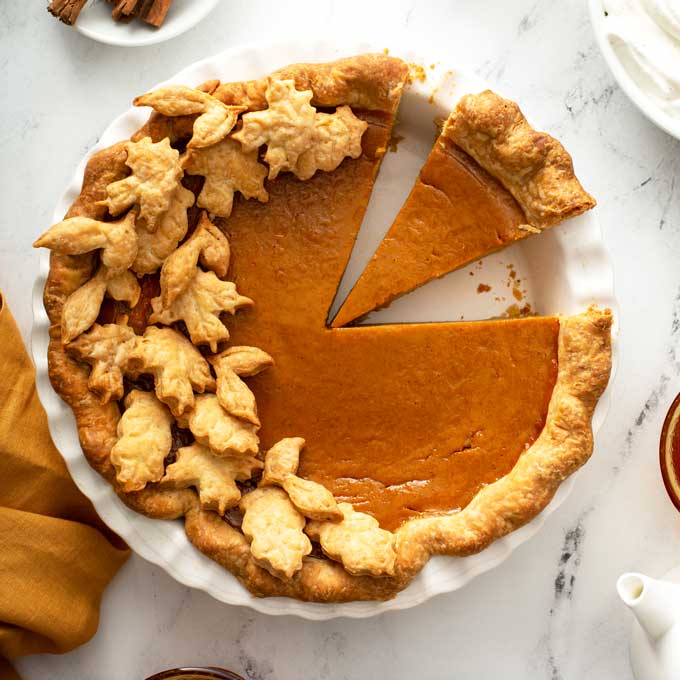
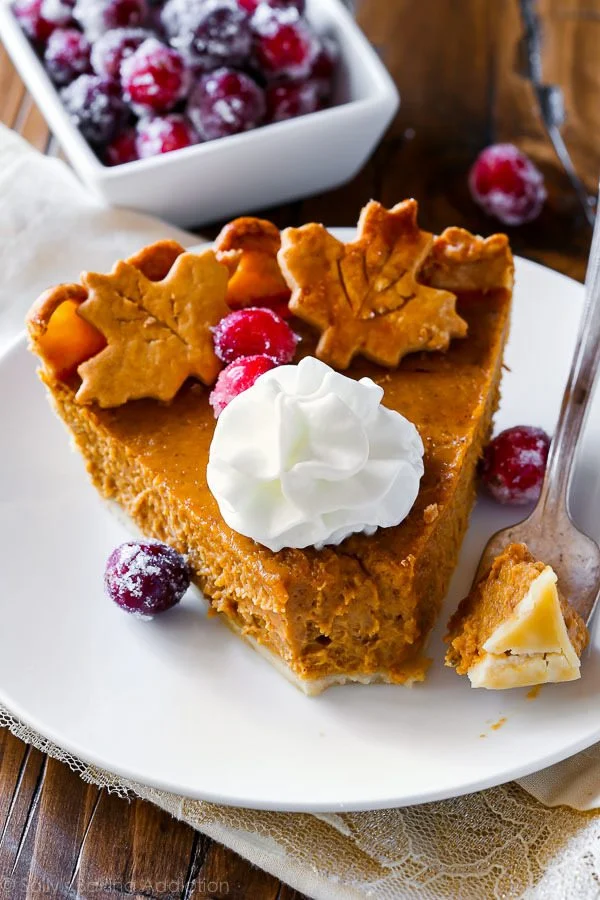
When it comes todessert, Pumpkin Pie is the go-to dish for the early winter. This recipe promises a tender, flaky crust and smooth pumpkin filling that won’t crack as it cools. Always adding the sweetened whipped cream.
Heat the oven to 425°F and set an oven rack in the middle position.
In a medium bowl, mix flour, 1/2 teaspoon salt, and the oil with a fork until all flour is moistened. Sprinkle with cold water, 1 tablespoon at a time, tossing with a fork until all water is absorbed. Shape the pastry into a ball. Press in the bottom and up the side of the 9-inch glass pie plate.
In a large bowl, combine the pumpkin puree, egg, egg yolks, white sugar, dark brown sugar, flour, salt, cinnamon, ginger, nutmeg, cloves, cardamom, and evaporated milk. Whisk it all together until smooth.
To prevent spilling, place the pastry-lined pie plate on the oven rack before adding the filling. Carefully pour pumpkin filling into the pie plate. Bake for 15 minutes.
Now you’ll reduce the temperature to 350°F and continue to bake. This helps the pie to cook evenly without cracking.
Then bake the pie for 50 to 60 minutes, until the filling is just set. The pie is done when a knife tip inserted in the center comes out wet but relatively clean. The center should be just barely jiggly.
Once done, transfer the pie to a wire rack and allow it to cool completely for at least 3 hours before garnishing and serving.
After a few hours, take a chilled medium bowl, and beat whipping cream and 2 tablespoons sugar with an electric mixer on high speed until stiff peaks form. Serve pie with whipped cream.
Before serving, you can also decorate it with sugared cranberries and pie crust leaves.
I have noted that, unlike other pies, a pumpkin pie can be made entirely from pantry items.
Pumpkin pie is an egg-based custard filling and should be stored in the refrigerator. Leftover pumpkin pie can be stored in the refrigerator for up to four days.
Despite ground ginger, nutmeg, cloves, and cardamom, whereas you can use 1 teaspoon of pumpkin pie spice. Be sure to still add 1 and 1/2 teaspoons of cinnamon.
Lastly, a canned pumpkin is best in this pumpkin pie recipe. Moreover, if using fresh pumpkin puree, lightly blot it before adding it to remove some moisture. The bake time may be longer.
To Sum Up
This homemade pumpkin pie recipe has just a few simple ingredients and a fuss-free pat-in crust. Better yet, it’s sure to fill your house with the delicious aroma of home baking. You’ll be licking your fingers after just one bite!
If you’re looking for a show-stopping dessert that’s sure to impress, thenlook no further than this delicious Pumpkin Pie. Trust us, it’s worth the effort!
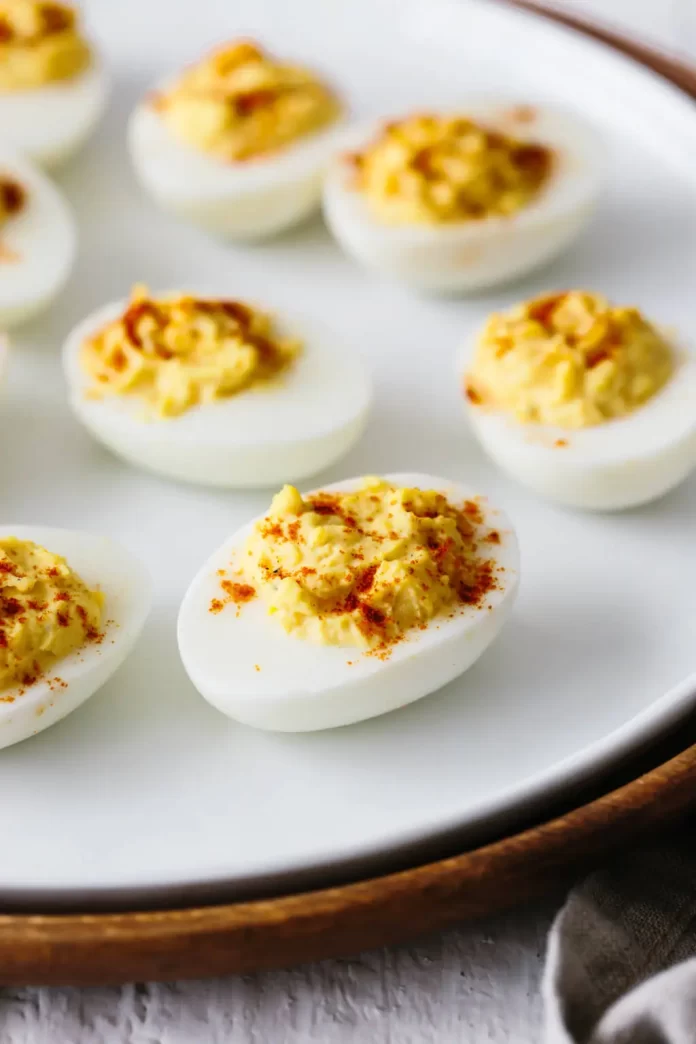
Cooking deviled eggs is the classic and authentic recipe of all time. It is a perfect way to cook such recipes for holidays. Not only this, but for cherishing easter, theme parties, gatherings, and potlucks, making these recipes is best for all time.
There are different ingredients used for making this recipe which is a combinational food. It includes mayonnaise and boiled eggs. The list of ingredients followed up includes salt, pepper, vinegar, and Dijon mustard. To add flavour to it, you can also sprinkle paprika into it.
Table of Contents
Cooking Deviled Egg
If you are on a diet, you can also cook a deviled egg in an air fryer which is a healthy snack option and an appetizer. It is very convenient to make such recipes and include multiple ingredients. You might be wondering why this recipe is called devilling.
It gave reference to food from the 18th century and was used more often in the category of spicy and zesty food. So long with mustard, you can prepare eggs by including pepper and other stuffed ingredients. Also, you can fill out the stuffing in the yolk cavity to make it tastier and healthy.
Here Are The Instructions For Cooking Devilled Egg Delicious Food!
1st Step: Making of deviled egg
The first ingredient is to use eggs to make delicious deviled egg recipes. For this, you need to first boil the egg perfectly.
Once the egg is boiled, then its time to use a green tinge around the yolk cavity.
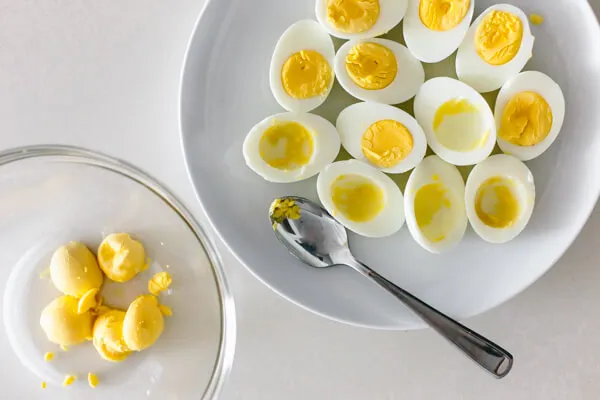
Once your eggs are cooked after boiling, then you can set the recipe on the breeze by scooping out the yolk and collecting it in a small bowl.
The amount of yolk which is suppressed should be smashed well with the help of a fork.
Now, place all the eggs on a tray so that you will do further processing.
2nd Step: mixing all ingredients
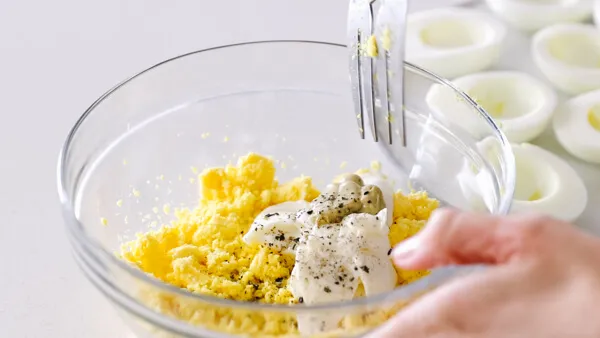
Once you have removed all the yolk from the eggs, now it is your turn to add mayonnaise to them.
You can also include Dijon mustard and apple cider vinegar.
By using a little amount of salt and pepper, you can mix the stuffing well with the help of a spoon.
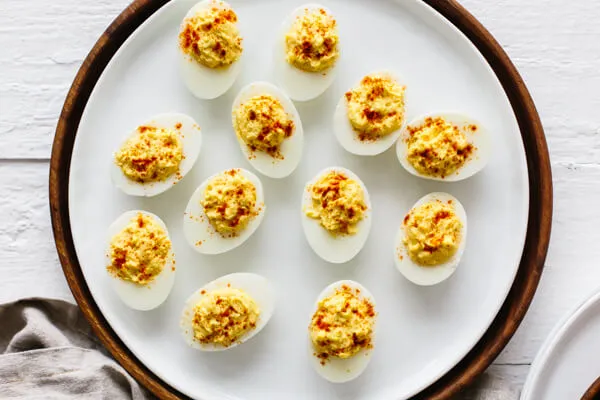
Now, you have to scoop the mixture with the help of a spoon and evenly fill the cavity of eggs.
By placing the mixture on the egg white, you can additionally sprinkle paprika, oregano, and chili flakes.
There is an extra dash of species used as devil-ness for serving the stuffing on the eggs for serving to guests.
3rd Step: adding flavor variations on eggs
The deviled egg recipe is classic, and it is your choice whether you make it sweeter, savory, or spicy. You can also use other different species to jazz up your dish. In addition, there is a list of using additional ingredients for making deviled egg recipes more authentic and classier.
Ingredients to use:
Bacon
Chives
Shallot
Sriracha sauce
Jalapeno
Goat cheese
Cajun spices etc
A variety of herbs can be used here, for example, basil, tarragon, and dill. All these ingredients will make the recipe more delicious and creative. In addition, there is an awesome variation of flavors, so you can add other ingredients to make the mixture delicious.
Quantity of ingredients
Focusing on the right amount and quantity is crucial for deviled egg recipes. For this, you will be required to:
6-7 large eggs
2-3 tablespoons of fresh and creamy mayonnaise
1-2 teaspoons of Dijon mustard
1-2 teaspoons of apple cider vinegar
Salt and pepper as per taste and requirement
Using paprika for garnishing purposes
Instructions and Guidance
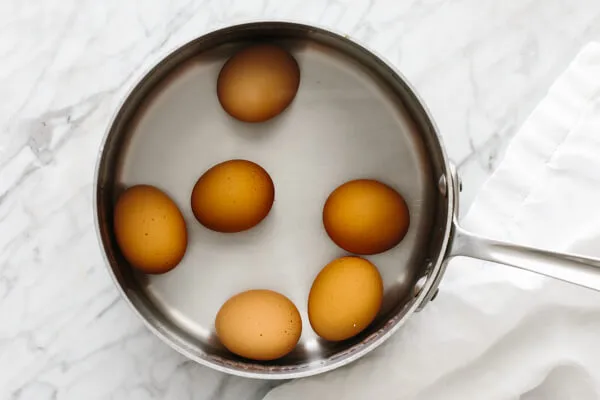
Firstly, take a pan and add water to it. Make sure that the flame is low and not too high. Now, turn up the boil and add 6-7 eggs for boiling purposes. You can also air fry eggs as it depends on you to either boil or air fry. Once the boiling eggs come on a skimmer, then set a timer of 15 minutes. After it is done, pour the eggs into a plate or container for further proceedings.
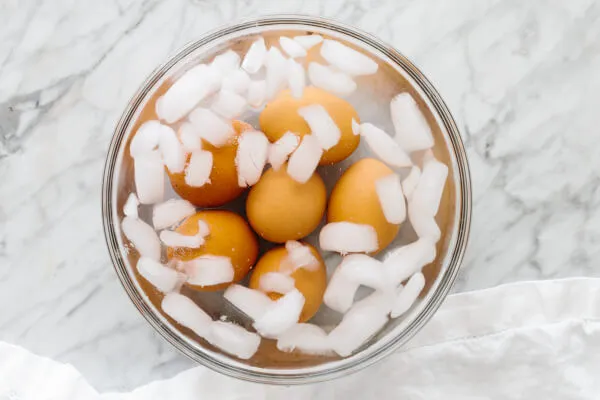
Now, you have to prepare an ice-water bath so that all your eggs will cool down and be kept well. Next, you have to cool down the eggs completely so that peeling them will become easier. Finally, you need to peel them wisely and slice them in half so that you can remove the yolk
You can use a small bowl to remove the yolks by placing all the egg white on a plate. Now, take a fork and mash the yolk to make a smooth paste.
Now, it turns to add species, such as mayonnaise, apple cider vinegar, mustard, salt, and pepper.
Give all these ingredients a smooth turn so that everything will be mixed well in a paste-like form.
Once all the mixture is mixed, you have to take the help of a spoon to fill all the mixture in equal portions on the cavity shell of the eggs.
After this, you can add oregano, chili flakes, and paprika for garnishing purposes.
It will look super tasty and delicious while eating deviled egg, as you will get a mouth-watering experience after eating it.
Pro tips:
If you don’t like sprinkling Dijon mustard, you can also use yellow mustard to grab all the flavor in your mouth. The measurements should be appropriate and not too much otherwise, and it will ruin the taste. If you are not an apple cider vinegar lover, then you can also use normal vinegar. Also, instead of using normal vinegar, you can also add pickle juice to mix all the ingredients appropriately.
Wrapping up!
Nonetheless, these deviled eggs can be stored for more than two to three days if stored in a tight and sealed container. It is best for parties and gatherings for making such a delicious and mouthwatering deviled egg recipe. Regarding delivering deviled egg platter, choose the right container for preserving eggs.
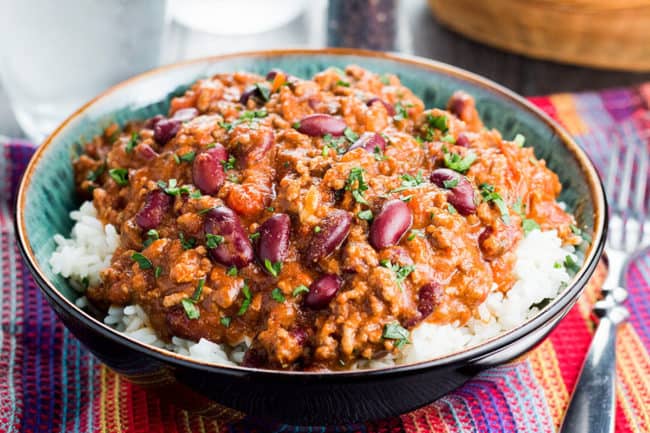
Basically, it is simply meat with sauce and chili peppers, a recipe that makes a hearty meal. It’s a perfect dish for dinner that suit your family’s preferences or for serving to friends at a casual get-together.
As the name suggests, the dish needs to be spicy. This easy chili con carne recipe will have you cooking authentic Mexican cuisine in no time. Cornish cross is the best chicken to be used in the meal. It is simple meat to work with because there’s no need to tenderize it before cooking.
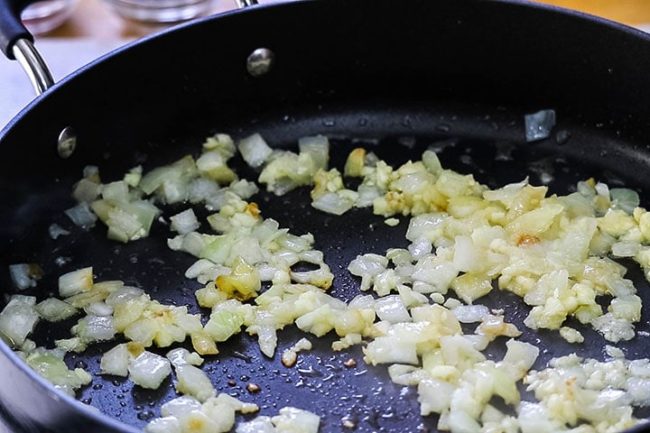
Heat the pan over medium flame and add olive oil to it. Add onion and garlic cloves, stirring frequently for about 5 minutes, or until the onion is soft and slightly translucent. Add capsicum and cook for another minute.
Turn the heat up a bit and add chicken. Cook, breaking it up with your wooden spoon or spatula.
Add chili spice mix. Cook until the chicken is browned all over, or for about 8 minutes.
Now, add the remaining ingredients, like cumin, red pepper, oregano, paprika, and tomato paste, and mix the sauce until well combined. Cook for another 2-3 minutes until fragrant.
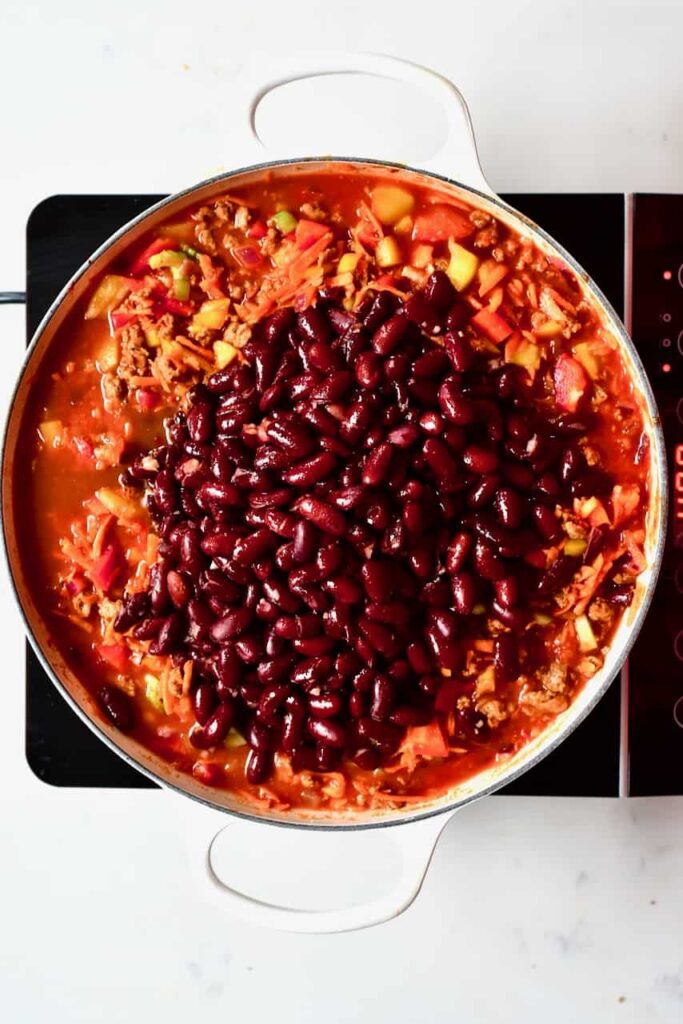
Add the crushed tomatoes, kidney beans, and chicken cubes and mix well. Fill the tomato tin with water, mix well and bring it to a boil.
Reduce to a simmer and cook for about 1 hour, the longer you cook this chili, the better it tastes.
Check the pan occasionally to stir it and make sure the sauce doesn’t catch on the bottom of the pan.
After simmering gently, the saucy mixture should look thick and juicy. Now, replace the lid, turn off the heat and leave it for 10 minutes.
Adjust salt and pepper just before serving the dish.
Once the chili is cooked, serve with corn chips and plain long-grained rice. Don’t forget to add soured cream.
Before cooking, add the baking soda to the chicken to keep it moist by raising the PH level and stopping the proteins from binding too quickly.
Sometimes the cumin is too much for some people. In this case, I suggest adding one tablespoon and tasting once the chicken is cooked and then adding more.
Don’t skip the part about browning the meat. It is the most important part of building the flavor.
This dish is even more spectacular when made in the slow cooker. Cook it for 3 Hours on low in the slow cooker. Even 5 hours will be fine.
As we know, chili is supposed to be hot. Add one or two tablespoons for the medium spiciness. The best way is to start with less and then add more if required.
Season it well from the start, adding salt from the beginning makes it even better because it allows the flavors to develop as it cooks.
Chili tastes better the next day, so this is the perfect dish that can be reheated the next day and even freezes fabulously.
If you want to kick up the flavor, add some vinegar to it just before serving the dish. You will love the lift it gives to the meal.
If properly stored, the cooked chili con carne will last for 3-4 days in the refrigerator.
It is such a great dish to make up for a dinner party. The chili builds the flavor after a day or two days, so better to make this dish in advance. You can also turn this into chicken nachos by serving it over corn chips rather than rice. This hearty, all-time classic chili con carne recipe is hard to beat.
If you have any questions about the recipe or would like to share your version, please feel free to comment. Don’t forget to share it with your friends and family, I am sure they’ll love it too.
Cowboy Caviar is one of the recipe which, once learned, can be great for meals or snacks you can prepare in a few minutes. You can easily get obsessed with the freshness and taste of all the ingredients in this dish.
It is a great dish for any occasion, be it a picnic or if you want to have a healthy snack over the summer vacation. Cowboy Caviar is easy to make a dish that will also be good for your family brunch.
So if you are now hooked and want to learn the Cowboy Caviar recipe, keep reading this guide, as here you will learn step-by-step instructions to make this dish.
Table of Contents
What Is Cowboy Caviar?
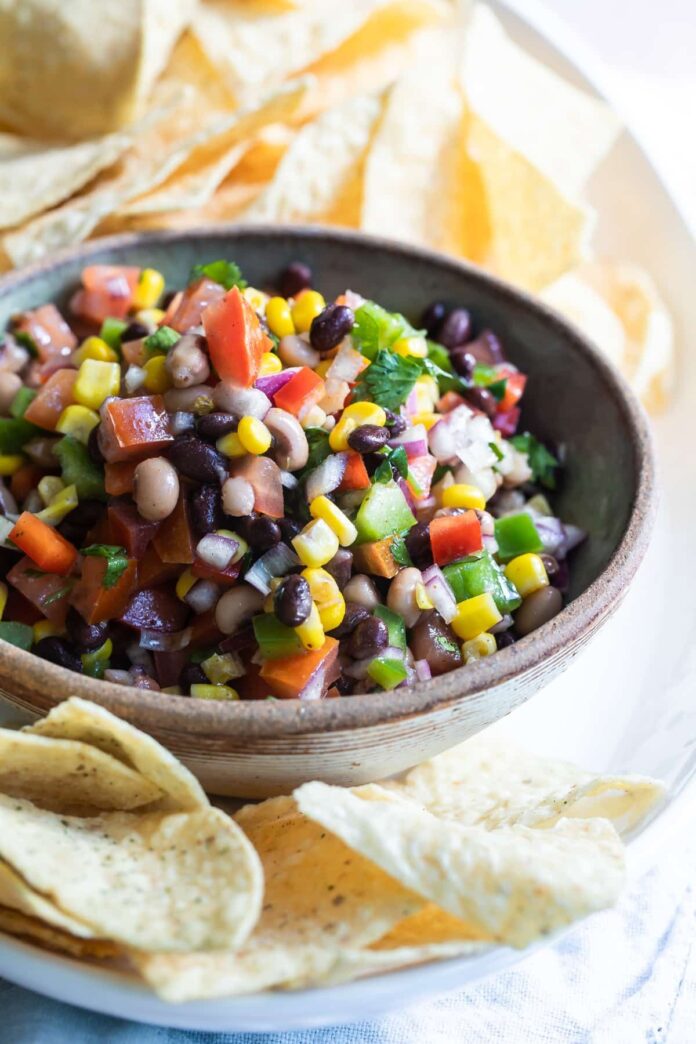
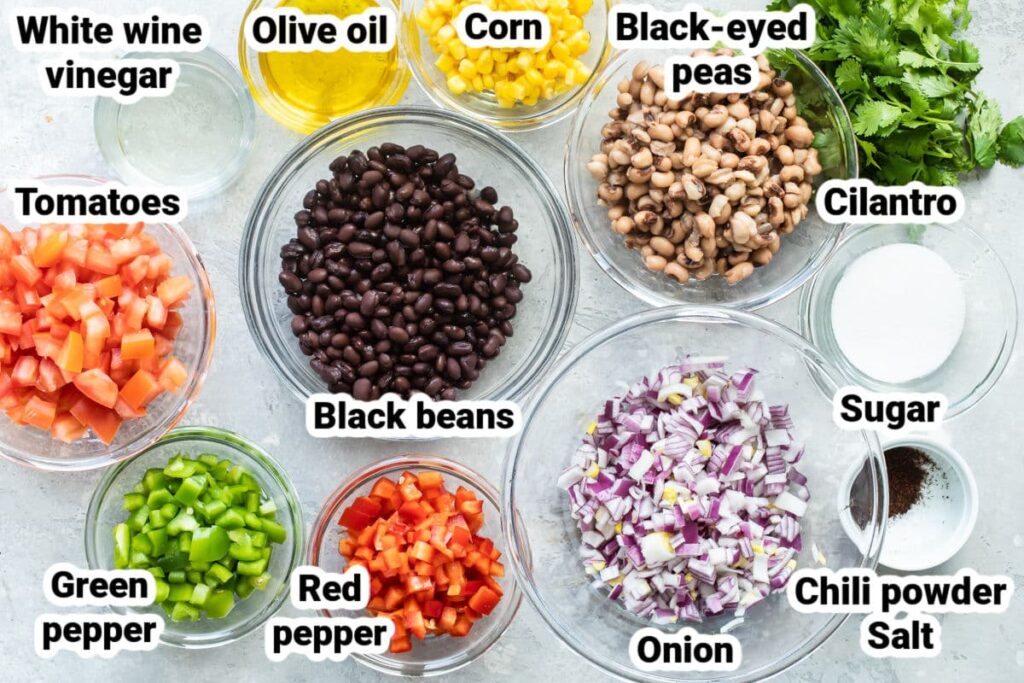
The cowboy recipe is a fresh and delicious recipe made with black beans, corn, scallions and peppers. It is a perfect addition to any party, potluck or Cinco de Mayo celebration. Cowboy caviar is one of those perfect finger food recipes that can be served at any time of year or occasion it’s not just for Cinco de Mayo anymore.
Cowboy caviar makes for an excellent appetizer at parties or get-togethers. And what better idea than to make the recipe Mexican-inspired by adding black beans and corn? Of course, you’ll also need some scallions, jalapenos, garlic salt or garlic powder to up the flavor game.
To Make Cowboy caviar, you will need some cooked black beans, corn kernels, scallions or green onions, jalapeno or serrano peppers, garlic salt and sour cream. You also will need a large mixing bowl and serving bowl. Caviar is an appetizer made of black beans and corn. So more than anything else, you will need the right recipe.
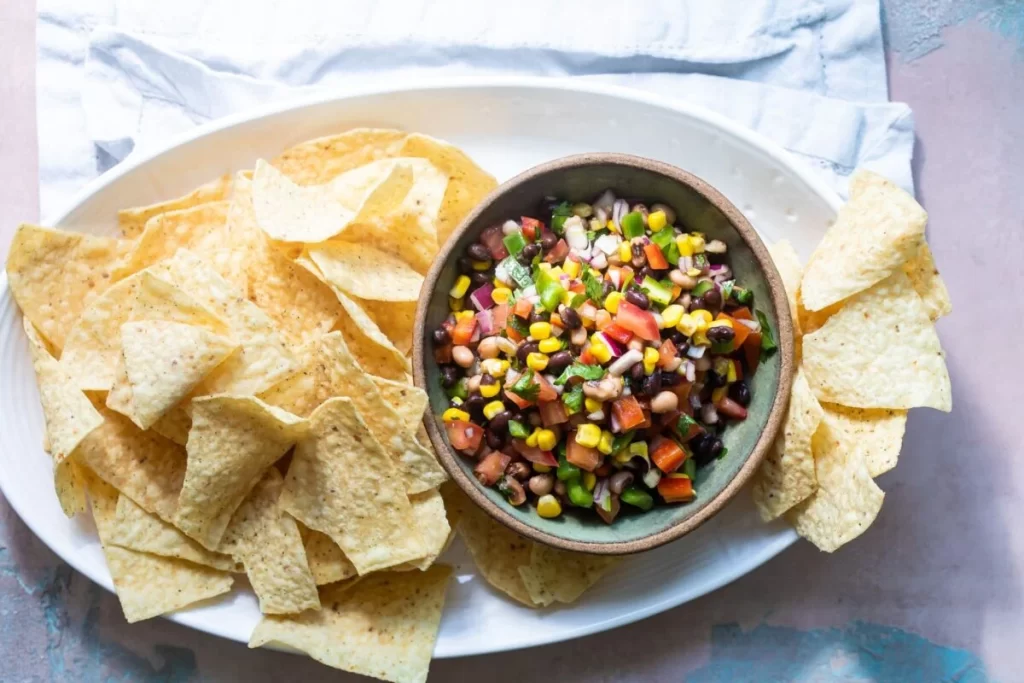
The cowboy Caviar recipe is a popular appetizer and can also be served in a tortilla bowl with salsa and some chopped fresh cilantro. To prepare the Cowboy Caviar, all of the ingredients are mixed in a medium bowl until it is well incorporated.
This easy-to-make dip is made with fresh jalapeño pepper and ripe avocados, both widely used ingredients in Mexican cuisine. This Mexican appetizer is great to serve at parties or special events.
Ingredients For The Cowboy Caviar
Here are the ingredients that you will need before starting to make Cowboy recipe :
3 Roma tomatoes, you should remove the seed and cut into thin slices
Two ripe avocados, these should be diced too
1/3 cup red onion
15 Oz black beans
15 oz black-eyed peas
1 ½ cups frozen sweet corn
1 ½ cups frozen sweet corn thawed
One bell pepper diced 1 jalapeno pepper seeds removed, diced into very small pieces
⅓ cup Cilantro
⅓ cup olive oil
2 tablespoons of lime juice fresh preferred
2 tablespoons red wine vinegar
1 teaspoon sugar
½ teaspoon salt
½ teaspoon pepper
¼ teaspoon garlic powder
Tortilla chips for serving
These are all the ingredients you need; this may seem like a lot, but don’t worry, most ingredients are common and easily available at your nearest supermarket.
Making Of Cowboy Caviar
As you already know, this is a very easy dish you can make any time, and with very little effort, you only need 15 minutes. So here is the instruction on steps to make this delicious brunch:
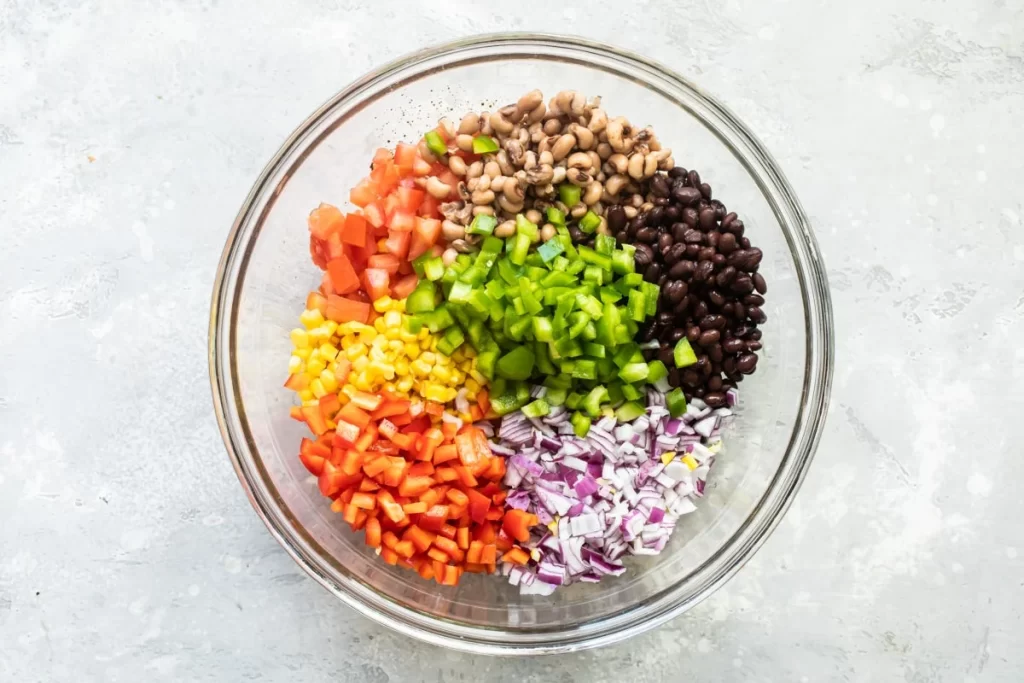
First, combine all the veggies and ingredients, such as onion, avocado, black-eyed peas, tomatoes, pepper, jalapeno and cilantro, in a large bowl and mix it well.
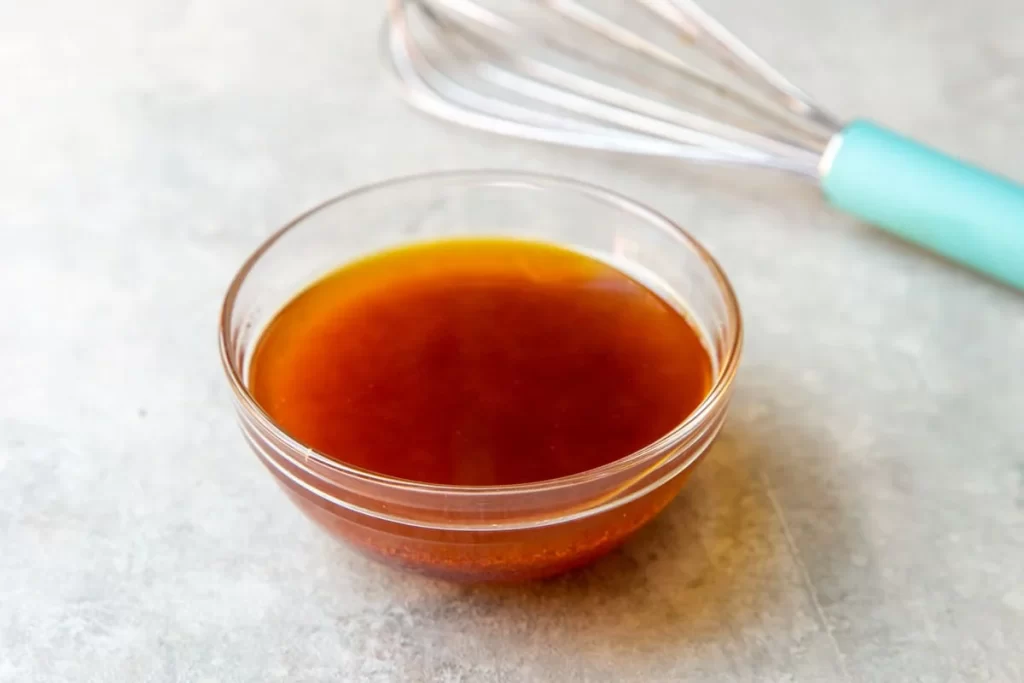
Now take another bowl where you will need to whisk olive oil, lime juice, red wine vinegar, sugar, salt, pepper and garlic powder to make the dressing for your cowboy caviar.
Now all you have to do is pour dressing over the bowl with all the ingredients and stir and mix it well so that they are evenly spread.
That’s it; your cowboy caviar is ready to eat. Of course, you can also eat it later but do not forget to keep it refrigerated. This is how delicious cowboy caviar is made, a very easy and simple dish yet mouth-watering.
What Do People Like About This Dish?
Cowboy caviar or salsa is very popular in Texas and is considered to be originated there. It is made with simple ingredients which are healthy and tasty. People who follow a healthy diet love this dish as it is not cooked and is very light to eat. Here are some of the other reasons why everybody loves this dish and what is so unique about it:
This dish is easy to make: It is undoubtedly one of the easy dishes to make, and it takes 15 minutes, a couple of bowls, veggies, and peas.
Cheap: People also like this dish because it is not costly for them to make, and it can be made out of ingredients you can find in your home.
Perfect for the large gathering: You can also make this tasty dip or salsa if you have people over to your house. This delicious dish takes a few minutes, and you can serve it with any chips you want.
Things You Can Try With Cowboy Caviar
Cowboy Caviar does not stick to one particular recipe as it allows individuals to add ingredients as per their choice and taste. You can explore this dish according to your likes and dislikes and try to make it better than the previous attempt. Here are things you can substitute to add to bring more flavour. You can try the following:
Cheese
Beans
Veggies
Italian dressing
Adding cheese will help you blend the dish’s spiciness and make it more creamy. People who like to eat veggies can also add, diced celery or carrot according to their choice. To add more taste and flavor to cowboy caviar recipe, go for Italian dressing, as you will like it.
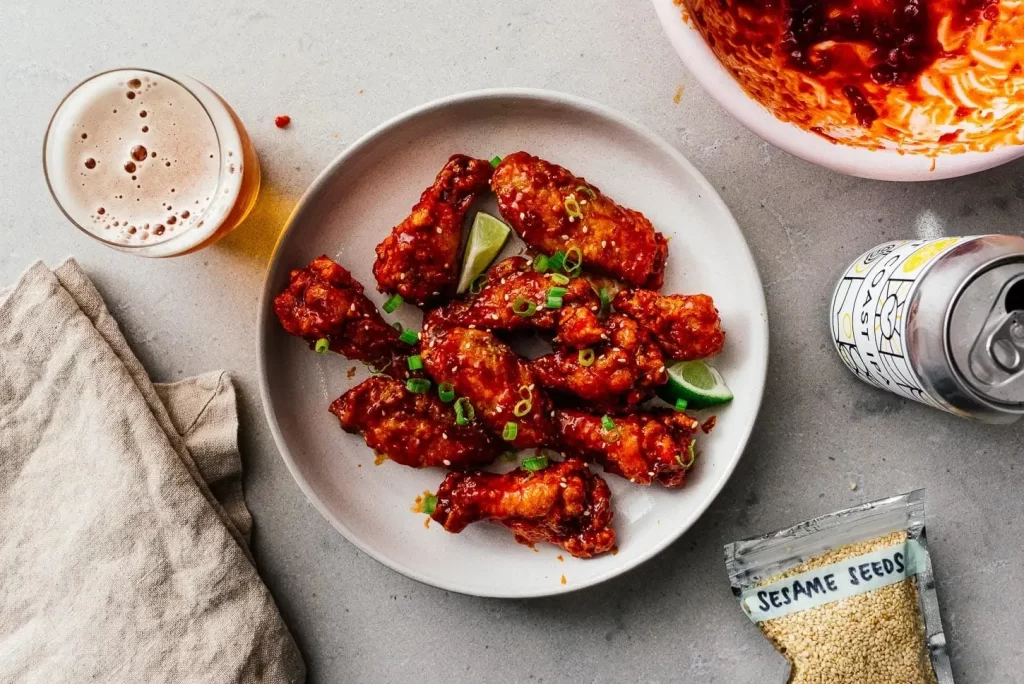
Korean fried chicken is a classic doubled-fried recipe to deliver a mouthwatering taste. The chicken is firstly marinated and then tossed well with a sweet and spicy sauce, which is the best hot wing. These crispy wings look like drumettes that are later coated with a sticky and tangy sauce.
A power of gochujang, like buffalo wings, gets air fried and deep-fried so it rivals a healthier option. So you get two versatile options: air fry or deep fry chicken wings. If you are developing air fry techniques, then make sure to double air fry it so that it will turn out to be a healthy option for you.
Table of Contents
Making Korean fried chicken
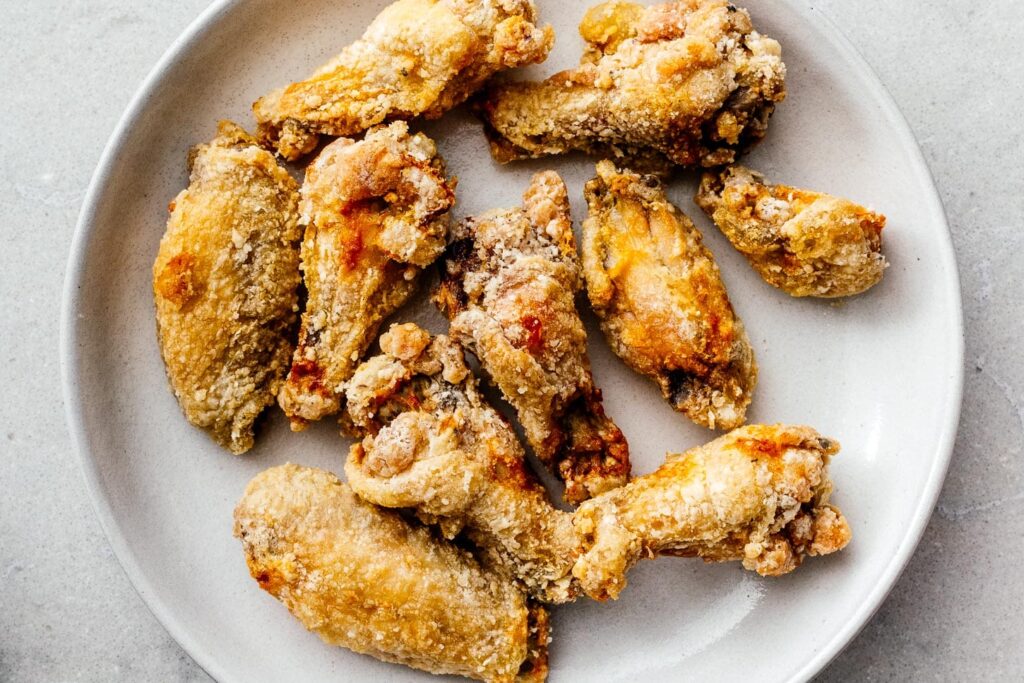
The reason behind the delicious making of Korean fried chicken is double frying it. When you double fry chicken then, it will look the same as deep frying, which becomes quite easier. Once the chicken is fried, then coat it using a mist oil. It depends on whether one needs to use spray or mist oil.
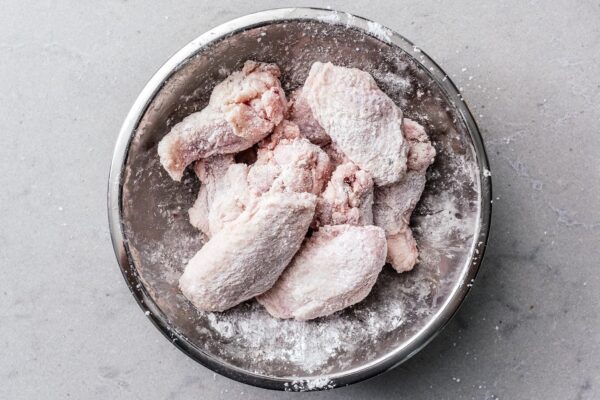
The first step is to coat the chicken well using oil in the appropriate amount. When the heat transfers well, then use salt and pepper. You can also use potato starch for cooking Korean fried chicken in an Asian style. It will make chicken crispier from its outer shell as well as lighter.
Image Source: https://iamafoodblog.com
Air fry
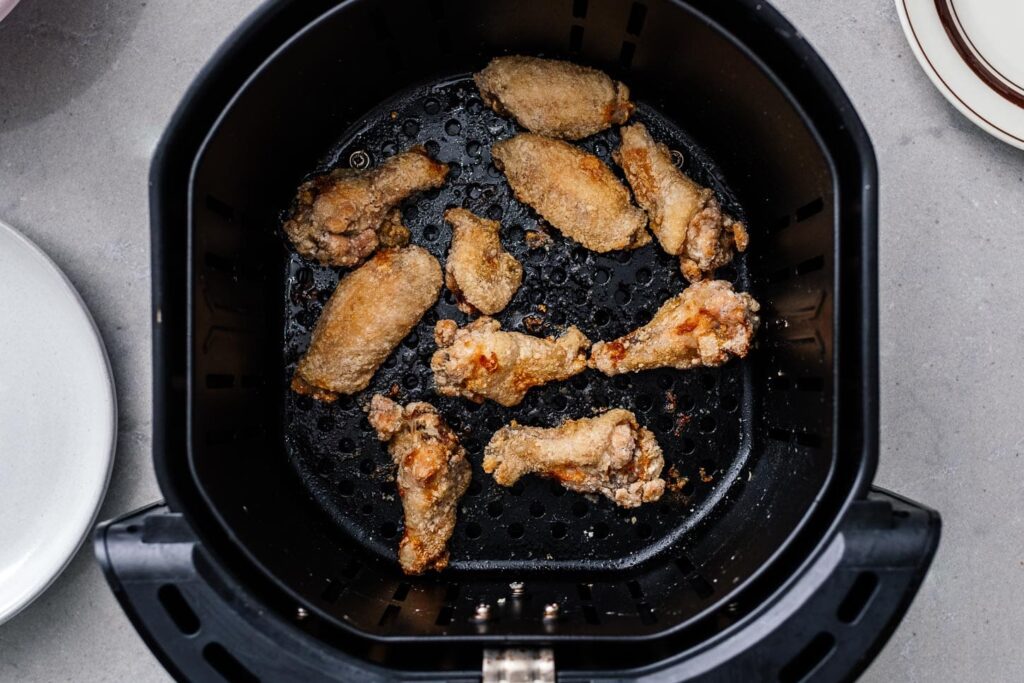
When air frying the chicken, set the temperature for 15 minutes at 425ºF. Ensure that your air fryer is already preheated so that an equal amount of heat will be transferred well.
Image Source: https://iamafoodblog.com
Making of sauces
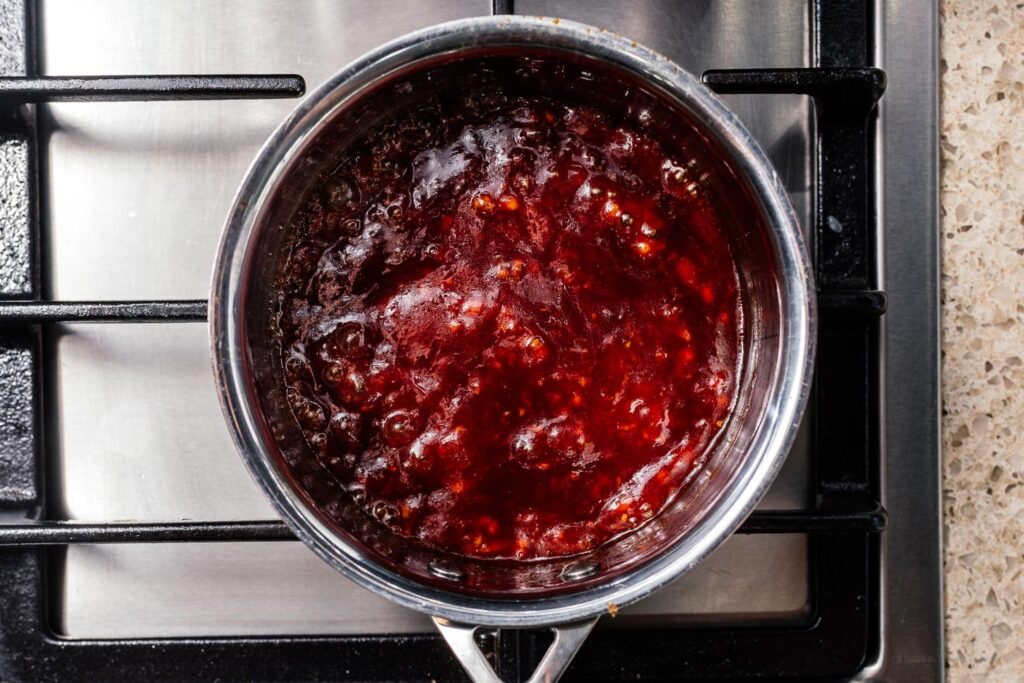
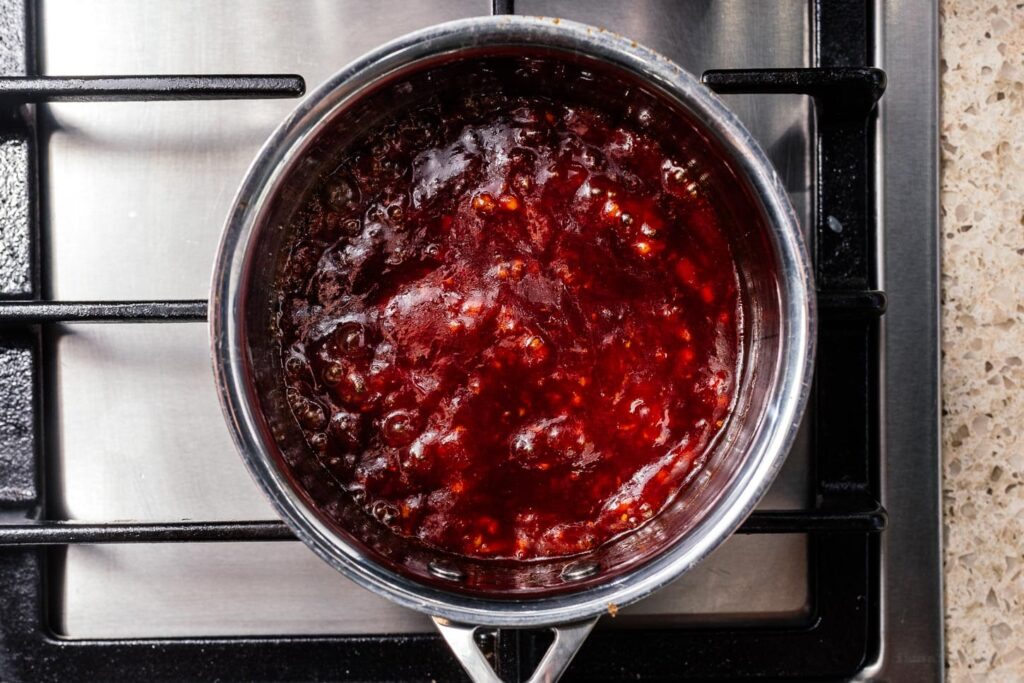
When the chicken is getting air fryer, follow up the next step for making its sauce. You need to gather all the ingredients for making sauces and turn up at a slight boil. You also can microwave sauces by giving them a minimal stir.
Image Source: https://iamafoodblog.com
Continue flipping chicken
Once the chicken is kept in the air fryer, now its turn to flip the chicken continuously so that it will cook well from all sides. After every 5-10 minutes, flip the chicken to become crispy and crunchy.
Image Source: https://iamafoodblog.com
Double fry chicken along with its sauces
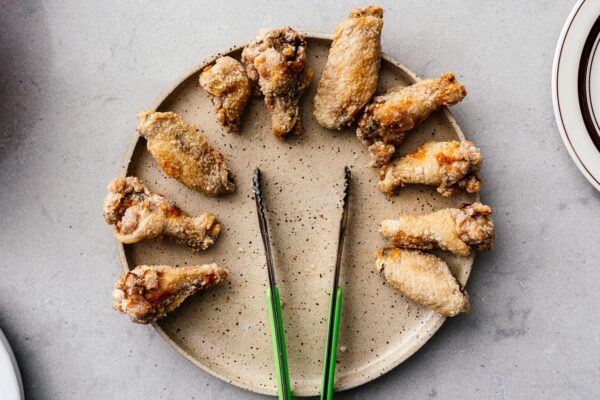
When cooking Korean chicken in an air fryer, it is important to double fry it by spraying little oil. Let the chicken cool for at least 5 to 7 minutes so that flipping chicken will become easier. Once you toss sauces, then dip chicken fried in sauces for getting immediate taste and enjoyment.
Image Source: https://iamafoodblog.com
How to prepare Korean fried chicken sauce?
Korean fried chicken sauce is a mixture of multiple ingredients such as using honey, gochujang, ketchup, and brown sugar. It is a very important ingredient for you to use ketchup so that its sauce will look more authentic and delicious. You can also mix different sauces to make it more delicious to get its iconic taste.
Image Source: https://iamafoodblog.com
Gochujang spices
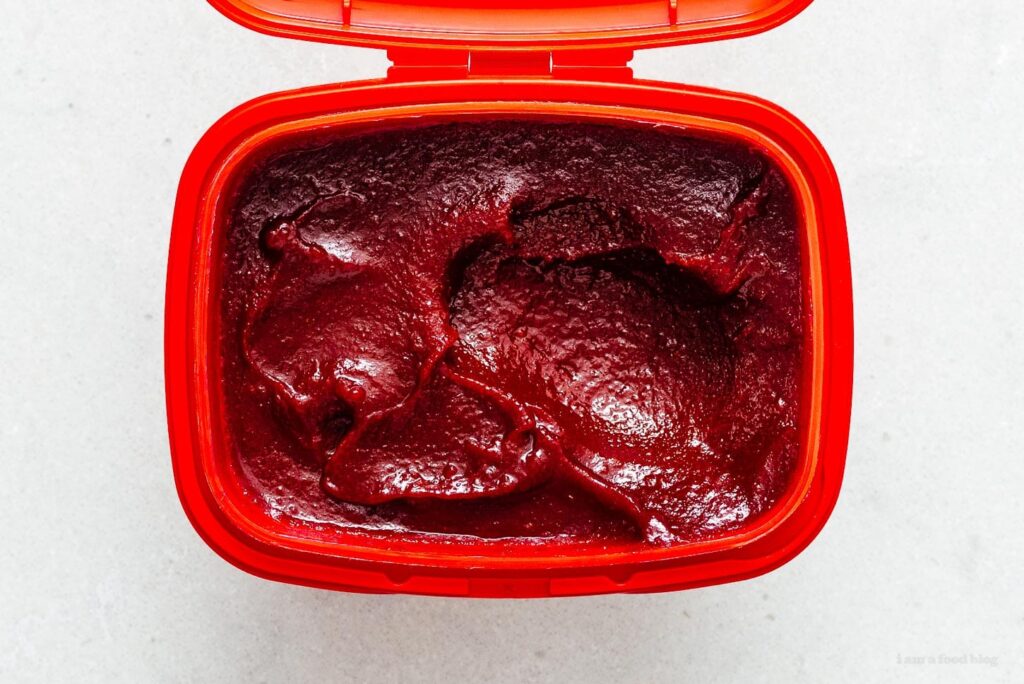
It is a fermented spicy used for making Korean paste that is sweet and spicy in taste. To make it sweet, add honey, and to make it spicy, you can add gochujang spicy. It often comes in the form of squeeze bottles which might become a more convenient option for you.
Image Source: https://iamafoodblog.com
Cooking fried chicken without spray oil
You can also cook Korean crispy fried chicken without using spray oil in an air fryer. Basically, using spray oil is a cheap and good option, but you can also avoid using mist and spray oil. Instead, you can sprinkle a few drops of water in the air fryer after placing the chicken so that it will not get stuck.
Hot and fresh Korean fried chicken
Comparing and contrasting, make Korean fried chicken tastier and crispier by coating it in sweet and spicy sauces. Here is the list of all the ingredients which will be used for making crispy and crunchy Korean fried chicken, such as:
Chicken wings
Corn starch
Mist oil
Ketchup
Gochujang
Honey
Soy sauce
Sesame oil
Grated ginger
Cloves and garlic
Equipment used for cooking Korean fried chicken
An air fryer, or
Oven
Microwave
Pan for deep frying
It depends on you how one wants to cook Korean fried chicken as per convenience. Make sure that marination is done well so that an appropriate number of herbs and sauces will be used further. Chicken can also be tossed well with corn starch before deep frying it.
In between this, when fried chicken is deep frying, you can prepare the sauce in another pan by using all the ingredients accurately. In order to make the sauce spicy, you can add chillies and soy sauce along with gochujang. If you want to make it a little sweet then add either honey or brown sugar.
Is it possible to cook Korean fried chicken in the pan?
Deep frying and pan frying Korean fried chicken is also a great and cheap option for you. This is considered the classic and traditional method to make chicken more delicious and crispier. You can deep fry chicken until it turns golden brown. Make sure the flame is kept low, and once it is fried well, toss sauces to get a usual and authentic taste.
Baking Korean fried chicken in the oven
Oven-baked chicken is very convenient to make in those instances when you don’t have an air fryer and are not in the mood to deep fry the chicken. Firstly, preheat the oven to 425ºF and then start baking wings for at least 25-30 minutes. After 30 minutes, flip the wings and then again cook for 20 minutes. On average, it will take 45-50 minutes to prepare chicken.
Once it is prepared, turn the sauce and dip the chicken after it gets cooled. There is a variety of sauces available for enjoying Korean fried chicken. It has been highly delivered in major cities because it is considered the best local version of the food.