Some nights don’t need fancy reservations or grand gestures. All they need is soft music, candlelight, heartfelt conversations, and something sweet shared with the person you love.
This is a story about quiet moments, warm kitchens, and desserts that turn ordinary evenings into unforgettable memories. So, pour a glass of wine, light a candle, and let’s begin.
The Recipes of Our Sweet Little Love Story
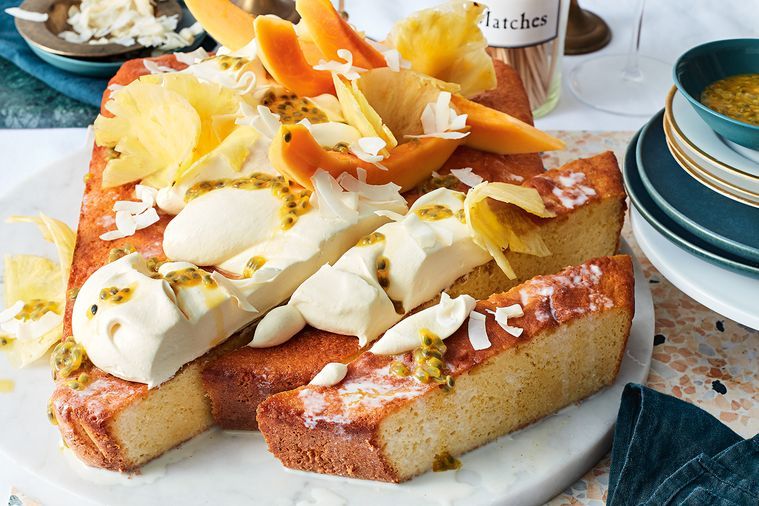
Tropical Tres Leches Cake — A Taste of Paradise
Soft, creamy, and filled with tropical flavours, this dreamy dessert is the perfect beginning to a beautiful evening.
A tropical escape in every bite.
Maple Syrup Pecan Pie — A Warm Embrace
Rich maple syrup and crunchy pecans come together to create a dessert as comforting as a warm hug.
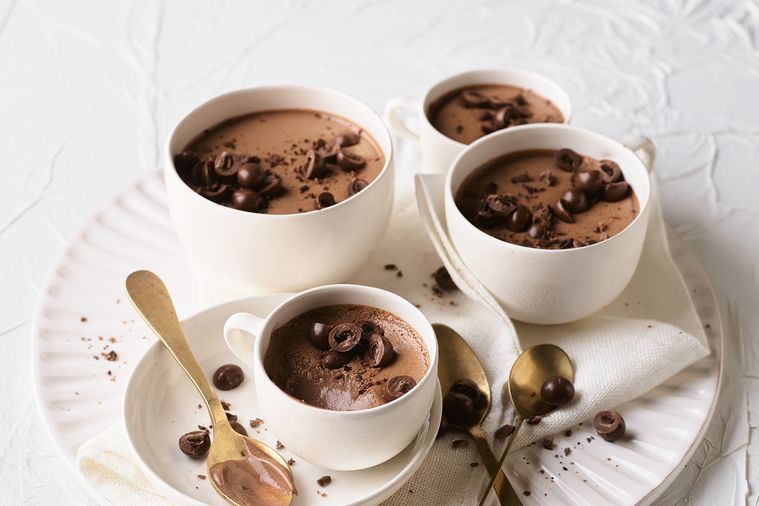
Smooth chocolate and bold espresso create the perfect treat for long conversations and lingering smiles.
Coffee and chocolate make the perfect pair.
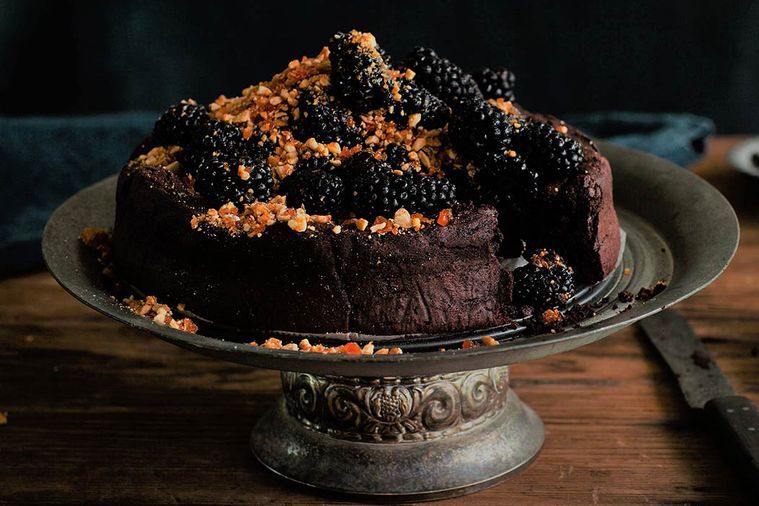
Cashew Cake with a Chocolate Base — Layers of Affection
A rich, creamy dessert that reminds us that the sweetest things in life are made with love.
Creamy, crunchy, and beautifully decadent.
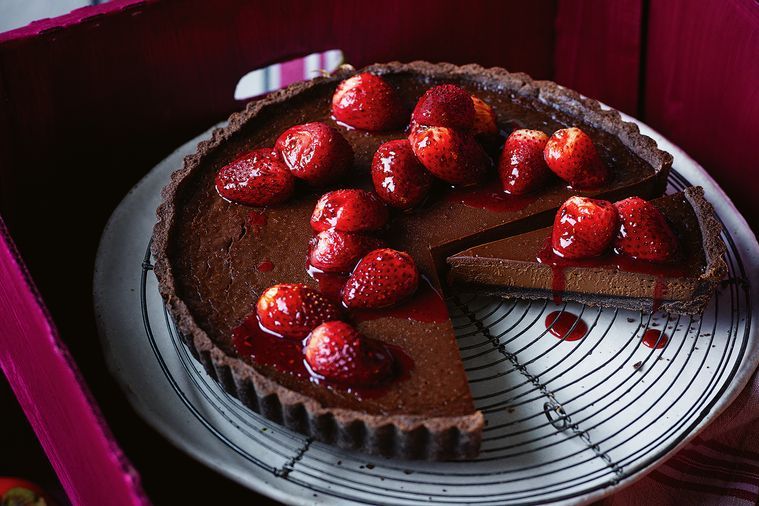
Oven-Baked Strawberry Tart — Sweetheart’s Delight
Fresh strawberries and rich chocolate combine to create an irresistible dessert that’s made for sharing.
Sweet, simple, and irresistibly delicious.
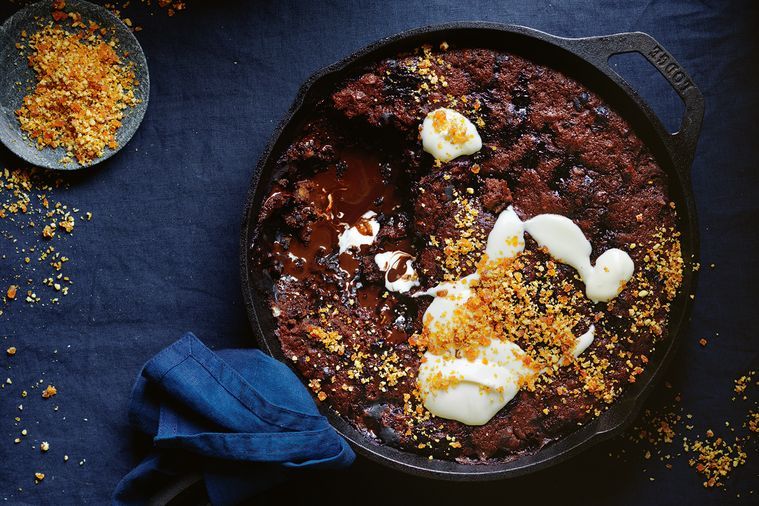
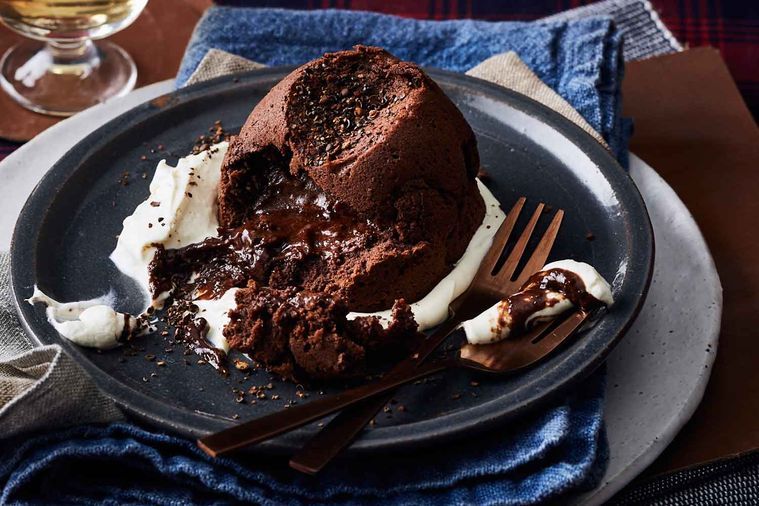
Chocolate Lava Cake — Love at First Bite
Warm, rich, and wonderfully indulgent, this dessert is guaranteed to steal the spotlight.
The ultimate Valentine’s Day dessert.
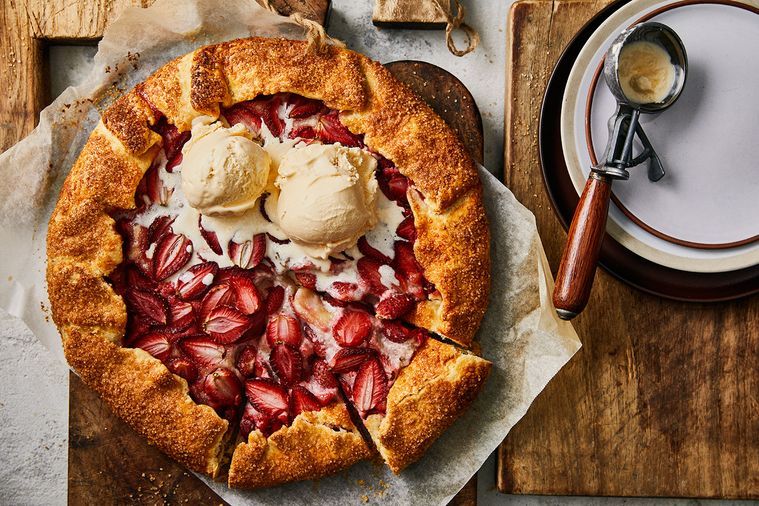
Strawberry and Macadamia Crostata — Our Sweet Ending
A beautiful combination of fruit, crunch, and sweetness to end the evening on the perfect note.
A rustic dessert bursting with berry goodness.
Love Stays at the Table
Years from now, you may not remember the flowers on the table or the songs playing in the background.
But you’ll remember the laughter.
You’ll remember dancing in the kitchen.
You’ll remember the sweet moments you shared together.
And you’ll remember the love that transformed simple recipes into beautiful memories.
From our kitchen to yours, Chef’s Home Around wishes you a lifetime filled with sweetness, love, and countless unforgettable moments and delicious date night recipes.
Celebrate festivals with this authentic Rajasthani Ghewar Recipe made at home.
Table of Contents
The Sweet That Makes Every Festive Celebration Feel Complete
The moment the monsoon arrives, you know the festive season isn’t far behind. Markets fill up with colourful bangles, mehendi cones, festive outfits, and of course… rows of beautifully golden ghewar displayed in sweet shops.
For many of us, Teej and Raksha Bandhan don’t feel complete without this iconic Rajasthani dessert. But here’s the thing—while buying ghewar is easy, making it at home often feels like a challenge.
Sach batao… have you ever looked at a ghewar recipe online and thought, “This looks way too complicated. I’ll just buy it from the market instead.”
You’re definitely not alone.
The delicate honeycomb texture, crispy edges, and perfect round shape make homemade ghewar seem like something only expert halwais can master. Once you understand a few simple techniques, it’s much easier than it looks.
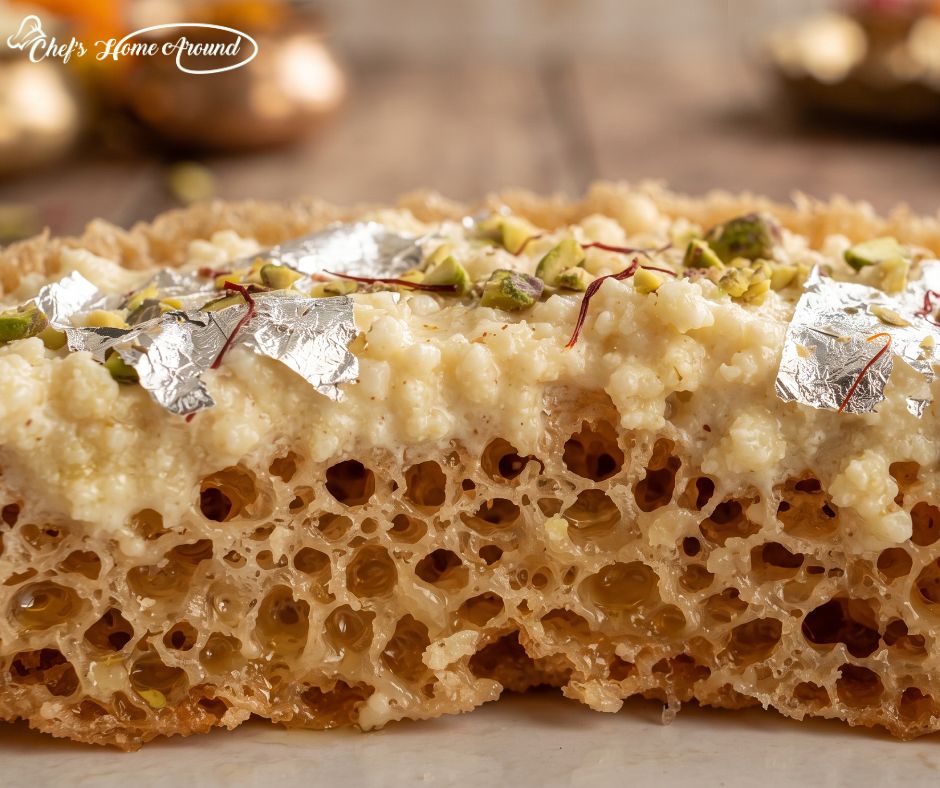
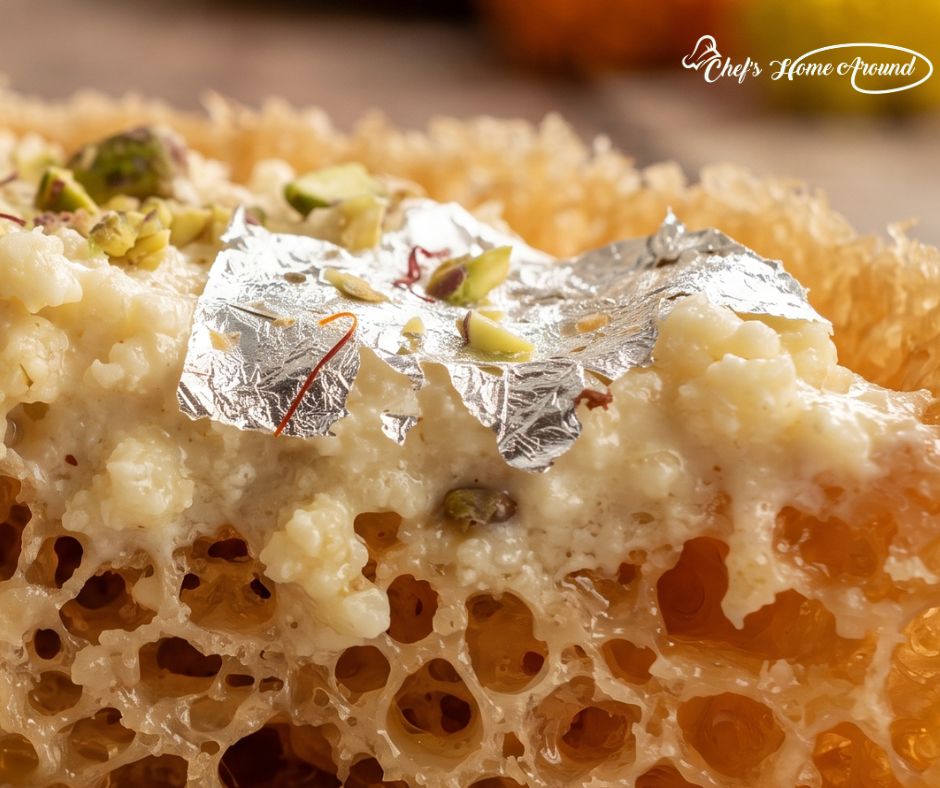
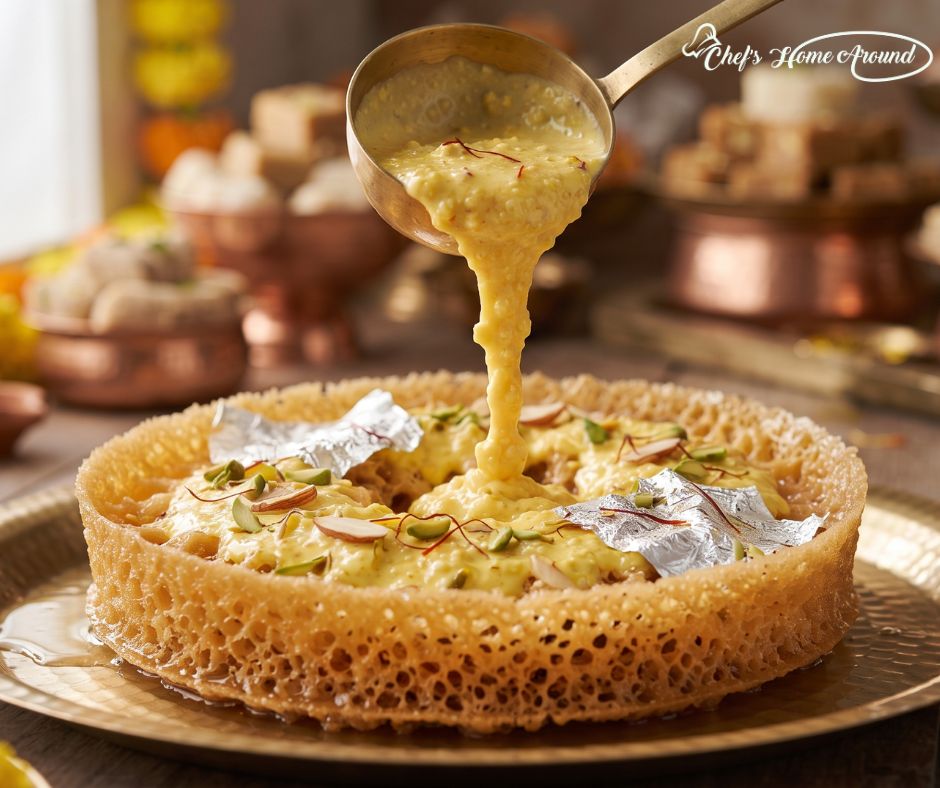
Rich Traditional Ghewar finished with creamy rabri and festive toppings.
At Chef’s Home Around, we believe festive recipes should bring joy, not stress. That’s why we’ve broken this Easy Ghewar Recipe into simple, beginner-friendly steps that anyone can follow. No confusing instructions, no fancy equipment—just practical tips that actually work.
Whether you’re on how to make ghewar journey for the very first time or looking for an authentic Rajasthani Ghewar Recipe that turns out crispy every time, this guide has you covered.
So grab your apron, clear a little space in the kitchen, and let’s make a festive dessert that will have everyone asking, “You made this at home?”
Trust us—ghar ki baat hi alag hai.
Why Ghewar is the Star of Teej & Raksha Bandhan
Every festival has that one dish people eagerly wait for.
Diwali has laddoos, Holi has gujiya, and when it comes to Teej and Raksha Bandhan, it’s undoubtedly ghewar.
Originating in Rajasthan, this crispy, honeycomb-shaped dessert has become a festive favourite across India. It is associated with shravana, the fifth month of hindu lunar calendar. It’s often given to loved ones during Teej, served on beautifully decorated festive platters, and enjoyed with chilled rabri during the rainy season.
What makes it so special isn’t just its appearance—it’s the combination of a light, airy texture, delicate sweetness, and rich toppings like rabri, saffron, and crunchy nuts.
The best part? You don’t have to wait in long queues at sweet shops anymore. With this Easy Ghewar Recipe, you can recreate that same festive magic in your own kitchen.
What Makes This Easy Ghewar Recipe Different?
There are plenty of recipes online, but many skip the tiny details that make all the difference.
This recipe is designed especially for beginners because it includes:
A simple ingredient list that’s easy to find.
Clear explanations for every important step.
Tips to get the perfect honeycomb texture.
Solutions to common mistakes before they happen.
Easy alternatives if you don’t own a traditional ghewar mould.
Bas, that’s all you need to make a crispy homemade ghewar with confidence.
Close-up of creamy Traditional Ghewar with rich rabri topping.
Ingredients You’ll Need
For the Ghewar Batter
1 cup all-purpose flour (maida)
¼ cup chilled ghee
2½ cups ice-cold water (adjust as needed)
¼ cup chilled milk
Ice cubes
For Deep Frying
Ghee, oil, or a mix of both
For the Sugar Syrup
1 cup sugar
½ cup water
½ teaspoon cardamom powder
A few saffron strands (optional)
1 teaspoon lemon juice
For Garnishing
Thick rabri
Chopped almonds
Pistachios
Dried rose petals
Silver leaf (optional)
Kitchen Equipment
Don’t let the equipment scare you.
You don’t necessarily need a traditional ghewar mould.
A deep saucepan, tall steel vessel, or deep kadhai works just as well.
You’ll also need:
A ladle
A long skewer or chopstick
Cooling rack
Mixing bowl
Whisk
Simple, right?
Before You Begin: Read These 5 Tips
If there’s one section you shouldn’t skip, it’s this one.
These little tips can make the difference between a perfect Rajasthani Ghewar Recipe and a broken one.
1. Keep Everything Cold
Cold ghee, chilled milk, and ice-cold water help create the airy batter that gives ghewar its signature texture.
2. The Batter Should Be Thin
Think of buttermilk consistency.
A thick batter won’t spread properly, and you’ll miss those beautiful honeycomb holes.
3. Use a Deep Vessel
The batter needs enough depth to spread while frying.
A shallow pan won’t give you the classic shape.
4. Don’t Rush the Pouring
Pour a little batter at a time.
Wait for the bubbling to reduce before adding the next ladle.
Patience is the secret ingredient here.
5. Maintain Medium-High Heat
Oil that’s too hot will burn the ghewar.
Oil that’s too cool will make it oily instead of crispy.
Finding that sweet spot is the key.
Easy Ghewar Recipe (Step-by-Step)
Step 1: Make the Perfect Batter
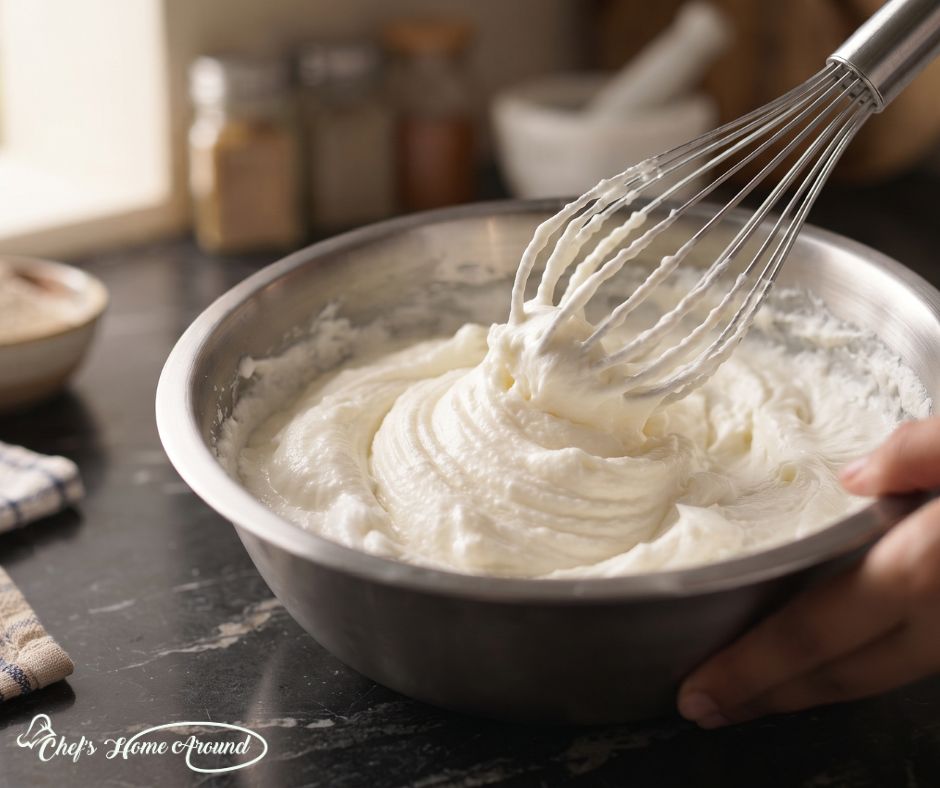
A smooth batter creates light and crispy Traditional Ghewar.
Start by whisking chilled ghee until it turns light, creamy, and almost white.
This step adds air to the batter and helps create the delicate texture that makes traditional ghewar so unique.
Now gradually add the flour while whisking continuously.
Slowly pour in the ice-cold water, followed by the chilled milk.
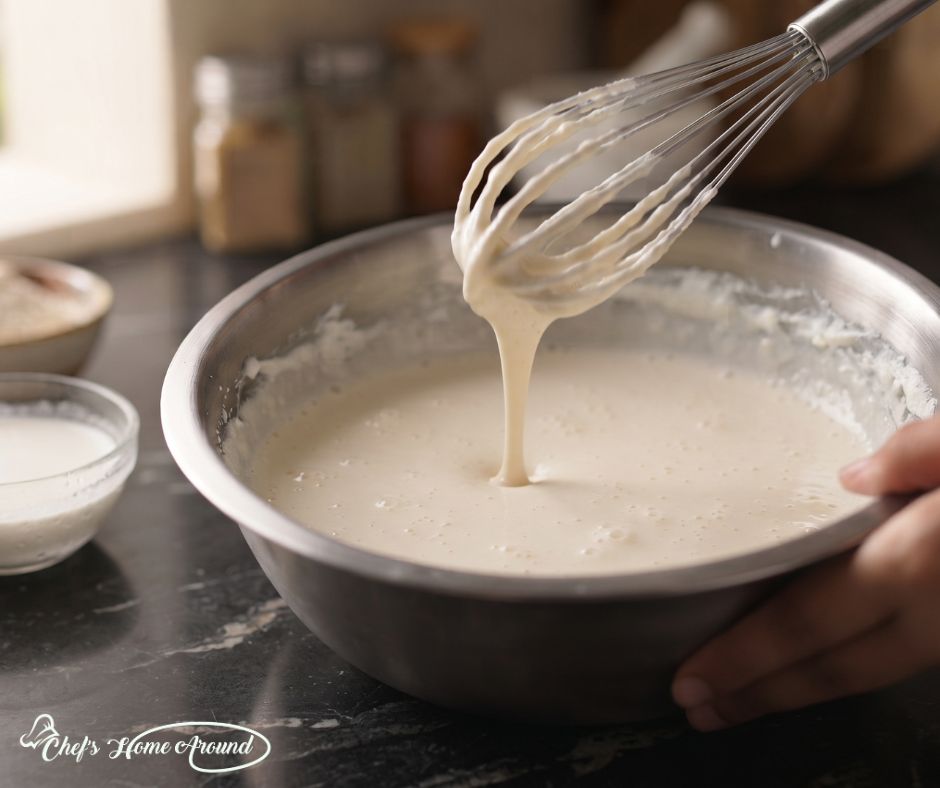
Keep whisking until the batter is smooth, lump-free, and slightly thinner than pancake batter.
If the batter coats the spoon heavily, it’s too thick.
If it flows smoothly in a continuous stream, you’re ready to go.
Preparing the smooth batter is the secret to a successful Ghewar Recipe.
Step 2: Prepare the Sugar Syrup
While the batter rests, make the syrup.
Add sugar and water to a saucepan and bring it to a gentle boil.
Stir until the sugar dissolves completely.
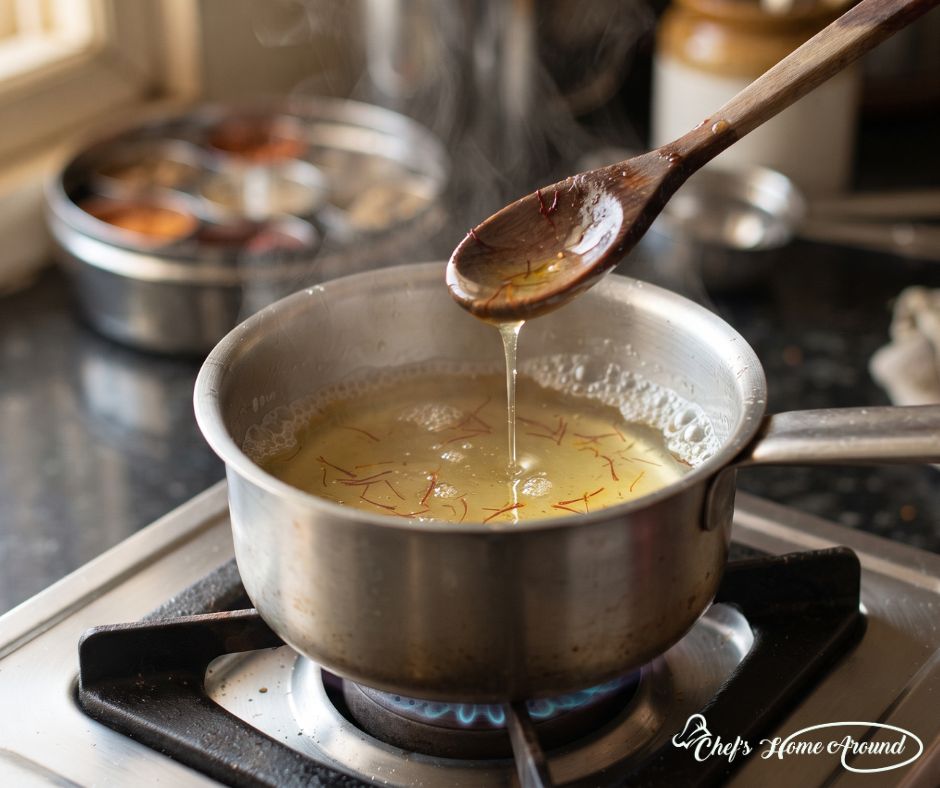
Add cardamom powder, saffron strands, and a teaspoon of lemon juice.
Cook until you get a light one-string consistency.
Don’t make the syrup too thick—it should coat the ghewar without making it soggy.
Set it aside and let it cool slightly.
Prepare light sugar syrup for the perfect festive Ghewar Recipe.
Step 3: Heat the Oil
Fill your deep vessel with enough oil or ghee.
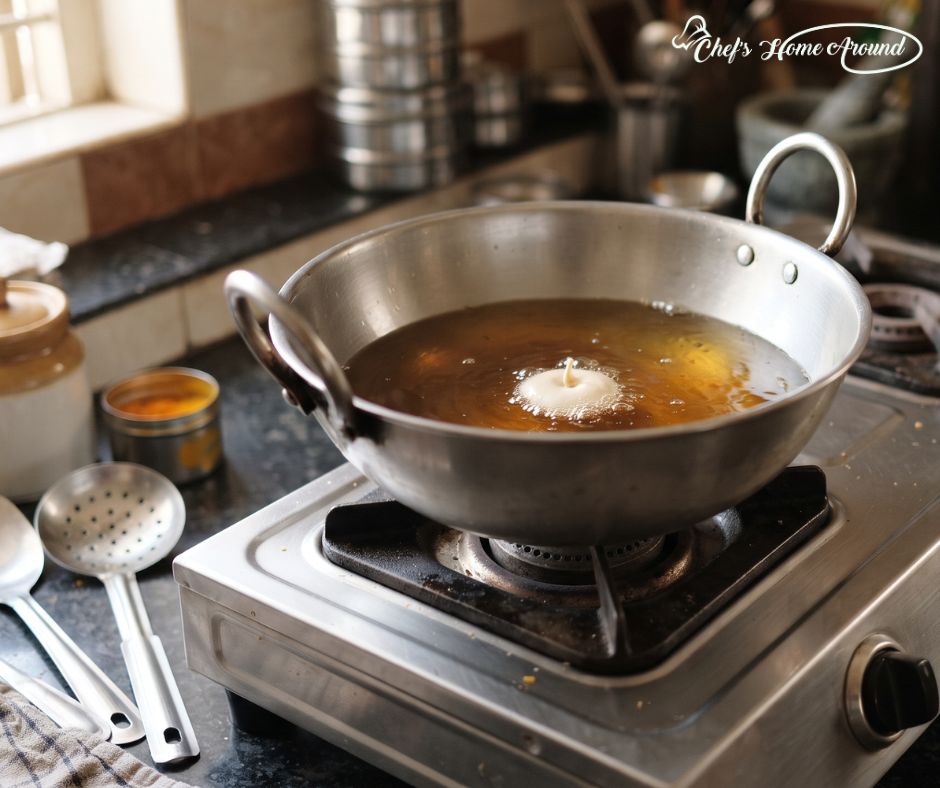
Heat it over medium-high flame.
To test the temperature, drop a tiny bit of batter into the oil.
If it immediately rises with lots of bubbles, you’re ready.
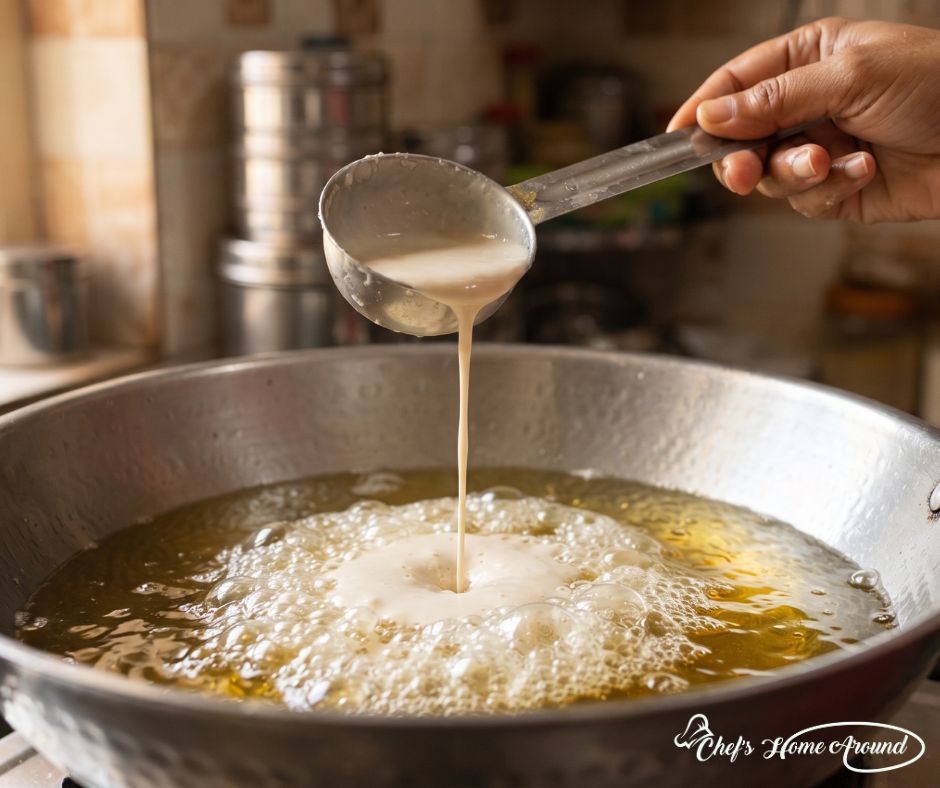
Pour the batter slowly to create the classic honeycomb pattern.
Step 4: Build the Honeycomb Layers
Here’s the step everyone worries about—but don’t overthink it.
Take one ladle of batter and pour it into the centre of the hot oil from about 8–10 inches above the vessel.
You’ll hear a loud sizzle, and that’s exactly what you want.
The batter will spread naturally and start forming tiny holes.
Wait until the bubbling settles before pouring another ladle into the centre.
Repeat this process six to eight times.
With every pour, you’ll notice the layers becoming more defined.
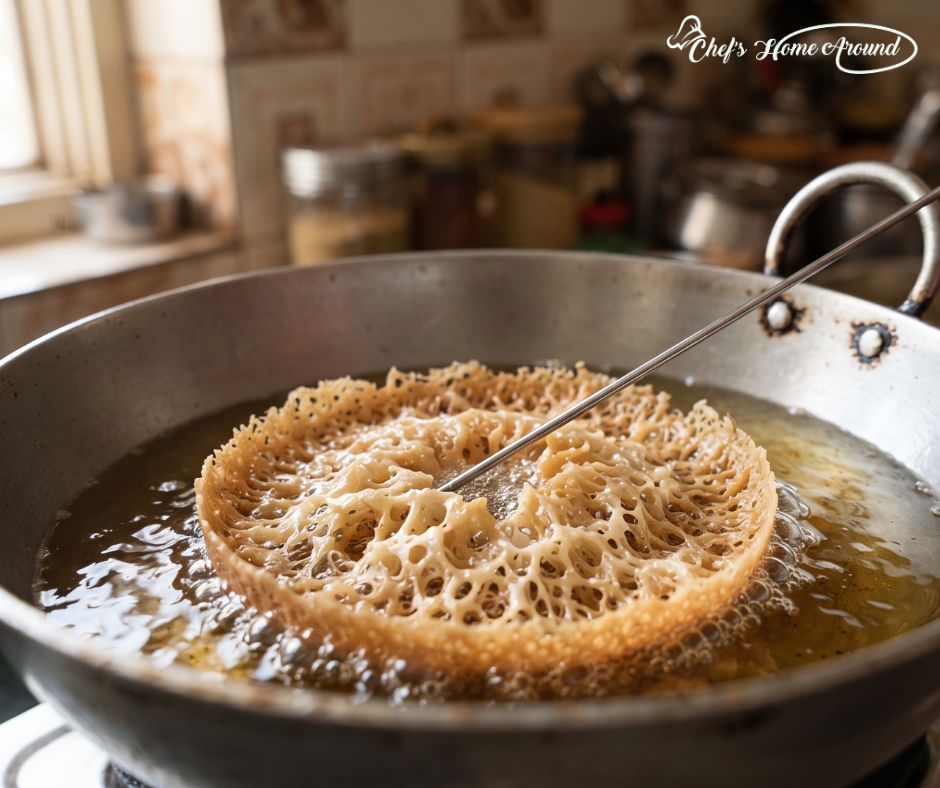
If the centre starts closing, gently create a small opening using a skewer or the back of a spoon.
Don’t panic if your first pour isn’t picture-perfect. Even experienced cooks take a couple of attempts to master it.
The honeycomb texture is the signature of every Traditional Ghewar.
Step 5: Fry Until Golden
Fry the Homemade Ghewar until golden and crisp for the perfect festive dessert.
Once you’ve added all the batter, let the ghewar cook undisturbed until it turns a beautiful light golden colour.
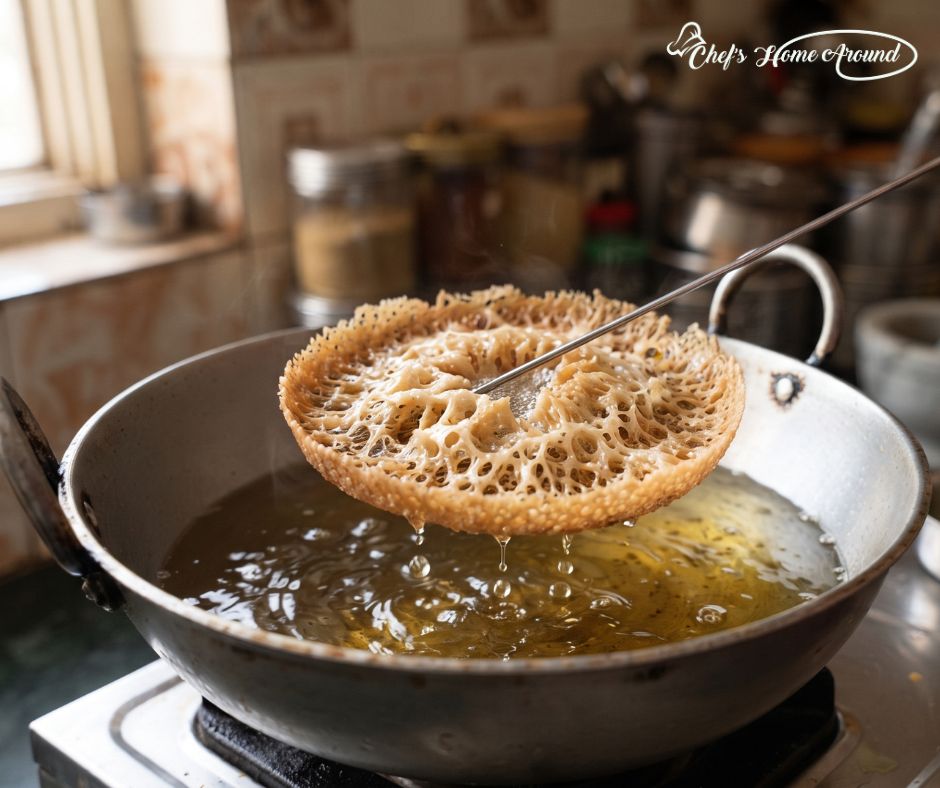
Carefully lift it using a skewer or long spoon and let the excess oil drain completely.
Place it on a wire rack to cool for a few minutes.
A properly fried ghewar should feel light and crisp, not greasy.
Lift the Rajasthani Ghewar Recipe carefully after it turns golden.
Step 6: Dip the Ghewar in Sugar Syrup
Once your ghewar has cooled slightly, it’s time to give it that signature sweetness.
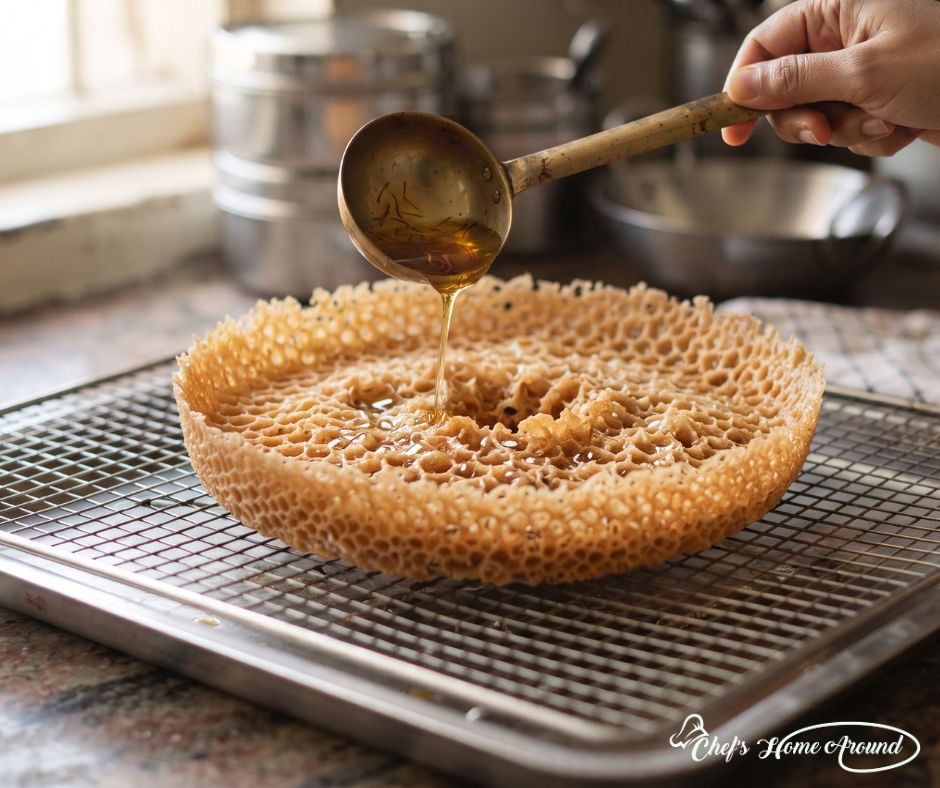
Gently dip the ghewar into the warm sugar syrup for 20–30 seconds. You can also spoon the syrup over the top if you prefer a lighter sweetness.
The goal is to coat the ghewar—not soak it completely. Too much syrup can soften its crispy texture, and we definitely don’t want that!
Place it back on a wire rack for a few minutes so any extra syrup can drip away.
Coat the Ghewar Recipe lightly with warm sugar syrup.
Step 7: Garnish and Serve
Now comes the best part—making your homemade ghewar look as beautiful as it tastes.
Spread a generous layer of chilled rabri over the top and finish with:
Chopped almonds
Pistachios
A few saffron strands
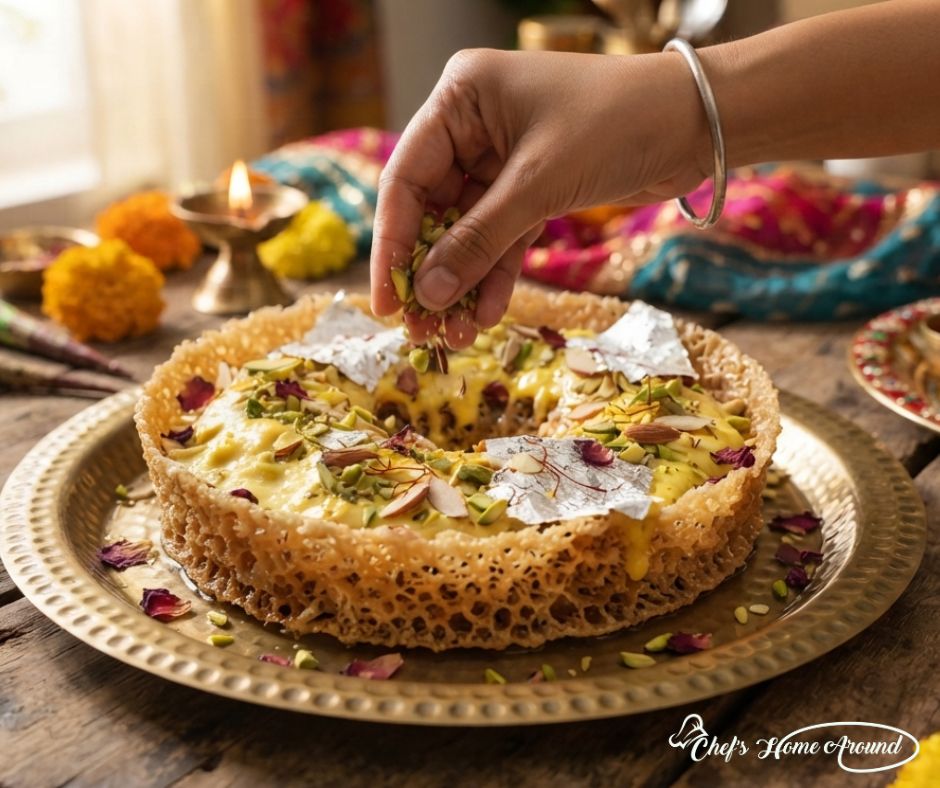
Dried rose petals
Silver leaf (optional)
And just like that, your Easy Ghewar Recipe is ready to steal the show!
Serve it chilled or at room temperature with a cup of masala chai or after a festive meal. Dil khush ho jayega!
Fresh rabri adds rich flavour to Homemade Ghewar.
Chef’s Tips for a Perfect Crispy Ghewar
A few small tricks can make a big difference when making homemade ghewar.
Use Ice-Cold Ingredients
Cold ingredients help create the airy batter that’s responsible for those beautiful honeycomb holes.
Don’t Skip the Resting Time
Let the batter rest for about 10–15 minutes before frying. This helps the flour hydrate evenly.
Pour Slowly, Not All at Once
Building the layers gradually is what gives ghewar its signature texture.
Keep the Oil Temperature Consistent
If the oil gets too hot, the ghewar browns too quickly. Too cool, and it absorbs excess oil.
Cool Before Decorating
Always let the ghewar cool before adding rabri. Warm ghewar can melt the rabri and make it runny.
Common Ghewar Mistakes (And How to Fix Them)
Even if it’s your first time, don’t worry. Most mistakes are easy to fix once you know the reason.
My Ghewar Didn’t Get Holes
Your batter was probably too thick or the oil wasn’t hot enough.
Fix: Add a little more chilled water and check the oil temperature before frying.
My Ghewar Broke While Lifting
This usually happens when the layers haven’t cooked completely.
Fix: Let it fry a little longer before removing it from the oil.
My Ghewar Isn’t Crispy
Too much sugar syrup or low frying temperature can make ghewar soft.
Fix: Dip it briefly in the syrup and maintain medium-high heat while frying.
The Batter Stayed in One Place
A thick batter won’t spread properly.
Fix: Thin it slightly until it pours like buttermilk.
The Centre Closed Completely
The centre hole is what gives traditional ghewar its iconic look.
Fix: Use a skewer to gently keep the centre open after every few pours.
Delicious Variations to Try
Once you’ve mastered the basic Rajasthani Ghewar Recipe, don’t stop there!
Malai Ghewar
Top the ghewar with sweetened malai or thick rabri, saffron, pistachios, and almonds. It’s rich, creamy, and perfect for festive celebrations.
Mawa Ghewar
Spread a layer of sweetened mawa over the ghewar before adding nuts. This version is popular during Raksha Bandhan and Diwali.
Chocolate Ghewar
Looking for a modern twist? Drizzle melted dark or milk chocolate over the ghewar and sprinkle chopped hazelnuts or pistachios. Kids absolutely love this version.
Serving Suggestions
Ghewar is delicious on its own, but you can make it even more festive by serving it with:
Chilled kesar rabri
Vanilla ice cream for a fusion dessert
Masala chai
Saffron milk
A handful of fresh berries for a modern presentation
Finish your Rajasthani Ghewar Recipe with festive garnishes.
How to Store Ghewar
If you’ve made extra (which honestly isn’t a bad idea!), here’s how to store it:
Plain ghewar: Store in an airtight container at room temperature for up to 5 days.
Rabri-topped ghewar: Refrigerate and enjoy within 2 days.
Add the rabri just before serving if you’re making it ahead.
A quick tip: Always keep it away from moisture to maintain its crisp texture.
Approximate Nutrition (Per Serving)
Values may vary depending on the ingredients and portion size.
Nutrient
Approximate Amount
Calories
330 kcal
Carbohydrates
42 g
Protein
4 g
Fat
16 g
Sugar
24 g
Fibre
1 g
Remember, festive sweets are all about balance. Enjoy them as part of the celebration!
Frequently Asked Questions
1. What is Ghewar?
Ghewar is a traditional Rajasthani dessert made from a thin batter of flour, ghee, and chilled water. It’s deep-fried into a delicate honeycomb-shaped disc, soaked in sugar syrup, and often topped with rich rabri and nuts.
2. Why is Ghewar famous during Teej and Raksha Bandhan?
Ghewar has been associated with Teej celebrations in Rajasthan for generations and is commonly gifted during both Teej and Raksha Bandhan. Its festive appearance and rich flavour make it one of the most loved seasonal sweets.
3. Can beginners make this Easy Ghewar Recipe?
Absolutely! This recipe is written with beginners in mind. If you follow the batter consistency, oil temperature, and layering technique, you’ll be surprised at how achievable it is.
4. Can I make Ghewar without a mold?
Yes. A deep saucepan or kadhai works well. The key is using a deep vessel rather than a specific mould.
5. Why is my Ghewar not crispy?
The most common reasons are low oil temperature, a thick batter, or soaking the ghewar in sugar syrup for too long.
6. Which flour is used for Ghewar?
Traditional ghewar is made using all-purpose flour (maida), which gives it its light and delicate texture.
7. Can I use oil instead of ghee?
Yes. You can use oil or a combination of oil and ghee. Ghee adds a richer flavour, while oil makes the recipe more budget-friendly.
8. Can I prepare Ghewar in advance?
Yes. Make the plain ghewar a day or two ahead, store it in an airtight container, and add the sugar syrup and rabri closer to serving time for the best texture.
9. How long does homemade Ghewar stay fresh?
Plain ghewar stays fresh for up to 5 days at room temperature in an airtight container. Once topped with rabri, it’s best enjoyed within 2 days if refrigerated.
10. What’s the difference between Plain Ghewar and Malai Ghewar?
Plain ghewar is simply coated in sugar syrup, while Malai Ghewar is topped with creamy rabri or sweetened malai and garnished with nuts.
Celebrate the Season with Homemade Sweetness
Festivals have a beautiful way of bringing people together. Whether it’s siblings laughing over childhood memories on Raksha Bandhan or the joy of dressing up for Teej, the sweetest moments are often the ones shared around the dining table.
This Easy Ghewar Recipe isn’t just about making a festive dessert—it’s about creating memories in your own kitchen. Yes, the first attempt might not look exactly like the ones in the sweet shop, and that’s perfectly okay. Every pour teaches you something new, and every homemade ghewar carries a little extra love that no store-bought sweet can match.
So this festive season, challenge yourself to try something different. Gather your ingredients, enjoy the process, and don’t stress about perfection. By the time you drizzle that chilled rabri over your crispy homemade ghewar, you’ll realise that making this traditional Rajasthani sweet is far less intimidating than it seems.
If you give this recipe a try, we’d love to hear how it turned out! Share your experience, your tips, or even your first-attempt photos in the comments. And if this recipe helped you, don’t forget to share it with your friends and family—because good food tastes even better when it’s shared.
From all of us at Chef’s Home Around, wishing you a joyful Teej and a memorable Raksha Bandhan filled with love, laughter, and plenty of homemade sweetness. Stay tuned with us for more desserts recipes and festival special recipes blogs.
Learn the secrets to making the best Chicken Piccata recipe at home.
Table of Contents
Have you ever tasted Chicken Piccata at an Italian eatery and wondered how it got to be so mouthwatering? You’re not the only one, because pan-fried chicken bathed in rich lemon butter sauce and contrasting salty capers is something that feels luxurious yet cozy at the same time. But the great thing is: you don’t have to be a professional chef to cook it yourself.
In Chef’s Home Around we love good Italian food that brings people together. The chicken piccata recipe is loved for its simplicity while still being delicious. A couple of the fresh ingredients and a few tips will help you make your dinner within 30 minutes.
In any case, whether you’re cooking it for your family or hosting a dinner party, these nine simple suggestions will help you bring this best chicken piccata recipe perfectly to life.
The perfect Chicken Piccata recipe for dinner.
Nutritional Value of Chicken Breasts
An ordinary boneless and skinless cooked chicken breast weighing 172 grams contains the following nutritional information:
Chicken Piccata is a favorite among American-Italians and regarded for its mixture of mild and bold flavors. The dish uses small chicken pieces that are coated in flour, fried until golden brown, and then slathered with chicken Piccata sauce made of butter, lemon juice, chicken broth, and capers.
This dish is known to be perfect because of the opposing tastes it mixes.
The taste of butter is complemented with the freshness of lemon, while the flavor of capers provides salty notes that make eating even more enjoyable. It is one of the best Italian recipes that speaks Italian Flavors in every single bite.
If you are searching for delicious and quick chicken recipes, try this dish to add it to your recipes collection.
Tender chicken coated in buttery lemon sauce.
Easy Chicken Piccata Recipe
Ingredients
2 boneless and skinless chicken breasts
Salt and freshly ground black pepper according to taste
½ cup of all-purpose flour
2 tablespoons of olive oil
3 tablespoons of unsalted butter (divided)
1 cup of chicken broth
¼ cup of freshly squeezed lemon juice
2 tablespoons of drained capers
2 tablespoons of finely chopped fresh parsley
Lemon slices for garnishing
Fresh ingredients make the best Chicken Piccata recipe.
Instructions
Step 1: Slice each chicken breast horizontally to get four thin cutlets. Dry them with paper towels and season them generously with salt and pepper.
Pound chicken evenly for quicker cooking.
Step 2: Dredge the chicken in flour, shaking off excess flour. It helps the Chicken Piccata sauce adhere well to the chicken.
Lightly coat the chicken before cooking.
Step 3: Heat olive oil and one tablespoon of butter in a big skillet on medium-high heat. Cook the chicken for three to four minutes on each side until golden brown and cooked through. Move to a plate.
Cook until perfectly golden brown.
Step 4: Pour the chicken broth into the same skillet, scraping off the brown bits from the bottom of the pan. Add lemon juice and capers, bring to a simmer for two to three minutes.
Rich buttery Chicken Piccata sauce in the making.
Step 5: Reduce the heat and whisk in the remaining butter until smooth and shiny. Place the chicken back in the pan, spoon the sauce over, and cook for another couple of minutes.
Finish with fresh parsley and lemon slices before serving.
Simmer chicken in a rich Chicken Piccata sauce.
This simple easy chicken piccata recipe goes superbly with angel hair pasta, smooth mashed potatoes, or some freshly baked crusty roll to mop up that lovely sauce.
9 Simple Tips to Make Chicken Piccata Like a Pro
1. Evenly Pound the Chicken
Thin and even pieces make for quicker cooking and moist meat.
2. Use Fresh Lemon Juice
Whenever Possible Freshly squeezed lemons will give the chicken piccata sauce its unique and bright flavor. Commercial lemon juice is often tasteless or too sour.
3. Use Minimum Shipment of Flour
Keep the coating light as too much flour can create a heavy sauce instead of light.
4. Allow the Chicken to Brown
If You Can Don’t move it too early; the golden crust will give it an amazing taste and leave you with great bits of fried food in the pan.
5. Deglaze the Pan
Those brown bits will add flavor and texture to your sauce when you dissolve them in the dish.
6. Incorporating Butter at the End
By including butter to the sauce at the last stages and whilst getting it off the heat, one can give the best chicken piccata recipe the luxurious shine that is characteristic of a dish made by the chefs in posh restaurants.
7. Finding the Right Lemon Balance
Excess lemon can make the dish bitter. Be sure to taste the chicken piccata sauce before serving it up and adjust if necessary.
8. Opting for Quality Capers
Capers are an essential component of this chicken piccata recipe. If you want the taste to be milder, wash them beforehand.
9. Serve Right Away
Chicken Piccata is best when it is piping hot and the sauce is still smooth.
Restaurant-style Chicken Piccata ready to serve.
What to Serve with Chicken Piccata
Being an old recipe, Chicken Piccata can be served with:
Angel hair or linguine
Parmesan risotto
Creamy mashed potatoes
Garlic bread
Roasted asparagus
Sautéed green beans
A nice green salad with a lemony dressing
The given dishes are simple yet fit perfectly the bright buttery flavor toppings of the Chicken Piccata.
Frequently Asked Questions
Is Chicken Piccata an authentic Italian dish?
Piccata is inspired by Italian cuisine, while chicken piccata has gained popularity among the American-Italian community. From that time, this dish has spread to different corners of the world. So in a way, yes Chicken Piccata is an Italian Dish.
Can I make Chicken Piccata without wine?
Definitely! This easy chicken piccata recipe doesn’t require any wine, since it uses chicken broth and lemon juice to give it flavor.
Why does the Chicken Piccata sauce taste bitter?
The usual reason for bitterness is that one has used bottled lemon juice or boiled fresh lemon juice for too long. When the fresh juice is added at the correct moment, the sauce is balanced and remains bright.
Is it possible to substitute chicken thighs with chicken breasts?
Yes, indeed. Boneless and skinless chicken thighs can taste wonderful and provide a more intense flavor, but they may take a little longer to cook.
Can Chicken Piccata be prepared in advance?
While this dish tastes the best freshly made, leftovers can be kept in the fridge for 3 days in an airtight container. Reheat it gently over low heat to preserve the smoothness of the sauce.
Final Thoughts
When it comes to preparing a delicious chicken piccata recipe, it is not a case of hard tricks or sophisticated skills. Instead, the trick lies in the simple ingredients and great traditional Italian tastes. Thanks to juicy chicken, velvety chicken piccata sauce, and 9 useful tips, you will make a plate that has both luxuriously tasty taste and perfect simplicity for any home dinner.
If you enjoyed this recipe, explore more comforting Chicken Recipes and timeless Italian recipes on Chef’s Home Around. Every recipe is created to help you bring restaurant-quality flavors into your own kitchen, one delicious meal at a time.
If you are searching for the best sabudana khichdi recipe to make for Sawan, you have come to the correct place. This traditional fasting dish is light and filling as well as naturally gluten-free. Whether you are celebrating Shravan Somwar, Ekadashi, Navratri, or any other fast, this tasty dish is perfect for your fasting menu.
This quick and easy sabudana khichdi recipe brings together well-soaked tapioca pearls, roasted peanuts, potato, cumin, green chilies, and fragrant ghee. So, if you are looking for well-known sawan vrat recipes and a great dish for breakfast or a light meal, this is a perfect option. It is extremely easy to make, and the dish always provides instant energy and keeps the hunger away.
In this blog we will learn how to make sabudana khichdi in a traditional way but with simple steps.
Why Is Sabudana Khichdi Popular During Sawan Vrat?
Among all the upvas recipes available for Vrat, the easiest and most delicious is Sabudana Khichdi. Sabudana or tapioca pearls are perfect for fasting because they are easy to digest and provide instant energy without being too heavy.
With the addition of peanuts and potatoes, the dish comes with a perfect mix of carbohydrates, healthy fats, and plant protein.
If you are looking for a great sabudana khichdi for vrat fasting, this recipe is perfect for you.
Why You’ll Love This Sabudana Khichdi Recipe
Perfectly fluffy and non-sticky every time
Easy to cook with few ingredients
Suitable for vegetarians and gluten-free meals
Among the easiest of fasting meals
Ready in just 30 minutes
Perfect for breakfast, lunch and dinner
Contains plenty of healthy fats, carbohydrates, and proteins
Nutrition Benefits of the Ingredients
Another reason for the popularity of this sabudana recipe is that all the ingredients of this dish bring their own nutritional benefits.
Discover why sabudana khichdi for vrat is a wholesome fasting meal.
Ingredient
Nutritional Benefits
Sabudana (Tapioca Pearls)
Excellent source of carbohydrates that provide quick energy during fasting. Naturally gluten-free and easy to digest.
Roasted Peanuts
Rich in protein, healthy fats, magnesium, vitamin E, and fiber, helping keep you fuller for longer.
Potatoes
Supply potassium, vitamin C, and complex carbohydrates for sustained energy.
Ghee
Provides healthy fats and enhances the absorption of fat-soluble vitamins while adding authentic flavor.
Cumin Seeds
Support digestion and add earthy aroma.
Green Chilies
Contain antioxidants and vitamin C while enhancing taste.
Lemon Juice
Adds freshness and improves iron absorption with its vitamin C content.
Fresh Coriander
Rich in vitamins A, C, and K while adding vibrant flavor.
When they are combined together, these healthy ingredients make a delicious, nutrient-rich gluten-free fasting recipe.
Ingredients
2 cups of medium-sized sabudana (tapioca pearls)
2 medium size peeled and diced potatoes
½ cup of roasted peanuts (for crunch)
2 finely chopped green chilies
1 teaspoon of cumin seeds
2 tablespoons of ghee
Sendha Namak to taste (rock salt)
1 tablespoon of lemon juice
2 tablespoons of chopped coriander leaves
1 teaspoon of sugar (for flavor)
Everything you need for an authentic sabudana khichdi recipe.
How to Soak Sabudana Properly (Most Important Step)
If you’re wondering about how to prepare a fluffy sabudana khichdi instead of a sticky one that’s simple – the answer lies in the soaking process.
Steps to follow:
1. Wash the sabudana well with running water for two or three times, till you can see the clear water.
2. Take a bowl and fill it with enough water just to cover up the pearls.
3. Let it soak for about 5-6 hours or overnight.
4. Remove any water that is left in the bowl.
5. Check for doneness by pressing the sabudana pearl with your fingers.
Chef’s Secret
Never use excess water while soaking sabudana. Too much water is the secret spoiler of your sabudana khichdi recipe as it makes it more sticky.
Preparation Time
Prep Time: 15 minutes
Cook Time: 15 minutes
Total Time: 30 minutes
Servings: 4
How to Make Sabudana Khichdi
Learn how to make sabudana khichdi with simple ingredients and expert tips.
Step 1
Heat the ghee in a pan with a heavy base on average heat.
Step 2
Put the cumin seeds in the heated ghee and let them crackle.
Step 3
Put the sliced green chilis in the pan and fry them for around 30 seconds in the pan.
Step 4
Add the cut pieces of potato and cook till they are soft and slightly brown.
Step 5
Grind the fried peanuts to a coarser level.
Step 6
Mix the soaked sabudana with peanuts and rock salt.
The salted peanuts take away any excess moisture in the sabudana.
Step 7
Put the mixture in the pan.
Step 8
Cook the contents for about 4-5 minutes, occasionally stirring.
Do not stir too much.
Step 9
Once the sabudana becomes clear, let the fire turn off.
Step 10
Add lemon juice along with the coriander leaves on top of the dish and serve while hot. And thus your sabudana khichdi for vrat is ready.
Follow these easy steps to prepare a fluffy sabudana khichdi recipe.
Chef’s Tips for Fluffy, Non-Sticky Sabudana
Even professional chefs have trouble with sticky sabudana. To prevent this from happening, here are a few things to keep in mind:
1. Choose medium-sized sabudana.
2. Use minimum water for soaking purposes.
3. Make sure you drain excess moisture before cooking.
4. Add ground peanuts before you start cooking the sabudana.
5. Cook it on a medium flame.
6. Stir the mixture occasionally, not constantly.
7. Remove the pan from the flame once the pearls are transparent.
8. Eat right away.
Common Mistakes to Avoid
Adding Too Much Water
This is the biggest reason why sabudana gets sticky.
Overcooking Sabudana
Cooking for more than 5-6 minutes will make your sabudana gummy.
Not Putting Ground Peanuts
Ground peanuts absorb moisture and improve the texture of the food.
Cooking on High Heat
Cooking on high heat leads to uneven cooking and sticking.
Using Hard Sabudana
Once a sabudana pearl is soaked, it should be tested once before cooking.
Delicious Variations
Maharashtrian Style Sabudana Khichdi
Include freshly grated coconut and a small dash of sugar for best taste.
No Potato Version
Leave out potatoes and increase roasted peanuts to keep it lighter.
Reduce green chilies and increase lemon juice to balance the taste.
What to Serve With Sabudana Khichdi
This comforting sabudana recipe goes wonderfully well with:
Plain yogurt
Peanut chutney
Cucumber raita (if allowed)
Fresh fruits
Sweet lassi
Coconut chutney
These pairs make it an excellent healthy gluten-free fasting recipe.
Approximate Nutrition Per Serving
Nutrient
Amount
Calories
340 kcal
Carbohydrates
47 g
Protein
7 g
Fat
14 g
Fiber
4 g
Sugar
2 g
Potassium
430 mg
Vitamin C
18 mg
Storage & Reheating Tips
One of the advantages of prepping this easy sabudana khichdi recipe is that it takes little time on busy fasting days. While it is best enjoyed fresh, storing properly helps preserve its taste and texture.
How to Store
Wait for the khichdi to cool before packing.
Use an airtight container to store it.
You can keep the dish refrigerated for up to 2 days.
How to Reheat
Heat about 1–2 teaspoons of ghee in a frying pan.
Put the khichdi in the pan and cook it on low heat for about 2–3 minutes.
To moisten the khichdi, add a few drops of water if it appears dry.
Microwaving properly is important to avoid making the pearls rubbery.
Chef’s Tip: Nothing beats freshly made sabudana khichdi for vrat when it comes to texture.
Expert Tips for Perfect Sabudana Khichdi Every Time
When it comes to making your sabudana khichdi recipe, you will need to adopt a few tips from the experts:
Use beautiful medium-sized sabudana pearls, as they will cook equally well.
Wash the pearls right before soaking to get rid of the extra starch.
Do not soak them in too much water.
Before cooking the sabudana, mix it along with the roasted peanut powder, which will absorb moisture and enhance the consistency.
Cook the dish just till the pearls become transparent.
Add fresh lemon juice at the end to improve the taste of the dish.
All these small tips transform this ordinary sabudana recipe into a restaurant-style delight.
Frequently Asked Questions
1. Why does my sabudana khichdi become sticky?
The most common reason is that too much water is used while soaking. To make the perfect sabudana khichdi, soak the sabudana in just the right amount of water without excess.
2. How long should I soak sabudana?
Medium-sized sabudana requires 5–6 hours or overnight soaking. It should become soft enough to be easily mashed between your fingers.
3. Can I soak sabudana overnight?
Yes, overnight soaking is recommended if you use the right amount of water.
4. Which sabudana is best for khichdi?
Medium-sized sabudana is the best because it will remain fluffy and separable when cooked.
5. Is sabudana gluten-free?
Yes. Sabudana is made from tapioca starch of cassava root hence it is naturally gluten-free. That is why this dish is an excellent gluten-free fasting recipe.
6. Is sabudana khichdi healthy?
Yes. Though sabudana is high in carbohydrates, the addition of peanuts, potatoes, and ghee makes the meal balanced during fasting as they provide energy, healthy fats, and protein.
7. Can I make sabudana khichdi without potatoes?
Yes, indeed. Many people make sabudana khichdi for vrat without using potatoes or even replacing them with other types, such as sweet potatoes, depending on the region.
8. Can diabetics eat sabudana?
Sabudana is rich in carbohydrates and has a high glycemic index. Those with diabetes should eat it in moderation and consult their doctor for tailored advice regarding meals.
9. Can I prepare sabudana khichdi in advance?
Yes. The sabudana can be soaked, peanuts roasted, and vegetables chopped in advance. Cooking it right before serving will yield a better product.
10. Why are peanuts added to sabudana khichdi?
The fried peanuts add crunch and healthy fat; they also absorb the excess moisture, making the dish fluffier.
11. Which oil is best for sabudana khichdi?
Traditional recipes use ghee for taste, however, peanut oil or coconut oil are also suitable for vegetarians.
12. Is sabudana khichdi suitable for breakfast?
Yes, it is one of the commonly preferred upvas recipes that indeed provides energy for sustenance during fasting.
13. Can children eat sabudana khichdi?
Sure. Sabudana khichdi is a gentle yet mineral-rich dish made with minimum spices. This dish can be eaten by infants who can consume the said ingredients.
14. Why is sabudana eaten during Sawan Vrat?
Sabudana is easily digestible, gives rapid energy, and is common for times of fasting. This makes it one of the key items for various Sawan vrat recipes around India.
15. What can I serve with sabudana khichdi?
You can have sabudana khichdi with plain curd, peanut chutney, cucumber raita (if any), coconut chutney, or some fresh fruits.
Why This Recipe Works
This is different from several recipes that get gooey or sticky because of the specific soaking method used in this easy sabudana khichdi recipe, right proportion of ingredients, and cooking method. Roasted peanuts, potatoes, cumin, and fresh lemon juice make it a delicious and filling dish that is good for fasting as well as a quick weekday breakfast. You can make it for Shravan Somwar, Ekadashi, Navratri, or just to satisfy a craving for some good Indian breakfast.
Serve this flavorful sabudana recipe with lemon for a satisfying fasting meal.
Conclusion
This sabudana khichdi recipe is a simple, wholesome, and comforting choice for fasting days. Whether you’re looking for an easy sabudana khichdi recipe, exploring traditional Sawan vrat recipes, or adding more upvas recipes to your meal plan, this classic dish is always a great option. Stay tuned with Chef’s Home Around, for more healthy, Gluten-free recipes.
Try it and let us know how it turned out in the comments! We’d also love to hear your favorite tips or which upvas recipes and Sawan vrat recipes you’d like us to share next. Happy cooking!
Discover three delicious high protein gluten free breakfast recipes that are easy, nutritious, and perfect for busy mornings.
Table of Contents
Beginning your day with the right meal can highly impact your goals. It is even more important when you want to stay energised the whole day long, boost muscle recovery, or just eat something healthier and lighter.
You need to try high-protein gluten free breakfast recipes that consist of wholesome ingredients, keeping you full and energetic throughout the day.
Each one of these recipes is simple to prepare, using easily available naturally gluten-free ingredients and protein rich ingredients, making it perfect for both fitness lovers, busy working professionals, or anyone on a gluten-free or protein rich diet.
Here are some of the protein rich and gluten-free breakfast recipes you must try.
Why Choose High Protein Gluten Free Breakfast Recipes?
The healthy combination of high protein breakfast foods and nutritious gluten-free ingredients is a good method of providing the body with the necessary energy for the start of the day. Is it really worth it? Yes, here are some of the reasons to count on:
Best Parts
Benefits
Keeps you fuller for longer
No more mid-morning cravings
Good for muscle recovery and maintenance
Keeps you energetic and Active
Provides steady energy
Gives you extra power for workouts, workdays, or busy mornings
Delivers balanced nutrition
Rich in Protein, Fiber & Essential nutrients
Makes meal prep easier
You can prepare these recipes in advance without any hassle
Tasty & Healthy Gluten Free Breakfast
No compromise on taste and
3 Best High Protein Gluten Free Breakfast Recipes
Now it’s time to finally introduce the gluten-free protein-rich breakfast recipes to you. Have a read, do try!
1. Greek Yogurt Berry Protein Parfait
This Greek Yogurt Berry Protein Parfait is one of the easiest protein rich breakfast recipes.
Are you looking for an easy and healthy way to jump-start your day? This Greek Yogurt Berry Protein Parfait makes for a wonderful healthy gluten-free breakfast choice as it combines protein-rich yogurt and fresh berries and is topped with nutritious ingredients.This is one of the simplest protein rich breakfast recipes to make. It is great to have on a go or after exercising.
Why You’ll Love It
It takes only 10 minutes.
High in protein and keeps you satisfied throughout the day.
Made with Naturally gluten-free ingredients.
Packed with the goodness of antioxidants.
No cooking required, you just need to layer.
Perfect grab-and-go breakfast option.
A creamy Greek Yogurt Berry Protein Parfait ready in just 10 minutes.
Ingredients
1 cup of plain Greek yogurt
½ cup of mixed berries (strawberries, blueberries, raspberries or more)
2 tbsp of gluten-free granola
1 tbsp of chia seeds
1 tsp of honey or maple syrup (as per availability)
Fresh mint leaves to garnish
Quick Steps
Take one half of Greek Yogurt to fill in a serving glass or bowl.
Layer it up with half of mixed berries and gluten-free granola.
Repeat the steps once again with the remaining ingredients.
Finally, sprinkle some chia seeds on top and add honey if desired.
You can also add mint leaves to make each serving fresh!
Greek Yogurt Berry Protein Parfait is a refreshing healthy gluten free breakfast packed with protein and antioxidants.
Protein: Approx 22–25g per serving
Prep Time: 10 minutes
Perfect For: Fitness enthusiasts, busy professionals, post-workout breakfasts, and anyone looking for a quick, protein-packed morning meal.
2. Cottage Cheese Veggie Egg Muffins
High protein Cottage Cheese Veggie Egg Muffins are perfect for breakfast, snacks, or post-workout meals.
These Cottage Cheese Veggie Egg Muffins are a healthy gluten free breakfast that’s packed with protein, colorful vegetables, and cheesy goodness. They’re one of the best protein rich breakfast recipes for meal prep, offering a convenient grab-and-go option that’s both nutritious and satisfying.
These Healthy Cottage Cheese Veggie Egg Muffins are a satisfying, protein-packed healthy gluten free breakfast option. If you’re looking for easy and quick to make protein rich breakfast recipes, then these muffins are definitely one of the best choices on the list.
Why You’ll Love It
High in protein so perfect for muscle recovery and appetite.
Made with Naturally gluten-free ingredients
Loaded with flavors of fresh vegetables.
Take easy meal prep you can make in batches and enjoy throughout the week.
Freezer-friendly so no morning storage hassle.
Goes great as a quick breakfast option or post-workout snack.
Cottage Cheese Veggie Egg Muffins are an easy meal-prep breakfast rich in protein and vegetables.
Ingredients
6 large size eggs
½ cup of cottage cheese
½ cup of finely chopped fresh spinach
¼ cup of diced red bell pepper
¼ cup of finely chopped onion
¼ cup of shredded cheddar cheese
½ tsp of garlic powder
Salt and black pepper according to taste
Cooking spray or olive oil for greasing
Quick Steps
Start by preheating the oven to 375°F (190°C) and grease a 12-muffin tin.
Next, whisk together the eggs, cottage cheese, garlic powder, salt, and pepper.
Then fold in the spinach, bell pepper, onion, and cheddar cheese.
After this, divide the mixture among the muffin cups.
Finally, bake for about 20-25 minutes or until muffins are cooked and slightly golden.
Let it cool for a couple of minutes before eating or keeping it aside for later.
High protein Cottage Cheese Veggie Egg Muffins are nutritious, portable, and freezer-friendly.
Protein: Approx 18–20g per serving (2 egg muffins)
Prep Time: 10 minutes Cook Time: 20–25 minutes
Perfect For: Meal preppers, fitness enthusiasts, busy professionals, and anyone looking for a portable, protein-packed breakfast.
3. Banana Oat Protein Pancakes (Gluten-Free)
Soft and fluffy Banana Oat Protein Pancakes make the perfect healthy gluten free breakfast packed with protein.
These banana oat protein pancakes are fluffy, mildly sweet, and highly enjoyable. They are among the simplest gluten free breakfast recipes to try at home. It is based on wholesome ingredients and will serve as an excellent high protein breakfast on busy mornings or after exercising.
Why You’ll Love It
Soft and fluffy in texture
Made without refined flour.
High in protein and fiber content, so it keeps you energized.
No sugar or artificial sweeteners made of only naturally sweetened ripe bananas.
Easy and Quick to prepare with your simple pantry staples.
Freezer-friendly
See how easy it is to prepare Banana Oat Protein Pancakes at home.
Ingredients
1 ripe banana
2 large size eggs
½ cup of certified gluten-free rolled oats
¼ cup of vanilla flavor protein powder
½ tsp of baking powder
½ tsp of cinnamon powder
1 tsp of vanilla extract
Pinch of salt (for flavor)
Butter or Coconut Oil for cooking
Fresh berries and maple syrup to drizzle
Quick Steps
First, blend all the ingredients.
Next, leave the batter to rest for a few minutes.
Thirdly, lightly grease a skillet with oil and heat it up over medium heat.
Then, pour the batter into the skillet.
Lastly, allow the pancakes to cook until brown on both sides before serving the dish.
Learn how to make fluffy Banana Oat Protein Pancakes for a healthy high protein breakfast.
Protein: Approx 24–27g per serving
Prep Time: 10 minutes Cook Time: 10 minutes
Perfect For: Fitness enthusiasts, families, meal preppers, and anyone looking for a
High-Protein Breakfast Meal Prep Tips
Make it easier for yourself each morning by preparing your breakfasts ahead of time with these nutritious high protein gluten free breakfast recipes. A little bit of organization goes a long way when it comes to enjoying a healthy morning meal even on the busiest of days.
Keep breakfasts in sealed containers to ensure freshness in the refrigerator for up to 3-4 days.
Prepare protein sources beforehand, for example by boiling several eggs, making some cooked quinoa, or baking egg muffins.
After that, you can have your pancakes frozen in one layer, and just heat them in your toaster or microwave before the meal.
Put smoothie ingredients, chia seeds, and berries into single servings and prepare them more quickly.
Frequently Asked Questions
What is the healthiest gluten-free breakfast?
The healthiest gluten-free breakfast consists of protein, fiber, and healthy fats, like eggs, Greek yogurt, quinoa, or a smoothie bowl.
What is the best protein for a gluten-free diet?
A diet that does not include gluten can be high in protein if you incorporate certain foods in your daily meals, such as eggs, Greek yogurt, cottage cheese, quinoa, chickpeas, tofu, nuts, and seeds.
How much protein should breakfast have?
According to experts, people should take approximately 20-30 grams of protein during breakfast for energy and fullness of muscles.
Conclusion
Here are our high protein breakfast options and gluten free breakfast recipes that help you have healthy mornings. Choose ones you like and include them in your nutritious weekly menu. Don’t forget to check our website for more high protein gluten free breakfast recipes and smoothie ideas if you want more quick and tasty options. Cook healthy with Chef’s Home Around!
Start your morning with three healthy gluten free breakfast recipes packed with protein for lasting energy and nutrition.
Table of Contents
Most breakfast foods consist of processed carbohydrates and gluten which leaves you disappointed, hungry, and low on energy in the very first part of the day. There are some healthy gluten free breakfast recipes that are highly nutritious, but it’s not easy to find the right one.
At Chef’s Home Around we believe mornings need home meals that are simple and wholesome, and so we came up with three recipes that would offer everything necessary for a healthy high protein breakfast full of energy, and the right amount of protein, as well as fresh and healthy components. Go for a read and try them out.
1. Spinach & Feta Chickpea Omelette
This Spinach & Feta Chickpea Omelette delivers Mediterranean flavors with plenty of protein and fiber.
If you are searching for scrumptious healthy gluten free breakfast recipes, this Spinach & Feta Chickpea Omelet should be at the top of your list. It includes protein dense eggs, chickpeas, spinach, and feta, creating a nutritious, high protein breakfast to keep you fueled and full throughout the morning.
Why You’ll Love It
Rich in protein and fiber, it keeps you full.
Made with Naturally gluten-free ingredients.
Simply nutritious ingredients.
Loaded with the goodness of fresh vegetables and rich Mediterranean flavors.
It takes only 20 minutes.
Perfect option for breakfast, brunch, or post-workout meals.
Ingredients
2 large size eggs
¼ cup of lightly mashed cooked chickpeas
1 cup of chopped fresh spinach
2 tbsp of crumbled feta cheese
1 tbsp of finely chopped onion
1 tsp of olive oil
¼ tsp of garlic powder
Salt and black pepper according to taste
Fresh parsley to garnish
Quick Steps
Easy step-by-step guide to making a healthy Spinach & Feta Chickpea Omelette at home.
Start by warming olive oil in a non-stick frying pan on medium heat.
Next, add onions and let them cook for 2 minutes before adding spinach until softened.
Then, combine the chickpeas and mix the ingredients for another minute.
Next, beat the eggs alongside garlic powder, salt, and pepper and add to the frying pan.
At last, sprinkle evenly with feta and finish cooking until the eggs are set.
Protein: Approx 24–26g per serving
Prep Time: 10 minutes Cook Time: 8–10 minutes
Perfect For: Fitness enthusiasts, vegetarians, busy professionals, and anyone looking for a nutritious, protein-packed breakfast with Mediterranean flavors.
2. Peanut Butter Chia Protein Smoothie Bowl
With wholesome ingredients and a creamy, refreshing texture, this Peanut Butter Chia Protein Smoothie Bowl is one of the easiest and healthy gluten free breakfast recipes for busy mornings. Packed with fiber, protein, and healthy fats, it’s the perfect breakfast for anyone looking for a nutritious high protein breakfast.
Peanut Butter Chia Protein Smoothie Bowl packed with protein, fiber, and healthy fats for a quick gluten free breakfast.
Why You’ll Love It
Thick and creamy texture
It is naturally gluten-free.
Rich in protein and supports muscle recovery
Helps to increase sustained energy.
Good source of fiber
Contains healthy fats to keep you full.
It takes only 10 minutes
No cooking required
Ingredients
1 frozen banana
1 cup of unsweetened almond milk
½ cup of plain Greek yogurt
2 tbsp of natural peanut butter
1 tbsp of chia seeds
1 scoop of vanilla flavor protein powder
½ tsp of cinnamon powder
Fresh berries
Sliced banana
Granola
Chia seeds for topping
Quick Steps
Follow these easy steps to make a creamy Peanut Butter Chia Protein Smoothie Bowl at home.
In a blender, combine the frozen banana, Greek yogurt, peanut butter, almond milk, chia seeds, protein powder, and cinnamon.
Blend until the desired consistency is achieved, adding more almond milk if necessary.
Pour the mixture into a bowl.
Top with berries, sliced banana, and gluten-free granola.
Protein: Approx 28–32g per serving
Prep Time: 10 minutes
Perfect For: Fitness enthusiasts, busy professionals, post-workout recovery, meal preppers, and anyone craving a quick, nourishing breakfast.
3. Quinoa Breakfast Bowl with Eggs & Avocado
Enjoy your mornings right with this Quinoa Breakfast Bowl with Eggs and Avocado, a nourishing breakfast packed with complete protein, healthy fats, and fiber. This is among the best high protein gluten free breakfast recipes you can try. Simple to make, it is useful on busy weekdays and after exercising. Ample protein breakfast ideas are now available to satisfy your cravings and tastes.
Quinoa Breakfast Bowl with Eggs & Avocado is a wholesome gluten free breakfast rich in complete protein and healthy fats.
Why You’ll Love It
Rich in protein to boost your muscle recovery.
Naturally gluten-free
Loaded with wholesome ingredients.
Packed with fiber content and healthy fats for long lasting energy.
Easy & Quick to prepare
It is customizable with your favorite veggies.
Ingredients
1 cup of cooked quinoa
2 large size eggs
½ sliced avocado
½ cup of halved cherry tomatoes
¼ cup of baby spinach
1 tsp of olive oil
½ tsp of paprika
Salt and black pepper according to taste
Fresh parsley or chives to garnish
Lemon wedges to serve
Quick Steps
Learn how to prepare a nutritious Quinoa Breakfast Bowl with Eggs & Avocado in just a few simple steps.
Transfer the cooked quinoa to the frying pan or into the microwave to reheat it.
Prepare the eggs in the way you prefer: poached, fried, or soft-boiled.
Put the warm quinoa into the serving bowl.
Add the eggs, sliced avocado, cherry tomatoes, and baby spinach on top.
Drizzle the dish with olive oil. Add a pinch of paprika, salt, black pepper, and fresh herbs on top of the dish.
Lemon juice may be served with the dish.
Protein: Approx 25–28g per serving
Prep Time: 10 minutes Cook Time: 10 minutes
Perfect For: Fitness enthusiasts, meal preppers, busy professionals, and anyone looking for nutrient-dense and high protein gluten free breakfast recipes.
Frequently Asked Questions
Can gluten-free breakfasts be high in protein?
Indeed. The introduction of eggs, Greek yogurt, cottage cheese, quinoa, or proteins from protein powder can make this kind of breakfast highly rich in protein.
Which breakfast has the most protein?
Breakfasts made out of eggs, Greek yogurt based parfaits, or smoothies are recognized to be high in protein meal.
Are high-protein breakfasts better than high-carb breakfasts?
Protein-rich breakfasts better satiate for a longer time in addition to providing better muscle recovery opportunities. The best is the combination of protein, healthy fat and complex carbohydrates in the meal.
Is Greek yogurt gluten-free?
Yes. Greek yogurt is naturally gluten-free. Special checks should be kept for flavored products.
Is cottage cheese gluten-free?
Cottage cheese is gluten-free too; but remember to check the label for other gluten ingredients.
What grains are both gluten-free and high in protein?
Quinoa is probably the most important; gluten-free certified oats, amaranth, teff and buckwheat are the second best.
Can I eat peanut butter on a gluten-free diet?
Yes. Naturally occurring peanut butter is gluten-free. Opt for peanut butter without added gluten.
Conclusion
A wholesome breakfast begins with making the right food decisions, a fact that is proven by these recipes as you will see that a tasty and healthy gluten free breakfast is also satisfying. No matter if you are fueling for exercise, going to work, or just want to enjoy a better start to your day, each high protein breakfast recipe provides a well-balanced mixture of taste and nutrition. For more healthy recipes, breakfast ideas, and easy-to-make meals, stay tuned with Chef’s Home Around.
Restaurant-style Spicy Vodka Rigatoni with Crispy Chicken, coated in rich creamy vodka sauce and finished with parmesan and basil.
Spicy Vodka Rigatoni with Crispy Chicken is a restaurant staple for a reason. I mean, perfectly cooked rigatoni combined with creamy, deliciously spicy vodka sauce hits differently. Especially when it’s topped with crispy golden chicken, fresh parmesan cheese, and fresh basil, this combo creates a satisfying plate of harmonious flavors and textures. Try this creamy vodka pasta recipe once and you will crave for it long after finishing the dish.
With its creamy cheese, spicy heat, and crunchy texture, this Crispy Chicken Rigatoni Pasta has all of the amazing flavors you seek for in any comfort food bowl. Yeah, comfort food like guilty pleasure in a bowl. Let’s indulge in this Spicy Vodka Rigatoni with Crispy Chicken recipe.
Why This Spicy Vodka Rigatoni Is a Guilty Pleasure
This Vodka Sauce Pasta Recipe is one of the best guilty pleasure pasta dishes on the planet because it captures all of our favourite comfort food sounds:
Creamy vodka sauce
Golden tenders of crispy fried chick
Parmesan cheese to top it off
Tender cooked rigatoni pasta
A hint of spicy heat
Restaurant-quality taste; from the comfort of your own home.
Every single bite of this Crispy Chicken Rigatoni Pasta will make you feel like you’re having the most amazing gourmet pasta in the world because it has creamy and crispy flavours in a perfect balance. The parmesan cheese melts into the creamy sauce to produce a level of silkiness that fully coats the rigatoni pasta.
Every bite of this Crispy Chicken Rigatoni Pasta delivers creamy, cheesy, spicy, and crunchy flavors.
What Is Spicy Vodka Rigatoni with Crispy Chicken?
Spicy Vodka Rigatoni with Crispy Chicken is a creamy Italian-American pasta that has rich rigatoni tossed in a tomato-based vodka cream sauce, seasoned with chili flakes and topped with crispy flavored chicken.
The vodka enhances the flavor of the tomatoes and cream without making the dish taste irresistible. When cooked properly, the alcohol evaporates, leaving behind a smoother & richer sauce.
That’s how this creamy, slightly spicy, savory, cheesy, and incredibly satisfying Italian guilty pleasure is made.
Ingredients
For the Crispy Chicken
500g boneless chicken thighs, cut into bite-sized pieces
1 cup buttermilk
1 teaspoon garlic powder
1 teaspoon paprika
1 teaspoon salt
½ teaspoon black pepper
1 cup all-purpose flour
Oil for frying
For the Spicy Vodka Sauce
300g rigatoni pasta
2 tablespoons olive oil
4 cloves garlic, minced
1 small onion, finely chopped
2 tablespoons tomato paste
1 teaspoon red chili flakes
¼ cup vodka
1 cup heavy cream
½ cup parmesan cheese, grated
Salt to taste
Black pepper to taste
For Garnish
Fresh basil leaves
Extra parmesan cheese
Chili flakes
How to Make Spicy Vodka Rigatoni with Crispy Chicken
Step 1: Marinate the Chicken
Combine all the ingredients (chicken, buttermilk, garlic powder, paprika, salt and pepper) into a large mixing bowl, until combined.
Let it sit in the refrigerator for a minimum ½ hour.
I recommend giving it at least 30 minutes because the longer you let it rest the juicier your chicken will be and more flavours it will carry.
Step 2: Fry the Crispy Chicken
Coat marinated chicken in flour and remove excess flour.
In a deep skillet (preferably cast iron) heat oil to 375 degrees and deep fry the marinated chicken until golden brown and crispy.
Place on a cooling rack to help retain crunch until you are ready to cook the rigatoni.
Step 3: Cook the Rigatoni
Bring a large pot of salted water to a rolling boil.
Cook rigatoni for al dente as per package instructions.
After cooking, remove one-cup of pasta water, before draining pasta.
Step 4: Make the Spicy Vodka Sauce
In a wide skillet, heat the olive oil over medium heat.
Due to their size, onions take the most time to soften. Add the minced garlic and sauté for an additional minute.
After that, mix in the tomato paste and continue cooking for another 2-3 minutes until it turns a deep red colour.
Now add the crushed red pepper flakes and the vodka, then reduce heat and allow to simmer for 2 minutes.
Next, add the heavy cream and mix well until all ingredients are blended together.
Finally, add the parmesan cheese to the pan and mix until melted into the sauce.
Be sure to also add a few pinches of salt and black pepper to taste.
Step 5: Combine Everything
Once all ingredients are mixed together in the frying pan, add the cooked rigatoni to the pan.
The rigatoni must be completely coated in the sauce but may require a splash of reserved pasta water to achieve the right consistency.
Once all of the rigatoni is mixed into the sauce, transfer to the serving bowls.
Serve topped with plenty of fried chicken, parmesan cheese, fresh basil, and additional crushed red pepper flakes.
Serve this Crispy Chicken Rigatoni Pasta piping hot when you are ready to eat.
Why Rigatoni Works Best for Vodka Sauce
Rigatoni’s unique shape makes it a perfect choice for use in a creamy vodka sauce. The ridges in the rigatoni capture the rich, thick sauce and the large tube-like openings provide a place for the sauce to settle inside the rigatoni, which guarantees that every single bite will be full of flavour.
Penne can also be used to replace rigatoni, but the addition of rigatoni creates a more enjoyable restaurant-style experience due to the larger size of the rigatoni relative to penne.
Tips for the Best Restaurant-Style Vodka Sauce Pasta Recipe
Rather than using tomato sauce as the primary source of tomato flavoring, consider substituting tomato paste for a deeper, more intense flavor profile in vodka sauce pasta recipe.
Don’t forget to reserve some starchy pasta water from the cooked pasta when you are ready to mix the sauce into your pasta as this will help to emulsify the sauce and produce a velvety texture.
For crispy chicken, prepare and fry a chicken breast right before serving; this will ensure that the outer crust remains crunchy and offer an excellent textural contrast to the creamy pasta.
Use freshly grated parmesan cheese as opposed to pre-grated parmesan, as it melts much easier and provides a better tasting result.
The longer you cook the vodka, cream, tomato paste, and parmesan together, the more well-combined and smooth the final product will turn out.
An easy-to-cook gourmet pasta recipe featuring creamy vodka sauce, crispy chicken, and tender rigatoni.
What to Serve with Crispy Chicken Rigatoni Pasta
This rich pasta goes great with:
Garlic bread
Caesar salad
Roasted vegetables
Garlic & parmesan broccoli
Burrata cheese
Sparkling lemonade
Storage and Reheating
If you have leftover pasta, it can be stored in an air-tight container in the refrigerator for approximately 3 days. If you have made crispy chicken, it is advisable to store the pasta and chicken in separate containers until you are ready to serve.
To reheat leftover vodka pasta, gently heat the pasta with a small amount of cream or milk over medium heat in a pan, and add your freshly reheated crispy chicken just prior to serving to maintain the chicken’s crispiness.
Frequently Asked Questions
What does vodka do in vodka pasta sauce?
By adding vodka in the pasta sauce, you can enhance the flavors of the cream and tomatoes. It brings all the elements together in order to have a smooth, balanced sauce, offering additional depth to surface flavoring without making pasta alcoholic. As most of the vodka evaporates during the cooking process.
Can I make spicy vodka rigatoni without vodka?
Absolutely! Although vodka adds to the dish’s distinctive taste, you can also try other options like chicken broth as a substitute or pasta water as stock! The sauce will undoubtedly remain creamy and delicious but will not be that strong in flavour.
Why is my vodka sauce separating?
Separation of sauce typically occurs when there is too much heat on the stove after you have added the cream to the sauce. Use low heat and stir frequently to keep your Vodka Sauce looking smooth and silky.
What chicken is best for crispy chicken pasta?
For chicken pasta with crispy skin, we recommend using chicken thighs because they keep their juiciness when fried and their flavour is richer than that of chicken breasts. They will become tender when cooked with hot pasta.
Is spicy vodka rigatoni very spicy?
Not really! The heat level of this recipe is moderate due to the chili flakes but can be adjusted easily by adding less or more of these flakes to your recipes.
Can I make vodka pasta ahead of time?
Yes, you may prepare the sauce up to 48 hours in advance and then refrigerate it until ready to use, after which you will need to reheat and combine with perfectly cooked pasta before serving. It is important for perfect texture.
What’s the difference between penne vodka and rigatoni vodka?
Both types of pasta use sauces that are similar in flavor, texture, and aroma, but rigatoni has larger tubes with a deeper rib profile which means more sauce will be able to adhere to rigatoni versus penne. Therefore, rigatoni provides you with a richer bite than penne, making rigatoni an ideal choice when it comes to restaurant-style vodka pasta dishes.
How do restaurants make vodka sauce so creamy?
Restaurants use heavy cream, freshly grated parmesan cheese, properly prepared tomato paste, and pasta water to achieve a smooth, gloss-like texture along with a luxurious coating for their pasta dishes.
Final Thoughts
If you want the ultimate Spicy Vodka Rigatoni with Crispy Chicken recipe, this one has it all! It gives you restaurant-quality pasta dishes with creamy vodka sauce, rigatoni cooked to perfection, crispy golden chicken, a hint of parmesan cheese and topped off with fresh basil!
This Vodka sauce pasta recipe is so rich, indulgent and full of flavor that you’ll be satisfied no matter what your plans are for an evening: a quiet dinner for two or a fun weekend comfort-food party at home. And if you ever have a craving for a pasta dish like this one, rest assured that the creamy Vodka Rigatoni recipe will satisfy all your cravings!
A bubbling pan of Four Cheese Volcano Lasagna with a molten cheese center and golden baked crust.
Imagine the moment you scoop into a bubbling pan of Four Cheese Volcano Lasagna and experience rivers of melted cheese flowing out like molten lava; that’s the image that comes to mind for me when I see this dish. The top layer of the lasagna is a beautiful golden brown with spots of blistering from the baking process. Each layer of the lasagna fills your mouth with all four different types of cheese (mozzarella, ricotta, parmesan, and provolone).
This dinner will be more than just a meal; it will be an Ultimate Ultra Cheesy Lasagna for all the Cheese lovers inside of everyone who enjoys Comfort Food.
The Four Cheese Volcano Lasagna was designed to replicate the thick, gooey slices you can find in all the Celebrity Restaurateurs and in the many Viral Food Videos out there; with their dramatic heights of cheese, rich meat sauce, and the gooey cheese center that continues to stretch endlessly when lifting off your plate.
Ingredient Highlight
Did you know a 30g serving of cheese contains 6–8g of protein and up to 20% of daily calcium needs? Well yes, this ultra cheesy lasagna recipe is a powerhouse of protein. It has four types of cheese: mozzarella, ricotta, parmesan and provolone. It provides high-quality protein essential for muscle repair and satiety.
The ultimate cheese pull from this ultra cheesy lasagna recipe.
The gooey melted cheese is an Extra Cheesy Baked Lasagna because it contains layers upon layers of full flavor. Each bite has been designed to be rich with equally rich layers of béchamel sauce, simmered meat sauce and then the four cheeses (mozzarella, ricotta, parmesan, and provolone ) melted and cooked together until they are creamy and gooey.
If you’re looking for the most delectable cheesy meal you’ve ever had, this Four Cheese Lasagna is the best way to satisfy your cravings.
The Four Cheese Volcano Lasagna is the ultimate comfort food, it takes everyday family dinner into a celebratory experience. The bubbling cheese crust, the substantial cheese pull from the cheese, and the deep flavor of the meat sauce make it impossible to eat just one slice when you have a craving for a Comfort Food.
If you have a strong craving for comfort food the Four Cheese Lasagna Recipe will definitely satisfy.
What Makes This a True Four Cheese Volcano Lasagna
The “volcano” style comes from layering cheese to create an inner pocket of melted cheese that results in a cheesy lasagna when pulled apart.
Ingredients for the Best Homemade Lasagna
Meat Sauce (Rich Ragù)
Ground beef
Ground pork
Onion, garlic
Crushed tomatoes + tomato paste
Oregano, basil, salt, pepper
Olive oil
Creamy Béchamel Sauce
Butter, flour, milk
Nutmeg, salt, pepper
Four Cheese Blend (The Volcano Mix)
Mozzarella — stretch factor
Ricotta — creamy layers
Parmesan — savory depth
Provolone or cheddar — melty richness
Pasta
Lasagna sheets
Fresh parsley garnish
Step-by-Step Ultra Cheesy Lasagna Recipe
1. Cook the Rich Meat Sauce
Simmer until the sauce is thick and has deep flavor (a rich version is key to making the best homemade lasagna).
2. Make the Creamy Béchamel
Create the creamy texture of the lasagna’s cheese layers.
3. Cook Lasagna Sheets
Cook adequately (al dente) and lay flat.
4. Assemble the Four Cheese Volcano Lasagna
Layer in this order (do this 3-4 times):
1. Meat sauce
2. Noodles
3. Béchamel
4. Mozzarella and Ricotta
Add an extra Ricotta and Mozzarella layer in the center to create the lava effect. Top with Mozzarella, Parmesan and Provolone.
5. Bake the Extra Cheesy Baked Lasagna
Bake at 180° C / 350° F for 40-45 minutes until hot and bubbling; let it rest for 15 minutes after taking it out so that all of the layers are perfect when you cut the lasagna.
Tips for the Perfect Gooey Cheese Lasagna
Close-up of rich layers in this extra cheesy baked lasagna with ragù and parmesan.
Use Low Moisture Mozzarella (for Stretchiness)
Laying Cheese Layers (All Layers)
Allow Resting Time Before Chopping
Creating a Golden Crust with Your Broiler
By doing these things, you are almost guaranteed to have a very cheesy lasagna!
Serving Suggestions for This Cheesy Lasagna Recipe
When serving this four-cheese Lasagna recipe, consider pairing it with some garlic bread, a Caesar salad, and some red wine or sparkling water on the side. These simple ingredients are great to balance out the richness of the dish.
Storage & Reheating
Fridge: 4 Days
Freezer: 2 Months
Reheat covered until heated through.
FAQs About Four Cheese Volcano Lasagna
How to Make Extra Cheesy Lasagna?
Place a minimum of four layers of cheese into the lasagna, and then place a “pocket” of cheese in the center of each layer to create a molten cheese effect.
What Are The Best Cheeses For Four-Cheese Lasagna?
Mozzarella, ricotta, parmesan, and provolone are all great ingredients that create the best flavor and texture for your lasagna.
Why is My Homemade Lasagna So Watery?
Reasons for watery lasagna are thin sauce or cutting before it has a chance to finish cooking. Let the pasta rest before slicing.
Can I Make Cheesy Lasagna Ahead Of Time?
Yes. You can assemble your lasagna up to 24 hours in advance and then bake when you are ready to serve.
How Many Layers Of Lasagna Are Ideal For Homemade Lasagna?
Three to five layers of lasagna will provide the best structure and texture for homemade lasagna.
Final Bite
That was Chef’s Home Around special Four Cheese Lasagna Recipe. Do try this guilty pleasure recipe and let us know in the comment section. If you are a cheese lover you may like our mouth watering Mac and Cheese recipe. For more delicious and irresistible recipes scroll down our recipe section.
Creamy, cheesy and unforgettable Italian Guilty Pleasure recipe of Truffle Parmesan Garlic Butter Pasta Recipe. It's vegetarian, easy to make, takes only 30 mins. Best Gourmet pasta you must try!
Table of Contents
Some recipes are comforting. Some feel luxurious. This one is both — and that’s exactly why it’s a true guilty pleasure. Truffle Parmesan Garlic Butter Pasta is unapologetically rich, loaded with butter, cheese, and aromatic truffle oil that turns a simple bowl of gourmet pasta into an indulgent restaurant-style experience. Let’s dig into this truffle oil pasta recipe easy to make and absolutely irresistible.
Ingredient Highlight
There are so many benefits of Truffles that makes an important ingredient. No wonder this recipe is a Guilty Pleasure, but truffle oil helps to balance your fitness goals. Truffle oil helps to reduce weight, keeps your skin glowing and also supports blood sugar circulation.
This Truffle Parmesan Garlic Butter Pasta celebrates the Italian love for simple ingredients cooked beautifully. With just a handful of pantry staples, you get silky pasta coated in a glossy garlic butter sauce that feels indulgent, satisfying, and absolutely worth the extra calories.
This gourmet pasta in this recipe demonstrates the emulsification process, which is how butter, pasta water and cheese can be made into a smooth glossy sauce, while fully coating pasta noodles. Features of this recipe include:
Pantry-friendly ingredients
30 minutes or less total to make
Creamy without any cream
Restaurant taste at home
Ingredients
Serves 2–3
250g spaghetti or fettuccine
4 tbsp unsalted butter
5–6 garlic cloves (minced)
¾ cup reserved pasta water
1 cup freshly grated parmesan
1–2 tsp truffle oil
Salt and black pepper
Optional garnish: parsley, chili flakes, extra parmesan.
Step-by-Step Instructions
1) Cook the Pasta Right
Ready to make this easy truffle pasta recipe at home? Let’s start! Cooking pasta in heavily salted water to al dente is important. When you drain the pasta, reserve about 1 cup of the cooking water for the sauce. Why it’s important: Starchy water from cooking the pasta will help to create a silky smooth sauce.
2) Create the Garlic Butter Base
Melt the butter in a medium skillet over medium heat. Once melted, add garlic and lightly sauté only until fragrant. This is your base for flavor.
3) Create the Emulsified Sauce
Add ¾ cup of reserved pasta water to the garlic butter in the skillet. Bring to a simmer for 2-3 minutes, & then reduce heat to low. This is your creamy butter sauce base.
4) Add the Pasta & Parmesan Cheese
Add your drained & rinsed cooked pasta to the garlic butter & water and toss frequently to combine with the sauce. Gradually incorporate parmesan cheese into the sauce until the sauce has a glossy appearance. Season with salt and black pepper.
5) Finish with Truffle Oil
After turning off heat, drizzle the truffle oil over all opened pan ingredients. Toss the ingredients together just to mix and serve pretty much immediately for best service.
Pro Tips for Perfect Results
Use freshly grated parmesan cheese
Only add grated parmesan cheese and other grated hard cheese to the sauce when you are cooking on low heat.
Always toss pasta noodles constantly while combining them with the sauce.
Serve this dish immediately; the texture will be hardly as good as cooked.
What to Serve With Truffle Pasta
Here you are done with your restaurant style pasta in 30 minutes! Now, select light accompaniments to offset the richness:
Lemon salad
Roasted veggies
Garlic bread
Why This Recipe Is a True Guilty Pleasure
Italian style gourmet pasta recipe-Truffle Parmesan Garlic Butter Pasta (Easy Gourmet Pasta in 30 Minutes). Its 100% vegetarian, cheesy and super delicious.
This pasta hits every food-indulging checkbox:
Butter provides considerable wealth and smoothness
Parmesan cheese provides salinity from fat-soluble flavor and creaminess
Truffle oil adds luster to the smell and depth of umami
This silk-like sauce wraps around all portions
This gourmet pasta is comfort food, a dish for celebrations and indulgence, not an everyday meal—but every forkful will be reversible.
Everything You Need to Know About Truffle Parmesan Pasta
How does truffle pasta taste?
Truffle parmesan garlic butter pasta has a deep, rich (buttery) earthy slightly nutty taste. Truffles have aromatic compounds that contribute to a rich and luxurious umami flavor and taste—a delicious combination together with the garlic butter and parmesan cheese will provide a creamy, comforting taste with intense aromas.
Can truffle pasta be made without truffle oil?
Yes! Alternatives to truffle oil include:
Sautéed mushrooms
Mushroom powder
Truffle salt
These alternatives will provide the same earthiness but will not produce a strong aroma as truffle oil does.
Why does my Parmesan cheese clump in my pasta sauce?
Parmesan will clump for a few reasons: it has been added to the sauce over high heat; it has been added too fast; or because you have used pre-grated parmesan.
To fix the problem, set the heat down, gradually add the parmesan, and toss continuously with freshly grated parmesan.
Is truffle oil made with real truffles?
Most truffle oils are actually just infused with truffle aroma compounds from olive oil, while some of the top-shelf brands do contain real truffles. If you’re looking for an authentic truffle flavor, you should check the label before purchasing.
How do restaurants make creamy pasta sauces without using heavy cream?
The method of emulsifying is used by the restaurants. Emulsifying is taking the starch from the cooking water and mixing it with a fat (butter) and cheese, to create a smooth and creamy sauce.
What is the best type of pasta to use for garlic-butter pasta?
The best shapes of pasta to use are spaghetti, fettuccine, or tagliatelle, as they all have a long enough noodle length to hold onto the butter sauce, and will have an even coating.
How much truffle oil should I use in Truffle Parmesan Garlic Butter Pasta?
You should only use 1 to 2 teaspoons of truffle oil.
Since truffle oil is very strongly flavored, you can easily overpower the dish if you use too much. Start off with a very small amount and then add to your desired taste.
Can I add protein to this truffle and parmesan gourmet pasta?
Yes, there are many different pieces of protein that can be added to this pasta to turn it into a main meal. Examples include grilled chicken, shrimp, mushrooms, or crispy pancetta.
Is the truffle pasta vegetarian?
You can use vegetarian parmesan and it’s vegetarian; however, if you go with the traditional parmesan, then check the label in case there is an animal rennet.
Can I reheat the Truffle pasta?
Yes, but gently. You can use a little milk or water to reheat in a pan (or skillet) for about 5 minutes or until heated through; avoid using the microwave if you can.
Final Bite
This recipe of Truffle Parmesan Garlic Butter Pasta demonstrates that using simple ingredients can produce an extraordinary gourmet product at home and serve as the basis for a great comfort food. This dish is so smooth, aromatic, and satisfying that it will be your go-to recipe for gourmet pasta. Once you make it you will be making this your Standard Gourmet Pasta Recipe. If you love pastas checkout our Spicy miso Carbonara recipe, it is a fusion pasta one of the favorites from 2025. For more exciting recipes by Chefs Home Around checkout our website.
Gluten Free and high protein dessert recipe by Chefs Home Around
Close your eyes and visualize a bride calmly sitting in a courtyard in Madhubani to soft sohar songs playing. Her arms are adorned with red chooriyan; there is a warm, nutty scent wafting from the kitchen
It is not from gulab jamun or jalebi: it is from Makhana halwa.
Makhana halwa is simple, soft, crunchy when slightly cooked and brings you deep comfort — it’s not just food at Mithila weddings. It’s an emotion. It’s tradition. It’s the one dish that doesn’t come across as trying “too hard,” yet still steals the show.
Unfortunately it is one of the golden lost recipes our ancestors indulged in. Let me take you to this lovely, unknown space. In this blog we will be exploring one of the best and easy desserts to make at home!
Table of Contents
A Dessert That’s More Than Just Sweet
In Mithila culture, food is not just about taste; it has meaning. Mithila gave us many authentic Indian recipes and one of them is makhana halwa. Making it and serving it at weddings is part of vivah sanskar. It is made with warmth, has blessings for you, and is a silent wish for a beautiful married life to come.
Madhubani and Darbhanga (in Bihar) are called the “heartland” of makhana (fox nuts). India has the highest-quality makhana; it grows in ponds, processed by hand, and turns into something magical.
What separates this particular halwa from others is its balance.
Unlike heavier varieties of halwa, such as moong dal, this type of halwa has a lighter, fluffier consistency due to the addition of makhana. Khoya makes this halwa rich in taste but is balanced by the mild and fragrant cardamom, which brings all the flavours together.
Why Makhana Halwa Feels So Special
Such types of traditional desserts have a feeling of comfort and satisfaction. Whether it be the texture from the soft halwa and the crispy bits of roasted makhana, the aroma from ghee and cardamom combining slowly, or the memories of large family gatherings and cooking for weddings that it brings back — it is full of nature’s nutrients.
This makes this dessert a great combination of indulgent but also mindful of what you are putting into your body. It is no wonder that it has been enjoyed across generations, from grandmothers to modern-day brides and all the many people in between.
The Traditional Mithila Recipe (Made Simple)
How about we bring this magic into your kitchen? Sounds exciting, right?
Ingredients:
2 cups of makhana (fox nuts)
1 cup of khoya (crumbled)
½ cup of desi ghee
¾ cup of sugar (or mishri for authenticity)
1 cup of full-fat milk
4–5 green cardamom pods
A handful of chopped nuts (cashews & almonds)
A few strands of saffron
1 tsp of rose water
Dry Fruits
Step 1: Roast the Makhana & Almonds
Gluten Free & High Protein Dessert Recipe by Chefs Home Around
To make this halwa, heat ghee in a large skillet. Roast the makhana and almonds in the ghee over medium heat, until the makhana:
Turns golden brown
Crisps
Makes a crackling sound
Remove half and set aside to use as a crunchy topping. Crush or grind the remaining 1/2 of the roasted makhana & almonds gently with a mallet or food processor.
Step 2: Cook the Khoya
Gluten Free and high protein dessert recipe of Makhana halwa.
In the same skillet, add the crumbled khoya and cook over a low heat, stirring constantly, until:
It is soft
Smells good
Becomes slightly creamy
Next, add the crushed makhana and finish mixing together.
Step 3: Build the Halwa
Combine the sugar and warm milk, then pour it slowly into the pan while continuing to stir. Add:
Crushed cardamom
Saffron (optional)
During cooking, you will see that the consistency changes from a thin liquid to a thick and shiny substance.
Step 4: Final Touch
To add some texture to the dish, mix roasted whole makhana into the batter.
In another small skillet, fry the nuts in some ghee and drizzle over the halwa.
For a final touch, drizzle a few drops of rose water over the halwa and continue to stir for another 1-2 minutes to allow all the ingredients to blend.
Serve the halwa warm.
How It’s Served in Mithila Weddings
It is one of the easiest desserts to make at home but when it is decorated it feels so tempting to eyes and heart as if some special conversation is going on with food. In Mithila, presentations are made with consideration.
Makhana halwa is typically presented in a steel or silver tray; usually accompanied by a small diya, thus providing the recipient with a warm, soothing, and personal experience.
Some examples of where makhana halwa is served include:
Brides may serve the makhana halwa to family and friends during a Griha Pravesh.
During winter weddings, makhana halwa is often served along with either peda or malai.
Makhana halwa may be formed into smaller portions for ease of service.
In presentation, nothing is overdone; simply presented, such is the inherent beauty of the dish.
The Health Side No One Talks About
The nutritional benefits of Makhana Halwa are impressive.
Makhana is:
Low in fat
High in protein
Contains antioxidants
Cardamom helps with digestion
Khoya contains calcium
When you eat this food item, you’re nourishing your body in addition to enjoying it.
That’s what makes it a great food item during fasting seasons like Navratri as well.
Modern Twists for Today’s Kitchens
Just like all traditional items, Makhana Halwa is changing as well.
More people are trying different things with makhana halwa today, like:
Using jaggery instead of sugar
Using vegan khoyas
Using coconut to create makhana halwa
Using chocolate or coffee as the basis for creating makhana halwa
However, no matter how modern you make it, the heart of the dish will always remain the same.
In business, everything you eat is sweet and soft and has a nutty flavor.
Not Just for Weddings
People often use Makhana Halwa at wedding celebrations, but it is not exclusive to that event by any means.
Makhana Halwa is also enjoyed for the following reasons:
To offer as bhog on Janmashtami
For Teej and Karva Chauth celebrations
As a treat to your family at home while enjoying the cool winter nights
There is no reason to need an occasion for Makhana Halwa. Some evenings, all you need is a warm bowl of Makhana Halwa and your peace of mind.
Final Thought: A Spoonful of Mithila
Halwa made with makhana is more than just a dish.
It evokes emotion.
It represents coziness within a Mithila household.
It recalls the purity of tradition.
It embodies a subtle sweetness that lingers without being cloying.
The next time you wish to experiment with a different type or style of dessert, think about choosing makhanas instead of your normal choices.
Assemble your ingredients; prepare them slowly by cooking them at low heat until they are tender. Allow the fragrance to permeate your environment.
After completing the above, you will almost surely experience the ambiance of a Mithila celebration: an atmosphere that is soft, comforting, and simply yet magnificently arranged. For more gluten free recipes, authentic Indian recipes, traditional desserts and lost recipes stay tuned with us at Chefs Home Around!