Home Blog Page 13

12 Best Overnight Oats Recipes!

0

Oats are considered one of the healthiest breakfasts one can have. These are filled with vital vitamins, fiber, and antioxidants. When talking about its recipe, you will be happier to know that these are very easy to make.

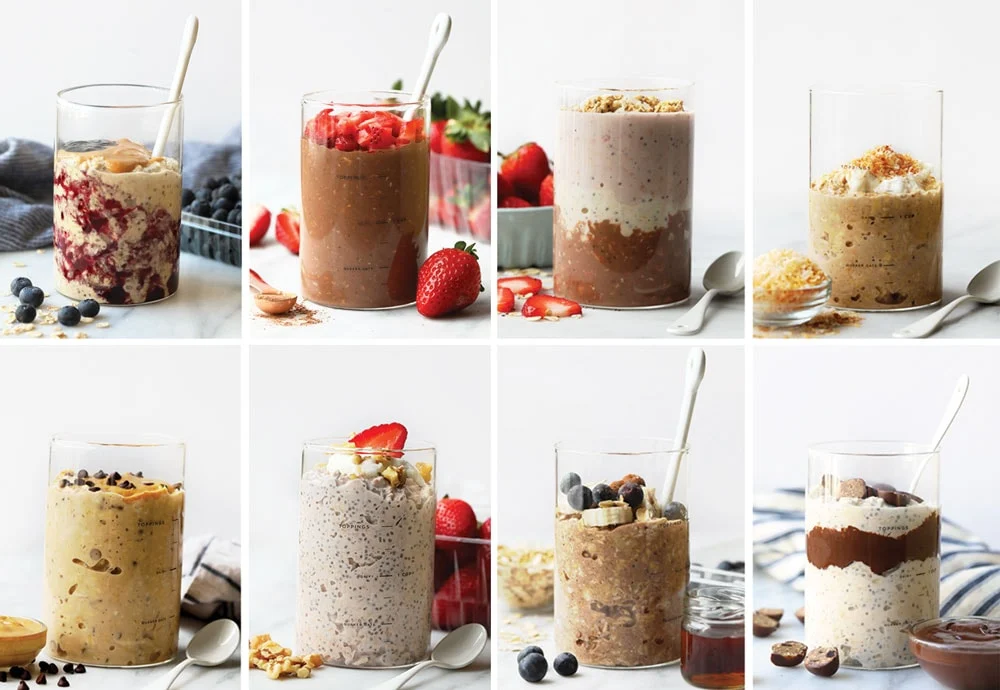
You can make different oats recipes overnight if you want a healthy and tasty night snack. However, many of you have not known before that oats can be made overnight, and that too in several interesting recipes. Here you get a list of amazing and easy recipes for overnight oats which you should try for once.

1. Coconut Pecan Steel-cut Oats

This recipe is a kind of no-cook method which is very easy to make and is healthy enough to give you nutrition. All you need to be just soak it overnight, and you are ready with a wholesome breakfast. Here are given its ingredients and easy recipe.

Ingredients

  • Steel-cut oats – 1/3 cup
  • Unsweetened coconut(shredded) – 1 tablespoon
  • Crushed pecans – 1 tablespoon
  • Brown sugar – half a tablespoon
  • Milk – 1/3 cup and one tablespoon
  • Ground cinnamon – 1/8 tablespoon

Steps

  • In one small container, combine the ingredients, including coconut, brown sugar, cinnamon, and pecans.
  • Next, cover it with 1/3 cup of milk.
  • Then refrigerate the mixture for at least 8 hours or overnight if.
  • After that, put one tablespoon of milk over the oat mixture and serve it as your healthy and tasty breakfast.
2. Chocolate Coconut Oats

The overnight chocolate coconut oats are one of the healthy and yummy breakfasts. This recipe of oats gives you a creamy and healthy oat breakfast in the morning. This does not need much time to prepare; you just need to use the ingredients and follow the simple steps.

Ingredients

  • Chocolate-flavored almond milk – 1 cup
  • Chia seeds – one tablespoon
  • Maple syrup – one tablespoon
  • Unsweetened cocoa powder – 1 tablespoon
  • Vanilla extract – 1 splash
  • Rolled oats – ¾ cup
  • Sweetened cocoa(shredded) – one tablespoon

Steps

  • First, combine the ingredients, including coconut, maple syrup, chia seeds, almond milk, cocoa powder, oats, and vanilla extract.
  • Take all these ingredients in a mason jar and mix well.
  • After mixing, refrigerate the mixture overnight.
  • Take it out and stir well, and you are ready with the delicious chocolate oats.  

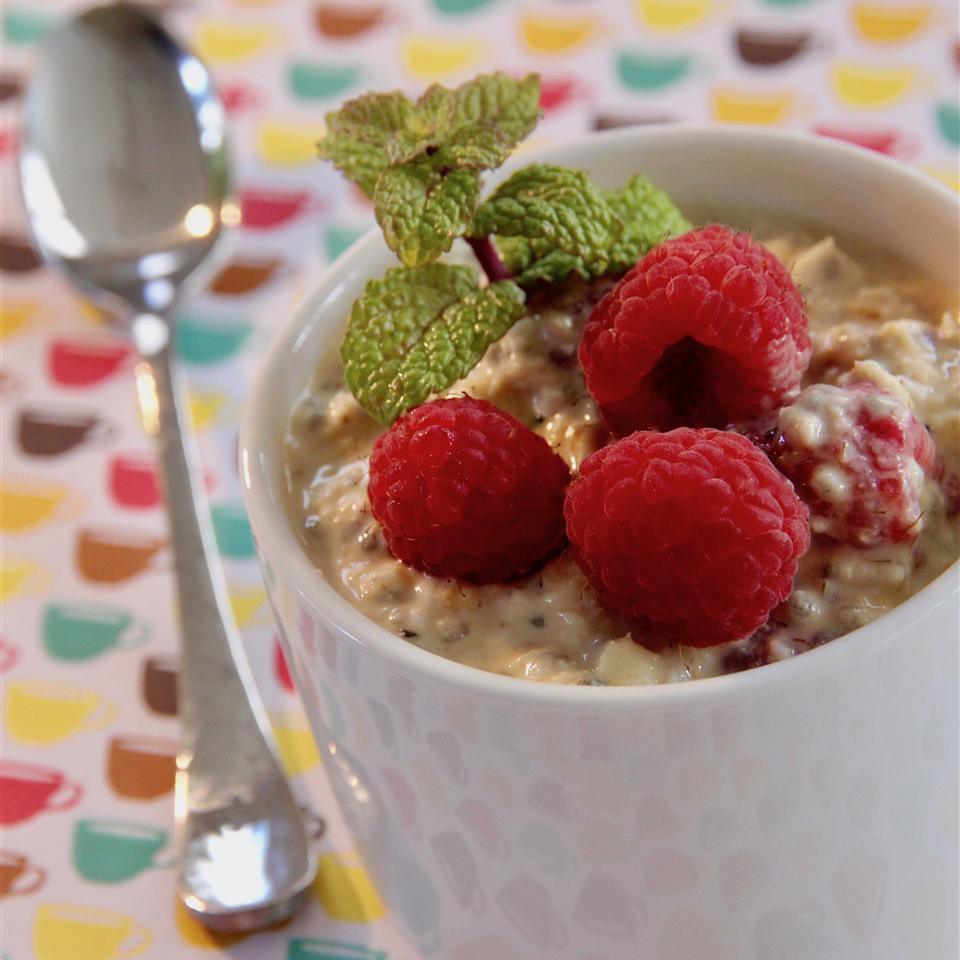
3. Light PB&J Oats

This is the light recipe of oats which gives you the option of customization and no time prep. Also, this is filled with plenty of health benefits, including vitamins, protein, and calcium. Just go with some easy ingredients and an easy process.

Ingredients

  • Almond milk – half cup
  • Fresh raspberries – ¼ cup
  • Rolled oats – ¼ cup
  • Powdered peanut butter –  2 tablespoons
  • Chia seeds – one and a half teaspoons
  • White sugar – one teaspoon

Steps

  • All you need to do is just mix some of the ingredients, including raspberries, powdered peanut butter, sugar, chia seeds, almond milk, and rolled oats.
  • Take all these in one container and combine well.
  • Cover the mixture and refrigerate overnight.
  • You are ready to serve one of the tasty, healthy overnight oats recipes.
4. Steel-cut Oats With Blueberries and Yoghurt

This steel-cut oats recipe is full of taste and health benefits. You just need some easy and tasty ingredients, and you are ready to have the yummy blueberries and yogurt oats.

Ingredients

  • Steel-cut oats – ¼ cup
  • Fresh blueberries – 2 ounces
  • Stevia powder – half ounce
  • Coconut milk – four and a half ounces
  • Plain yogurt – 1 container

Steps

  • Firstly, put oats in a mason jar and add some ingredients.
  • Mix or stir well blueberries, yogurt, and stevia powder.
  • After mixing well, pour coconut milk over the mixture and stir again.
  • Refrigerate the covered jar overnight.
  • Serve your healthy and delicious oatmeal for breakfast.

5. Overnight Chai Oatmeal

  • The overnight chai oatmeal is that recipe of oats that comes up with enough flavor and a delicious smell.
  • The recipe needs some extra milk which can be ¾. It comes out to be very thick and has a good consistency.
  • Overall the recipe needs two cups of milk, and the use of cardamom makes the recipe more amazing, so don’t forget to leave this good ingredient.

6. Honey and Peanut Butter Overnight Oats

Peanut butter is considered a healthy ingredient, and adding it to your diet would be a great thing. When you add it to your oats recipe, you will get one of the healthiest breakfasts, along with the sweetness of honey.

Ingredients

  • Milk – 3 cups
  • Rolled oats – two and half
  • Greek yogurt – 1 cup
  • Honey – 1/3 cup
  • Peanut butter – 1/3 cup
  • Vanilla extract – 1 tablespoon
  • Salt – 1 teaspoon
  • Dried cranberries – 1 ¼ cups
  • Flaxseed meal – 1/3 cup
  • Walnuts (chopped) – 1 ¼ cups

Steps

  • Take the ingredients oats, yogurt, peanut butter, honey, milk, flaxseed meal, salt, and vanilla extract.
  • Put all these in a mixing bowl and mix all these until the oats turn out to be soft.
  • Take out the mixture in a jar and pour two tablespoons of walnuts and cranberries each.
  • Refrigerate the mixture overnight and serve in the morning.

7. Healthy No-Cook Overnight Oats

If you are searching for oats that are very easy to make and healthy at the same time, then this may be for you. You can get the most out of this recipe and can get creative by using some of your favorite ingredients.  

Ingredient

  • One sliced banana
  • Unsweetened almond butter – one tablespoon
  • Chia seeds – one and a half teaspoons
  • Rolled oats – one cup
  • Unsweetened almond milk – one cup
  • Maple syrup – one teaspoon
  • Vanilla extract – ¼ teaspoon

Steps

  • Firstly place about four slices into a jar and layer it with almond butter, chia seeds, and oats.
  • Then mix maple syrup, vanilla extract, and almond milk in a separate bowl.
  • Pour the oats over the mixture and allow them to soak into the mixture.
  • Cover up the jar and refrigerate it overnight until the oats get moist and serve it.

8. Caramel Gingerbread Oats

This recipe is full of flavors because of caramel and gingerbread. The spices are also included in it, making it more delicious. Just take the ingredients given below and follow the simple process of making it.

Ingredients

  • Butter – one tablespoon
  • Pear (chopped) – ¼
  • Chopped walnuts – two tablespoons
  • Ground cinnamon – half teaspoon
  • Rolled oats – half cup
  • Pumpkin pie spice – two teaspoons
  • Ground ginger – half teaspoon
  • Protein shake (caramel flavored) – 6 ounces

Steps

  • First, melt the butter in a pan over medium flame.
  • Mix walnuts, pear, and cinnamon and sauté for about 5 minutes.
  • Remove the pan from the heat when the pear gets softened.
  • Then mix oats and protein drinks in a mason jar.
  • In the Mason jar, add the cooled pear mixture and refrigerate by covering it overnight.
  • Finally, add ginger, pumpkin spice, and some cinnamon at the time of serving, and you are ready with it.

9. Blueberry Smoothie Oats

Just try these amazing blueberry-flavored oats and get several health benefits from them. All you need to have is some incredible ingredients and get the most out of this recipe.

Ingredients

  • Rolled oats – one cup
  • One chopped frozen banana
  • Blueberries – one cup
  • Vanilla extract – one teaspoon
  • Maple syrup – one teaspoon
  • Unsweetened almond milk (vanilla flavored) – 1 ¼ cups
  • Flaked coconut – two tablespoons
  • Fresh blueberries – 1 tablespoon
  • Chia seeds – one teaspoon

Steps

  • Mix the ingredients, including oats and almond milk, in a bowl and refrigerate it overnight.
  • After taking it out, combine this mixture with other ingredients, including almond milk, banana, vanilla, maple syrup, and blueberries. Blend this mixture with a blender until it turns out to be smooth.
  • Take out the smoothie in a bowl and add the toppings of coconut, chia seeds, and blueberries and enjoy.
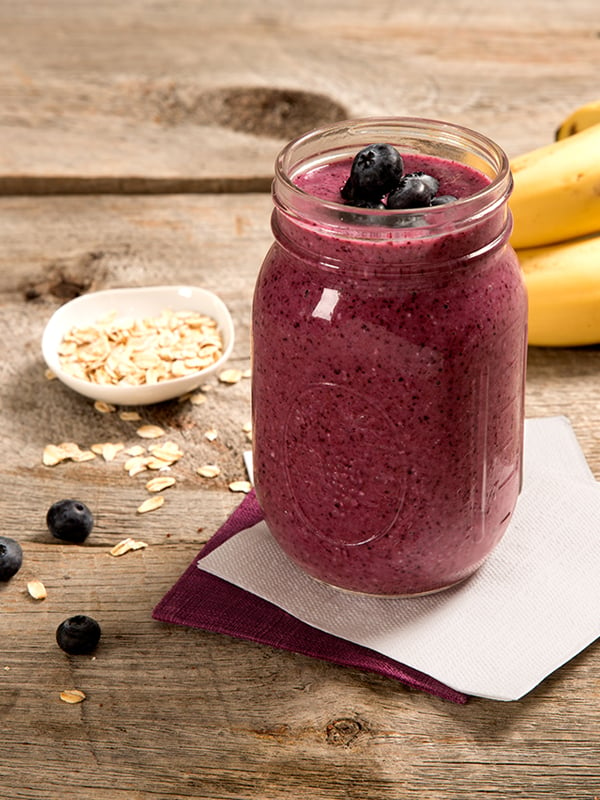
Blueberry Smoothie Oats

10. Oats With Pumpkin and Spice

Ingredients

  • Water – 3 cups
  • Salt – half teaspoon
  • Steel-cut oats – 1 cup
  • Pumpkin puree – half cup
  • Pumpkin pie spice – two teaspoons

Steps

Mix the water and salt in a pan and boil it. After boiling, add oats, pumpkin pie spice, and pumpkin puree to the water. Then boil the mixture of oatmeal for another minute. Take it out and refrigerate the oatmeal overnight. When you want to eat, just stir the mixture and heat for about 5 minutes over low flame.

11. Oats With Jam

The oatmeal with jam is considered one of the sweet and healthy breakfasts giving you a great start full of energy for the day.

Ingredients

  • Greek yogurt – one cup
  • Rolled oats – half cup
  • Strawberry jam – four tablespoons
  • Chia seeds – two tablespoons

Steps

All you need to do is just mix together jam, oats, yogurt, and chia seeds in a container. Just cover it and refrigerate overnight, and you are ready with a luscious and healthy oatmeal breakfast.

12. No Cook Overnight Oatmeal

In case you want a quick recipe of overnight oats with fewer ingredients, and it still turns out to be the healthy and delicious one, then you can go for this one.

Ingredients

  • Milk – 1/3 cup
  • Greek yogurt – ¼ cup
  • Rolled oats – ¼ cup
  • Honey – two teaspoons
  • Chia seeds – two teaspoons
  • Ground cinnamon – 1 teaspoon
  • Fresh blueberries – 1 ¼ fresh blueberries

Steps

Just mix the oats, honey, milk, chia seeds, yogurt, and cinnamon in a container. Cover the container and shake well until all these are combined well. Refrigerate the mixture overnight, and you are done having a tasty breakfast in the morning.

MUST TRY: Protein Pancakes
Plum Cake Recipe!

0

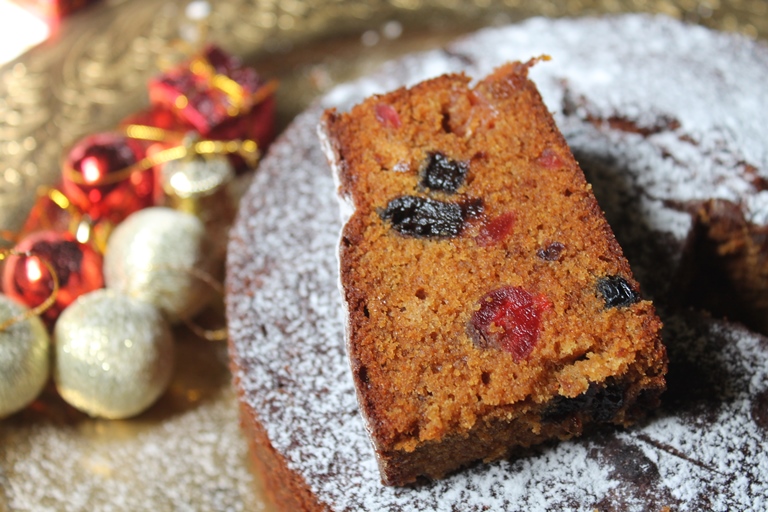
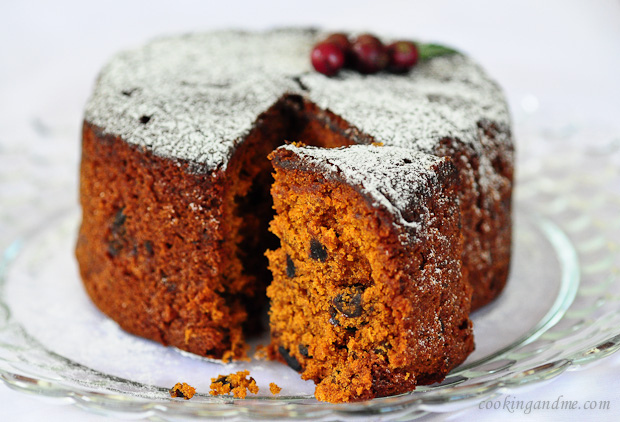
Plum cake is considered one of the most delicious and easy-to-make cakes. This is one of the tastiest fruit cakes which can be made without using eggs. Most people like to make it on the occasion of Christmas because it’s vegan and can be enjoyed by the whole family.

The kids as well as like this cake because of the use of fruits and wheat flour in it. In addition, it uses caramel which not only gives the cake a beautiful brown color but also adds nice flavor and depth to it. This is not too difficult to make, and you can easily enjoy it at home by using some ingredients.

Ingredients for Making Caramel

To make the delicious plum cake, first, you need to make the caramel. Then, to make that, you need to know about the ingredients used in it, and then it’s a simple process. So, before knowing how to make the cake batter, just goes through the simple steps of making the caramel.

  • Small or medium size dates – half cup
  • Cashews – ¼
  • Almonds – two tablespoons
  • Golden raisins –  two tablespoons
  • Walnuts – ¼ cups
  • Black currants – two tablespoons
  • Pistachios – two tablespoons
  • Glazed or canned cherries – 10
  • Candies orange peels – 45 grams
  • Apple juice – 1 cup
  • Sugar – 100 grams
  • Water as needed
  • Melted butter or olive oil – 1/3 cup
  • Apple cider vinegar

Steps to Make Caramel

After knowing about the ingredients for caramel, just know some of the simple steps of making it. The caramel you make would make your fruity cake more yummy and luscious.

  • Firstly take all the dry fruits in a bowl and rinse them with water. After that, chop the nuts with the help of a food chopper.
  • Add 1 cup of apple juice which should be thin and transparent and of flowing consistency. Mix and combine the ingredients very well.
  • After all, this lets the fruits soak and be put in the fridge for one day.
  • Take a saucepan and add two tablespoons of water and half a cup of sugar. Mix it and occasionally stir on low heat.
  • Bring the mixture to a boil and cook it for some more time.
  • You will find that the sugar gets crystallized, and the pale brown color will come, which stays for a while.
  • Cook it further until you see the color changes into dark brown and put down the pan from the stove.
  • Immediately add one cup of water into it, and the caramel gets somewhat harder, then place it again on the stove on low heat.
  • Stir it occasionally until the harder caramel gets dissolved completely.
  • Then put it down and let it cool down completely and strain it and keep it aside.
  • After cooling down, add 1/3 cup olive oil or melted butter and mix it with the solution.
  • Finally, add one and a half spoons of apple cider vinegar, and your caramel solution is ready.
Best Plum Cake
Image Source: https://chockochoza.com

Ingredients for Making the Batter

  •  Wheat flour – two cups
  • Baking soda – 1 teaspoon
  • Baking powder – ½ teaspoon
  • Cinnamon powder – ¼ teaspoon
  • Clove powder – ¼ teaspoon
  • Nutmeg powder – ¼ teaspoon

Steps to Make the Plum Cake Batter

Once you have made the caramel solution, it’s time to prepare the cake batter using the ingredients mentioned above, and you just need to follow some of the basic steps for making a nice batter.

  • Take a pan sized as per the quantity of the cake and grease it with butter or oil.
  • Pour two cups of wheat flour into the pan and mix all the powders mentioned above in the list.
  •  Mix and combine all these ingredients and put them aside.
  • Add the mixture of soaked fruits and dried nuts to the pan.
  • Mix all the ingredients very well, and there should not be any gluten strands lies in the batter.
  • Add the caramel solution in one go and fold the mix nicely.
  • Fold the mixture in a way that turns into a smooth batter which should not be too thick or no too thin.
  • Put the batter into the greased pan and gently tap it so that the batter gets even out.
  • Finally, put the pan into the preheated oven and bake it at a temperature of 180 degrees Celsius. The time taken would be around one to one and half hours based on the varied brands of ovens.
  • Once the time gets over, put out the cake and let it cool down to room temperature.
  • Here your delicious and fruity plum cake is ready, just slice it and enjoy it with your family.

FAQs

Can the Cake Be Cooked Without an Oven?

Most often, people ask this question, can we make the cake without an oven, and the answer for this is yes. You can make it in a pressure cooker, also. You just need to follow some of the different steps with the same ingredients.

Can Dry Fruits Be Soaked for a Few Hours?

The dry fruits and nuts used in the cake are needed to be soaked overnight or for a day to get the amazing taste. But in case you don’t have so much time, then soak these for about 3 to 4 hours and not less than that.

Can Wheat Flour Be Replaced?

In case you want to replace the whole wheat flour, then you can go for another option. For example, you can use all-purpose flour. You can also combine both of the flours in half proportion.
You can do this with this luscious cake to make your Christmas more amazing. In case you want to have a fruity cake at your home, then also you can just make it. This cake is considered one of the tastiest cakes that can be baked at home with no more difficult procedure. You just need to collect some of the ingredients and follow the simple steps. So there you go enjoying the delicious cake.

MUST TRY: Dump Cake Recipe

Green Bean Casserole Recipe

0
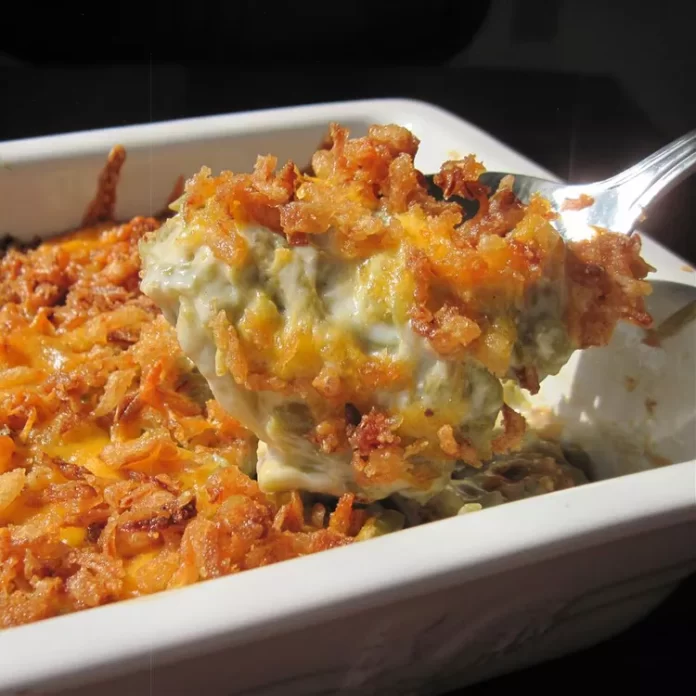
Green Bean Casserole

If you are throwing a Thanksgiving party and wondering what to serve, then a Green Bean Casserole recipe is the best option for you. This recipe is prepared in a very minimal time and by using fewer ingredients. A total of four ingredients are required for preparing a green bean dish which are Green Bean Casserole, French-fried onions, a condensed mushroom soup, and shredded Cheddar cheese.

It will deliver a very mouth-watering taste in the mouth to prepare a cheesy sauce while serving it with Green Bean Casserole. You can also include crunchy onions dipped in cream this, which will only take a minute to prepare.  

Ingredients

  1. Green beans
  2. Canned soup
  3. Cheese
  4. French-fried onions

Optional Ingredients

  1. Crumbled bacon
  2. Garlic
  3. Parmesan cheese
  4. Black pepper
  5. Sauteed mushrooms
  6. Onions

Instructions for Using Ingredients

  1. For using green beans, a total of two drained cans are required.
  2. A canned soup is prepared by using condensed cream of mushroom soup.
  3. While buying shredded Cheddar cheese, make sure that you are using sharp and mild cheese so that it will become very easy to mix and blend.
  4. French-fried onions are used so that a crush on the topping of Green Bean Casserole generates a savory flavor.

A Brief Overview

Here is an overview for making super delicious and healthy Green Bean Casserole. Also, all the detailed steps will be listed below, which we will discuss later.

  1. The first step is to take a bowl that is microwave safe. Now mix all the beans and soup and put it in the microwave until it is completely warmed.
  2. It’s time to melt and blend the cheese by taking another bowl and placing it in the microwave.
  3. Take a baking dish and transfer all the baking ingredients to it. Now, add fried onions and cheese to the baking sheet.
  4. Last but not least is the step where you will first preheat the oven and bake the dish until all the cheese is melted. Also, all the onions should be turned golden brown.

How Much Time Required for Cooking?

For cooking Green Bean Casserole, a total time of 10 minutes is required until it is perfectly made. You need to first preheat the microwave to 350 degrees F.

Can We Store It?

Yes, once you have prepared Green Bean Casserole, then make it cool at room temperature. Once it gets completely cool, then you can store it in an airtight container. You must cover it properly. Otherwise, the entire taste will be changed. You can store this dish for at least 3 to 4 days in the refrigerator by covering it tightly.

Directions

The recipe for Green Bean Casserole is made by following the 5 basic steps.

  • 1. If you want to prepare this recipe in the microwave, then preheat the microwave to 175 degrees C.
  • 2. Take a bowl and mix green beans along with condensed soup and then microwave it for at least 5 minutes. Make sure that the soup is completely warmed.
  • 3. Now, take out the mixture and add half a cup of Cheddar cheese and again microwave it for 3 minutes. This is used so that a creamy texture will be formed.
  • 4. Take a casserole dish and properly transfer all the mixture by sprinkling French-fired onions and leftover Cheddar cheese on top of it.
  • 5. Until all the cheese melts, you have to bake it so that all the onion gets browned. On average, it will take about 8 to 10 minutes to be baked completely.

What Are the Mistakes One Should Avoid?

While cooking Green Bean Casserole, some common mistakes should be avoided otherwise, it will completely ruin the entire taste such as:

  • Do not forget the stovetop while preparing the dish because it is prepared perfectly oven-only. Always use fresh ingredients such as mushrooms and onions.
  • While cooking, make sure that the topping is crispy and the onion rings turn golden brown. If it is soggy, then the entire taste will get ruined. To make it crispier, you can coat it with cornstarch.
  • Try to avoid using mushy green beans because using Frozen French-cut green beans is more appropriate. The reason is it will generate a better texture but do proper roasting otherwise, and the taste will not get enhanced. You can also steam or boil it to make it crispier.
  • Do not use a casserole if it is watery otherwise, it will become thick. You can also use flour and cornstarch while preparing sauce.
Green bean casserole recipe
Image Source: https://wholefully.com

FAQs

What Are the Dishes That Goes With Green Bean Casserole?

The dishes that go well while serving Green Bean Casserole are Cajun turkey, Lentil Loaf, Baked Mac, Pumpkin Dinner Rolls, and Cheese. You can also include oven-fried chicken and instant pot BBQ while serving this dish with shaved brussels sprouts salad.

How to Make Green Beans Flavorful?

To make green beans flavorful, you can add garlic powder, pepper, onion powder, and salt to it. By mixing all these things, a delicious taste will be generated from green beans.

Which is the Perfect Seasoning for Green Beans?

The taste of beans goes best with rosemary, savory, thyme, and parsley. If you like the taste of onions and garlic, then you can also include it either. While buying beans, always go for the specific kinds of beans which is mung and fava beans.

What is the Nutrition Present in It?

On average, there are 110 calories, 10g of total carbohydrate, 2g of sugar, 7g of total fat, and 1g of protein present in it.

Should One Bake With Lid on or Off?

When you are baking the Casserole then, it should be uncovered otherwise, it will not become crispy. If you are cooking casserole with grains, then only it should be covered while baking otherwise, it should not.

MUST TRY: Sweet Potato Shepherd’s Pie Recipe

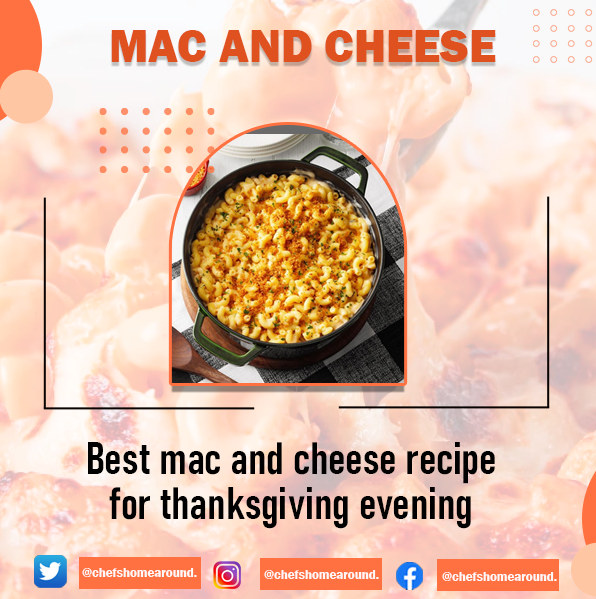
Mac And Cheese Recipe

0

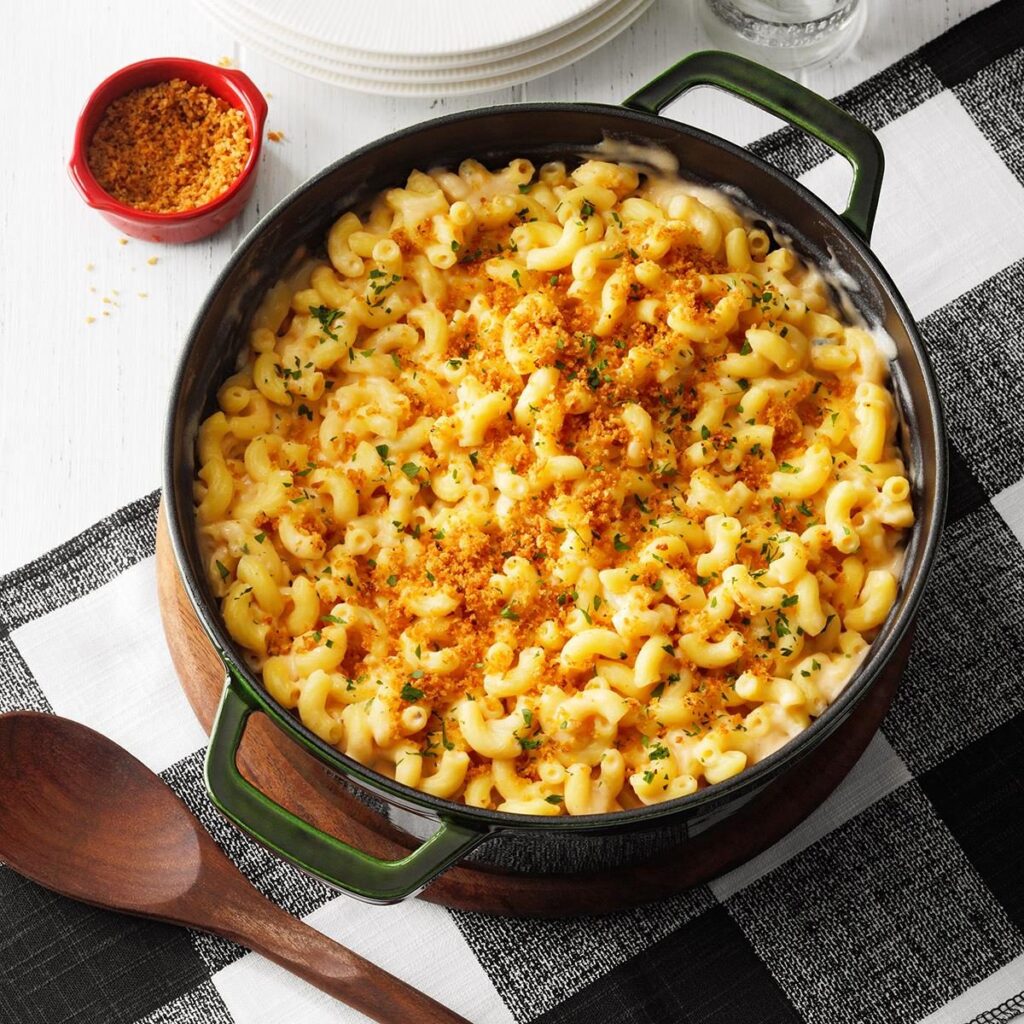
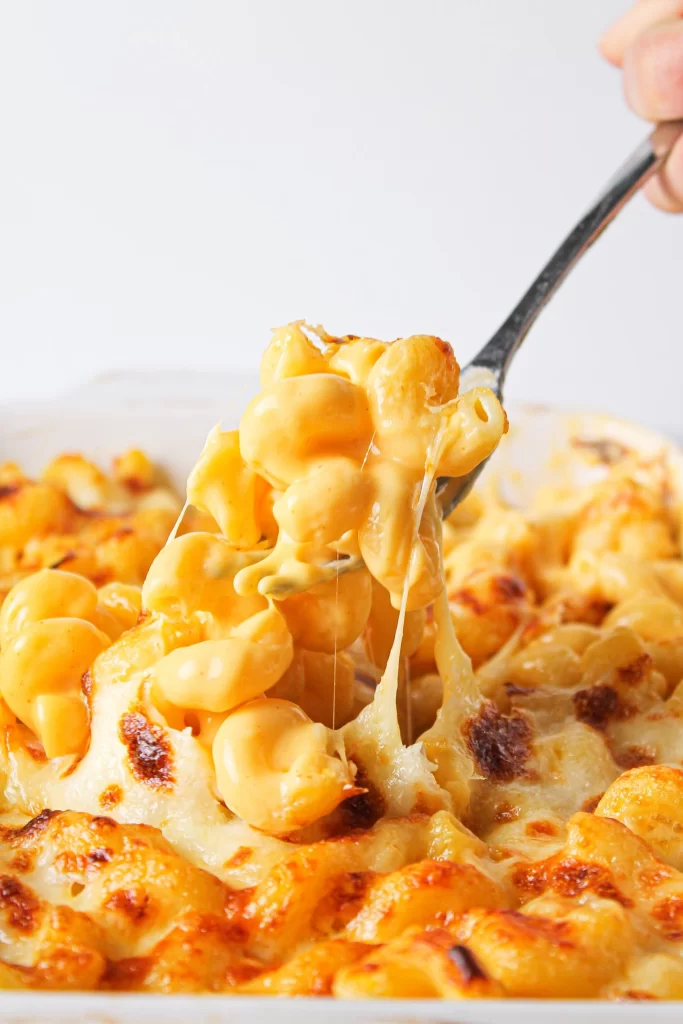
Everyone’s favorite mac and cheese is a must-try dish to satisfy your evening cravings. This easy, tasty macaroni and cheese dish is loved by both kids and adults as well. Whimsy, designer mac, and cheese will cost you only 50 bucks to prepare when you have so many exotic and expensive cheeses, but they aren’t always the best tasting. This simple recipe is quick and cheap to make. A sprinkle of paprika and a final layer of cheese gives it a more gorgeous, and light golden color.

Ingredients You Need

  • 4 tablespoons unsalted butter
  • 250g / 3cups dried macaroni
  • 3 cups milk
  • 1/2 cup all-purpose flour
  • 2 large eggs
  • 1/4 teaspoon garlic powder
  • 1 cup mozzarella cheese
  • 1 tsp garlic powder
  • paprika and black pepper

Making Mac and Cheese

Macaroni

  • Take a medium pot and heat 4 cups of water.
  • Add salt and elbow macaroni to the bowl.
  • Stirring occasionally boil it until the macaroni is firm to eat.
  • Now, Drain it and add some butter to it to prevent it from sticking.
  • Set aside while you prepare the sauce for it.

Sauce

  • For making the sauce, preheat the oven to 350 F.
  • In a large pot, heat the unsalted butter on low heat.
  • Add the all-purpose flour, and whisk it all together.
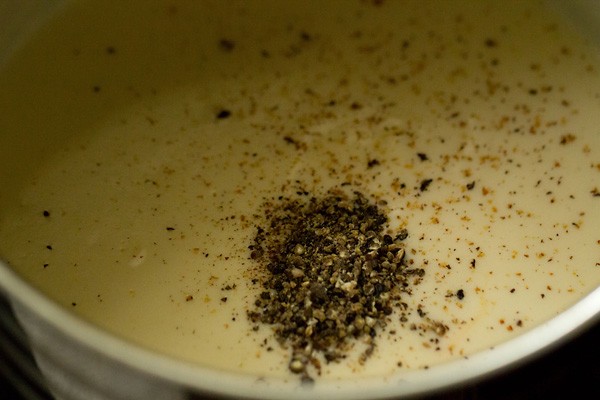
  • Now add the salt and pepper to the sauce, while stirring constantly.
  • Cook for 5 straight minutes and don’t let it burn.
  • Now, pour milk into the sauce and whisk it regularly.
  • Cook for about 5-7 minutes, until the cream is thickened.
  • Now, In a medium-sized bowl, beat the eggs.
  • Add the sauce to the beaten eggs.
  • Whisk it all together and now add cheese to it.
  • Stir the mixture until it’s smooth and add salt if needed.

Assemble

  • Pour the drained macaroni into the sauce.
  • Mix it up well until fully coated in the cheese sauce.

Topping

  • Melt the butter in a medium pan.
  • Add the bread crumbs to the butter.
  • Cook for at least 5 minutes until golden brown.
  • In the last, spread these bread crumbs on macaroni.
  • Sprinkle some black pepper and paprika as well and serve hot.

Nutrients Value!

Calories845
Fat48g
Carbs65g
Protein37g
Image Source: https://forkandtwist.com

Notes for the Chefs!

  • Don’t overcook macaroni and don’t forget to coat it in butter.
  • You can keep this in the refrigerator as well for at least 3-5 days.
  • While making sauce, keep stirring continuously to avoid lumps.
  • If you can, use only room-temperature liquids.
  • You can also add chicken, bell pepper, and sauteed onion to your macaroni as well.
  • You have to keep a careful eye on your milk so that it doesn’t burn.
  • Check on the taste of salt, it needs to be perfect.

MUST TRY: Pesto Pasta Recipe

Roasted Sweet Potatoes

0

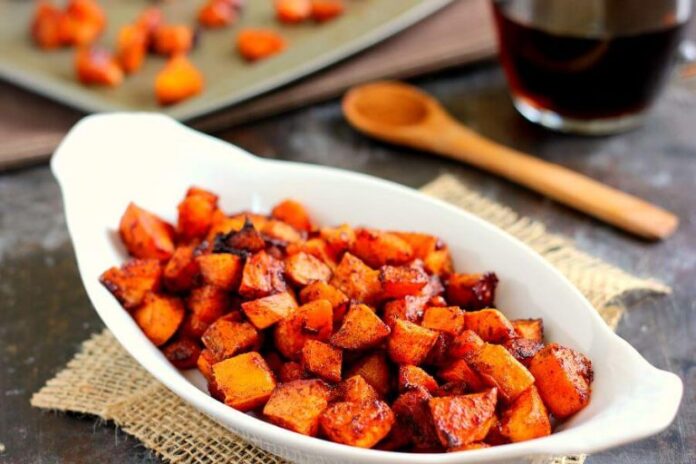
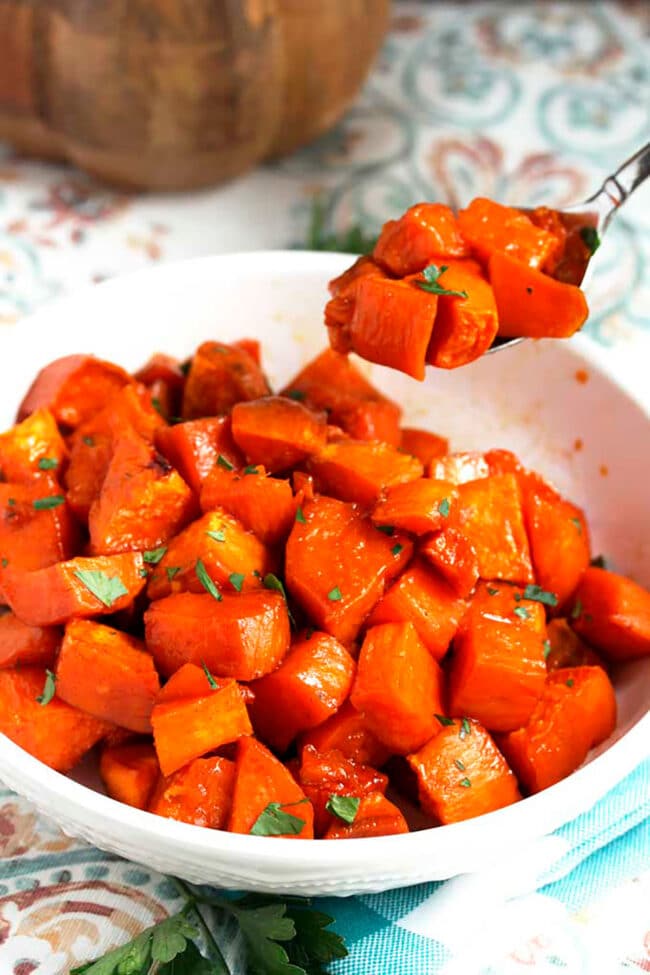
This incredibly simple roasted sweet potatoes covered in delicious maple syrup can become a perfect side dish for the evening of your thanksgiving day this time. As we all know maple and cinnamon do great together, that’s all this recipe is all about. This recipe is so easy to prepare that it just needs a last-minute preparation, I mean roasted sweet potatoes are this easy to make.

This melt-in-the-mouth, finger-licking dish is a favorite for everyone, whether it would be a kid or a well-grown gentleman. The delicious taste of sweetness as well as sourness mixed in a dish makes it more authentic.

Ingredients

  • 2 large sweet potatoes (cut into 1-inch cubes)
  • 3 tablespoons pure maple syrup
  • 2 tablespoons olive oil
  • 2 teaspoons kosher salt
  • 1 teaspoon ground cinnamon
  • 1 teaspoon black pepper
  • 1 teaspoon red
  • chopped candied pecans (for garnish)

Instructions to make Roasted Sweet Potatoes

  • Heat the oven to 400 degrees F. Take a large baking sheet with parchment paper or foil.
  • Lubricate your pan with nonstick cooking spray.
  • Place the peeled sweet potatoes on your greased baking sheet. Drizzle with olive oil and toss them until they are well coated.
  • Make sure that your pan is not crowded. Place the sweet potatoes in a single layer, without touching each other.
  • Sprinkle some salt on the sweet potatoes and place your pan in the oven for roasting.
  • Now, Leave them for about 20-25 minutes.
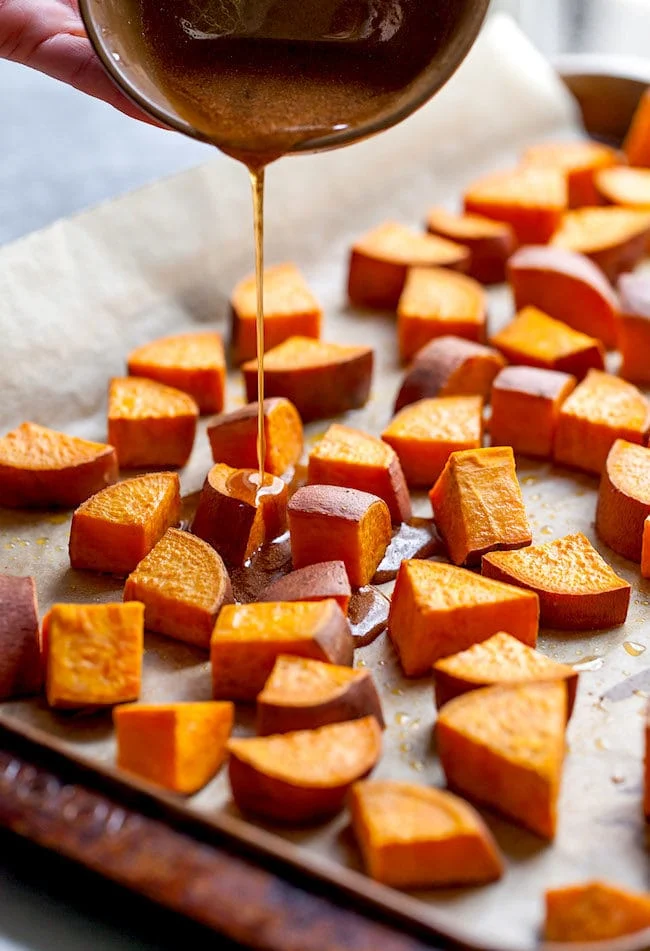
  • Take a small bowl, and mix together the pure maple syrup and cinnamon. You can use a fork to do the same.
  • After 20-25 minutes, remove the pan from the oven and pour the maple cinnamon mixture over the sweet potatoes.
  • Mix them well until the sweet potatoes are nicely coated. Make this thing certain that sweet potatoes are in a single layer.
  • Return to oven and bake for 10 to 20 minutes more, this part depends on how crispy you like your sweet potatoes.
  • Stir halfway through to make sure they are cooked evenly. I recommend checking at 10 minutes to be safe.
  • Take out the pan from the oven and immediately place sweet potatoes in a serving bowl or on a platter.
  • Decorate your sweet potatoes with candied pecans or walnuts, if you have them. Serve hot.

Nutrients Value

  • Calories: 189.7kcal
  • Carbohydrates: 35.05g
  • Protein: 2.38g
  • Fat: 4.74g
  • Saturated Fat: 0.67g
  • Sodium: 271.45mg
  • Potassium: 524.53mg
  • Fiber: 4.63g
  • Sugar: 10.32g
  • Calcium: 52.63mg
  • Iron: 0.92mg

Notes for the recipe!

  • Make sure to slice your sweet potatoes into even-size pieces so they all cook at the exact rate.
  • You can also peel the sweet potatoes or perhaps you don’t have to. It’s your personal choice.
  • Make sure that you only use pure maple syrup and not some other fancy syrup.
  • Sprinkle salt on your roasted sweet potatoes because the combination it will create is super compelling.

To Conclude!

This extremely classic side dish with the rich flavor of Maple Syrup is a must-have on your Thanksgiving day menu. Incredibly simple and always a favorite roasted sweet potatoes are seasoned with different flavors and roasted to perfection until they are crispy on the outside and soft on the inside.

If you have any questions about the recipe or would like to share your version of roasted sweet potatoes, please feel free to comment. Don’t forget to share it with your friends and family, I am sure they’ll love it too.

Must Try: Sweet Potato Shepherd’s Pie Recipe

Chicken Nuggets Recipe

0
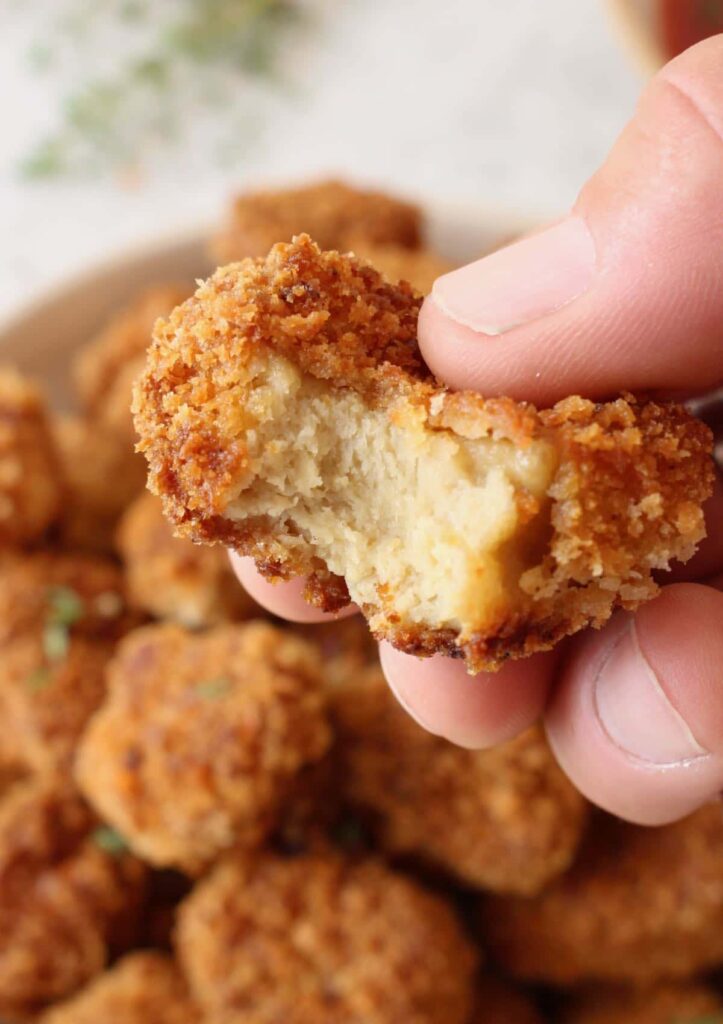
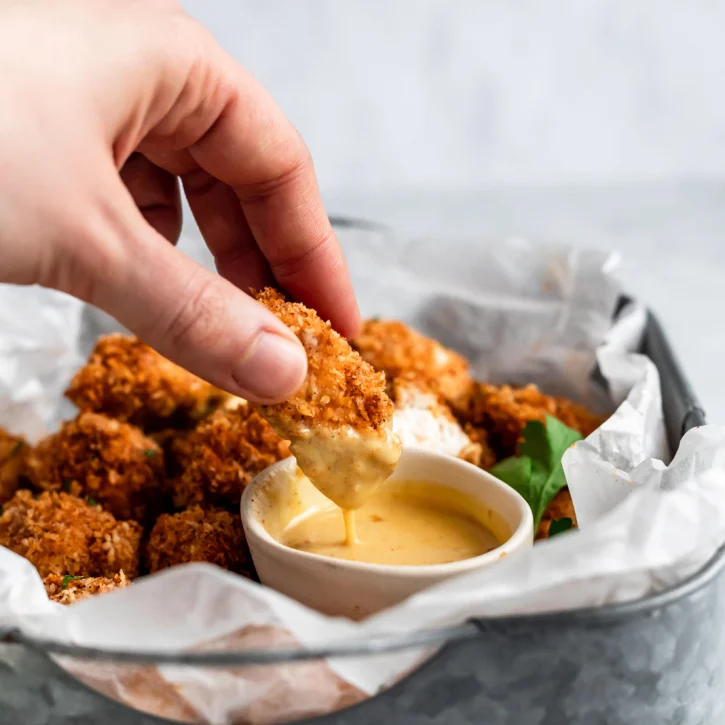
Chicken Nuggets

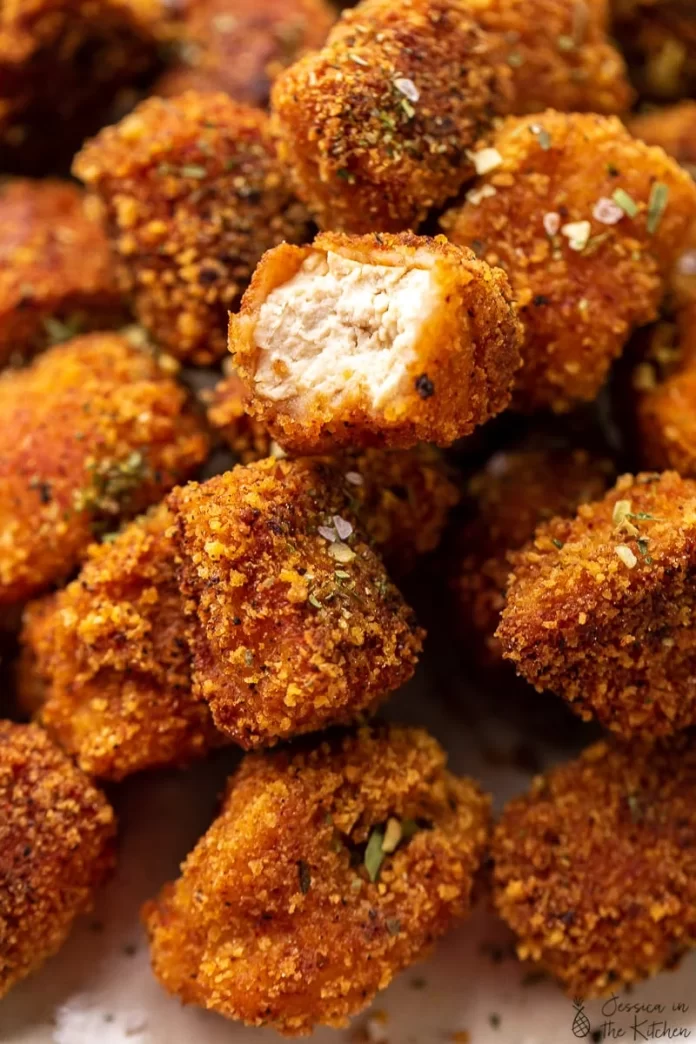
Nobody can resist eating crunchy, super flavorful chicken nuggets. So here is the most awaited recipe for you all. This delicious cum healthy recipe takes just 20 minutes to prepare. It is the most popular and easy-to-make recipe among kids and adults. As soon as we jump on the recipe, you need to make sure that you follow the step-to-step guide to the recipe given below.

Ingredients to Make Chicken Nuggets

  • 250g chicken breasts
  • 1/2 cup all-purpose flour/maida
  • Salt to taste
  • Pepper to taste
  • 1/2 cup hung curd
  • 1 teaspoon garlic paste
  • 1 teaspoon olive oil
  • 1 tsp Red Chilli Flakes
  • 1 tsp Oregano
  • 1 egg
  • 1 cup bread crumbs
  • Mixed herbs

MUST TRY: The Best Chicken Drumstick Recipes by Using 5 Ingredients Only!

Directions to Make Nuggets

Clean and Marinate the chicken

  • Wash and clean the chicken pieces. Pat dry and marinate the boneless chicken.
  • Take a bowl and add the chicken pieces.
  • Add the 1/2 cup hung curd with the salt, pepper, and garlic paste.
  • Take all the ingredients and give them a good mix.
  • Make the paste of it and keep it in the fridge for an hour.

Arrange the Ingredients

  • Once the chicken is fully marinated, begin the cooking process.
  • Take another bowl, and fill that separately with whisked egg and 1 tsp water.
  • Add the flour mixture with the salt, garlic powder, pepper, and mixed herbs.
  • Lastly, take a bowl full of breadcrumbs.

Shallow fry the Chicken Nuggets

  • The next step is to dip the boneless chicken in the egg mixture.
  • Lastly, dip the chicken in the bread crumbs.
  • Repeat this process with all the chicken pieces.
  • On the other side, heat the olive oil in the large frying pan.
  • Once the oil is hot enough, slide the chicken pieces into the pan one by one.

Enjoy your Nuggets

  • Shallow fry the nuggets until they turned golden brown.
  • Use the spatula to transfer the nuggets from the pan
  • Serve them hot with your favorite dip.
  • They are great when simply served with ketchup too.

Recipe notes!

Freezing: Bread these chicken nuggets per instructions then place them on a baking sheet in a single coating. Refrigerator until solid then move them to a freezer bag and freeze for up to 3 months. Then, fry from frozen ones until they turn golden brown and crispy.

Make ahead: Chicken nuggets can be kept in the refrigerator for up to 3 days and can be reheated in the oven until warmed through.

Nutrient Value

Calories: 293kcal

Carbohydrates: 31g

Protein: 26g

Fat: 6g

Cholesterol: 135mg

Sodium: 712mg

Fiber: 6g

Sugar: 1g

Conclusion

These breaded bites of perfection are the perfect feast when you want to have a comforting food that you can enjoy with your friends, family, and kids too. This is super easy to make, you can make a bunch of these and freeze them. So you can fry them whenever you need them.

If you have any questions about the recipe or would like to share your version of chicken nuggets, please feel free to comment. Don’t forget to share it with your friends and family, I am sure they’ll love it too.

ALSO TRY: Quick garlic chicken thighs recipe: Perfect for midweek dinner

Cinnamon Bites Recipe

0

If you are looking for a delicious dessert that is easy to make and perfect for the holidays, the Cinnamon Bites recipe might be what you are searching for. This recipe combines all of the ingredients that make up this dessert into one simple recipe. In addition, you will find instructions on how to make each part of it, along with baking times and temperatures. All in all, these cinnamon bites are every bit tasty as they sound.

With their warm, robust flavor and a hint of sweetness, these cinnamon bites are sure to please any palate. These bites are a great afternoon snack when you want something sweet but don’t want to ruin your dinner. You can also make them ahead of time and store them in an airtight container in the refrigerator or freezer.  

Looking for a delicious dessert to serve your guests after dinner, this recipe is sure to be a hit. This dessert can be served for any special occasion or dinner party, making it perfect. It is also very easy to make, so anyone in your family can prepare it.

Cinnamon Bites

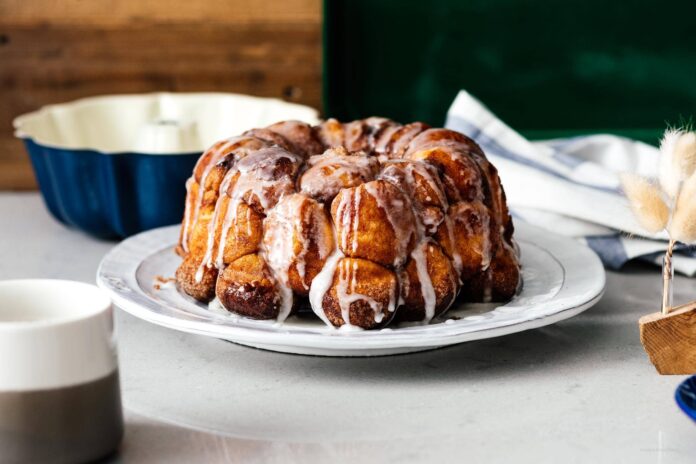
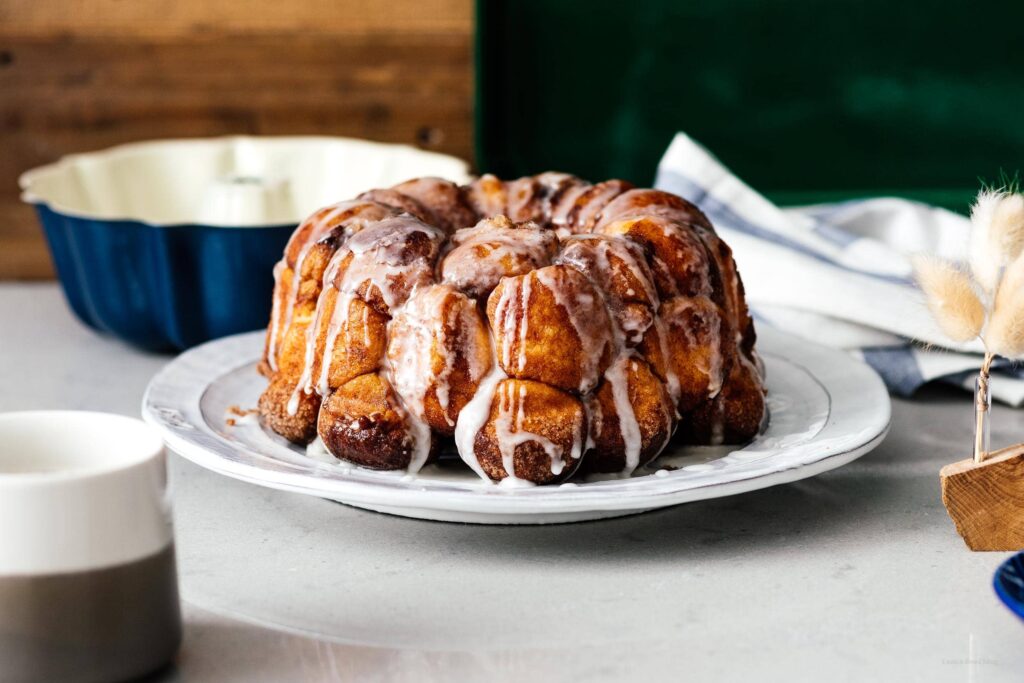
Its a popular dessert made with soft, gooey cinnamon sugar mixed bread that is baked until they get golden brown. It’s a super-cute little baked treat that you can pull apart to create swirls of cinnamon-sugar crumbs on top. Of course, the more squishy and gooey the dough pieces are, the better. Cinnamon is a fabulous flavor for baked goods and makes everything taste yummy.

In this recipe, the dough is made with both butter and Crisco shortening. Not only does it give the whole cinnamon bites a soft texture, but it also balances out their wholesome sweetness with its rich flavor. They are called by different names in different parts of the world, such as honeycomb bread, monkey bread, cinnamon rolls, or cinnamon balls.

But one thing that remains the same is its taste; people love this treat and are very fond of eating it regularly. So if you too want to learn how to make this super good and delicious little piece of the dessert, then keep reading this guide to know everything from the ingredients to the steps involved with this recipe.

All The Ingredients You Need

As you know, Cinnamon bites require very few ingredients, and here is the list of all the main ingredients that you will need :

Flour: The first and primary ingredient is bread flour. You can buy all-purpose flour, but it will be better if you prefer bread flour. Bread flour makes the dough and every bite soft and fluffy, and it is perfect for making bread and desserts. This flour has a higher protein content than the other regular ones. Bread flour will make your cinnamon bites gooey, soft, and chewy, which is what you should go for.

Milk: You can purchase any type of milk to make cinnamon bites. You need not find any specific oat or almond milk.

Yeast: The most important ingredient for baking purposes is using yeast. The instant yeast makes the dough and your bread fluffy, giving it a chewy taste. You need to buy any yeast mix and dissolve it in warm water to let them do its work for a bit and then add it to your dough.

Eggs: Another ingredient that you need while making this recipe is eggs. The eggs will give extra flavor to the cinnamon bites, making them even more delicious.

Cinnamon: And, of course, you need to have cinnamon. It will be better to buy fresh cinnamon as it is one of the primary ingredients, and all the bites will be rich with cinnamon content.

Butter: The last ingredient that you need to have on your kitchen table is butter. Most bakery items or desserts use butter, and everyone loves it.

Making Cinnamon Bites

At first glance, this recipe may seem complicated and require some intricate ingredients, but it’s not as difficult as you think. Homemade cinnamon bites are a treat that the whole family will love, and they’ll be the perfect addition to any holiday get-together or other occasion.

The cinnamon bites may cause your house to smell like you’ve been baking all night because of the ground cinnamon byproduct left behind; however, this simple sweet treat will be well worth it in the end.

Here is the step-by-step guide to making this treat

  1. The first step of cinnamon bites is to make the dough. So take all the bread flour and start making the dough. You can use the electric mixer to make the dough. Take all the ingredients, such as milk, sugar, egg, egg yolk,  and melted butter. Now stir the flour and yeast and add a pinch of salt to make the ball of dough.
  2. Now start mixing it all and knead it for eight minutes. Now take the dough out of the mixer, put the oil on the surface, and put it aside for some time.
  3. Do not forget to cover the dough with a kitchen towel so the yeast can work properly. The dough will become double in size in a couple of hours.
  4. Meanwhile, melt the butter and mix the sugar and cinnamon.
  5. When the dough is ready, it’s time to make them into balls. First, divide the dough into small rolls to shape them into circular balls.
  6. Now take these balls and dip them into the pre-made cinnamon sugar mix. Make sure they are dipped fully and properly and keep the balls in the oven pan and let them sit there for a few minutes.
  7. The next step is to bake them for about thirty to forty minutes until they get golden brown and are perfectly baked. After baking them, take them out and let them cool for about five to ten minutes.

Take the cinnamon bites and drizzle the freshly prepared icing on them, and that’s it with this recipe. The cinnamon bites are all set and ready to be served.

Conclusion

If you need a quick yet impressive dessert for your next dinner party or any other occasion, this is the recipe for you. Cinnamon bites are both quick and delicious and will be the perfect ending to any dinner or party. Another advantage of making them is that you can even store them in an airtight container to continue eating them for the next couple of days.

6 Best Thanksgiving Recipes

0

Are you looking for thanksgiving dinner recipes? If yes, then we have picked unique, delicious and traditional Thanksgiving Day recipes for you. Also, a mix-and-match thanksgiving menu is created so that you can pick an ideal recipe which is easy to cook and prepare. This is the best option for all vegetarians and vegan people.

6 Best Traditional Thanksgiving Day Recipes!

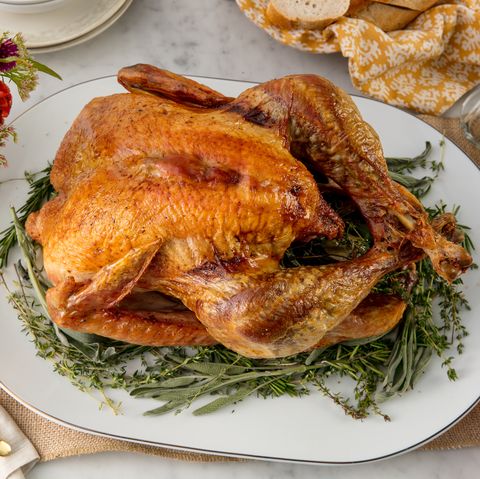
1. Roasted Herb Turkey And Gravy

Roasted Herb Turkey And Gravy

This dish is a traditional thanksgiving and an ultimate option for you to pick. This is a super crispy and juicy meat which will let you eat your fingers too. An aromatic-infused butter is used for coating along with thyme, fennel seeds and sage. You can also use onions, celery, beans and carrot to make the best and thick gravy.

Ingredients

  • Using 3 tbsp of aromatic-infused salted butter
  • ½ tbsp of kosher salt
  • 1 tbsp of dried thyme
  • 2 tbsp of dried sage
  • 2 tbsp of black pepper
  • 1 tsp of crushed and dried fennel seeds
  • 12 lb of a fresh and whole turkey
  • 2 tbsp of canola oil or any other oil
  • 3 chopped yellow onions
  • 7 finely chopped carrots
  • 5 stalks of chopped celery
  • 2 bay leaves
  • Turkey gravy
  • And water as per requirement

3-steps for Easy Cooking

  • Firstly, you need to melt butter and cook it on medium flame. Now, add salt, sage, black pepper, thyme, and crushed fennel seeds. You need to cook until a pleasant fragrance comes out.
  • It is very important to remove all the giblets and excessive skin from the turkey. Once you are done, then pat dry it by using a cotton cloth or paper cloth.
  • Next, you need to mix the butter well under the skin after replacing the skin. On an average, 1 tbsp of butter is required for drizzling oil. After you are done with all these things then let the turkey be at room temperature for 1 hour.
  • Once all the things are done then, preheat your oven to 375-degree Fahrenheit. In the bottom of the pan, you need to roast onions, beans, celery, bay leaves and carrots. Use a cooking spray to coat the rack and place the turkey properly. You can additionally add water to the pan before preheating it. Finally, you need to bake it until the thermometer reaches at the desired temperature.  

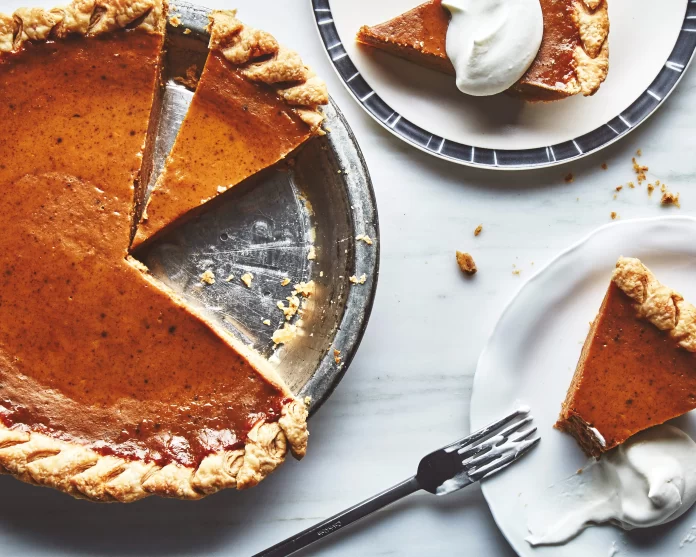
2. Pumpkin Pie

Pumpkin Pie
Pumpkin Pie

This pumpkin pie recipe is all about fillings by preparing a whipped cream. It is a very time-saving option which includes basic ingredients like casserole, biscuits, gravies and pies. We will assure you that you will definitely love the recipe for pumpkin pie.

Full Recipe Here: Pumpkin Pie: Perfect dessert for early winters

Following Ingredients

  • 14.1 oz of refrigerated piecrust
  • 2 tbsp of buttermilk
  • 15 oz of pumpkin
  • Parchment paper
  • ¾ cup of sugar
  • ½ tbsp of kosher salt
  • 2 tbsp of cinnamon
  • 1tbsp of vanilla extract
  • 2 eggs
  • 1 egg yolk

Directions

  • Take a 9-inches metal pie pan and preheat it to 425 degrees. Brush the pan with buttermilk and line all the pie crust on the parchment paper. You need to bake the pie crust for at least 15 minutes.
  • Now, take another bowl and whisk all the ingredients together, which includes pumpkin, 1 and a half cups of buttermilk and a mixture of piecrust.
  • It’s time to reduce the heat from 425 degrees to 325 degrees. Then, you should bake it for at least 40 minutes until all the edges are properly puffed.

Once all the processing is done, then you need to refrigerate it for 1 hour, and it will last longer for 2 days in your refrigerator.

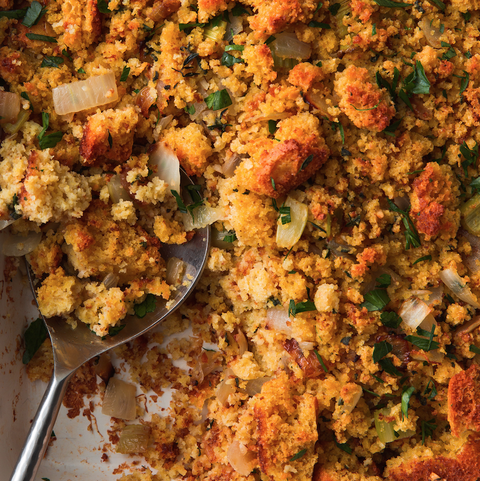
3. Cornbread Dressing

Cornbread Dressing
Cornbread Dressing

This is a traditional thanksgiving recipe which is made with southern-style dressing. This is a very simple recipe and very easy to make. You can store this recipe for at least 1 month in your freezer.

Ingredients and Dressing

  • 2 cups of cornmeal mix
  • 1 tbsp of granulated sugar
  • 2 eggs
  • 2 cups of buttermilk
  • 3 tbsp of salted butter

For making its dressing, you are required to use

  • Some chopped onions
  • ½ cup of salted butter
  • 2 tbsp of fresh sage
  • 2 cups of celery
  • 6 eggs
  • 1 tbsp of fresh thyme
  • 1 tbsp of kosher salt
  • 2 tbsp of black pepper
  • 10 cups of chicken broth

Directions

For preparing the cornbread, you need to first preheat the oven to 425-degree Fahrenheit. Now create a mix of cornmeal in a bowl by adding sugar, eggs, and buttermilk. Give it a fine stir until the bread is moistened. Next, heat the butter until it is melted and then bake the cornbread until it turns golden.

To prepare the dressing, add onion, celery, thyme, sage, eggs, black pepper, stuffing mixture, onion mixture, and kosher salt and blend it properly. Now, uncover the cornbread and spread all the stuffing evenly.

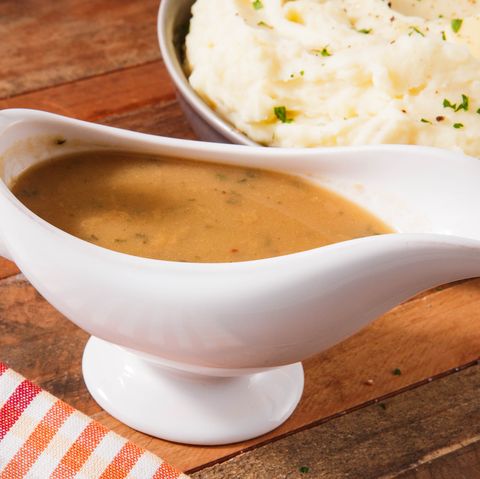
4. Turkey Gravy

Turkey Gravy
Turkey Gravy

The ultimate Thanksgiving Day recipe is incomplete without adding turkey gravy in it. It is made with very simple ingredients such as turkey drippings, ½ cup flour, kosher salt, ground pepper, 2 tbsp butter, one bay leaf, 2 spring thymes, rosemary, 1 onion and 2 shallots.

Instructions

Take a saucepan and butter until it melts. Now, add all the ingredients together by giving it a proper mix. Next, add a little amount of water for making a slurry for turkey gravy. Now turn off the pan and let the mixture cool. Once you are done with all these things, then whisk it so that all the lumps will be removed. You need to whisk it until the gravy becomes thick.

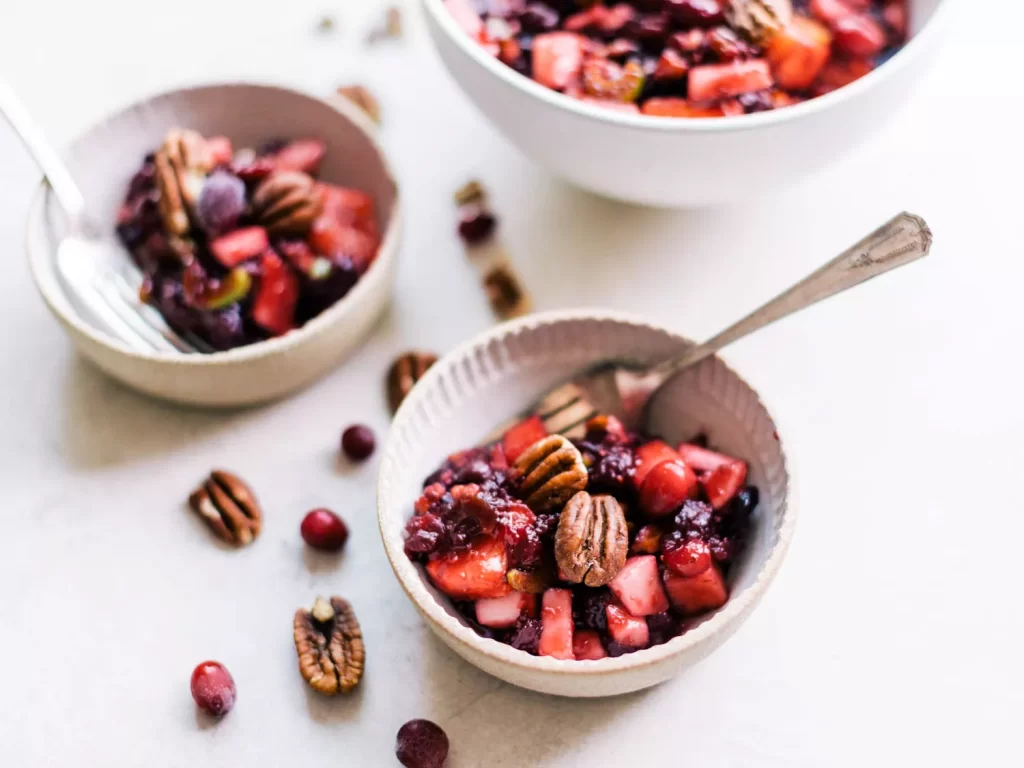
5. Classic Cranberry Salad

Classic Cranberry Salad

This is a classic and traditional cranberry salad which can easily be prepared in just 20 minutes. You will get crunchy in every bite of this cranberry salad. Now we will not waste a second and proceed towards the ingredients and directions for making a cranberry salad.

Ingredients

  • 3 to 4 cups of frozen cranberry
  • ¾ cup of brown sugar
  • ½ cup of orange juice
  • 1 cup of pear
  • 1 cup of fresh pineapple
  • ½ cup of celery
  • And ½ cup of pecans (roasted)

Directions

Take a bowl and add cranberries, sugar, and orange juice and stir it on medium flame. Stir it properly until the mixture becomes thick. Once it is heated then, cool it to room temperature. Now, it’s time to add pineapple, celery, pecans and bartlett pears to the mixture.

It is completely done and you can chill it for an entire day as it is ready to serve. The pro tip for making cranberry salad is that it will last for 3 days.

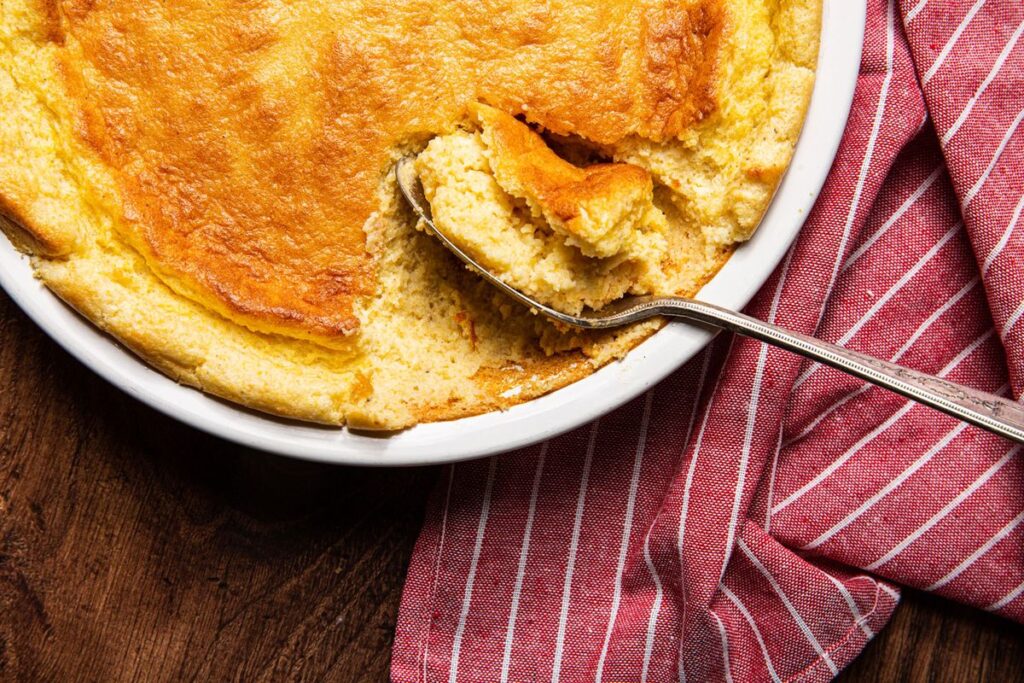
6. Butter Milk Spoon Bread

Butter Milk Spoon Bread

The consistency of a spoon bread is a little bit thick and similar to a savoury pudding. The ingredients used are 3 tbsp of unsalted butter, 2 cups of milk, 1 cup of buttermilk, 1 cup of white cornmeal, 2 tbsp of fresh thyme, 2 tbsp of kosher salt, ½ teaspoon of black pepper and 3 large eggs without yolk.

Directions

Firstly, preheat over to 350 degrees. Now take a casserole dish and use butter on it. Properly heat milk and add buttermilk into the saucepan. You need to wait until there is a boil. In between, you can also use a whisk to prevent lumps in the mixture. You can also include butter, thyme, salt, and pepper. Add eggs to the mixture by stirring it properly so that it will not look grainy. By using a spatula, you will be able to mix ingredients evenly. Once all the mixture is mixed, then preheat the oven until it turns light brown. It will take 30-40 minutes and after that, it is ready to serve hot.

5 Best Chicken Drumstick Recipes

0

For cooking mouth-watering and juicy chicken drumsticks, you only need five ingredients. It is super easy to make so that your dinner parties will become a breeze. Chicken drumsticks are everyone’s favorite which are full of flavour’s. You must try this easy chicken drumstick recipe for your next big party. The reason behind loving chicken is that it is easy to make, delivers a juicy flavour and is made only by using very few ingredients.

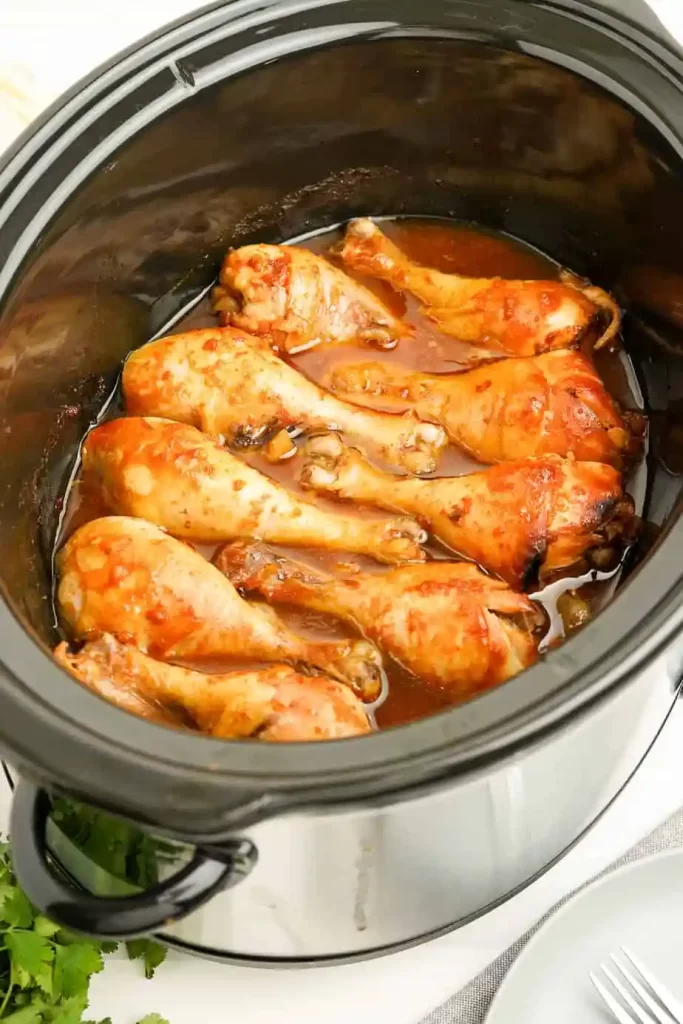
1) Crock-Pot Chicken Drumsticks

List of Ingredients for chicken drumstick

  1. Soy sauce
  2. Ketchup
  3. Chicken drumstick
  4. Garlic
  5. Honey

Using these 5 ingredients, you can easily cook chicken drumsticks without worry. The amount required for cooking chicken drumsticks is listed below.

  • 12 drumsticks of chicken which is equal to 3 pounds of chicken drumsticks
  • ½ cup of honey
  • ½ cup of soy sauce
  • ½ cup of ketchup
  • And 1 minced teaspoon of clove garlic

You can also change the measurements and ingredients of the chicken drumstick as per your requirement and taste. For example, for a reason, some people love adding red pepper flakes to the sauce.

Processing of Cooking Chicken Drumstick

  • Firstly, take a small bowl and add honey, soy sauce, ketchup and garlic in it. Now you have to whisk them together for 2-3 minutes.
  • Take a crock pot and spray cooking oil in it. You can use olive oil, avocado oil, or mustard oil in it. Basically, it depends on which type of oil you use to cook chicken drumsticks.
  • Now, place the chicken appropriately in the crock pot.
  • You can pour the sauce you have prepared over the chicken drumsticks.
  • The last step is to cook the chicken drumstick on high heat. It will take around 4 to 6 hours to prepare chicken drumsticks.

Once it is prepared, you can garnish it with coriander leaves so it will become ready to serve.

What to do to make a thick sauce?

A lot of people love thick sauce for preparing chicken drumsticks. We can easily thicken the sauce by adding two teaspoons of cornstarch along with 4 teaspoons of water. You need to prepare a slurry of cornstarch so that the sauce will become slightly thick.

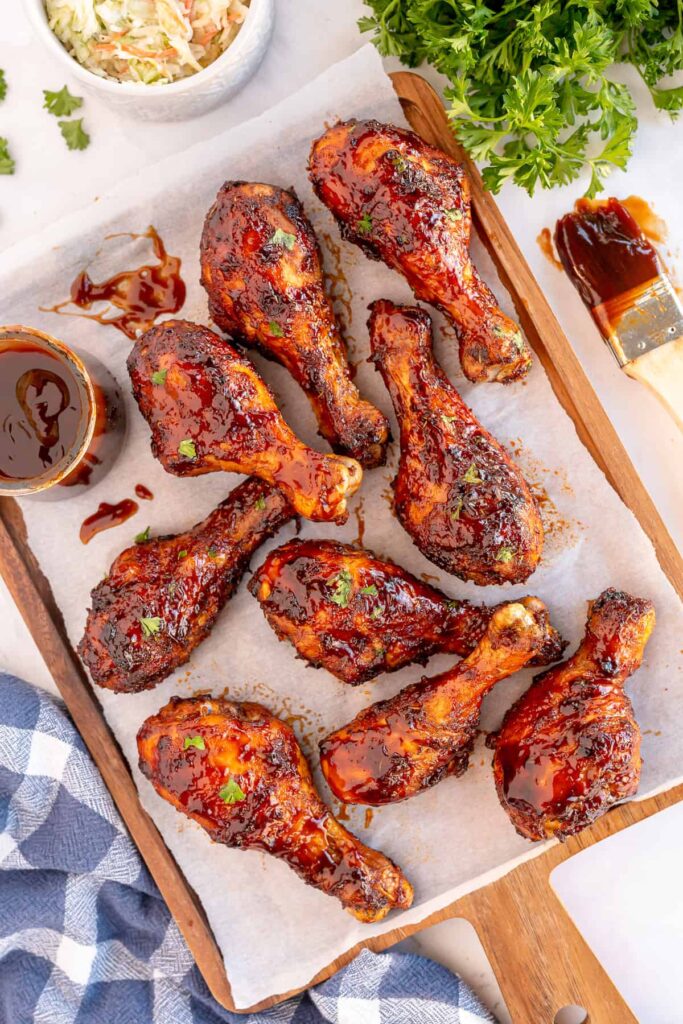
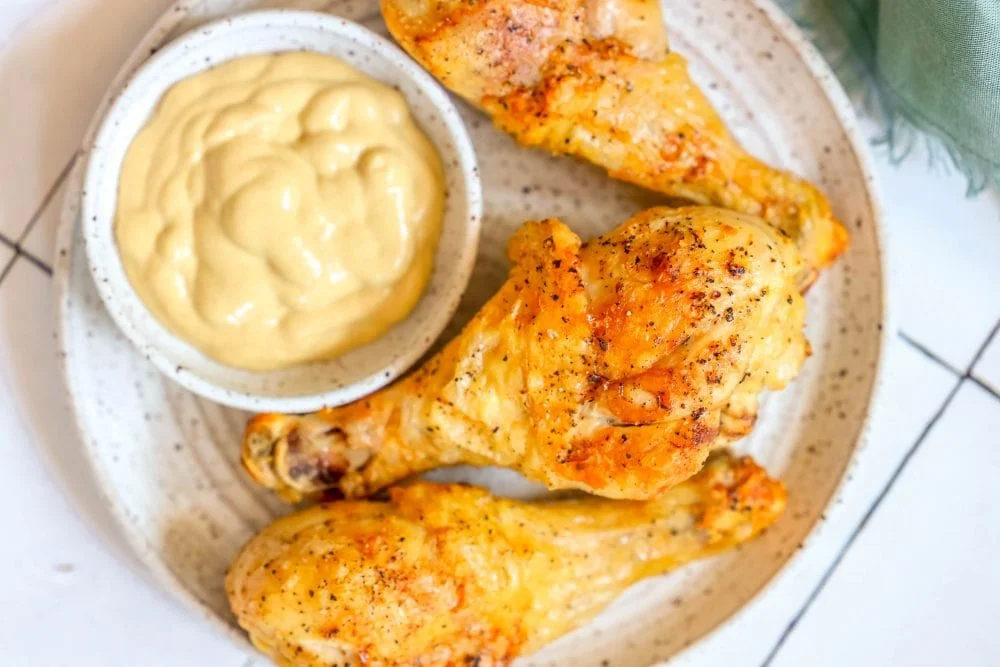
2) Air Fryer BBQ Chicken Drumsticks

Air fryer BBQ chicken drumsticks are made by preparing a delicious sauce and sticks. This recipe is very easy and quick. It takes only 30 minutes to cook BBQ chicken drumsticks. It is the best and ultimate option to serve for parties and family dinners. The preparation time of BB2 chicken drumsticks takes about 3-5 minutes, whereas cooking time takes 23-25 minutes.

Ingredients used for preparing BBQ chicken drumstick

  1. Eight pieces of chicken legs or drumsticks
  2. 2 to 3 teaspoons of olive oil or avocado oil
  3. 2 teaspoons of white sugar or brown sugar
  4. 2 teaspoons paprika
  5. 1 teaspoon of garlic powder
  6. 1 teaspoon of kosher salt
  7. 1 teaspoon of onion powder
  8. ¼ teaspoon of black pepper
  9. 1/3 cup of BBQ sauce

Guidance for preparing BBQ chicken drumstick

  • Firstly, you need to preheat the air fryer by setting it to 400-degree Fahrenheit.
  • Now take a bowl and prepare a mixture of brown sugar, garlic powder, salt, black pepper, and onion powder.
  • Apply oil on the chicken legs appropriately and then drizzle the mixture which you have prepared.
  • Take the air fryer tray and evenly put chicken legs by cooking it at 400-degree Fahrenheit. It will take 8-10 minutes to cook chicken legs from one side. After that, you have to change the side of the chicken legs and then cook it for 10 minutes again.
  • Once the chicken is fried in the air fryer, now put BBQ sauce evenly on all the sides of the chicken legs.
  • Now you have to cook chicken legs again in the air fryer at 400-degree Fahrenheit for 3 to 5 minutes.
  • The last step is to let the chicken sit for some time so that you won’t harm your fingers by serving it hot.
  • You can also add some coriander leaves to garnish the chicken legs on the serving table.

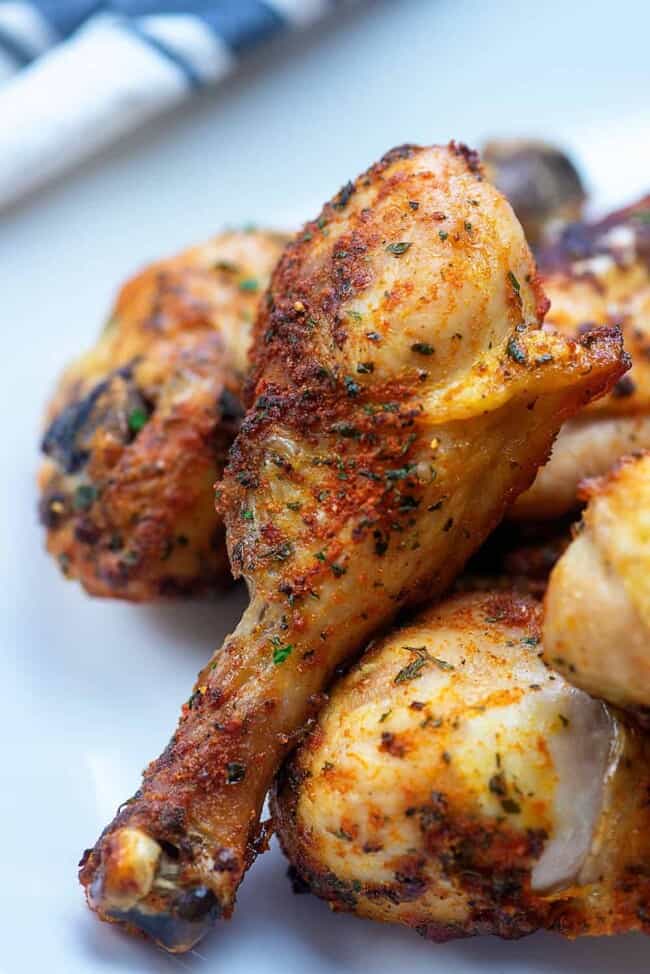
3) Air-Fryer Drumsticks

For preparing super delicious and juicy air-fryer drumsticks, all you need is chicken drumsticks and some seasonings. There is no requirement to use any additional ingredients because this recipe is very easy to make. You can also prepare chicken drumsticks by using two tablespoons of oil.

What ingredients are required for making this recipe?

  • Using 8 chicken drumsticks

You need to pick chicken drumsticks which are made with high quality, in order to make them crunchy. These drumsticks should be freshly bought from the market. By using a paper towel, you can pat dry chicken drumsticks in order to make them dry.

  • Using 2 tbsp of oil

The next step is to use 2 tbsp of oil. You can choose any oil, either avocado, canola, sunflower, or olive oil. To enhance the flavor of chicken drumsticks, you can use classic olive oil to make it more flavourful.

  • Adding 1 tsp of Celtic Sea salt

The third major ingredient is to add 1 tsp of Celtic Sea salt, which will enhance the overall flavour of the chicken drumstick. You need to add a very small amount of salt because Celtic Sea salt is salty as compared with regular table salt. Keeping all these things in mind is very important otherwise, it will ruin the entire taste of your recipe.

  • Adding 1 tsp of cracked pepper, smoked paprika and garlic powder

To make flavours more joyful, you can add 1tsp of cracker pepper. Adding garlic powder, it will completely change the taste of the chicken drumstick. Using 1 tsp of smoked paprika will slightly change the colour of the chicken to deliver a smoky flavour.

  • Lastly, add ½ tsp of cumin

For delivering a meaty taste on the chicken drumstick, you can also add ½ tsp of cumin powder.

Follow this method

Take a small bowl and add all the herbs and spices to it. Now, give it a mix and then set it aside. Next, take another bowl and place drumsticks by drizzling olive and avocado oil. You can also take a plastic bag for placing drumsticks and applying oil. Mix all the things appropriately and sprinkle spices on all the drumsticks.

If you are preparing this recipe in an air fryer, then preheat it to 400-degree Fahrenheit for at least 5-10 minutes. Next, you need to flip the drumsticks evenly so that they will become crispier. In between, keep an eye towards the temperature of drumsticks by using a digital thermometer. Once the chicken drumsticks reach towards 170-165 degrees, then it is all set to be served.

Tips for making chicken crunchier

To make a perfect air-fried chicken, you need to follow these tips:

  • Preheat air fryer

A lot of people made the mistake of not preheating the air fryer. If you also make this mistake, then it will ruin the texture of your chicken. It is better for you to always preheat the air fryer in order to make it crispy.

  • Preparing of sauces

While preparing the sauce, make sure that you are using all the ingredients in an appropriate amount. The reason behind the crunchy crust of chicken is its sauce.

  • Do not rush

You should not rush a lot while preparing chicken in an air fryer. First, check the temperature and then start the processing. Also, flip the chicken in the air fryer so that it will be cooked properly.

  • Using a digital thermometer

A lot of people are using a digital thermometer because it will help in acknowledging the actual temperature. You need to insert the thermometer in the middle of the chicken pieces. Make sure that you will not touch the bone. If the thermometer shows a 162-degree temperature, then it means that your chicken is cooked properly. In case the chicken has not sustained 162 degrees of temperature, then cook it again for 5 minutes.

4) Baked Chicken Drumsticks

The baked chicken drumstick recipe is a very easy alternative for serving guests without making much effort. It includes only three basic steps such as coating chicken, adding seasonings, and tossing chicken in the oven. These baked chicken drumsticks are the perfect emergency meal which is prepared within a few minutes.

How to prepare the seasoning for baked chicken drumsticks?

For preparing to season for baked chicken drumsticks, you need to mix all the ingredients to get a classic taste, such as:

  • Lemon pepper
  • Garlic herbs
  • BBQ sauce
  • Teriyaki
  • Ranch seasoning
  • Jerk seasoning
  • Taco seasoning

For preparing a delicious sauce, you can use ranch dressing, honey mustard sauce, BBQ sauce and comeback sauce.

Instruction and guidance

  1. The very first step is to preheat the oven to 400-degree Fahrenheit. You should not avoid this step otherwise, chicken drumsticks will take longer time to get cooked.
  2. Combine all the herbs and spices together, which includes smoked paprika, garlic powder, onion powder, cayenne pepper, black pepper, salt and oregano.
  3. Take a bowl and add chicken drumsticks by using cooking oil. Mix it well and drizzle the oil properly by powering all the seasonings. Coast all the oil and spices well so that marination is done appropriately.
  4. Take a baking sheet and add all the seasoned drumsticks and bake it for at least 40 minutes until the temperature reaches towards 175-degree Fahrenheit.

Equipment required

You need a tong, meat thermometer and enamelware sheet pan for preparing chicken drumsticks.

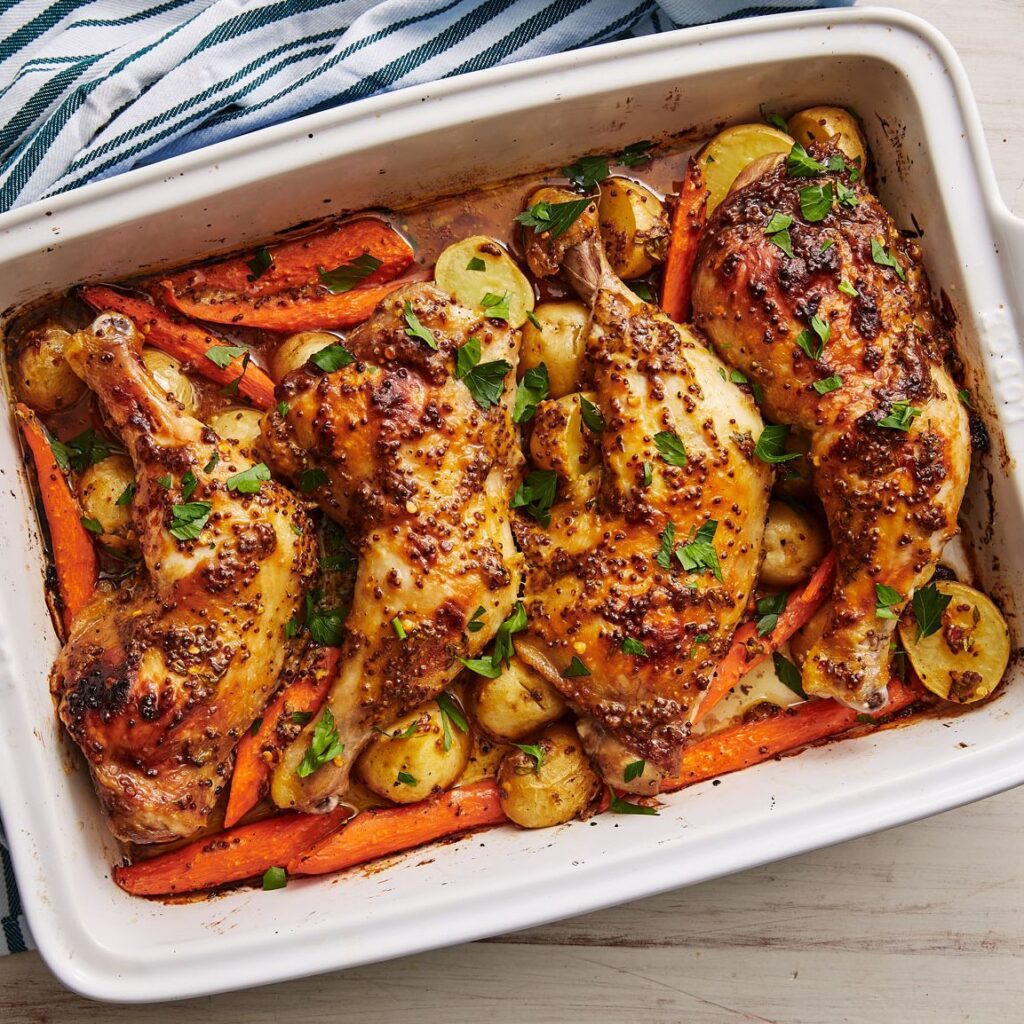
5) Maple-Mustard Chicken Legs

While buying a chicken, there are some major concerns which are that it should be golden, fresh, juicy, flavourful and comes with a crackling skin. However, this delicious and mouth-watering dish is kid-friendly and loved by everyone.

Ingredients

  1. 2 units of potato
  2. 16 ounces of chicken legs
  3. 2 tsp of Dijon mustard
  4. 2 tsp of sour cream, which contains milk
  5. ½ ounces of pecans which contains tree nuts
  6. 1 tsp of fry seasoning
  7. 2 tsp of maple syrup
  8. 6 ounces of green beans
  9. 1 tsp of nutmeg
  10. 2 tsp of olive or avocado oil
  11. 2 tsp of butter
  12. 1 tsp of pepper
  13. And 1 tsp of kosher salt

Utensils required as

  1. A paper towels
  2. Baking sheet
  3. Peeler
  4. Medium pot
  5. Strainer
  6. Potato masher
  7. Small bowl

Instructions for cooking

  • Take a rack and put it in the oven by preheating it to 450 degrees.
  • Pat dry the chicken so that it will not contain any drops of water.
  • Now add all the seasonings for doing the marination of chicken legs.
  • Spread the chicken evenly on the entire sheet. As an alternate, you can also use a foil.
  • Roast the chicken properly for 20 minutes so that it will become super crispy.
  • Peel the sweet potato and add it to a medium pot.
  • Bring a boil and drain all the sweet potatoes.
  • Now, prepare a cream by using butter and a pinch of nutmeg. Additionally, you can also add salt and pepper.
  • Use the maple syrup until the sweet potato is cooked. You can also use mustard for preparing the seasoning.
  • Once the chicken is roasted then, add all the seasonings and spices together. You can also add green beans and sweet potato for an external flavour.
  • It depends on your taste and choice whether you need to add sauce or not.
  • Now it is ready to serve and enjoy.

Additional note

You can use any high-heat cooking oil of your choice.

Nutrition

In 1 serving drumstick, 23 g of protein is available and 1 g of fibre. It is a very high source of protein and fibre, which will fulfil all your cravings.

Garlic Chicken Thighs

0

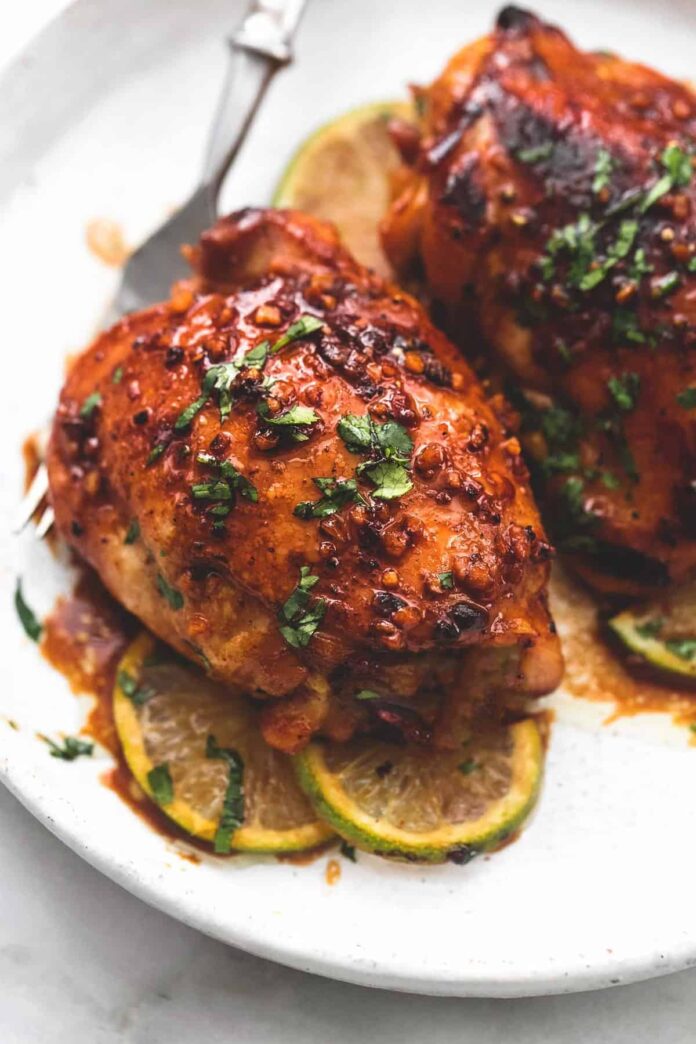
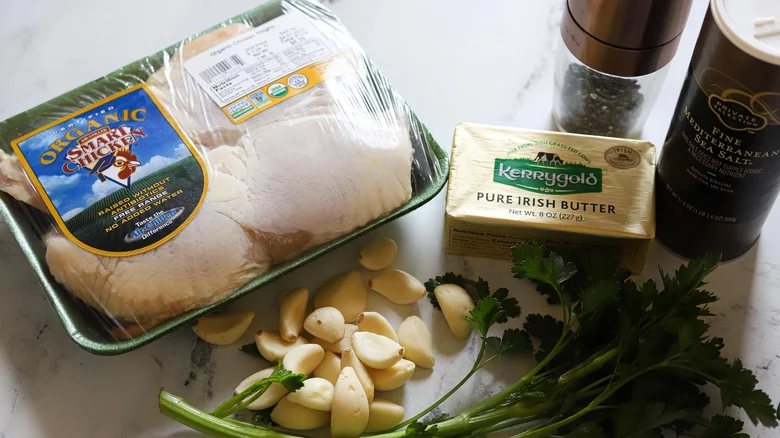
A quick garlic chicken thighs recipe is always a midweek lifesaver, and these Garlic Chicken Thighs are one of my gold nuggets!

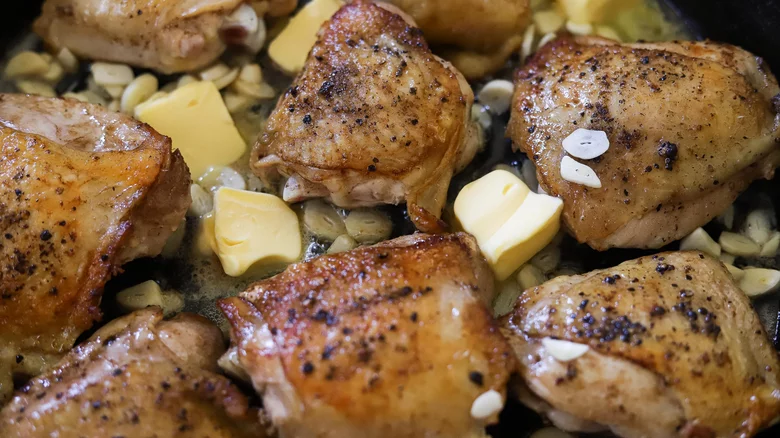
We brought a fantastic quick and easy chicken thigh recipe for you and your loved ones. You’ll love the terrific garlic flavor in this – seared on the crust and in the sauce. The trick to make crispy skinless chicken thighs is to cook for a little longer on a lower heat.

Ingredients for Garlic Chicken Thighs

  • 6-7 boneless skinless chicken thighs
  • 2 tablespoon olive oil
  • 1 tablespoon garlic powder
  • 2 tablespoons unsalted butter
  • 2 large garlic cloves
  • finely chopped parsley
  • 125ml dry white wine (or water)
  • salt and pepper

How to make garlic chicken thighs?

Prep the ingredients

  • Pat the chicken thighs dry with a kitchen towel and cut off excess or visible fat.
  • Now, sprinkle both sides of the chicken with garlic powder, salt, and pepper and set aside.

Brown the chicken

  • Place a pan on medium flame, add olive oil and butter, and heat until dissolved.
  • Place the chicken thighs in a single layer in a large cast iron skillet and cook for about 5 minutes.
  • Press down lightly with the help of a spatula, and cook until the skin is light brown and crispy.
  • Turn and press lightly with a spatula. Cook for another 2 minutes.

Make garlic butter and bake

  • On the side of the pan, melt the butter.
  • Add the garlic and chicken thighs to the pan. Cook a little longer, until it smells good. Make sure it’s not on high heat as you don’t want to burn the garlic cloves.
  • Now, Add wine and then turn up the heat. Stir around the chicken to dissolve the golden bits stuck on the skillet into the wine.

Baste and serve

  • Remove the heat and spoon the garlic butter over the chicken a few times to coat it.
  • Then, garnish the chicken with chopped parsley and serve them hot with your favorite side dishes.
  • Don’t forget to add lemon slices and crunchy garlic pieces.

Recipe Notes!

  • This recipe can also be made with the breasts of chicken but it won’t have the same crispiness. Cut breasts in half horizontally so they’re 1cm / 2/5″ thick, follow the recipe but use these cook times: heat skillet on high, cook for 2 minutes, flip, cook for 1 minute then add garlic and butter, proceed with the recipe as written above.
  • Make sure to get chicken thighs with the bone in and skin on for maximum flavor. 
  • To store: The leftover thighs can be stored in an airtight container for up to 4 days. 
  • To reheat: In the oven, you can reheat the chicken thighs to keep their skin crispy for a long. 
  • To freeze: You can freeze cooked chicken for up to 3 months in a freezer-safe bag.

What to serve it with?

  • Rice
  • Mashed potatoes
  • Roasted potatoes
  • Roasted or steamed veggies
  • Cucumber salad
  • Pasta
  • Roasted mushrooms

To conclude

Garlic butter chicken thighs are easy to make and taste great with your favorite sides. It is a perfect weeknight dinner you can make when time is of the essence, be sure the whole family would love this. Make this recipe and do tell us in the comments how you like it on a scale of 10.

MUST TRY: Easy Steps For Cooking Delicious Korean Fried Chicken Within 30 Minutes!