Home Blog Page 15

Creamy Espresso Martini

0

Have you ever thought of going to a drink that refreshes the evening? If so, an creamy espresso martini could be just the drink you’re in the mood for. It is one of the popular drinks in almost every bar. The key is to make it with cream and vodka.

This martini will require you to consume two shots of your favorite alcoholic beverage, so pace yourself when preparing it. If you’re feeling adventurous, you can substitute any other flavors, such as Kahlua or even green tea. You may want to add a little chocolate syrup or vanilla ice cream at the end for extra sweetness.

So if you want to enjoy the evening with your friends, then an espresso martini makes it more interesting. In this guide, you will learn how to make a creamy espresso martini and serve it to your friends.

Let’s Start With All The Ingredients

Here are all of the ingredients to make a creamy espresso martini. Make sure you have all these before start making the drink.

  • 1½ ounces (45 ml) vodka
  • 2 ounces (60 ml ) cream-based flavorings such as baileys Irish cream or any other sort of cream
  • 3/4th ounce of espresso
  • ½ ounce of coffee liqueur
  • Coffee beans for garnishing

Steps To Make Espresso Martini

To start making the espresso martini follow these simple steps to make a perfect refreshing drink:

  1. First, take the drink shaker and add the vodka, coffee liqueur, and espresso.
  2. Also, add the simple syrup and Ice to make the drink chill.
  3. Now just shake the drink and strain it into chilled glasses.
  4. Garnish the espresso martini drink with the coffee beans.

This is it; with a very little bit of effort and time, you can make the creamy espresso martini whenever you want to enjoy the drink.

Creamy Espresso Martini: Perfect Post-Dinner Drink

So if you are looking for something to drink after dinner, you should try a creamy espresso martini. It is guaranteed that you will love this soothing and refreshing drink once you taste it. It has been one of the popular drinks in this world for quite some time.

Creamy espresso martini was first served in the 1980s, and since then, it has been in the trend and always refreshes with its magical flavors. The British bartender Dick Bradsell, who used to work in Fred’s Club in London, first made this classic drink. He decided to try something new for fun, so he mixed the vodka, espresso, and coffee liqueur, and voila, creamy espresso martini was invented.

This drink is perfect for the post-dinner, and you can enjoy the effect of the drink by ordering it next time whenever you go out. You can make the espresso out of the espresso machine if you have or you can use the concentrated cold brew.

To make the drink right, make sure you keep its temperature right and chilled, and to make it strong, you can add strong coffee, which will make this drink even better. Try to take the right amount of everything from vodka to coffee liqueur etc., to make the drink taste better. Then, shake it well, so it gets chilled and is ready to serve.

Try Espresso Martini With Different Ingredients To Find Your Taste

The best thing about this drink is that it can be made perfect for people with variable drink tastes. You can easily vary and substitute the ingredients to explore the different flavors of this drink.

  • If you want to change the flavor and structure, try or add the different flavors of Irish cream or salted caramel. You can also try flavors such as espresso crème, red velvet, and vanilla cinnamon. Each different taste will let you decide which of the espresso martini you like the most.
  • If you are too worried about the dairy product added to your drink, you should try almond milk for a change of taste.
  • If you are the one who does not like to have sweetness in their martini, then you should add a few dashes of bitters to the drink. You can choose from the Chocolate, walnut, cherry, toasted almond, and whiskey barrel; these all smoked bitters give you the exact taste you want from your creamy espresso martini.
  • You can also substitute the main ingredient of martini, vodka, with flavored vodka. It is suggested for people who like to have bold flavors and want vanilla, caramel or raspberry, or whipped cream in their drink.
  • Bourbon, Rye, or Whiskey also adds to the martini to give the drink a fresh and new flavor. Have you ever tried flavored whiskey? If not, then you can surely try it with this martini.

Now, as you know, creamy espresso martini not only gives you remarkable taste and flavor but also allows you to choose your own ingredients. You can experiment with the drink until you find the right one. To sweeten the drink, you can add a pint of Simple syrup. As mentioned above, you can add any ingredient more or less according to your preference and enjoy the martini just how you like it.

Garnish Your Drink With Coffee Beans

Coffee beans are often used in garnishing this classic and traditional martini. But you can decide on the garnishing of your own and can add various things to it. You should not forget to garnish your drink or cocktail as it is incomplete without the garnish.

  • To present the drink attractively, you swirl the caramel or chocolate syrup in the martini glass and can create various designs to make it look better. You can also pour some of the syrup on the martini foam.
  • To create the foam out of cold coffee, you need to add the hot coffee and some ice into the shaker. Then shake the drink vigorously to create the sturdy foam on your espresso martini.
  • As per your personal choice and preferences, you can add whipped cream on the top to make the martini creamier.
  • You can also opt to go for some nutmeg or ground cinnamon.
  • You can garnish your drink with citrus fruits such as orange cuts etc., to enrich the flavor of your drink.

Thus, if you want to try a new drink or cocktail that goes well with dinner or brunch, then you can go for a creamy espresso martini without any doubt.

Marry Me Chicken Recipe

0

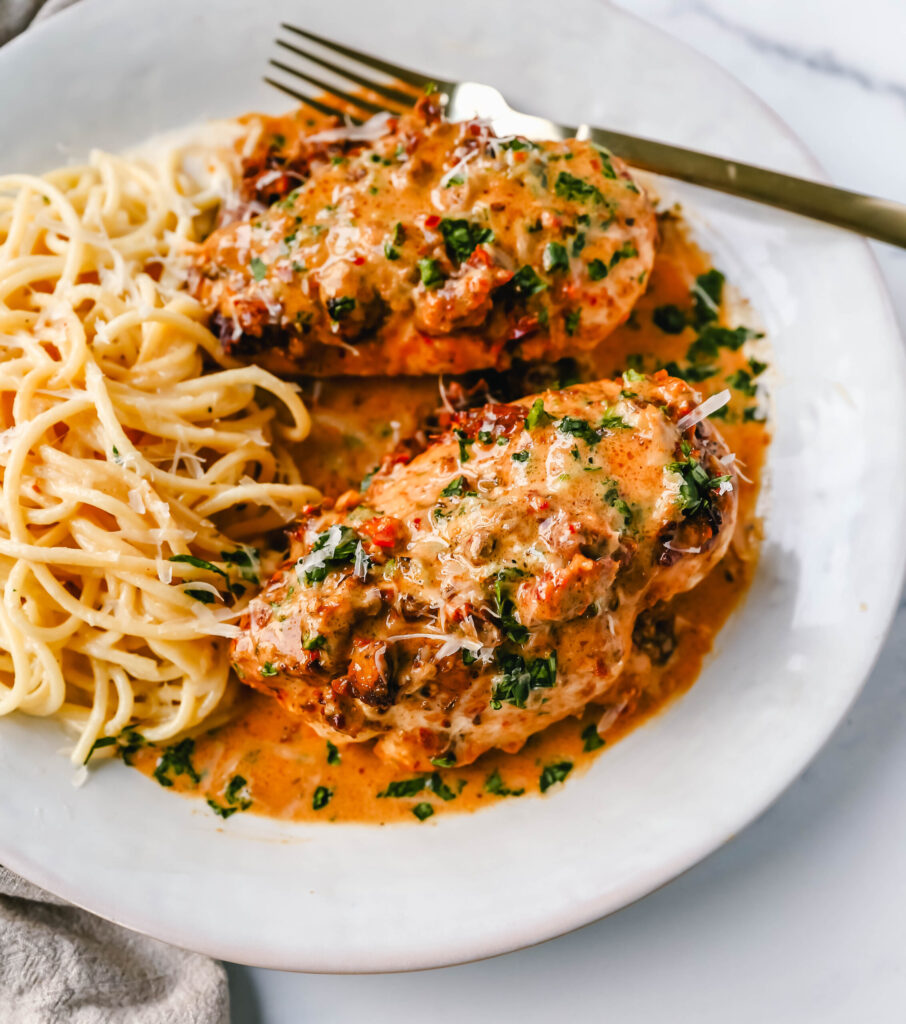
As the name intrigues, Marry me chicken is juicy and full of flavor dish made out of chicken smothered in cheese. You can enjoy this healthy and flavorful dish for an easy and delicious weeknight chicken recipe in just a little bit of time. Plus, this is perfect for the whole family dining.

With proper planning, it’s easy to pull out this dish even you are beginner in cooking. All you need are some diced onion, tomatoes, cheese, and common ingredients. This is one of the easiest recipes to prepare, and it’s so good that you’ll want to make it over and over again.

What Is Marry Me Chicken?

Many people get curious about the marry me chicken and wonder why it is called marry me chicken and want to know how it is cooked. So marry me chicken got its name because of the ingredients and chicken blend with each other to give the perfect juicy chicken dish.

So that is why it is named marry me chicken because of how ingredients and chicken marry one another. The chicken is so soft and juicy, and its tenderness mixed with flavor-packed sauce, cheese, and herbs makes it a mouth-watering dish.

Also, you only have to use one skillet to make this dish; thus, it is one of the easy dishes that can be made in less time whenever you are busy and have less time. You can serve this chicken with various things such as pasta, rolls, or salad. Surely, everyone in the family will enjoy this dish and demand more.

Now if you are looking to cook this dish, it would be ideal to follow the below mentioned steps and apply the tips to make it highly delicious.

marry me chicken recipe

Ingredients Used In Marry Me Chicken

All the ingredients used in the marry me chicken are common and easily available, and there are chances that you will have most of them in your refrigerator. So let’s get started with the ingredients for this dish one by one:

  • Chicken: one of the main ingredients, or you can say the star of the dish, is chicken. It would help if you got boneless skinless chicken breasts that are juicy and tender.
  • Salt: It is used in seasoning the chicken
  • Pepper: Used alongside the salt to give chicken the flavor
  • Olive oil
  • Butter
  • Garlic
  • Flour
  • Chicken broth
  • Heavy Cream: This will add thickness to your creamy sauce
  • Parmesan Cheese: This is also a key ingredient as it is used in making the sauce
  • Sun-dried Tomatoes
  • Dried Italian seasoning: To make the seasoning better, you can use Italian seasoning. It contains all types of herbs and will bring out the rich Italian flavor
  • Fresh basil: Basil is used to garnish your marry me chicken

These are the list of ingredients that will be used in the making of marry me chicken. So make sure to get all to get started with the cooking process.

Making Delicious Marry Me Chicken

Now with all the curiosity and listening to this delicious and juicy dish, you will know about the steps used in making this recipe.

  1. First, you need to prepare the chicken, so cut thinner slices of chicken to cook them easily.
  2. In a medium skillet over medium heat, cook one tablespoon of vegetable oil. Add the chicken breasts to the hot skillet and season with salt and pepper. Cook on each side for about five to seven minutes.
  3. Now keep the cooked chicken aside, and it is time to make the sauce.
  4. To make the sauce, return to the same skillet, add butter and garlic, and sauté it. Then after a minute of sautéing, add the flour to make the sauce.
  5. Now you need to use a whisk to stir the chicken broth with heavy cream and parmesan cheese.
  6. Add the Italian seasoning and dried tomatoes and let it be cooked on low heat for a few minutes to thicken the sauce.
  7. Now take your chicken, add it to the sauce, and continue to cook it for another five minutes.

That is it; marry me, chicken is ready to eat, but garnish it with fresh basil before that. And the tasty and juicy chicken is ready to serve.

Tips To Make  Marry Me Chicken Better

The Thanksgiving staple of Marry Me Chicken is a classic for a reason. It’s easy, it’s cheap, and it pleases everybody. Following these three tips will help you make this dish perfect for your next family dinner.

  • Use skinless, boneless chicken breasts pounded thin between two sheets of plastic wrap for a crisp crust and juicy meat. This also helps seal in flavor.
  • The key to keeping the meat moist is coating each breast in egg whites before breading them in crumbs mixed with Parmesan or salty white cheese. You can do this with a pastry blender or without one by using your fingers.
  • To keep the chicken from collapsing into a big pile of a bland, mushy mess when you flip it, use tongs instead of a spatula to turn it over. Then, after flipping it and coating it in egg whites and crumb mixture, you could finish it off in the oven for extra crispiness. You could also broil or grill if you need to be done that night.

You can also check the temperature of the chicken with a thermometer to check whether it is being cooked at the right temperature. One advantage of marrying me chicken is that you can serve this dish with almost anything.

You can serve it with rice, mashed potatoes, or even pasta. If you want to have side dishes with it, you can go for steamed asparagus, mushrooms, and sautéed Brussel sprouts with bacon.

Top 5 Best Kids Tiffin Box Recipes That You Must Try

0

The food habits of the kids are continually changing year by year. They are completely choosy or fussy several times in case they aren’t getting food of their requirements. Hence, every mother should make a balance among their favorite food & healthy components. Majority of the mothers are facing problem while getting the new kids Tiffin box recipe ideas every day. This has become real concern for almost all the moms. They aren’t finding new recipe that can satisfy their taste buds.

Here we are going to discuss 5 Tiffin Box Recipes that are filled with ingredients, packed with essential nutrients & can also keep your kids satisfied.

Must Try: 10 Homemade Baby Food Ideas – Easy To Apply!

Potato & Cheese Sandwich

This is foremost best Tiffin box recipe & almost every kid can love to eat this sandwich in his Tiffin. Almost every person including kids loves the cheese. Every kid almost has different kinds of food habit & taste.  If you also prepare Potato & cheese sandwich for your kid then you must prepare the mixture & after that you can refrigerate them. In the morning, you can easily fry them & after that make potato & cheese sandwich for them.

This is healthy option for your kid as it is created from cheese, vegetables & potatoes. To keep your kid full for a lot of time then you must try this dish.

INSTRUCTIONS

To make this sandwich then you need different types of equipment like sandwich toaster, manual toaster, mixing bowl & pressure cooker.

For stuffing, you will requires 2 med potatoes, cheese slice, 1 onion, 1 tsp red chili powder, Coriander powder, lemon juice & coriander leaves. If you are making for children’s then you don’t have to add chili powder into it. Instead of adding green chutney for kids, you must apply one layer of ketchup.

Spinach Corn Sandwich

Tiffin Box Recipe
Spinach Corn Sandwich

INSTRUCTIONS

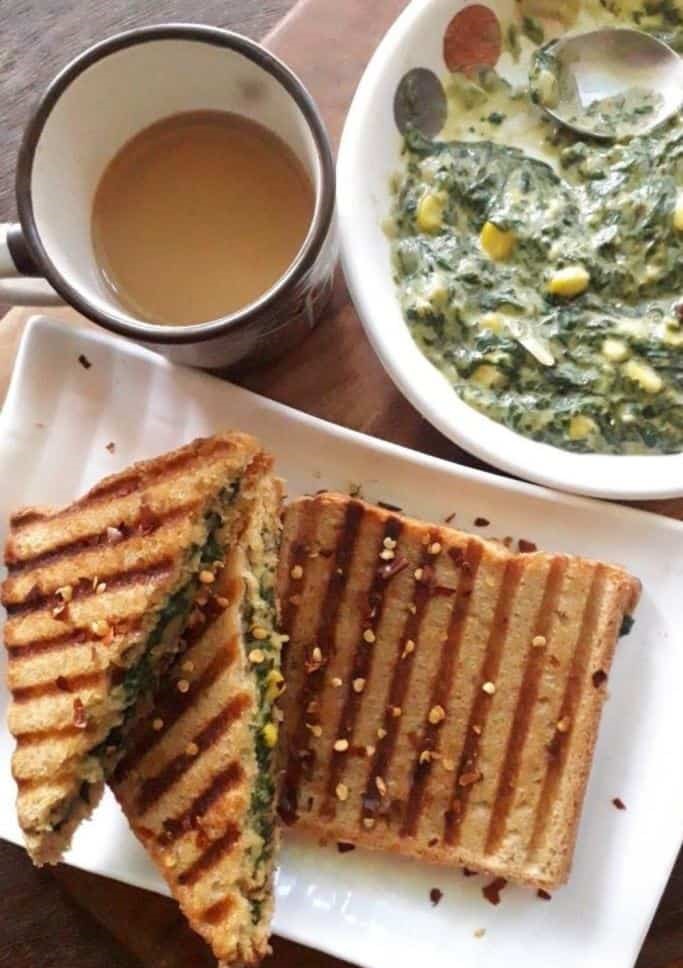
If you are looking for tasty & healthy Tiffin box recipe option for your kids then you must choose spinach corn sandwich. This sandwich is made using the combination of corn kernels & spinach leaves. You must add cream into sandwich. Therefore, your kids will surely love to eat easy & creamy sandwich which is healthy for your children. Such recipe is completely healthy, vegan, easy. You can quickly make this kid-friendly breakfast in limited time.

To make it easy, you can refrigerate the stuffing from night. Hence, you don’t have to hurry while making the stuffing & sandwich.  If you want to make it healthier then you must make replacement of purpose flour with almond or wheat flour. After that, you can easily serve to your children’s with any type of sauce of your requirements. If you aren’t adding cheese to this but still you can get same creamy & cheesy taste.

This is utterly easy recipe & it takes approximately 30 to 40 minutes to make this sandwich. Within 15 minutes, you can make the stuffing of spinach corn & rest 15 minutes requires in creating the sandwich. Spinach has become most important ingredient that you can use for stuffing. Hence, you must wash the leaves and dry also before adding into the pan.

Vegetable Maggie Raman Noodles

Vegetable Maggie Raman Noodles

Majority of the kids love to eat Maggie Raman noodles. This has become one of the easiest snacks that you will make for your beloved children’s any time. It is created with the refined flour & therefore it isn’t perfect as everyday food. You can occasionally make this food for your children’s. Almost every kid love to eat ramen noodles. To make the noodles healthy, you must add different kinds of vegetables & food into the Maggie.

INSTRUCTIONS

You can easily create vegetable Maggie Masala for your children’s Tiffin box that will surely be non-sticky & tasty for a lot of hours. However, if you are boiling Maggie only then it automatically becomes the sticky when cold. So taste also become different thus you cannot give this Maggie to our children’s. So, you must sauté them in the oil with veggies.

If you are making Maggie in this style then it will surely be non-sticky for a lot of hours. Therefore, in case you are packing for your children’s Tiffin box recipe for the breakfast then this will surely be completely non-sticky & also yummy. Make sure that you are making this kind of kid friendly Maggie for your kids occasionally. To make the Maggie healthier then you must add important vegetables such as carrots, green beans, cauliflower & many more things.

Paneer Cheese Sandwich

Tiffin Box Recipe Sandwich

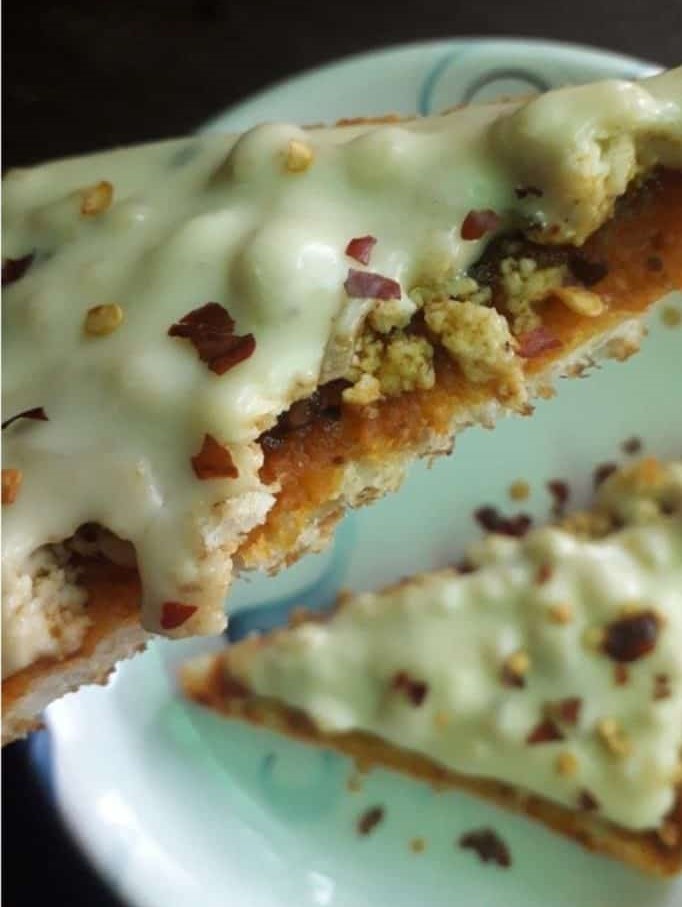
This has become most prominent recipe & also considered as perfect Tiffin box recipe for children’s. You will surely love to eat this particular toast that is packed with protein for your early morning breakfast. All you need to stuff the paneer among two pieces of the bread that will help you in making the sandwich or open-face toast.

It is going to be another best bread snack items for your children. To make this sandwich then you are required to make the use of crumbled paneer. After that, you must add spices as per your requirements. One should top it properly with the slice of cheese.

INSTRUCTIONS

Two methods are out there to make this sandwich.  Make sure that you are grating the paneer cube & add the properly chopped vegetables. You must add the important spices such as pepper, salt, Masala. One should stuff it properly.

This has become one of the best great Tiffin box ideas for the children’s till 6 years old. This is completely reliable option for you. In addition, one will surely make this sandwich or toast for the 18+ also. In case you don’t want to be sandwich cheesy then you must remove the slice from recipe carefully.  

Veg Omelette/Besan Cheela

Tiffin Box Recipe Besan Chilla

Veg omelette is simple and utterly delicious vegetarian version of the omelette. If you are searching for gluten-free and vegan dish then you must try this. Moreover, it has become a right option for quick breakfast.  

This has become one of the best vegetarian versions of the omelette. Make sure that you are also adding the tomatoes, onion into omelette so you can easily add the additional flavor. This has become one of the most popular as a tomato omelette as well.

If you are making the veg omelette then you will also able to add the variation to it. To make the omelette delicious and tasty then one must serve with slices of bread as a sandwich. You can prepare the tomato omelette using onion, mixing gram flour, tomato & other important aromatic spices. The best part about this omelette is that one will surely make these important savory crepes with any kind of other flour like wheat flour crepes, lentil crepes and others.

Related Recipe: Stay Healthy With These Amazing Gluten-Free Recipes For Lunch

The Final Verdict

Lastly, you must respect the child’s preferences & likes. Your kid’s lunch box must be packed with best food. However, you don’t have to make the boring food that doesn’t look delicious anymore. Make sure that you are considering these above-mentioned Tiffin box recipes.

Try to create right food that will helpful for you in getting the sufficient nutrition for steady development and growth of your kids. You must also pay attention on the eating habits of your kid. In addition, nutrients, proteins and grains are important that are making the healthy choices.

FAQs

Q.1 What Are Most The Most Popular Lunch Box Recipes?

The recipes of lunch box have become a best collection of main course & side dish ideas that are delicious & nutritious enough. These kinds of dishes are easy to cook & quick for the moms for work and school also.

Q.2 What Are The 3 Easy & Tasty Recipes For Kids Lunch Box?

Fried rice, Roti & Idli are 3 tasty options that you can try for your kid lunch box.

Q.3 What Type Of Lunchboxes Are Prominent To Pack?

Steel lunchboxes are proven to be great that can easily fulfill your requirements. These kinds of lunchboxes are much better than conventional boxes.

Soft Pretzels Recipe: The Tasty Snack For People On The Go

0
Soft Pretzels

Soft pretzels are a popular snack originating in Germany and are a treat that is commonly found at malls and movie theaters. The soft pretzel has been a favorite snack in Germany for centuries. Its popularity is almost as old as that of its close cousin, the bagel. Today, the soft pretzel is a favorite snack in the United States and is often found in malls, movie theaters, and sports arenas. Soft pretzels are eaten as a snack or offered as a side with a meal.

Recipe Ingredients

  • Yeast – 1 packet
  • Water – 2 cups (480 mL)
  • Salt – 2 teaspoons (10 g)
  • Flour – 1 cup (120 g)
  • Baking soda – 2 teaspoons (10 g)
  • Egg wash (optional): whisk together 3 tablespoons of water, 1 tablespoon of canola oil, and 1 egg yolk. Use this mixture to brush the tops of your pretzels after they’ve been baked in the oven. If you would like them extra crispy, sprinkle coarse salt on top before baking them at 400°F for 8–12 minutes or until golden brown all over.

Ingredients for the pretzel dough

  • 2 cups all-purpose flour
  • 1 tsp. salt
  • 1 package (1/4 oz.) of active dry yeast
  • 3/4 cup warm water, about 110 degrees F. (You can add some hot water to make it easier to dissolve the yeast.)

How to Make Soft Pretzels

Making soft pretzels is easy, but it does take some time. The first step is to soak your flour in water for about 30 minutes. Then you need to knead the dough until it becomes very smooth, adding more flour if needed. Once this has been done, let it rest for an hour or so before forming into pretzels and baking them in the oven! Let’s discuss about it step by step:

Soft Pretzels

Step 1: Combine the ingredients for the yeast and let it sit for 10 minutes.

  • Combine the ingredients for the yeast and let it sit for 10 minutes.
  • In a small bowl, mix together 1 cup of warm water (90 degrees F) and 2 teaspoons of sugar. Stir well to dissolve the sugar.
  • Add this mixture to your flour mixture along with 1/2 teaspoon salt and 2 teaspoons butter (or margarine). Stir until everything is combined evenly.

Step 2: Mix the dough into a large ball, then use both hands to knead it for five minutes. Cover the dough with a damp cloth, then let it rise for about 30 minutes.

  • Use a stand mixer or food processor to mix the dough. If you don’t have one, use your hands instead, but be sure not to squeeze the dough. It should form a ball that is no longer sticky but still soft and pliable—you want to work with it without damaging it too much.
  • Knead for five minutes until smooth and elastic (if using your hands). Cover with a damp cloth so that this process doesn’t dry out your starter dough as well! Let rise for about 30 minutes before shaping into pretzels.

Step 3: Preheat your oven to 425 degrees Fahrenheit (220 degrees Celsius).

  • Preheat your oven to 425 degrees Fahrenheit (220 degrees Celsius).
  • Set the timer for 10 minutes, then place your pretzels on a baking sheet and cook until golden brown, about 5-7 minutes per side (you may need to flip them over after 2 minutes). Be careful not to burn them!

Step 4: Divide the dough into eight equal pieces

Divide the dough into eight equal pieces, then roll each piece into a long strip that looks like a rope. Twist each strip into a pretzel shape, then dip them in the baking soda-water solution. Place them on a baking sheet in your preheated oven, then bake them between 10 and 15 minutes until they’re golden brown. Making soft pretzels at home couldn’t be easier.

Let cool completely before serving!

What to serve ?

Soft pretzels are always delicious treats, but if you’re looking for something to serve with them, here are some ideas! Serve them with a yummy cheese sauce! You can also serve them with spicy mustard or one of your other favorite dipping sauces. You can also serve them with beer-based mustard, dijon mustard, or spicy brown mustard!

Conclusion

These homemade soft pretzels are a great treat to make with your family. They’re easy and fun to make, and they only take about an hour! The best part of all is that if you want even more excitement in your life, it’s never too late – there are so many recipes out there that you can try your hand at making these tasty snacks yourself.

Also check: How to Make Banana Oat Pancakes: Easy and Delicious Recipe

One-Pan Salmon Asparagus- 30 minutes ready

0
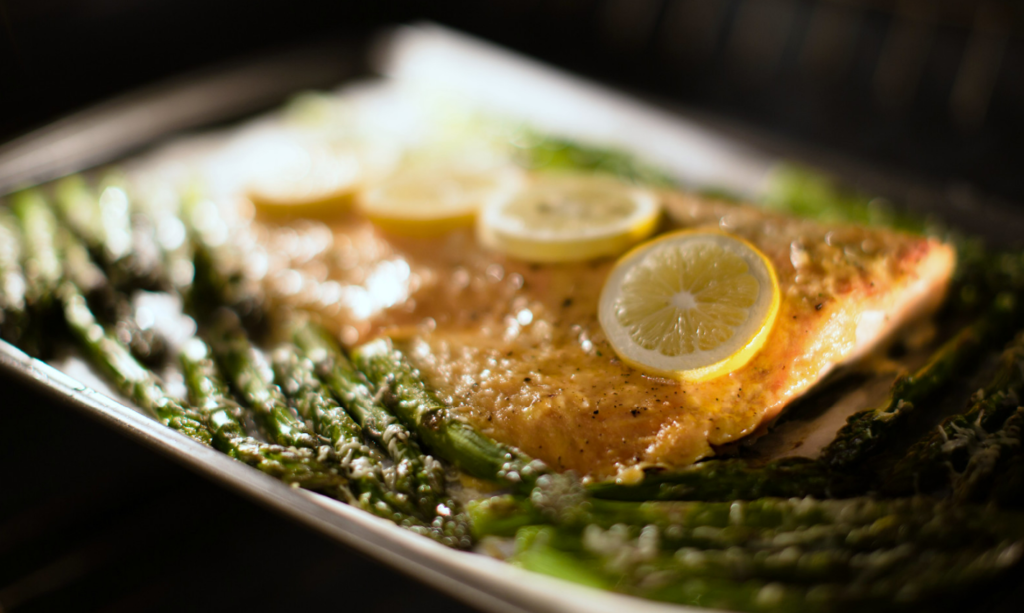
salmon asparagus

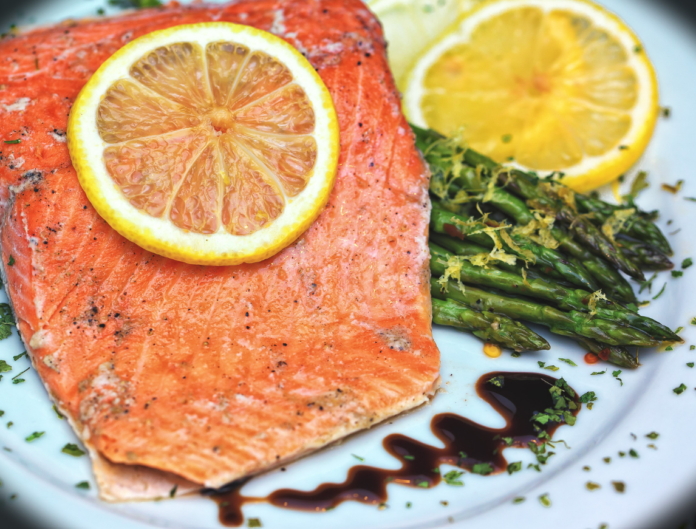
Salmon Asparagus Recipe – Make this quick and easy salmon recipe tonight! Salmon and asparagus are oven-baked together with a rich creamy sauce in single foil packs. The bright lemon flavors perfectly fit with butter, and garlic adds a pungent touch to this great carefree dinner. It is one of my favorite ways to eat salmon. It’s delicious, easy, and healthy! This meal will be ready in under 30 minutes!

Ingredients

  • Salmon
  • Asparagus
  • Lemon juice
  • Garlic (optional)
  • Herbs (optional)
  • Butter

How to make salmon asparagus?

  1. Preheat the oven to 450 degrees. 
  2. Place salmon in a baking dish and add the asparagus, garlic, and herbs. 
  3. Drizzle olive oil over the top, then bake for 15 minutes or until cooked through (the fish should flake easily). Serve immediately
salmon asparagus

What to serve?

For the best results, pair your asparagus with something light and fresh. The combination of salmon and asparagus is a great one that works well with most dishes. You can even make it into an appetizer or side dish by serving it on top of some fresh bread or crackers.

If you’re not sure what to serve with it, we recommend making a little bit more than you need so that you have leftovers for lunch tomorrow!

Conclusion

You can make it in just about 30 minutes and the recipe is easy to follow. This is healthy and nutritious and will help keep you full throughout the day. Salmon asparagus is an effortless dish to make and it’s so delicious! I hope you love this recipe as much as I do. If you try out the recipe, please let me know by leaving a comment down below. 

Also try: Perfect & Delicious Salmon Burger Recipe

Grilled Shrimp Recipe – Serve This Delicious Dish for Dinner Tonight!

0
Grilled Shrimp

‍One of the most versatile ingredients you can have in your pantry is shrimp. It can be easily transformed into a fragrant, spicy marinade for skewers or an elegant salad with a slight twist. There are so many ways to serve shrimp and the best news is that it’s super affordable and easy to cook! 

If you are looking for some new ideas on how to serve this type of seafood, check out our grilled shrimp recipe. You will love the simplicity of this dish but also its complex layers of flavors. This meal is perfect for casual dinners or even picnics since it takes just 20 minutes to prep and cook these tasty skewers. Let’s get started!

 What You Need for This Recipe?

 – Chicken or vegetable oil for cooking

 – Shrimp, peeled and deveined

 – Lime wood smoked chicken, cubed (14 oz.)

 – Cooking liquid from the wood-smoked chicken

 – Sesame oil 

 – Salt

 – Black pepper

 – Red chili flakes 

 – Garlic, peeled and minced

 – Ginger, freshly grated 

 – Green onions, thinly sliced 

 – Cilantro, chopped

How to Make Grilled Shrimp Skewers

  1. Peel and devein the shrimp. Shrimp should be peeled and deveined because the peel has a bitter flavor and can negatively affect the taste of the shrimp. 
  2. Cut the meat off the chicken. You can use a sharp knife to quickly cut the meat off the chicken but doing this with a large chef’s knife helps to avoid making the meat into tiny pieces. The meat should be chopped into small chunks. 
  3. Add the wood-smoked chicken and shrimp pieces to a medium-sized mixing bowl.
  4. Add the lime wood smoked chicken and shrimp cooking liquid, sesame oil, salt, black pepper, and red chili flakes.
  5. Mix well and transfer to a separate container so the shrimp does not get soggy. – Thread the shrimp onto the skewers by threading the shrimp through the chicken and then twisting it back towards the shrimp. 
  6. Heat up a nonstick skillet or grill pan on low heat. You can also use a stovetop grill pan for this recipe. 
  7. Add a few drops of oil to the skillet and then place the shrimp skewers on the pan. You can use two skillets or a grill pan for this recipe. 
  8. Cook for about 2 minutes on each side until the shrimp is pink and cooked through.

Also try: The Easiest Ever Seafood Rice – Using Pre-Prepared Mix Seafood

Serve with Main Dish and Desserts

You can eat grilled shrimp as a snack or as a side dish with main dishes like BBQ chicken, Mexican dishes, and Asian stir fry recipes. Or you can also serve it as an appetizer alongside a cocktail or wine party. If you want you can use grilled shrimp skewers as an ingredient in deviled eggs, frittatas, quesadillas, and more. You can also pair grilled shrimp skewers with fresh fruit, chocolate cake, bread and butter, and more.

Grilled Shrimp

Tips for Grilled Shrimp Skewers

  • If using wooden skewers, soak them in water for 30 minutes to prevent them from burning on the grill. 
  • If using metal skewers, cover them with a dish towel to prevent them from getting stuck in the food.
  • If using wooden skewers, soak them in water for 30 minutes to prevent them from burning on the grill.
  • Let the shrimp sit at room temperature for 20 minutes before grilling to help bring out their natural flavors. 
  • When grilling shrimp skewers, you want to cook them on low heat so they are not tough and rubbery. You can do this by placing the shrimp skewers on an aluminum foil-lined tray and placing them on a low grill setting.

Conclusion

Cooking shrimp is easy and straightforward, thanks to its mild flavor. They’re also very inexpensive and can be found in most grocery stores. You can even buy frozen shrimp since that is the only kind that is not peeled. All you have to do is heat them up on the grill and have a tasty, protein-filled meal.

Also Try: Thai prawn curry

Korean chili, sesame & honey chicken

0
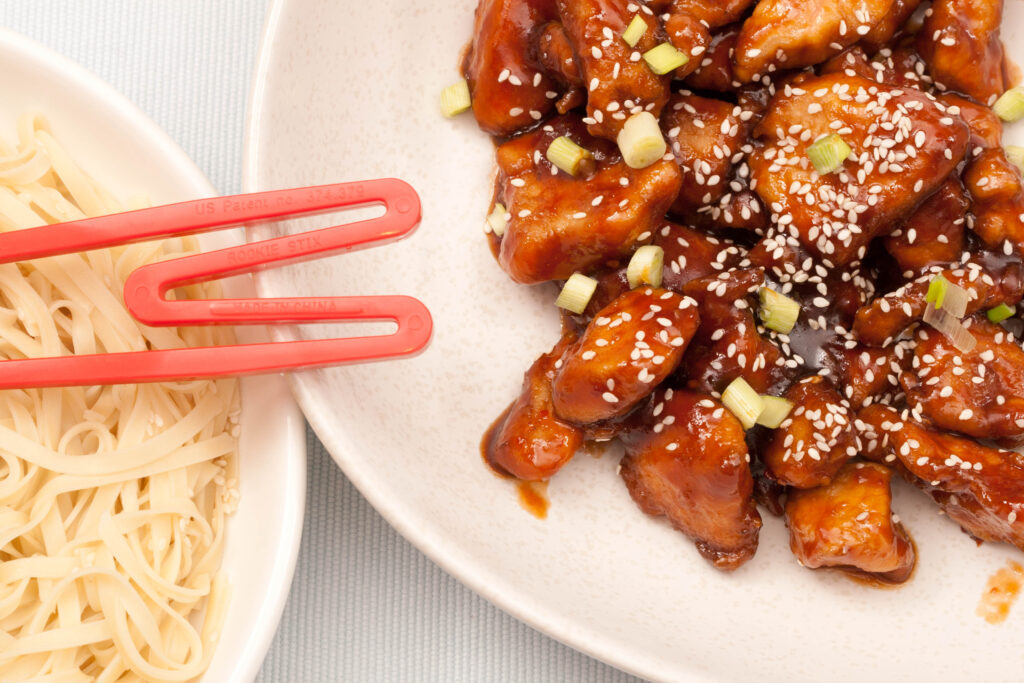
Honey Chicken

Most people love spicy food. It’s a favorite way to eat, and I’ve always been a bit of a ketchup connoisseur. But when it comes to ordering in restaurants, I often find myself torn between something simple like a burger and fries or pasta with tomato sauce, or something more adventurous like Korean chili, sesame & honey chicken.

This time around it was easy—I knew exactly what I wanted: chicken with chili seeds and sesame seeds mixed with honey (and perhaps some sort of grain like quinoa).

Ingredients

1 large chicken breast

1 tbsp sesame seeds, toasted (optional)

2 spring onions, chopped finely

½ tbsp soy sauce

1 tsp honey (optional)

1 tsp chili powder

2 tsp garlic powder, or according to taste

1 tsp ginger powder, or according to taste

3 tbsp sesame oil

How to make it?

  • Heat a pan over medium heat and add the oil. Add the chicken to the pan, season with salt and pepper, and cook for about 5 minutes until golden brown on each side.
  • Remove from the pan and set aside in a bowl while you prepare the sauce.
  • In another large bowl mix together all ingredients for the sauce until smooth then add your cooked chicken pieces back into it along with some extra soy sauce if needed. 
  • Stir everything together well so that everything is coated in the sauce. But, not too much liquid has been released from any of them (you want some liquid remaining).

Also try: Chicken Tikka Masala: Spicy and Flavorful

Serve:

When you’re cooking this dish, you can serve it with rice and vegetables. If you want to be fancy, try serving it with a slaw or potato salad.

Honey chicken

Nutrition: Per serving (6)

Kcal – 263, fat-14g, fiber- 1g,Protein-23g, Salt- 1.9g

Saturates- 3g, carbs-11g, sugars- 9g

To Sum Up!

You can make it in just about 40 minutes and the recipe is easy to follow. Korean chili, sesame & honey chicken is healthy and nutritious and will help keep you full throughout the day. I hope you enjoy this recipe as much as I did! If you make it, please leave a comment below and let me know how it went for you.

Also try: Skillet Chicken and Mushroom Wine Sauce: The Best Easy Dinner Recipe You’ll Find

30-min Vegetarian Meatballs: Easy and Healthy

0
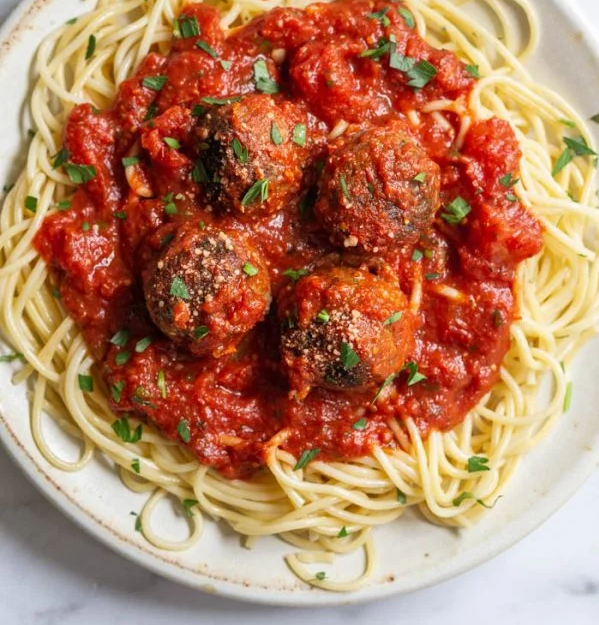
Vegetarian Meatballs
Source : Pinch of yum

These vegetarian meatballs are incredibly easy to make. People like the way they’re crispy on the outside, tender on the inside and so satisfying to eat with hands. And especially they’re vegetarian! It is packed with cauliflower, quinoa, brown rice, garlic, and spices- all tasty vegetables are there.

Meatballs are also super versatile—you can serve them as an appetizer or even use them in soups or casseroles. So since it’s wintertime and there’s nothing better than sitting by a fire with these little guys (and carbs) going why not make your own?

Ingredients:

  • 3 large cauliflower florets
  • 1 cup quinoa
  • 2 cups brown rice
  • 3 cloves garlic, minced or pressed through a garlic press (I used my fingers)
  • 1 teaspoon dried basil leaves (or fresh if you have it) and oregano, rosemary, red pepper flakes, and salt to taste.

How to make veggie meatballs?

In a food processor or blender, mix the following ingredients: 

  • 2 cups of dry quinoa (or brown rice), 1 cup of yellow onion, 1 clove of garlic, 1/2 cup of parsley stems and leaves (or other chopped herbs), and 2 eggs. 
  • Process until smooth. Transfer mixture to a large bowl; add flaked salt and black pepper to taste. 
  • Stir in grated cheese at this point if desired; set aside for later use.

Pile up these in your freezer and your future self will thank you!

Vegetarian Meatballs
Source: food with feeling

Tip for making veggie meatballs:

Use vegetable oil instead of butter when cooking them so they won’t stick together too much but still keep their shape once cooked through.

To Sum Up

I hope you’re enjoying these vegetarian meatballs! These are the easiest way to get your protein, carbs, and veggies in one dish. Add them to pasta or serve them as an appetizer at your next party. You can also use fresh vegetables like spinach or bell pepper instead of frozen ones if they’re not available in the season where you live.

Also Try: Makeover Your Meatballs: Spicy Turkey Mince Chili Black Beans Recipe

Best-Ever Turkey Burger Recipe

0
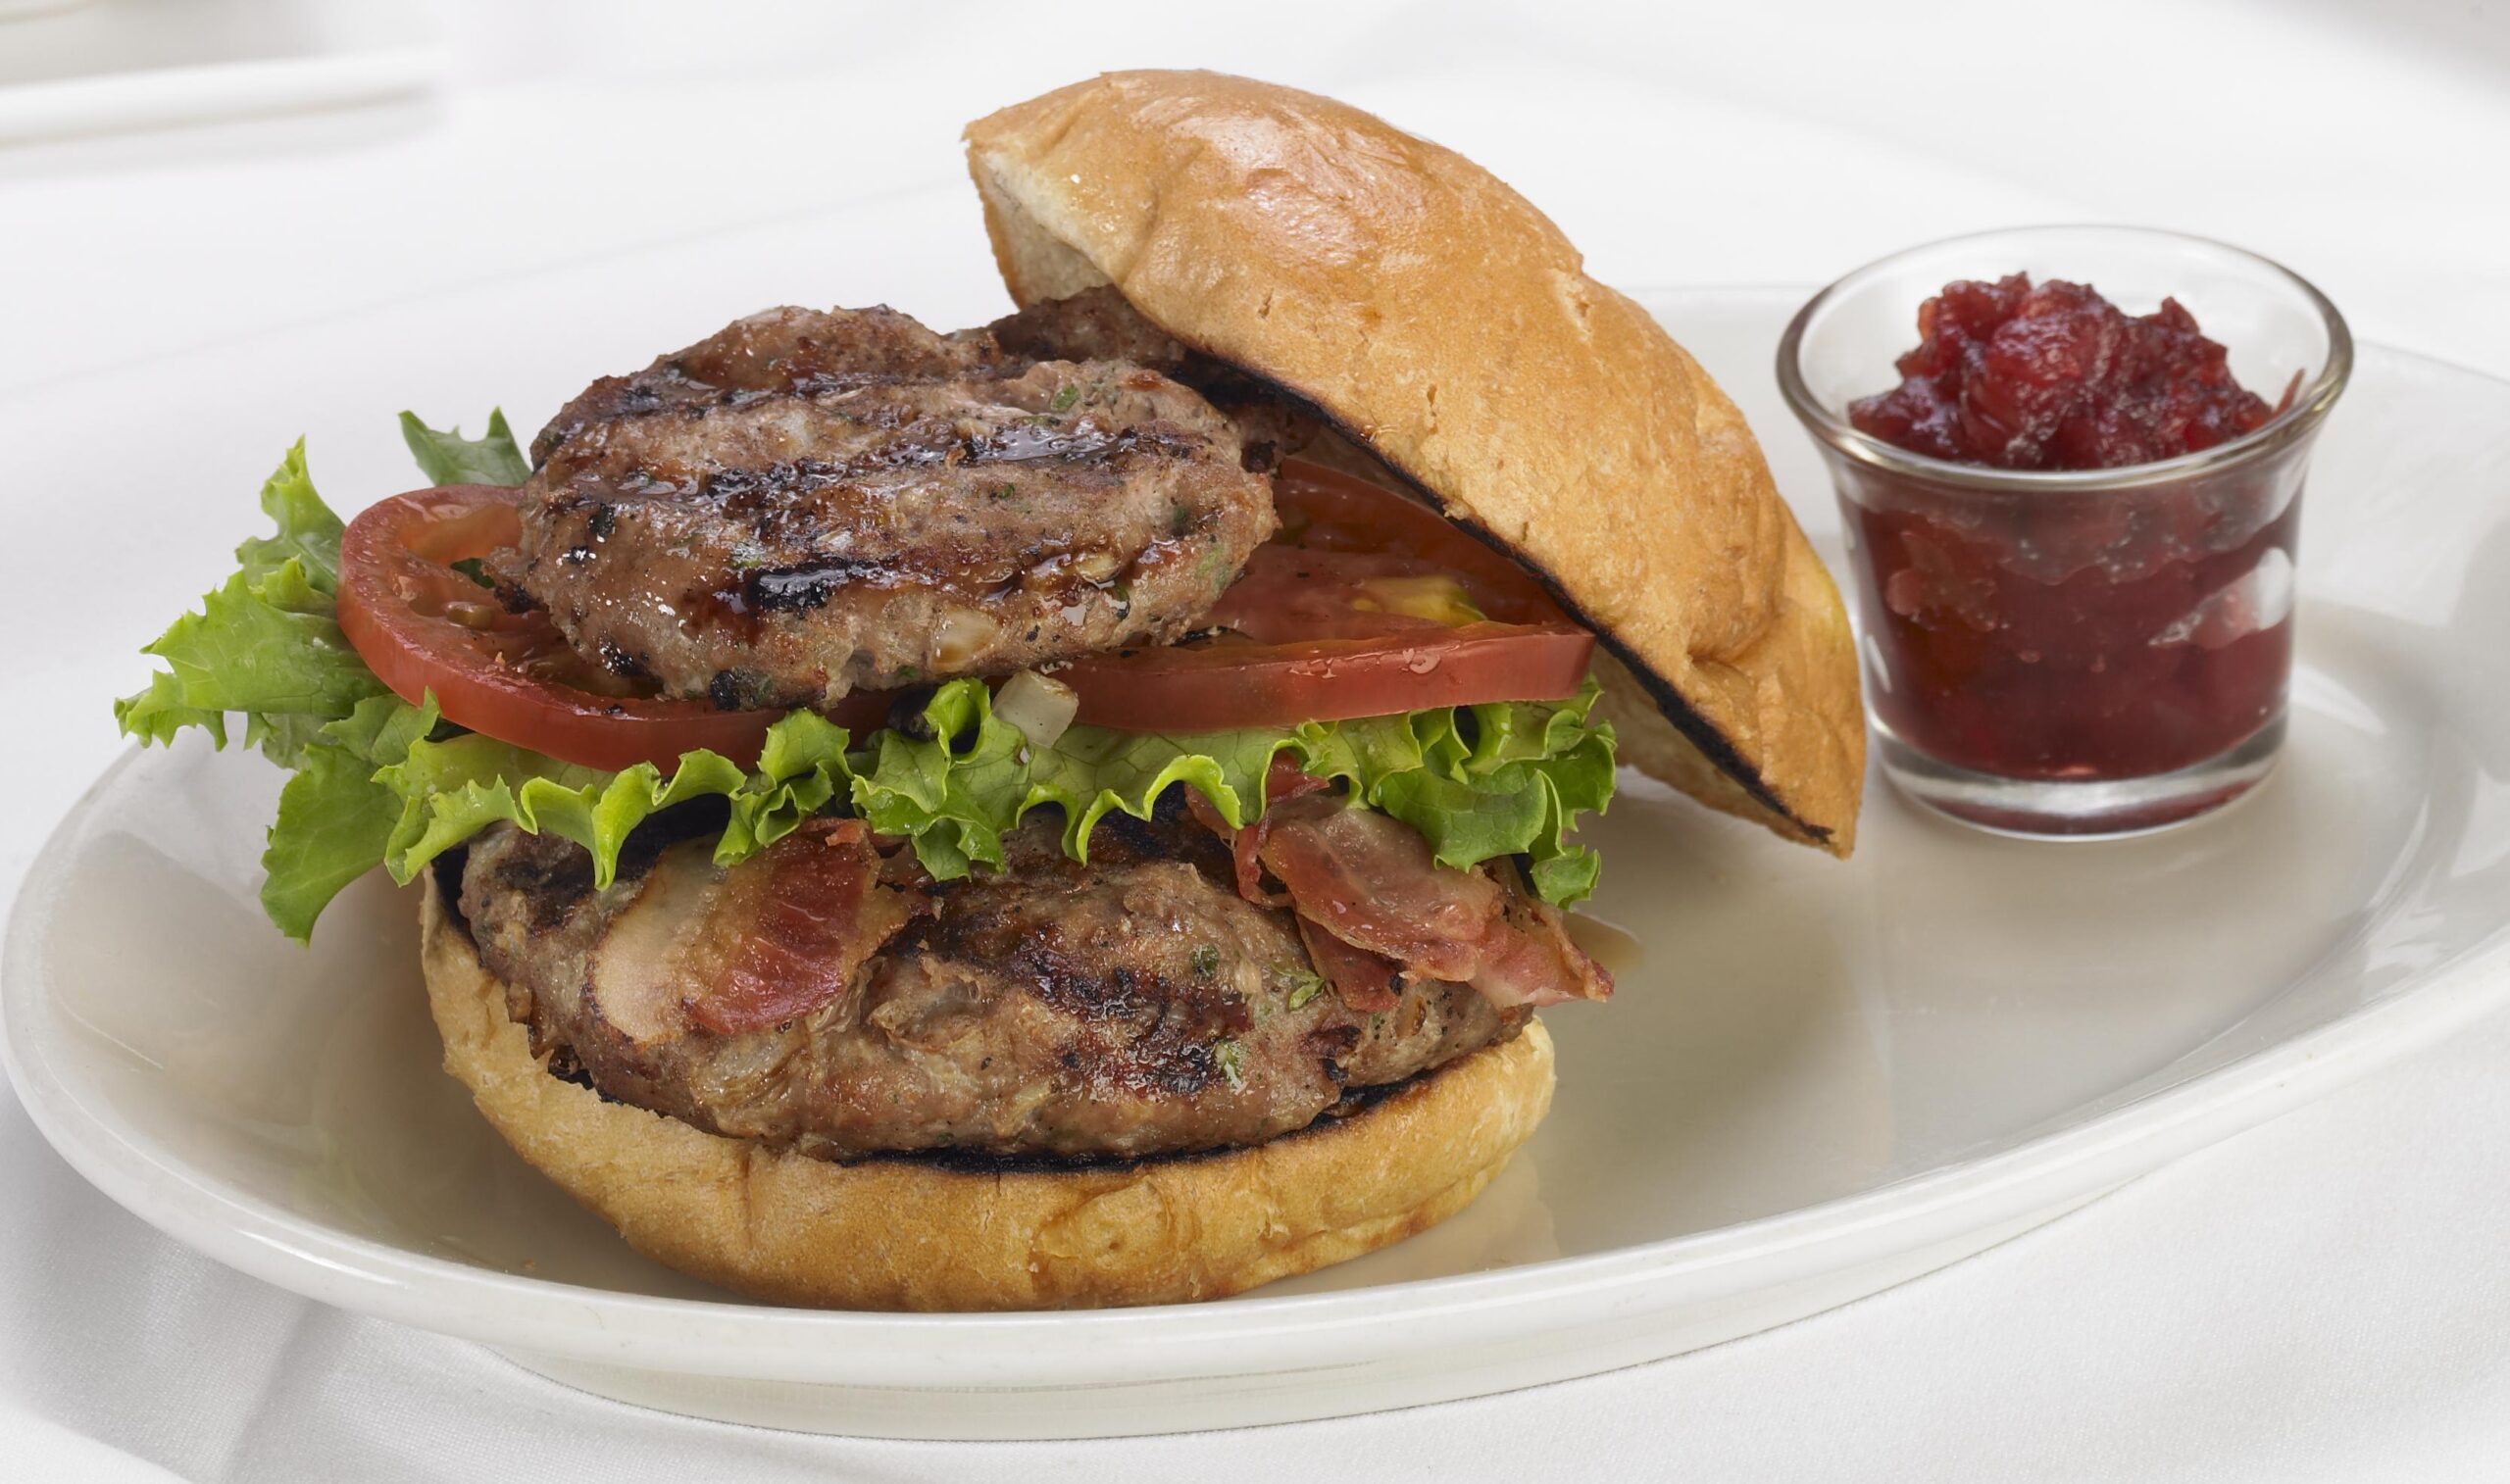
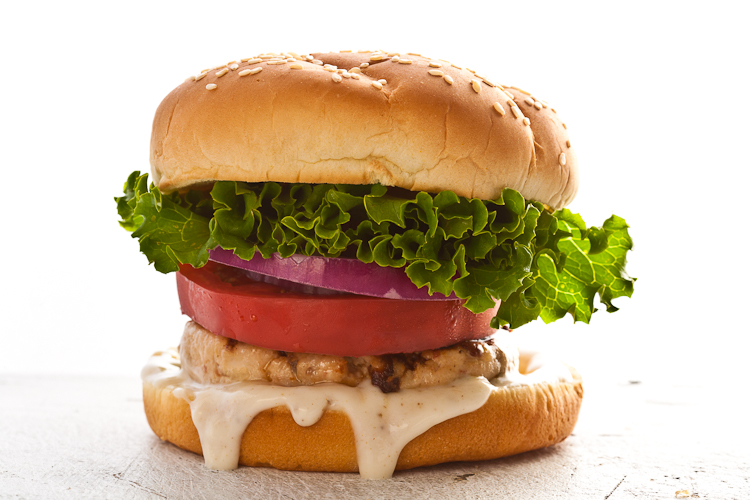
Best Turkey Burgers

When it comes to burgers, I know I’m not alone. We all crave them on a weekly basis, and that’s okay. But as adults, we all realize that maybe we shouldn’t indulge in those weekly cravings. Enter the turkey burger. This easy recipe hits all of the key points and satisfies our craving without the guilt of red meat.

Ingredients

  • 1 pound ground turkey
  • 1/4 cup breadcrumbs
  • 1 tablespoon minced garlic
  • 2 eggs

How to make it?

In a large bowl, combine the ground turkey with the breadcrumbs, garlic, basil, and egg. Form into 4 patties.

Mixing the ingredients in a bowl is an easy way to make sure they are evenly distributed, but if you’re feeling more ambitious, use your hands and form them into 4 patties.

For best results when forming your burgers:

  • Use a spoon or fork to mix up the ingredients before hand-forming them (this will help ensure there aren’t any clumps of breadcrumbs).
  • Don’t overwork the meat at this point—you want it as loose as possible without being too wet/mushy looking. If you find that your hand isn’t soft enough, add some extra breadcrumbs from another bowl until yours looks like wet sand!

Also Check: Green burgers step-by-step recipe

Turkey Burger

Serve in hamburger buns with desired toppings.

  • Top with lettuce, tomatoes, onions, and other veggies that you like.
  • You can also make a turkey burger in a frying pan or on a grill! This will give you the same great taste without all the guilt of eating red meat.

Conclusion

This is a quick and easy way to get your burger fixed without all of the guilt. To make sure you have the right texture and taste, cook it thoroughly. If you are using a frying pan, make sure that your non-stick pan is hot before adding oil or butter. If you are using a grill or oven, use a meat thermometer so that you can ensure that there isn’t any pinkness left inside when cooking time is up!

We hope you’ve enjoyed this easy-to-make turkey burger recipe. Feel free to add any of your favorite toppings or vegetables to the mix. Also, be sure to use a good quality ground turkey with no added fillers.

Also try: Perfect & Delicious Salmon Burger Recipe

Easy Creamy Tuna Pasta Bake: Super Comfort Food

0
Creamy Tuna Pasta

This Creamy Tuna Pasta Bake is easy enough that you’ll feel like you’re in heaven because it’s so good! It has just enough creaminess from the cream cheese sauce and tuna can be found in most grocery stores these days. If you haven’t tried canned tuna before or don’t own an instant pot yet, then this recipe is perfect for you!

What do we need?

  • 400 g (14 oz) rigatoni pasta
  • 3 tbsp butter
  • 1 onion – peeled and chopped finely
  • 40 g (⅓ cup) plain/all-purpose flour
  • 600 ml (2.5 cups) of milk
  • 250 g of (2.5 packed cups) strong cheddar, grated
  • ¼ tsp salt
  • ¼ tsp pepper
  • 320 g (11 oz) of canned tuna – drained and flaked
  • 330 g (11.5 oz) of canned sweetcorn drained
  • 150 g (1 cup) frozen petit pois
  • chopped parsley to serve

A can of tuna, a box of pasta (or more if you want to make it into the main dish), sweetcorn, peas, and carrots for garnish, salt, and pepper (omit if using fresh herbs)

How to make it

  • Heat the oil in a frying pan over medium heat.
  • Add the onion and cook for 4 minutes or until translucent, stirring often to avoid browning at the bottom of your pan (this can make it harder to achieve that nice golden color).
  • Add garlic, tomatoes, and capsicums (peppers) then simmer for 2 minutes before adding peas and sweetcorn; cook for another 2 minutes or until heated through then serve topped with melted cheese if desired!

What to serve it with

  1. Parmesan Carrot Fries or Oven-Baked Potato Fries
  2. Homemade Garlic Bread
  3. A nice crisp salad
Creamy Tuna Pasta

Also try: Caponata pasta

Can you freeze it?

Yes, sure you can. Make up the dish and cover it with the cheese (but don’t bake in the oven). Cover and freeze.

Defrost it in the refrigerator overnight. Make sure to take it out of the refrigerator an hour before you want to make it, to take the chill off, then place it in the oven covered in foil at 190C/375F for around 10 minutes, then an additional 20-25 minutes uncovered. Check that it’s hot in the middle before serving it.

NUTRITION

Calories: 690kcal, Carbohydrates: 66g, Potassium: 528mg, Calcium: 447mg

Protein: 40g, Fat: 28g, Sodium: 547mg, Fiber: 3g, Vitamin A: 990IU, Iron: 2.7mg

Saturated Fat: 15g, Cholesterol: 78mg, Sugar: 9g, Vitamin C: 11.4mg

Conclusion

It is such a great dish to eat on a cold winter night when you want something hearty but not too heavy. I hope that you enjoy this Creamy Tuna Pasta Bake. It is a delicious, healthy, and easy meal that the whole family will love!

If you have any questions about the recipe or would like to share your own version, please feel free to comment.

Also Check: Creamy Mushroom Pasta