Home Blog Page 8

Chicken Lettuce Wraps Recipe

0
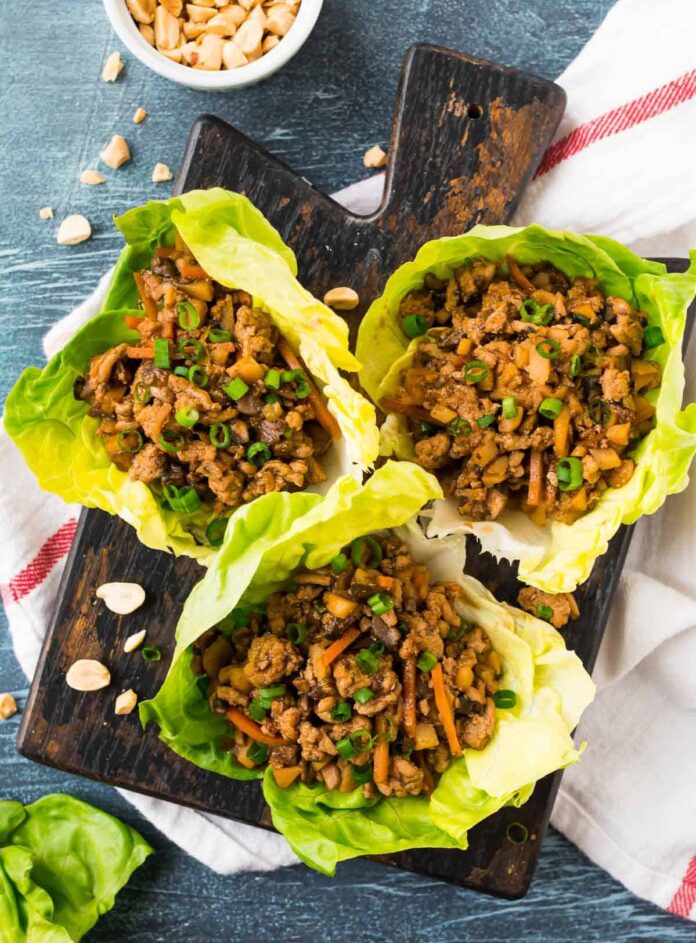
Asian Lettuce Wraps

Are you tired of the same old dinner options? Do you want to try something new and exciting? Look no further than Chicken lettuce wraps! This Indian take on the classic chicken lettuce wraps recipe is packed with flavour and can be made in under 20 minutes. One of the key ingredients in this recipe is cumin powder, which adds a warm and earthy flavour to the dish. Coriander powder is also used to add a fresh, citrusy note. Together, these spices create a wonderful depth of flavour that will leave your taste buds begging for more. To make this dish, start by cooking the chicken in a pan with some oil and spices.

With the flavours of India infused into this classic recipe, you’ll be sure to impress your family and friends with this unique and delicious meal. So why not give it a try tonight? Your taste buds will thank you!

Ingredients

  • 1 lb ground chicken
  • 1 tbsp peanut oil
  • 1/2 onion minced
  • 1 cup red or green pepper
  • 1 8oz can water chestnuts
  • 3 tbsp soy sauce
  • 3 tbsp hoisin sauce
  • 1 tbsp sesame oil
  • 1 tbsp rice vinegar
  • 1 tbsp peanut butter
  • 1 tbsp honey
  • 2 tbsp sweet chilli sauce
  • 1/2 tbsp garlic powder
  • 1/4 tbsp powdered ginger
  • 1/4 cup peanuts crushed
  • lettuce or your favourite Asian salad

Directions to Make Chicken Lettuce Wraps

  • The sauce’s components should be well mixed by whisking. 
  • To melt tougher peanut butter and make sure everything is thoroughly combined, microwave the mixture for 30 to 60 seconds.
  • In a frying pan, warm 2 tablespoons of peanut oil. Add ground chicken once it’s heated.
  • Cook until a few of the pieces start to turn brown. After adding the onion, sauté it for 5 minutes or until it turns translucent.
  • After adding them, simmer the peppers and water chestnuts for about 5 minutes or until tender.
  • When the chicken and vegetables are well cooked, add the sauce and simmer on low heat until everything is uniformly covered.
  • Serve over noodles or rice, in lettuce leaves, or on top of your favourite Asian salad.

Recipe Notes

  • Chicken breasts that have been finely chopped are a fantastic alternative to ground chicken.
  • If you don’t have peanut oil or a peanut allergy, you may substitute any other oil here. I advise using avocado or olive oil!
  • Coconut Aminos can be used instead of soy sauce if you are allergic to soy; however, to make this recipe for Asian lettuce wraps gluten-free, be sure to use a gluten-free soy sauce.
  • To keep this dish gluten-free, use a gluten-free hoisin sauce.
  • Any nut or seed butter would work here if you are allergic to peanuts, but peanut butter produces the greatest results.

Nutrients Value

  • Calories: 209.1 kcal
  • Carbohydrates: 14.3g
  • Protein: 18.7g
  • Fat: 9.2g
  • Saturated Fat: 1.9g
  • Cholesterol: 43.6mg
  • Sodium: 675mg
  • Potassium: 112.5mg
  • Fibre: 1.4g
  • Sugar: 8.6g
  • Calcium: 12mg

To Conclude

Not only are these chicken lettuce wraps delicious, but they’re also incredibly healthy. Lettuce is low in calories and high in fibre, while chicken is a great source of protein. Plus, the cumin and coriander powder add a ton of flavour to the dish. Overall, these chicken lettuce wraps are a great option for a quick and easy dinner that’s both healthy and delicious. So next time you’re in a rush and looking for a flavorful meal, be sure to give these chicken lettuce wraps a try.

If you try this recipe, please let us know. Please comment if you have questions about the recipe or want to share your version of chicken lettuce wraps. Don’t forget to share it with your friends and family; I am sure they’ll love it too.

MUST TRY: Looking for an easy way to roast a whole chicken? Try this!

Spatchcock Chicken Recipe

0

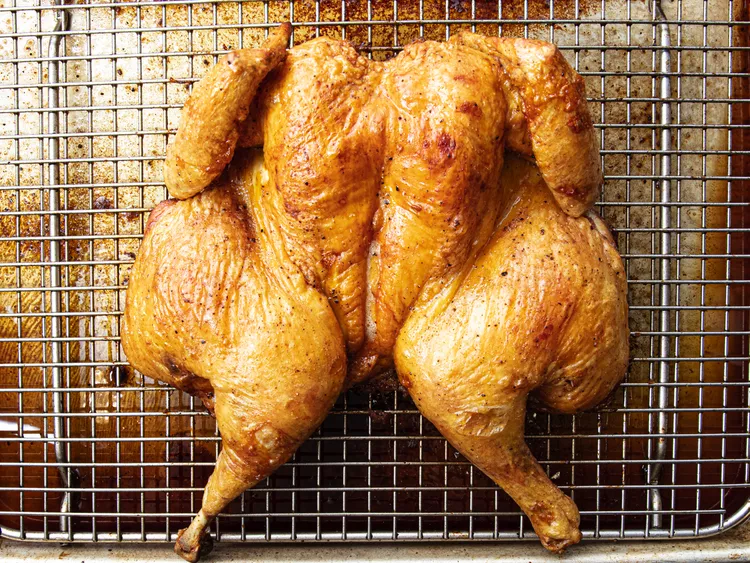
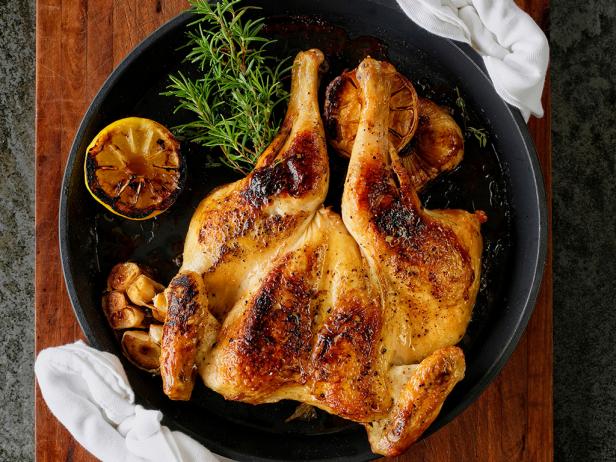
Spatchcock chicken is the perfect way to enjoy a juicy and flavorful roast chicken. It’s so simple to prepare, and the resulting dish is always so delicious. This recipe has been our favourite for years, as it never fails to deliver a perfectly cooked bird every time. So if you’re looking for an easy dinner that you know will be a hit with your family and friends, give this spatchcock chicken recipe a try – you won’t be disappointed.

If you’re looking for a delicious and easy way to roast a whole chicken? Then follow the whole guide step by step. This recipe not only yields juicy and flavorful roasted chicken, but it’s so simple that even novice cooks can master it. So bring out your favourite roasting pan, gather the ingredients, and let’s get started on making this delicious Spatchcock Chicken.

Ingredients for Flavored Butter

  • 4 Tbsp unsalted butter
  • 1 Tbsp olive oil
  • 1 Tbsp parsley
  • 2 garlic cloves
  • 1/2 tsp lemon zest
  • 1 Tbsp lemon juice
  • 1 tsp salt
  • 1/8 tsp black pepper

Ingredients for Spatchcock Chicken

  • 4 1/4 lb whole chicken
  • 1/2 tsp salt
  • 1/8 tsp black pepper
  • 2 lbs medium red potatoes
  • 3 medium carrots
  • 8 oz Brussels sprouts

Instructions

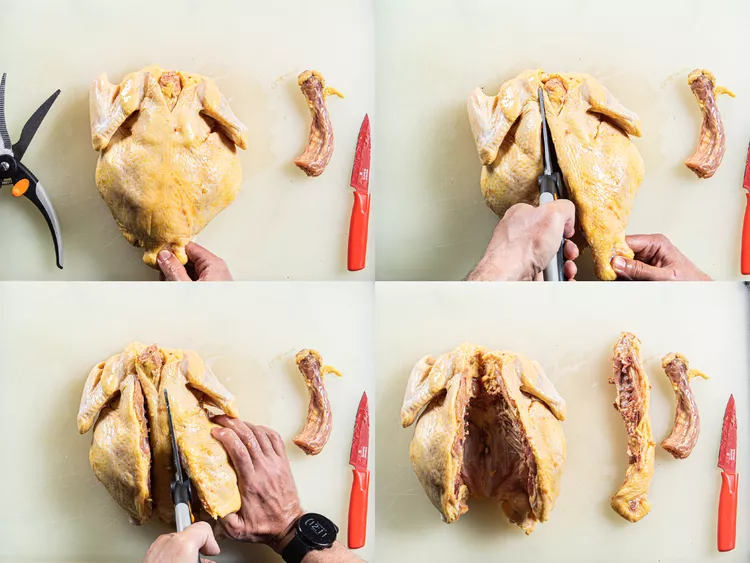
  • Lay the chicken breast side down with the neck and wings facing you. Kitchen shears should be used to cut through the ribs near the spine on both sides to remove them. Open the rib cage, then slice the sternum with a large knife.
  • The chicken will be flattened and the breast bone will be helped to pop out. Add a sprinkle of black pepper and 1/2 teaspoon salt to the chicken’s inside.
  • Lay the chicken breast side up on a rimmed baking sheet that has been lined with parchment paper. Push hard over the breastbone with your hand’s palm to make the chicken lay entirely flat. Over the breast, thigh, and drumstick regions, use your thumbs to remove the skin from the flesh.
  • Combine the ingredients for the flavoured butter in a small mixing dish. Fork-mash the butter for a few minutes, or until the lemon juice is mostly integrated. 
  • Spread a third of the mixture underneath the chicken’s skin and the rest butter over the bird.
  • Around the chicken, arrange the prepped veggies, and then liberally spray with olive oil. Season the chicken and the veggies well with salt and black pepper.
  • Bake for 45 minutes, uncovered, at 425°F, or until a thermometer that can be read instantly placed into the thickest region of the chicken breast registers 160°F. Before serving, remove from oven and let stand uncovered for 10 minutes on a chopping board.

Tips and Notes!

  • For uniform baking, let the raw chicken sit at room temperature for 30 minutes before use.
  • Avoid overbaking to prevent dry breasts. When it comes out of the oven, the internal temperature will increase by another 5 to 10 degrees.

Nutrition Facts

  • Calories: 523 kcal
  • Fat: 29g
  • Saturated Fat: 9g
  • Cholesterol: 125mg
  • Sodium: 748mg
  • Potassium: 1224mg
  • Carbohydrates: 30g
  • Fibre: 4g
  • Sugar: 4g
  • Protein: 33g
  • Calcium: 60mg
  • Iron: 3.2mg

To Conclude!

If you’re looking for an easy, delicious way to roast a whole chicken that’s sure to impress your family and friends, then this Spatchcock Chicken recipe is the way to go. This method of roasting a whole chicken is incredibly flavorful and ensures that each part of the bird turns out juicy and full of flavour. So, why wait? Prepare this and enjoy a mouthwatering roast chicken with this amazing Spatchcock Chicken recipe.

If you try this recipe, please let us know. Please comment if you have questions about the recipe or want to share your version of the spatchcock chicken. Don’t forget to share it with your friends and family; I am sure they’ll love it too.

MUST READ: Prepare these delicious Thai Fish Cakes!

Cacio e Pepe Recipe

0
Cacio e Pepe Recipe

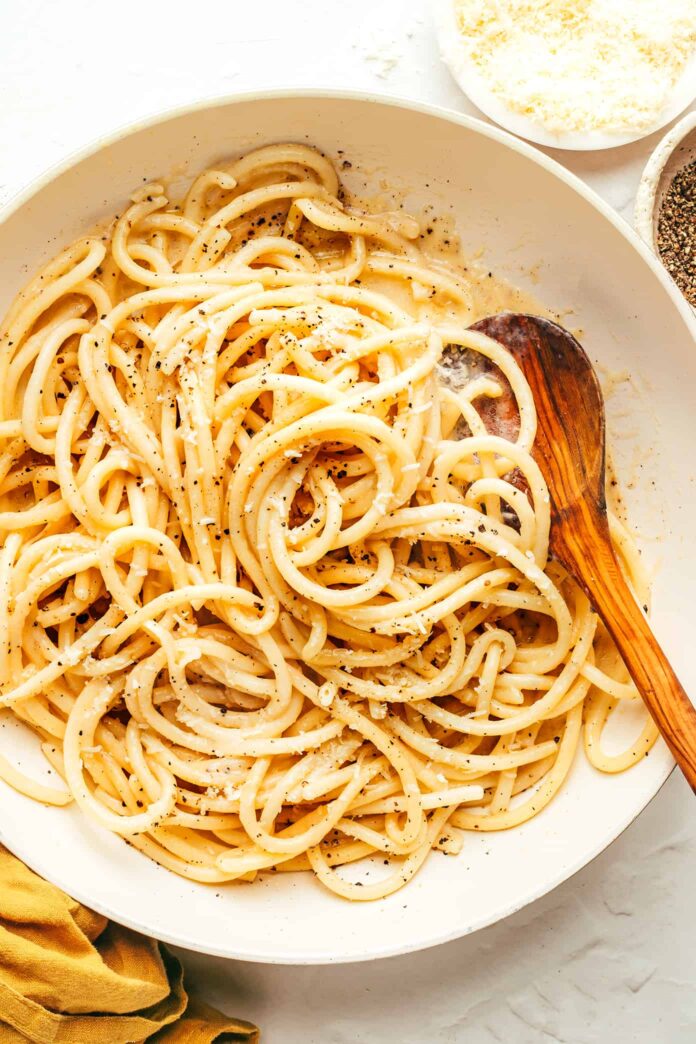
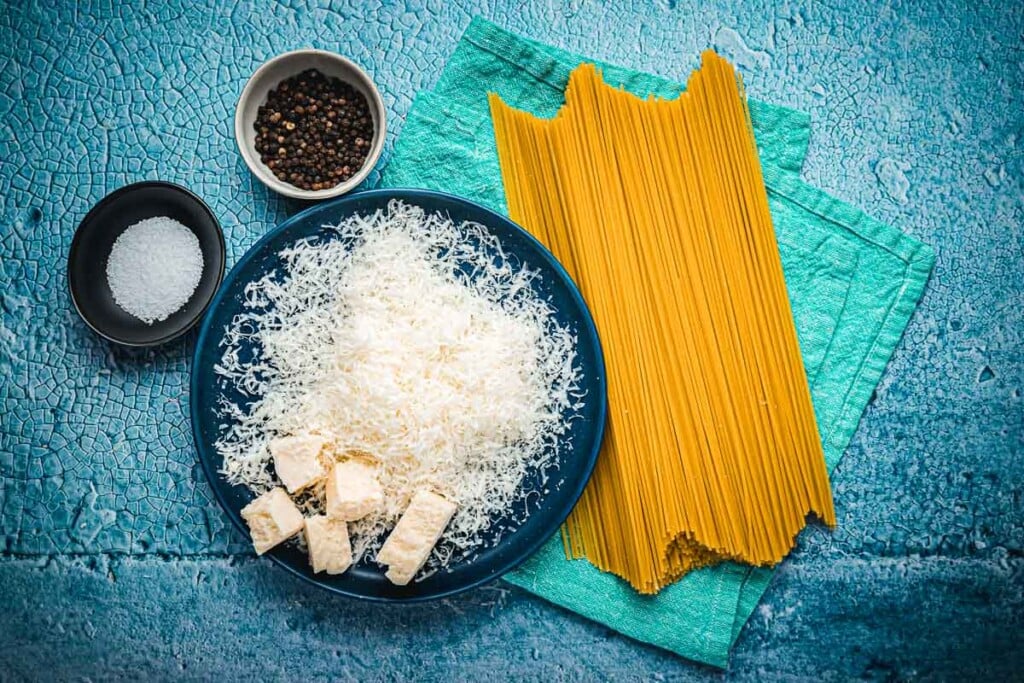
Cacio e Pepe is a traditional Italian pasta dish that has been around for centuries. It’s delicious, flavorful, and incredibly easy to make with just three simple ingredients – Pecorino Romano Cheese (Cacio), black peppercorns, and pasta. This classic pasta dish is a staple of Italian cuisine and can be ready in minutes. Try this authentic Italian Cacio e Pepe recipe today for a quick, delicious dinner.

Ingredients For Cacio e Pepe

  • Kosher salt
  • 6oz pasta, or spaghetti
  • 3 tbsp unsalted butter, cubed, divided
  • 1 tbsp freshly cracked black pepper
  • ¾ cup finely grated Grana Padano or Parmesan
  • ⅓ cup finely grated Pecorino

Preparation

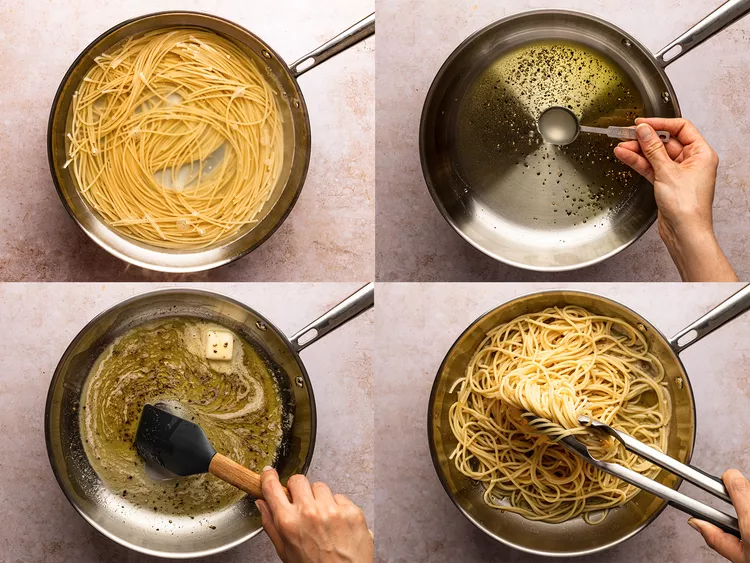
  • In a 5-qt saucepan, bring 3 quarts of water to a boil. Add salt, add the pasta, and boil, tossing periodically, until just cooked, approximately 2 minutes. Drain the pasta, saving 3/4 cup of the cooking water.
  • Step 2 Melt 2 tablespoons of butter in a Dutch oven or other big pot or pan over medium heat in the meanwhile. Pepper should be added and cooked for about one minute while stirring the pan.
  • Step 3 Stir in 1/2 cup of the leftover pasta water and bring to a simmer in the skillet. Pasta and remaining butter are added. Turn down the heat, add the Grana Padano, and whisk and toss with tongs until melted. Take the pan off the heat, add the Pecorino, and swirl and toss until the cheese melts, the sauce covers the pasta, and the pasta is cooked through.

Recipe Notes!

Pecorino should be grated as finely as possible. The ideal tool for this job is a Microplane. Instead of being tightly packed, the grated cheese should be light and airy.
Use more pepper than you would initially imagine. When we cook, the majority of us add pepper sparingly, almost as an afterthought. But since pepper is essential to cacio e pepe, it must stand out. To bring out the pepper’s fruity and spicy flavors, roast the pepper before grinding it, using at least 2 tablespoons. You may get a mixture of coarsely and finely crushed pepper by pounding the peppercorns in a mortar and pestle; this mixture is excellent, in my view. Avoid using ground pepper from a shaker or canister at all costs because it won’t be nearly as aromatic or pungent.

Don’t linger. You must eat cacio e pepe hot. Whatever degree of creaminess you may get in your sauce, it will become stiffer as it cools. Mix, serve, and have fun!
Find a mixing technique that suits you. My favorite approach is to combine cheese, pasta water, and noodles in the pasta pot while vigorously stirring. However, some chefs like to combine everything in a big bowl after making a paste of cheese and pasta water. This is how you do it: Mix the pepper, 2/3 of the shredded pecorino, and just enough boiling pasta water to make a paste. More water can be added while whisking to assist the cheese melt and dissolve. Work out any lumps.

Nutrients Value

  • Calories: 357.8kcal
  • Carbohydrates: 58.2g
  • Protein: 16g
  • Fat: 6.3g
  • Saturated Fat: 3.5g
  • Cholesterol: 19.7mg
  • Sodium: 1006.8mg
  • Potassium: 207.1mg
  • Fiber: 2.8g
  • Sugar: 2.2g
  • Calcium: 224.8mg
  • Iron: 1.3mg

To sum up!

It’s the perfect meal for a busy weeknight, as it requires minimal effort and tastes delicious. Follow the recipe and make this delightful dish today as well as enjoy the comforting flavors of Italy. If you’re looking for a quick and light Italian meal, look no further than the classic Cacio e Pepe recipe. It’s an incredibly flavorful dish that only takes minutes to make and is sure to be a crowd-pleaser. So if you’re looking for an authentic Italian meal that’s easy to make and tastes amazing, this is the dish for you.

If you try this recipe, please let us know. Please comment if you have questions about the recipe or want to share your version of the Cacio e Pepe. Don’t forget to share it with your friends and family; I am sure they’ll love it too.

MUST TRY: Guacamole: The Versatile and Delicious Mexican Dip for Any Meal!

Guacamole Recipe

0
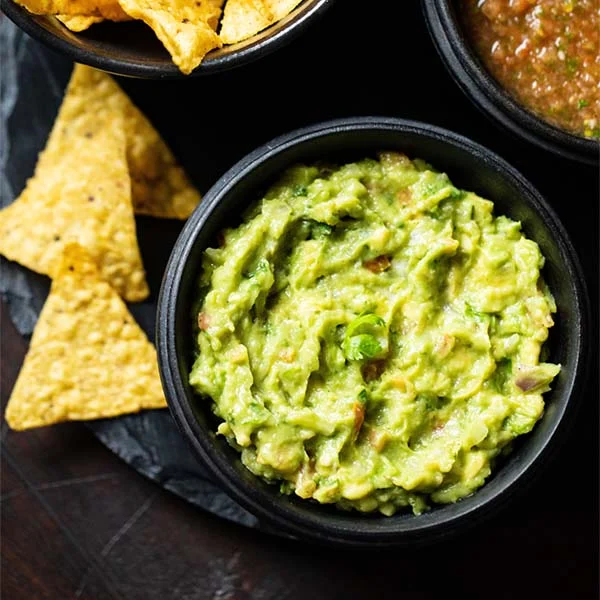
Easy Guacamole

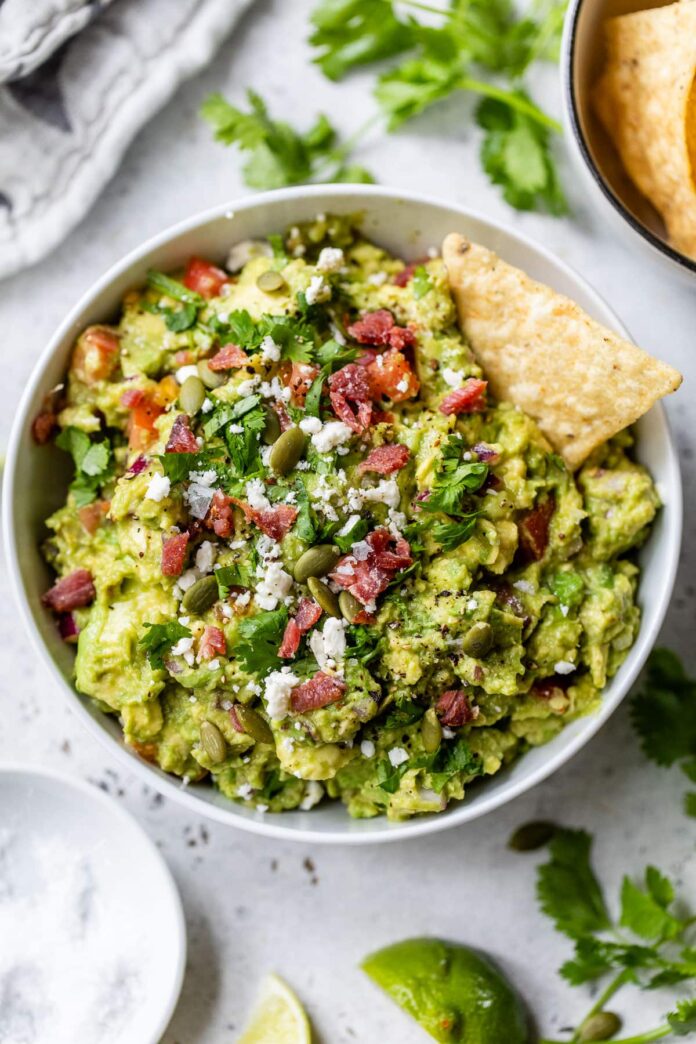
Do you ever find yourself too tired or too busy to make breakfast or dinner? Look no further than the quick and easy Guacamole recipe. This famous Mexican dip is a favorite in many households and for good reason. With just a few simple ingredients and five minutes, you’ll have a delicious and healthy meal or snack. Not to mention, it’s incredibly versatile. Serve your Guacamole dip with toast, tacos, or tortillas for a filling breakfast or lunch.

Need something heartier? Try making grilled sandwiches with Guacamole – the creamy texture and tangy flavor will make for a satisfying and tasty meal. But Guacamole isn’t just tasty – it’s also packed with health benefits. Avocado, the main ingredient in Guacamole, is loaded with healthy fats, fiber, and nutrients such as potassium, vitamin K, and folate. This dip will improve cholesterol levels, reduce inflammation, and even aid in weight loss. So every time you’re in a rush or too tired to cook, whip up some Guacamole for a quick and nutritious meal. Your taste buds and your body will thank you.

Ingredients to Make This Dip

  • 1 avocado
  • 1/2 cup chopped onions
  • ¼ cup finely chopped tomatoes or 1 small tomato
  • 1 teaspoon green chilies or jalapeno pepper
  • 1 small garlic clove
  • 1/2 teaspoon black pepper or ground black pepper
  • 2 tablespoons chopped cilantro
  • 2 teaspoons lemon juice or add
  • 2 teaspoons extra virgin olive oil
  • kosher salt
  • a few coriander leaves

How to Make Guacamole

  • Divide the avocado in half equally. Use a spoon to scrape away the ripe pulp.
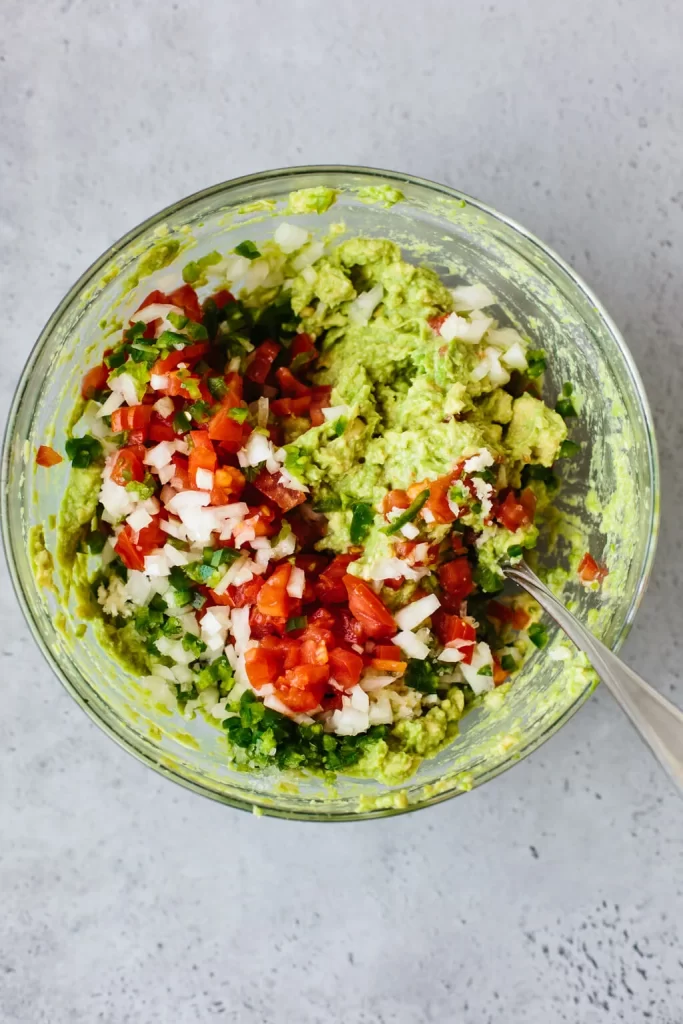
  • Combine it with the remaining ingredients that have been chopped, salt, olive oil, and lemon juice. 
  • Salt and freshly ground black pepper should be used as spices. 
  • The avocado pulp can also be chopped and combined with the other ingredients.
  • As you combine, mash the avocado simultaneously.
  • This guacamole is the greatest, so serve it with toast, tortilla chips, nachos, or as a side to a burrito or quesadilla. While serving, you can add a few coriander leaves as a garnish.

Tips and Notes!

  • You can omit the recipe’s tomatoes, garlic, and olive oil as optional components. 
  • Always use ripe avocados while making these. If the avocados are not quite ripe, wrap them in brown paper or a paper towel and leave them on the kitchen counter for a few days so they may mature.
  • Add 1 small to medium-sized cucumber and 1 tiny bell pepper for a little more crunch. 
  • Alternate options include using fresh parsley in place of the cilantro. If you don’t have any fresh herbs, use dried basil or parsley instead.
  • Cumin: You can also add a little ground cumin to your guacamole dip. 
  • Servings: The recipe yields two servings and is readily adjusted by lowering or raising the number of certain components. 
  • You can substitute Black pepper or cayenne pepper in place of ground pepper. Even sweet or smoked paprika is an option. 
  • Use your preferred salt. I like to use Himalayan pink salt, rock salt, or any mix of the three.

Nutrition Facts

  • Calories: 177 kcal
  • Fat: 15g
  • Saturated Fat: 2g
  • Sodium: 591mg
  • Potassium: 561mg
  • Carbohydrates: 12g
  • Fiber: 7g
  • Sugar: 2g
  • Protein: 3g
  • Calcium: 12mg
  • Iron: 1mg

Conclusion

So, if you’re looking for a quick and easy meal solution that is both nutritious and delicious, look no further than guacamole. With its rich flavor, versatility, and ease of preparation, it’s the perfect choice for busy nights or any time you need a quick and healthy meal. Try out our guacamole recipe today and experience the deliciousness for yourself.

If you try this recipe, please let us know. Please comment if you have questions about the recipe or want to share your version of the guacamole dip. Don’t forget to share it with your friends and family; I am sure they’ll love it too.

MUST TRY: Sizzle up your summer with this flavourful elotes recipe!

Veal Piccata Recipe

0
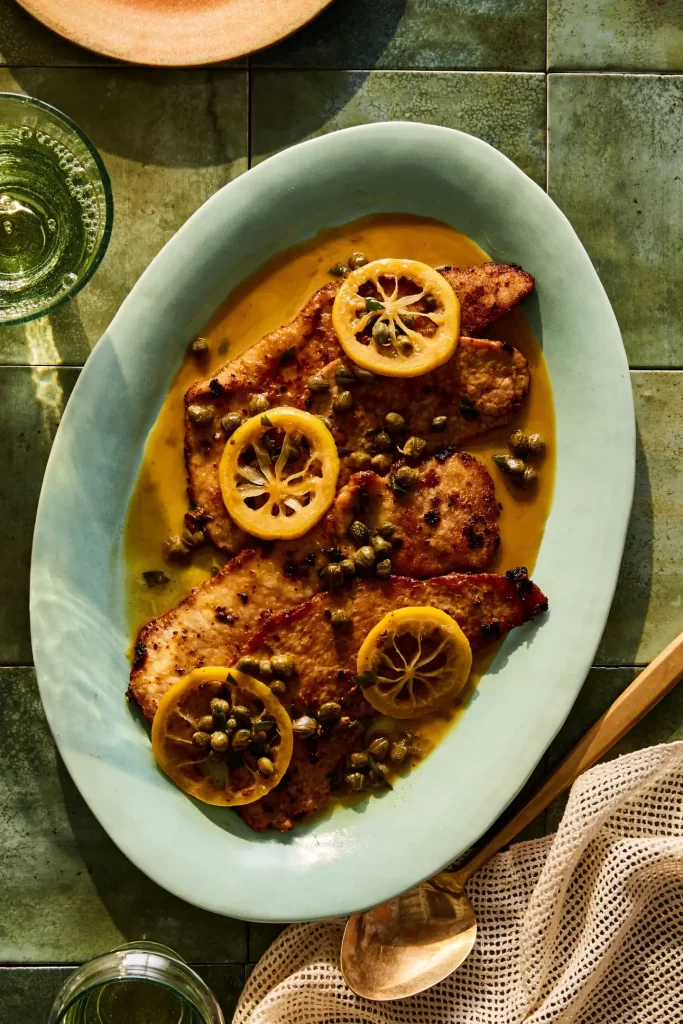
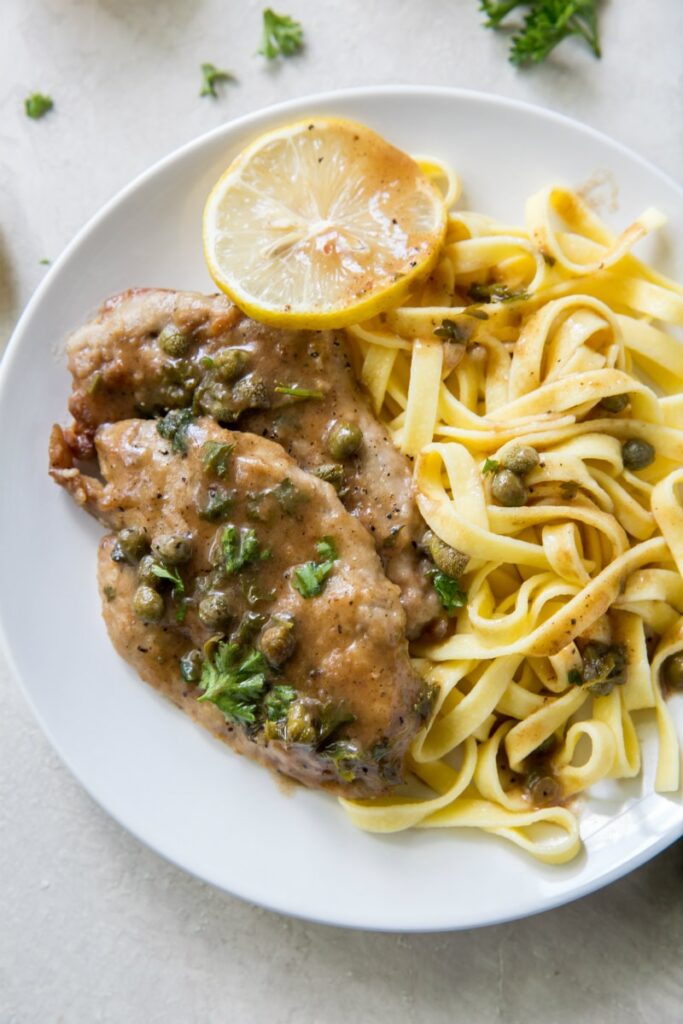
Veal piccata

Veal piccata is one of the simplest dishes you can make. It’s a classic Italian dish made with thin slices of veal and some lemon juice, garlic, salt, and pepper. The veal gets dredged in flour, then pan-fried until it’s golden brown and crispy on both sides. It sounds like a lot of work for a simple meal, but this recipe takes less than 30 minutes from start to finish (including prep time). And when you’re done, you’ll have an awesome dish that tastes great and looks amazing on the plate.

This veal recipe is so delicious and easy to make that we urge you not to pass up this opportunity. It comes from a veal chop or shoulder steak that has been tenderized by being pounded with a mallet (or something similar) until it’s about 1/2 inch thick. If you can’t find veal locally, it may be available frozen at local grocery stores. Look for packages labeled “veal cutlets” or “veal scallops.”

Veal piccata
Image Source: https://www.saveur.com

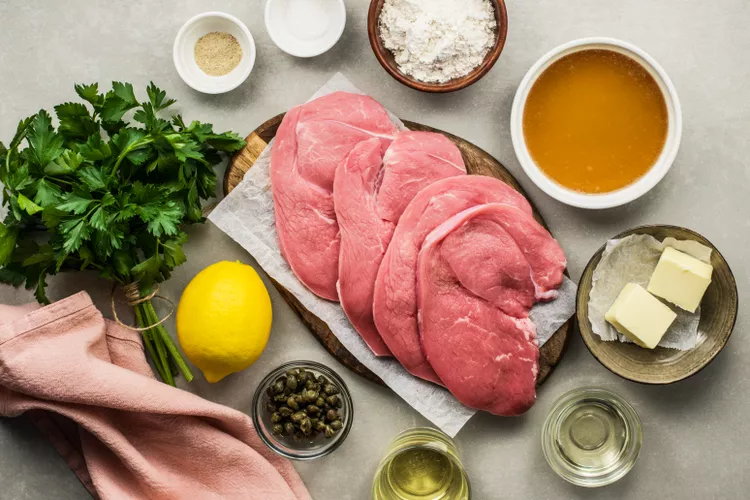
Ingredients Needed

  • 1-pound veal cutlets
  • 1 Tablespoon garlic salt
  • 1/2 Tablespoon black pepper
  • 1 cup all-purpose flour
  • 1/4 cup olive oil
  • 1 cup chicken broth
  • 1/2 cup dry white wine
  • 2 Tablespoons capers
  • 2 Tablespoons lemon juice
  • 2 Tablespoons fresh thyme leaves
  • 3 Tablespoons unsalted butter
  • 1 Tablespoon cornstarch

Things You’ll Need

  • Large heavy-bottomed skillet
  • Vinyl gloves

Directions to make Veal Piccata

  • On all sides, season the veal with garlic salt, and pepper. Each cutlet should be floured and the excess shaken off.
  • Oil in a skillet should be heated to shimmer before serving.
  • Cutlets should fry for 4-5 minutes on each side in heated oil. Get rid of it and keep warm.
  • Taking care to leave any brown remains in the pan, carefully remove half of the oil.
  • Bring the pan to a boil after adding the chicken broth.
  • Add cornflour, white wine, capers, lemon juice, fresh thyme, and capers. Stir well, then bring to a boil.
  • Reintroduce the veal after lowering the heat. Spend 15 minutes simmering.

Tips for making this recipe

  • Frequently, veal Piccata is pounded first and then fried. We don’t pound the meat since we want ours thicker. If you’d want, you can. It is not necessary for piccata. “Pounded flat cooked in a sauce of lemon, parsley, and butter” is what piccata implies. As fresh thyme has a stronger flavor than parsley, we decided to incorporate it into our recipe.
  • For this recipe, Chardonnay, Pinot Grigio, or Sauvignon Blanc are all suitable wine choices. Using drinking wine instead of cooking wine gives your food more flavor. If all you have is cooking wine, by all means, use it.

Nutrition Value

  • Serving: 1 cutlet
  • Calories: 646 kcal
  • Carbohydrates: 38g
  • Protein: 37g
  • Fat: 35g
  • Saturated Fat: 12g
  • Fat: 0.5g
  • Cholesterol: 150mg
  • Sodium: 2865mg
  • Potassium: 700mg
  • Fiber: 2g
  • Sugar: 1g
  • Calcium: 52mg
  • Iron: 4mg

Final words

This dish looks fancy and complicated but really all that’s happening is that you’re browning the meat (which gives it great flavor) and adding some salt to keep it tender. It’s also important not to overcook your veal or else it’ll be tough. But if you’re looking for an easy weeknight dinner that doesn’t take too long and won’t break your budget or make you fat, then this veal recipe is what you need.

If you have questions about the recipe or want to share your version of veal piccata, please feel free to comment. Don’t forget to share it with your friends and family, I am sure they’ll love it too.

MUST TRY: Try making these Chicken Satay Strips for brunch

Lemon Cupcakes Recipe

0
Lemon Cupcakes

There’s nothing like the combination of fresh lemon and cream cheese to make something taste special. This Lemon Cupcakes recipe is simple enough for even beginners but still packs a punch in terms of flavor (and calories!).

Lemons are full of Vitamin C as well as other antioxidants. They also contain high levels of fiber which helps remove toxins from the body. The phytochemicals found in lemons have been shown to prevent cardiovascular disease, cancer, and diabetes. The recipe below is for lemon cupcakes with vanilla buttercream topped with fresh lemon. Go ahead and make these delicious cupcakes and also you can adjust the ingredient amounts according to your preference.

Ingredients to Gather

  • 1/2 cup (115g) unsalted butter, softened to room temperature
  • 1 cup (200g) granulated sugar
  • 2 large eggs at room temperature
  • 1 and 1/2 teaspoons of pure vanilla extract
  • 1 and 1/2 cups (188g) all-purpose flour
  • 2 teaspoons baking powder
  • 1/2 teaspoon salt
  • 1/2 cup (120ml) whole milk
  • 1 and 1/2 Tablespoons lemon zest
  • 1/3 cup (80ml) fresh lemon juice
  • topping: vanilla buttercream and additional lemon slices

Directions to make Lemon Cupcakes

  • Set the oven’s temperature to 350°F (177°C). Make sure you use cupcake liners in a 12-cup muffin tin.
  • Beat the butter and sugar for about 2 minutes on medium-high speed using a hand-held or stand mixer with a paddle attachment. As necessary, scrape the bowl’s bottom and sides. 
  • Add the eggs and vanilla essence and beat at medium-high speed for approximately a minute or until mixed. As necessary, scrape the bowl’s bottom and sides. Place aside.
  • Combine the salt, baking soda, and flour in a larger basin. 
  • The milk, lemon juice, and lemon zest should be added gradually after the dry components have been combined with the wet ones. 
  • Turn the mixer on low speed. After combining, turn off the mixer.
  • Fill each cupcake liner equally with batter, about two-thirds full. For 18 to 22 minutes, bake. A toothpick in the center will come out clean when they’re finished. 
  • Bake at the same oven temperature for 11 to 13 minutes for around 30 small cupcakes. Take the baked goods out of the oven and let them cool fully before icing. Normally, I let them finish cooling in the muffin tin.
  • Vanilla buttercream is used to frost cupcakes that have cooled. If using lemon zest as a garnish, add it just before serving. 
  • There can be leftovers depending on how much frosting you use on each cupcake.
  • Cupcake leftovers store nicely for three days in the refrigerator when properly wrapped.

Cooking Tips

  • Prepare Ahead and Freeze Directions: Covered and kept at room temperature, cupcakes can be prepared a day in advance. Frosting may be prepared a day ahead of time, covered, and kept in the fridge until needed. Use an electric mixer set to low speed, and whip in an additional splash of milk to the vanilla buttercream because it can harden and thicken in the refrigerator overnight. Before serving, decorate cupcakes. Whether frosted or unfrosted, cupcakes may be frozen for up to 2-3 months. In the refrigerator, thaw overnight.
  • Additional Resources: Cupcake liners, a 12-cup muffin pan, a stand-alone electric mixer, a zester, a disposable or reusable piping bag,, and a Wilton 1M piping tip are all necessary baking supplies.
  • Milk: Whole milk makes for a rich, moist cupcake, but any milk, dairy or non-dairy, can do in a hurry.
  • Lemons: You’ll need roughly 2 or 3 medium lemons to get this much zest and juice.
  • Garnish: Instead of a lemon slice as a garnish, you may top the cupcakes with white chocolate chips, sprinkles, or crushed hard lemon candies.
  • Next, you can also try making a lemon-blueberry cake. The same recipe is used to produce a layer cake, just doubled.

Nutrition Information

  • Serving: 1 cupcake
  • Calories: 394 kcal
  • Carbohydrates: 56g
  • Protein: 3g
  • Fat: 20g
  • Saturated Fat: 11g
  • Cholesterol: 89mg
  • Sodium: 242mg
  • Potassium: 112mg
  • Fibre: 1g
  • Sugar: 43g
  • Calcium: 52mg
  • Iron: 1mg

Conclusion

This lemon cupcakes recipe is the best way to learn how to make the moist and fluffy cupcakes. These simple buttermilk cupcakes is easy to prepare, delicious, and perfect for any occasion. It’s also easy to add your own flavorings or mix-ins, so go ahead and experiment.

If you try this recipe, please let us know. Please comment if you have questions about the recipe or want to share your version of lemon cupcakes. Don’t forget to share it with your friends and family; I am sure they’ll love it too.

MUST TRY: Spice Up Your Week with these Vegetable Stuffed Peppers!

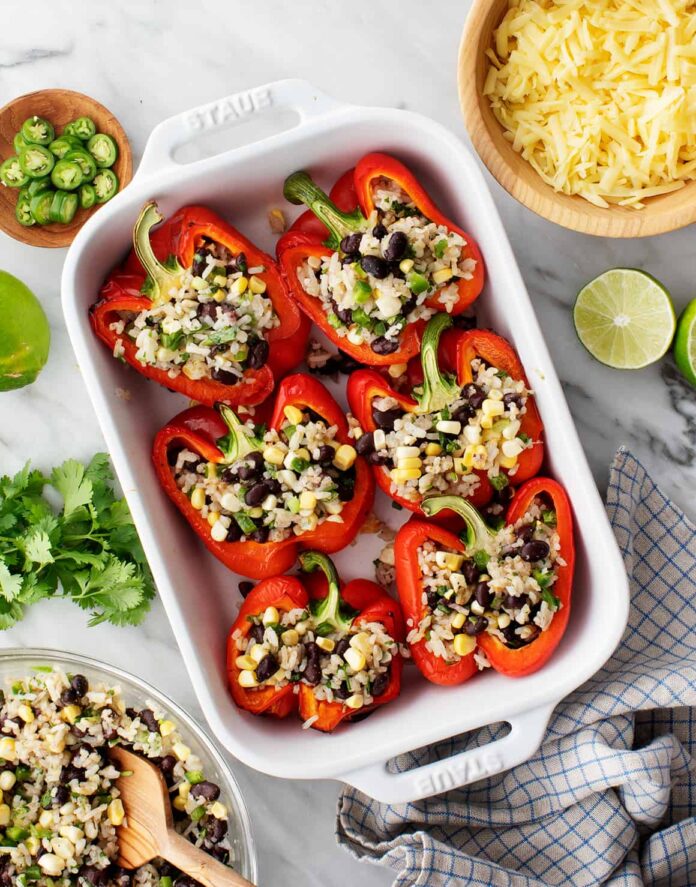
Vegetable Stuffed Peppers Recipe

0
stuffed bell peppers

Are you tired of eating the same old boring meals every week? Are you looking for a new delicious vegetarian dish that the whole family will love? Look no further than Vegetable stuffed peppers. These Quinoa and Bean Stuffed Peppers perfectly combine easy, flavorful, and filling. Packed with protein-rich quinoa and beans, these peppers are a great way to get your daily dose of nutrients. They make the perfect freezer meal and are great for meal prep.

Vegetable Stuffed Peppers are a great way to incorporate more plant-based foods into your diet without sacrificing flavor or satisfaction. To make these Stuffed Peppers, all you need to do is gather your ingredients and get cooking. You can even freeze the leftover stuffed peppers for a quick and easy meal later.

Ingredients

  • 4 large red bell peppers or any colour you choose
  • 1 tbsp olive or vegetable oil
  • ½ medium yellow onion diced
  • 3 cloves minced garlic
  • 1 cup Mexican Rice
  • 1 tsp salt
  • 2 Roma tomatoes diced
  • 3-4 green onions chopped
  • 2 tbsp taco seasoning
  • 1 can black beans drained and rinsed (13.5 oz)
  • 1 cup frozen corn
  • 1 cup shredded pepper jack cheese
  • chopped fresh cilantro garnish

Instructions For Vegetable Stuffed Peppers Recipe

  • Set the oven to 400 F.
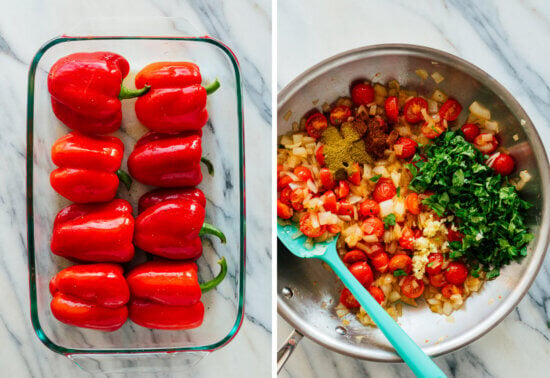
  • Remove all the seeds and white membranes from the bell peppers by cutting them in half lengthwise, from stem to base.
  • When the edges of the bell peppers have started to blister and are tender enough to pierce with a fork, drizzle in olive oil and bake for 20 to 25 minutes.
  • In a large pan over medium-high heat, add the onion, salt, and sauté until the onion softens while the bell peppers roast. Cook the tomato for 3 to 5 minutes after adding it.
  • Then, stir in the garlic and taco seasoning, cooking for 30 to 60 seconds or until they are fragrant.
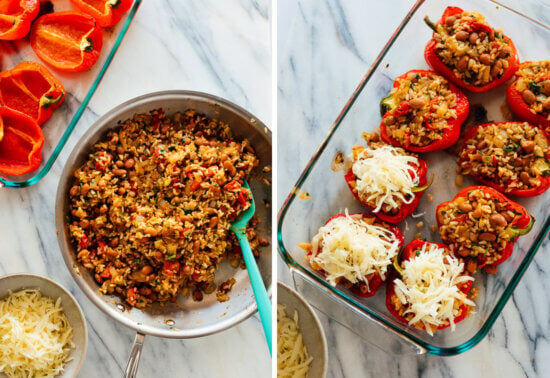
  • Add Mexican Rice, black beans, corn, and green onions. Stir everything together, then warm everything up. To taste, add salt and pepper.
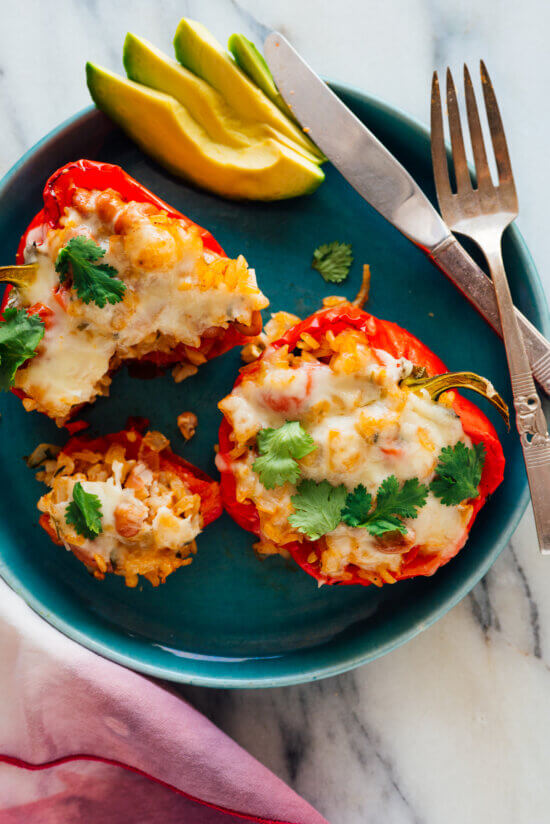
  • Give each bell pepper a heaping scoop of the mixture after the peppers cook. Add cheese to the top of each one, then re-bake until the cheese is melted.
  • Add freshly chopped cilantro as a garnish.

Notes and Tips!

  • To prepare meals for the next week, you can create the filling in advance. To fill the peppers, bake them first and reheat the stuffing. 
  • If you want to switch things up, quinoa and lentils are great alternatives to Rice.
  • You may substitute pinto beans for black beans if you have none.
  • Rice should always be cooked before being combined with peppers. Adding uncooked Rice to the stuffing won’t cook with the peppers and will be crisp and unpleasant. 
  • Additionally, chickpeas are a fantastic addition to the filling.
  • Stuffed pepper leftovers keep in the refrigerator for up to 4 days. An airtight container must be used for storage. 

Nutrition Content

  • Calories: 499kcal
  • Carbohydrates: 76g
  • Protein: 19g
  • Fat: 14g
  • Saturated Fat: 6g
  • Cholesterol: 25mg
  • Sodium: 849mg
  • Potassium: 893mg
  • Fiber: 12g
  • Sugar: 9g
  • Calcium: 271mg
  • Iron: 3mg

Final words

Not only are these vegetable Stuffed Peppers delicious and easy to make, but they are also a great option for meal prep. Make a big batch on the weekend and enjoy them for lunch or dinner throughout the week. Whether you’re a vegetarian or just looking for a healthy and delicious meal, vegetable Stuffed Peppers are a perfect choice. So why not give them a try and see for yourself why they are quickly becoming a family favourite?

If you try this recipe, please let us know. If you have questions about the recipe or want to share your take on vegetable stuffed peppers, please feel free to comment. Don’t forget to share it with your friends and family; I am sure they’ll love it too.

MUST TRY: Protein Pancakes: The Ultimate Recipe for Healthy Breakfast!

Protein Pancakes Recipe

0
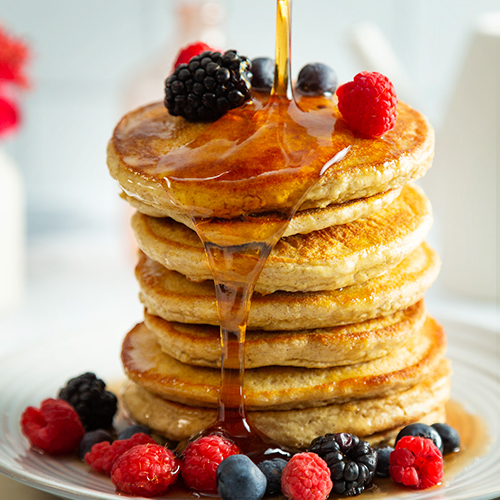
Protein pancake

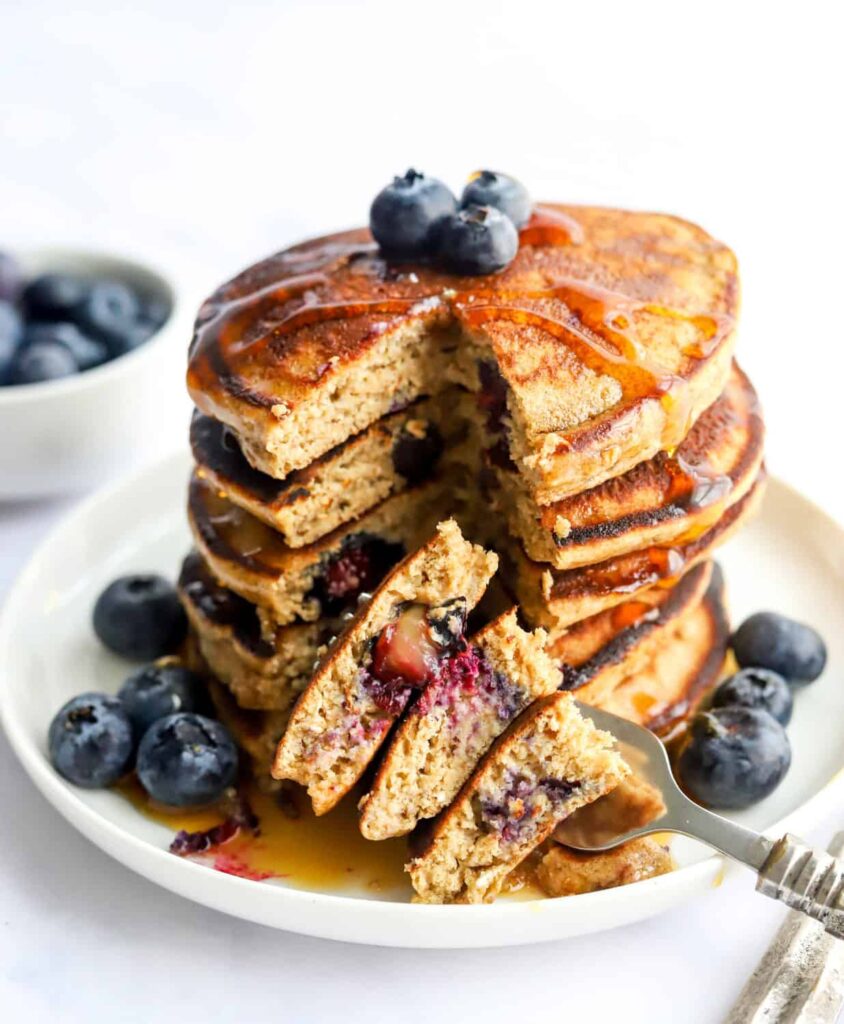
If you love pancakes and want to live a healthy lifestyle, then you’re in luck. The perfect solution to your dilemma is here – protein pancakes. These pancakes are made with protein powder, eggs, milk, and spices, making them a nutritious and delicious breakfast option. Protein pancakes differ from regular pancakes because of their high amount of protein. With 37g of protein per serving, these pancakes will keep you full and satisfied for hours.

They’re also packed with complex carbs and fiber, meaning you’ll have sustained energy throughout the day. Not only are these pancakes healthy, but they’re also easy to make. All you need to do is blend the ingredients together and cook them on a non-stick pan. The result is a light and fluffy pancake that’s bursting with flavor. The best part is that you can customize your protein pancakes with your own toppings.

Image Source: https://pinchmegood.com

Ingredients

  • 2 large eggs
  • 1 tablespoon vanilla extract
  • 1 teaspoon stevia glycerite (equals ⅓ cup sugar)
  • ½ cup plain Greek yoghurt (not regular yoghurt)
  • 2 scoops unsweetened whey protein powder not packed (about 40 grams)
  • 1 teaspoon baking powder gluten-free if needed
  • Cooking spray for the griddle

Steps to Make Protein Pancakes

  • Whisk the eggs, vanilla, stevia, and yoghurt in a medium bowl.
  • When adding the protein powder, mix it in well until it is well-combined and smooth. If necessary, scrape the bowl’s sides using a rubber spatula.
  • Add the baking powder by whisking. Then, while the griddle is heating, let the batter rest. As it sits, it becomes somewhat thicker.
  • A big 14-inch nonstick skillet or nonstick griddle should be heated to medium heat (not higher). Spray some oil on.
  • Pour heaps of the batter onto the griddle using a 1.5-tablespoon cookie scoop. A skillet can hold three to four pancakes, while a double-burner griddle would likely hold eight.
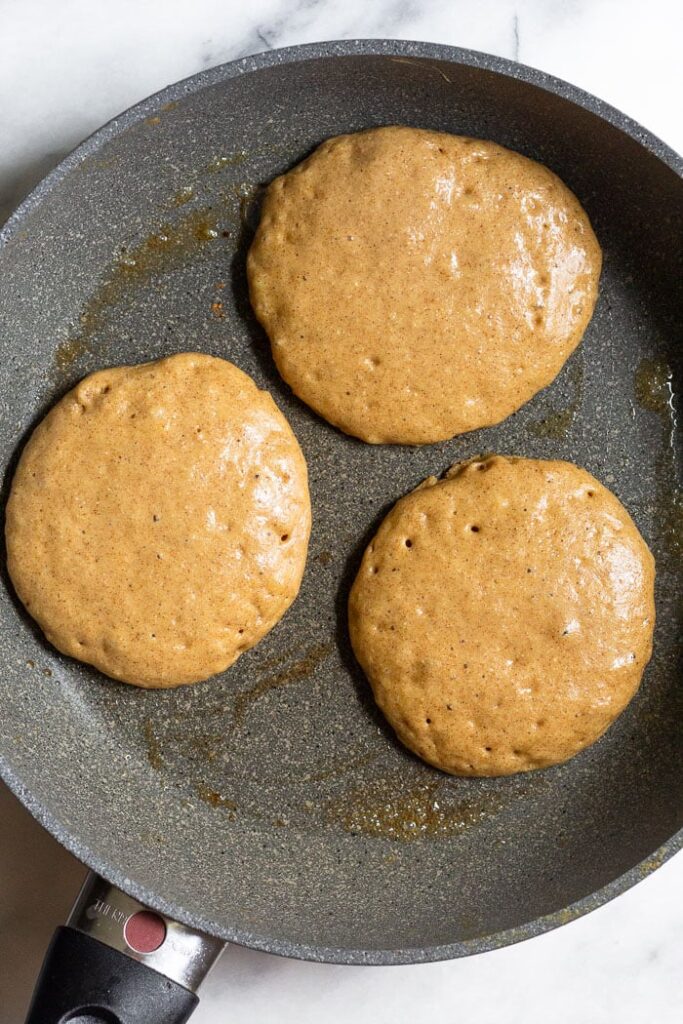
  • Cook the pancakes for over one minute or until they bubble on top. It usually occurs quickly.
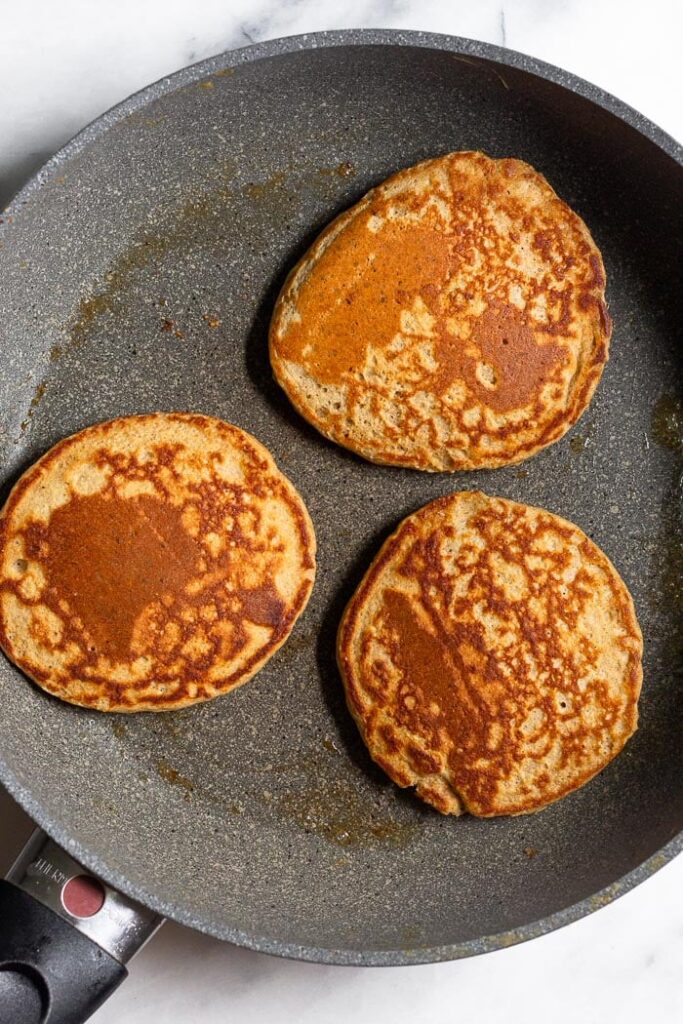
  • Flip them over and fry the other side for 10–20 seconds. It’s crucial to avoid overcooking them to avoid rubbery, dry results.
  • Cook the remaining pancakes while transferring the cooked pancakes to a platter, covering them with foil to keep them warm. Serve right away.
Image Source: https://eatthegains.com

Recipe Notes

  • This recipe does not work with peas or other non-dairy protein powders. 
  • Whole milk yogurt is acceptable but must be Greek and not standard yogurt. I use nonfat Greek yogurt.
  • Since the batter is thin and spreads out, making little pancakes is crucial (I use a 1.5-tablespoon cookie scoop rather than a 4-tablespoon ice cream scoop) and fry them as little as possible; they should only be cooked for a few seconds on each side.
  • Advice: Depending on your protein powder, you might need to alter the water to thin down the batter. Reduce the oats by up to a third, but no more, since the batter will become too thin to cook if you desire more low-carb pancakes.
  • Variations: Replace vanilla protein powder with another flavor, such as chocolate. Swap out blueberries for other low-carb fruit like raspberries and strawberries.
  • Suggestions: Serve with fresh berries on top and a drizzle of sugar-free syrup.
  • Storage: Pancakes may be refrigerated for up to 24 hours in an airtight container before being reheated in the microwave. Before storing pancakes in the refrigerator, let them cool fully. If not, the moisture will cause them to become wet.
Image Source: https://eatthegains.com

To sum up!

Top them with fresh berries, nuts, or even a drizzle of maple syrup. The possibilities are endless, and you’ll never get tired of eating these delicious pancakes. Protein pancakes are perfect for anyone looking for a well-balanced breakfast that’s both healthy and tasty. They’re also a great option for athletes or people who are trying to build muscle.

With the high amount of protein they contain, protein pancakes can help you meet your daily protein requirements and aid in muscle recovery after a workout. If you’re looking to switch up your breakfast routine and try something new, consider making protein pancakes. They’re easy to make, packed with nutrients, and customizable to your taste preferences. Don’t wait any longer. Try protein pancakes today.

If you try this recipe, please let us know. Please comment if you have questions about the recipe or want to share your version of the protein pancake. Don’t forget to share it with your friends and family; I am sure they’ll love it too.

MUST TRY: Shrimp Alfredo pasta – a quick and delicious weeknight meal!

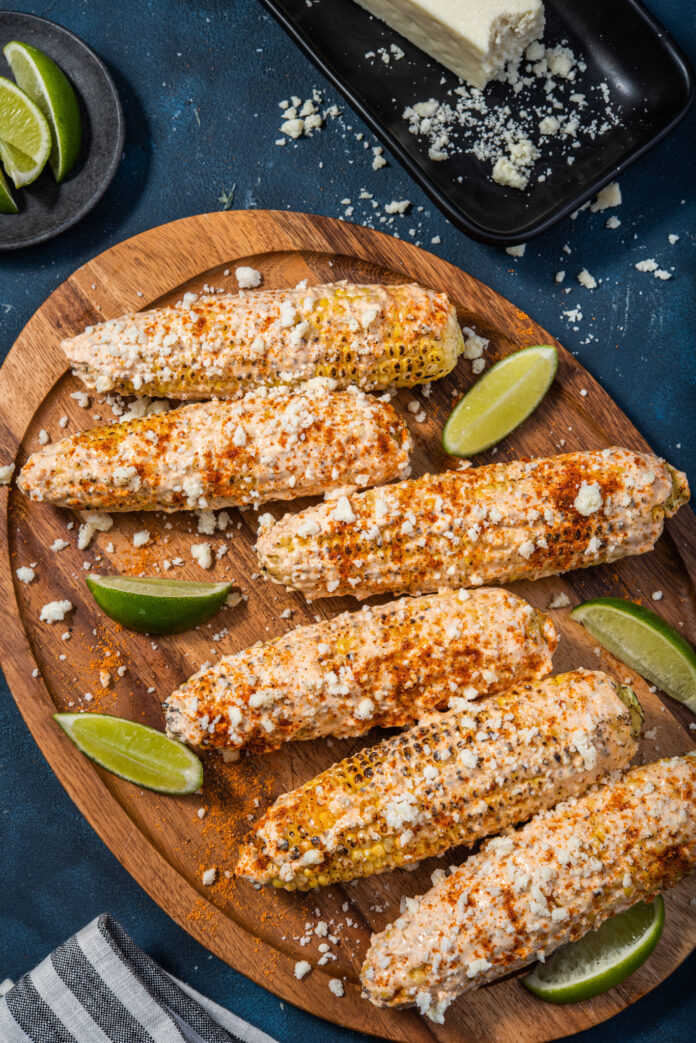
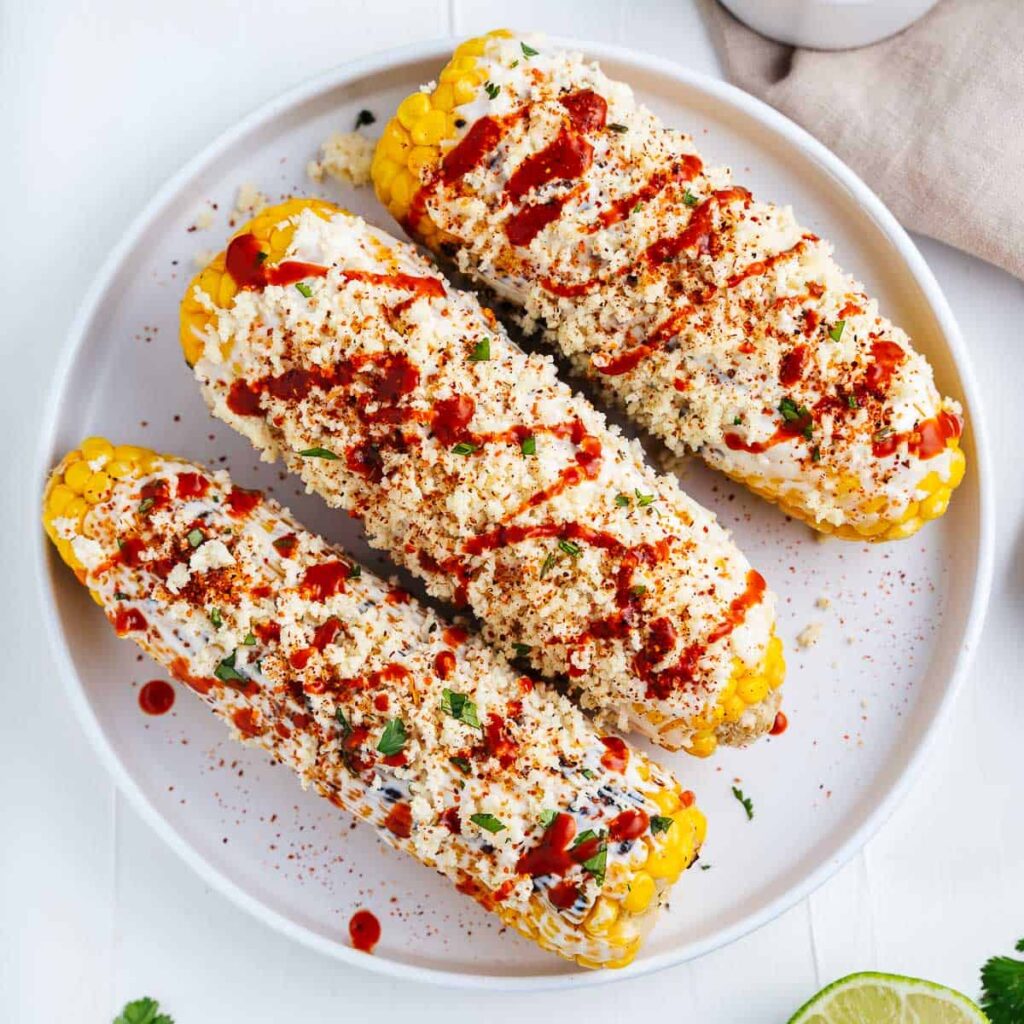
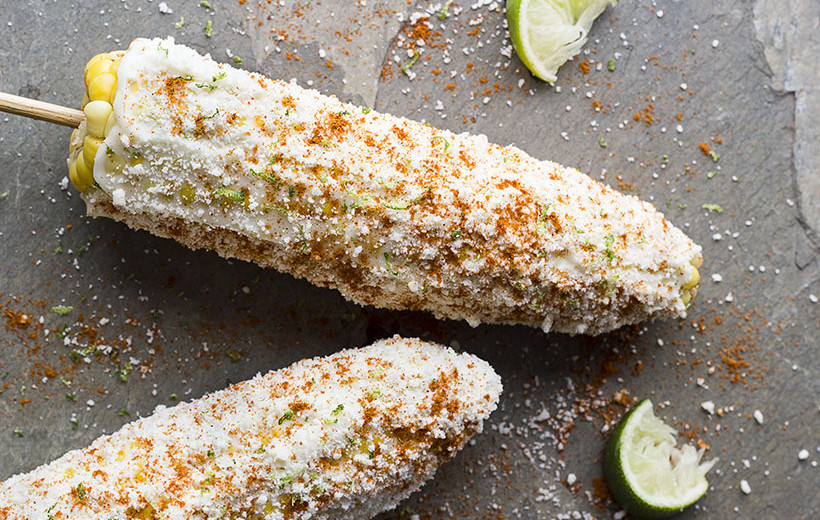
Elotes Recipe – Grilled Mexican Street Corn

0
chile and lime elotes

Are you looking to spice up your summer barbecues with a new and delicious dish? Look no further than the elotes recipe!

This dish takes a classic summertime staple, grilled corn on the cob, and transforms it into a mouth-watering treat with a tangy twist. With just a few simple ingredients like mayonnaise, lime, chilli powder, Cotjia cheese, and cilantro, you can impress your guests with this unique and flavorful recipe. Follow along for step-by-step instructions on how to make elotes, and get ready to add a new favourite to your summer menu.

Ingredients

  • 4 ears of grilled corn
  • 1/4 cup mayonnaise
  • 1 1/2 teaspoon lime juice
  • 1/2 teaspoon chilli powder
  • pinch of cayenne pepper
  • 1/4 teaspoon kosher salt
  • 2 ounces finely grated cotija cheese
  • 2 tablespoons finely chopped cilantro

Instructions to Make Flavorful Elotes

Prepare the Cotija-cilantro blend and chilli-mayo sauce while the corn is cooking. Mayonnaise, lime juice, chili powder, salt, and optional cayenne pepper should all be combined in a small bowl. Stir everything together. Combine the cheese and cilantro in a separate bowl. Separate the two bowls.

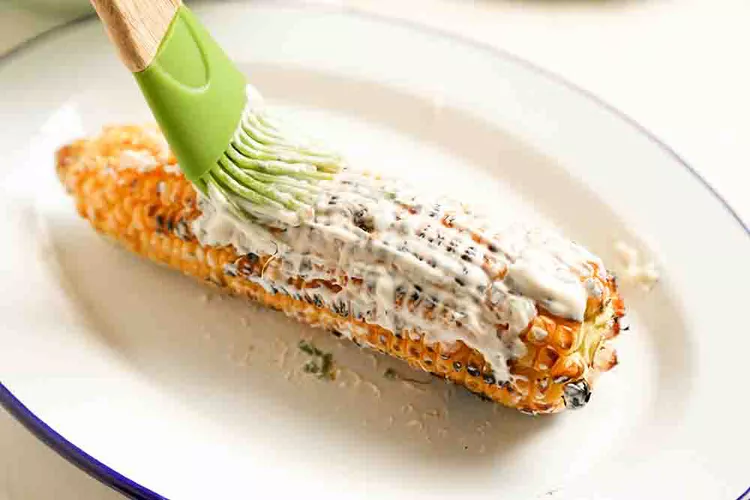
Cover one ear with the mayonnaise mixture when the corn is done. Spread the Cotjia mixture thoroughly on a dish, stirring the corn as required (it will be messy, there is no getting around it!). A separate serving plate should be used for the finished cob. Use the cheese in the bowl and any extra on the plate as required to cover the remaining corn.

Recipe Notes!

REMOVE THE DAIRY: Use less vegan Parmesan than asked for in the recipe because it has a stronger, saltier flavour to replace the Cotija. or simply leave out the Cotija.

MAKE IT VEGAN: Use the vegan sour cream for the mayo and a dash of vegan Parmesan for the Cotija (use less Parmesan than asked for in the recipe because it is saltier). Alternatively, you may skip the cheese and substitute an excellent vegan mayonnaise.

WHERE TO FIND COTIJA CHEESE: Shops that specialise in Mexican goods or well-stocked supermarket stores should carry Cotija. I got near the goat cheese at Whole Foods, and I purchased it. If you can’t locate it, use finely grated Parmesan or crumbled feta cheese.

Nutrients Value

Calories241
% Daily Value*
Total Fat 16.7g21%
Saturated Fat 3.8g
Trans Fat 0g
Polyunsaturated Fat 4.2g
Monounsaturated Fat 7.6g0%
Cholesterol 29.2mg10%
Sodium 386.2mg17%
Total Carbohydrate 20g7%
Dietary Fiber 2.2g8%
Sugars 6.5g
Protein 6.2g12%

Conclusion

If you’re craving something bold and flavorful to add to your grilling repertoire, look no further than the elotes recipe. This dish has been a staple of Mexican street food for decades, and for a good reason. With its juicy, charred corn on the cob, tangy mayonnaise, and savoury cheese and spice toppings, elotes are the perfect way to spice up your next barbecue or outdoor gathering. Whether you’re a seasoned grill master or just starting out, this recipe is easy to follow and sure to impress your guests. So fire up the grill and get ready to taste the delicious flavours of elotes!

If you try this recipe, please let us know. If you have questions about the recipe or want to share your version of elotes, please feel free to comment. Don’t forget to share it with your friends and family; I am sure they’ll love it too.

MUST TRY: Egg salad recipe- a perfect on-the-go meal that is healthy too!

Egg Salad Recipe – Quick and Healthy

0
egg salad

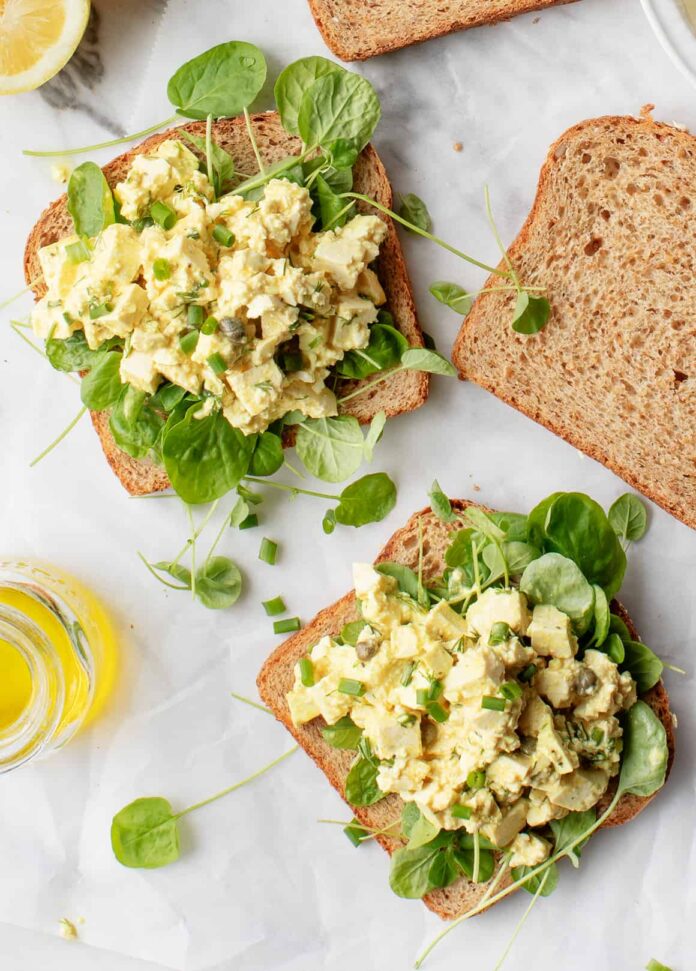
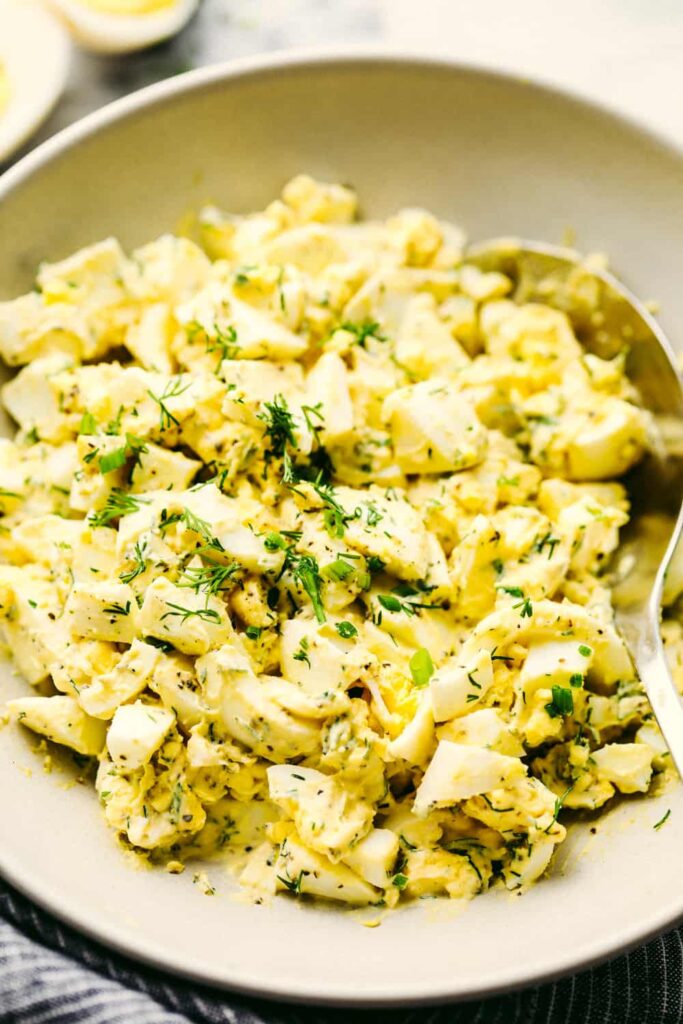
This classic egg salad recipe features foolproof hard-boiled eggs, mayonnaise, mustard, and crunchy mix-ins which is perfect for light meals or sandwiches all year long. Egg salad is versatile but easy to make. You can serve it as an appetizer or main course with crackers or bread and a side of veggies. It also works well as part of a lunch box when packed along with some celery sticks and carrots (or any other veggies you like).

Eggs are an inexpensive source of protein that can be eaten at any time of day. They’re also a great way to get in nutrients like vitamin D and selenium — both most importantly for healthy skin, bones and joints.

Ingredients

  • 8 large eggs, cold
  • 4 cups cold water
  • 4 cups ice cubes
  • ½ cup mayonnaise
  • 1 tablespoon ground mustard
  • 2 teaspoons lemon juice
  • ¼ cup celery, ¼” dice
  • 1 tablespoon red onion, minced
  • 1 teaspoon chopped chives
  • ½ teaspoon kosher salt
  • ¼ teaspoon black pepper

Steps to Make Egg Salad

Boil the Eggs: Fill a big saucepan with water so the eggs are covered by an inch of water. Water should slowly boil at 200°F (93°C). Place the eggs carefully in the boiling water, then boil them for 30 seconds. Turn the heat down to low and cover the pot. Cook for 12 minutes at a low simmer.

Chill the eggs: Prepare an ice bath in a medium dish with 4 cups of water and ice for the eggs to be chilled. As soon as the eggs are through frying, please place them in the ice bath to cool instantly for 15 minutes.

Peel and chop: Peel the cooled eggs after cracking the shell. The hard-boiled eggs should be finely chopped using a chef’s knife.

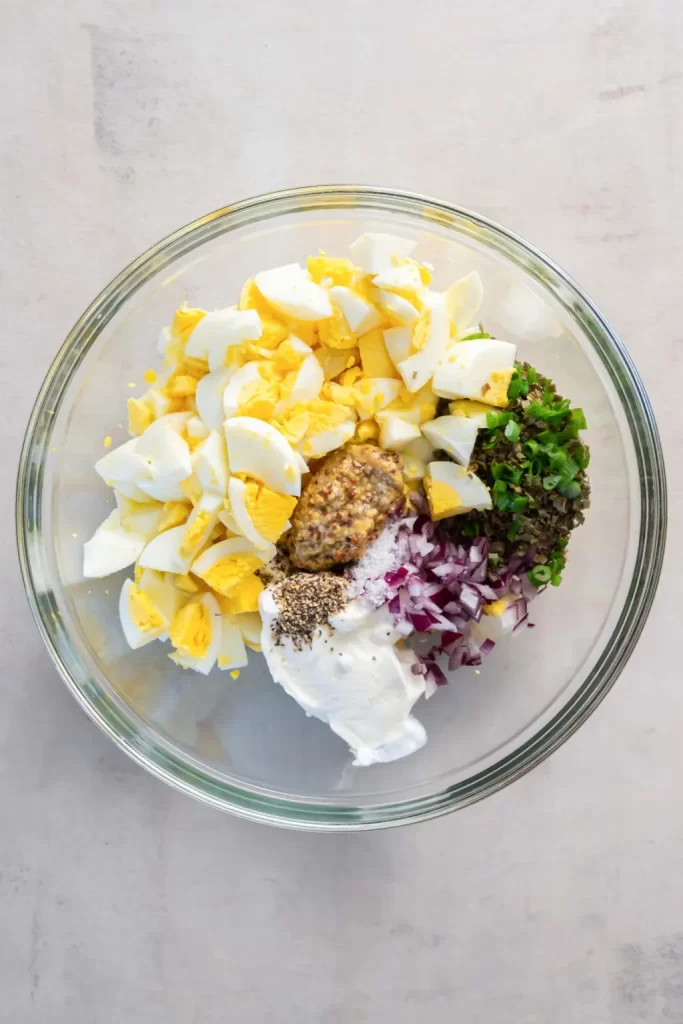
Combine: In a medium bowl, stir together the chopped eggs, mayonnaise, mustard, lemon juice, celery, red onion, chives, salt, and pepper.

Tips and Tricks

  • For faster preparations, boil the eggs prior to the time and keep them in the refrigerator.
  • In place of the red onion, try substituting finely chopped celery, shallot, or green onion.
  • Use additional fresh herbs in place of or in addition to the chives.
  • If you’d like, you may swap out the Dijon mustard with yellow mustard.
  • After combining everything, taste the egg salad and season to your preferences. Add some Greek yogurt or mayonnaise if it’s not creamy enough.

Nutrition Value

  • Calories: 110kcal
  • Carbohydrates: 2g
  • Protein: 10g
  • Fat: 7g
  • Saturated fat: 2g
  • Cholesterol: 246mg
  • Sodium: 273mg
  • Potassium: 112mg
  • Fiber: 0.3g
  • Sugar: 1g
  • Calcium: 59mg
  • Iron: 1mg

Final Words

Eggs are a good source of protein and vitamins A and B12. They’re also low in fat and cholesterol free. But most importantly, don’t forget about their high fibre content. To keep things simple, we recommend using readymade mayo instead of homemade; however, if you prefer making it yourself, we suggest adding some vinegar into the mix so that it stays nice and creamy once mixed together with everything else.

If you try this recipe, please let us know. If you have questions about the recipe or want to share your version of hamburger soup, please feel free to comment. Don’t forget to share it with your friends and family; I am sure they’ll love it too.

MUST TRY: Make this refreshing sweet potato shepherd’s pie for dinnertime!