Home Blog Page 7

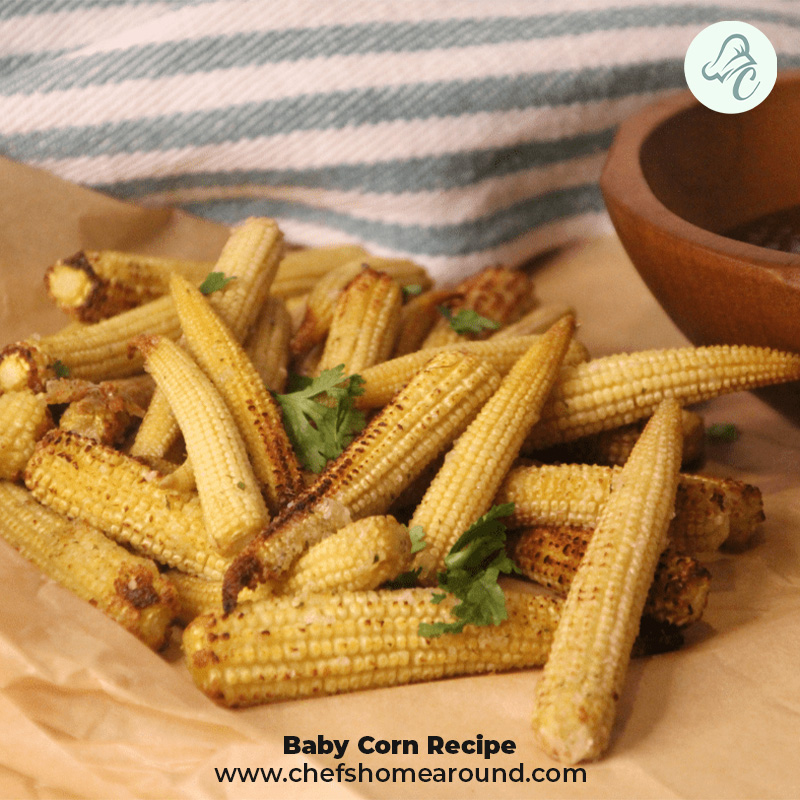
Fried Baby Corn Recipe- Quick and Delicious Snack

0
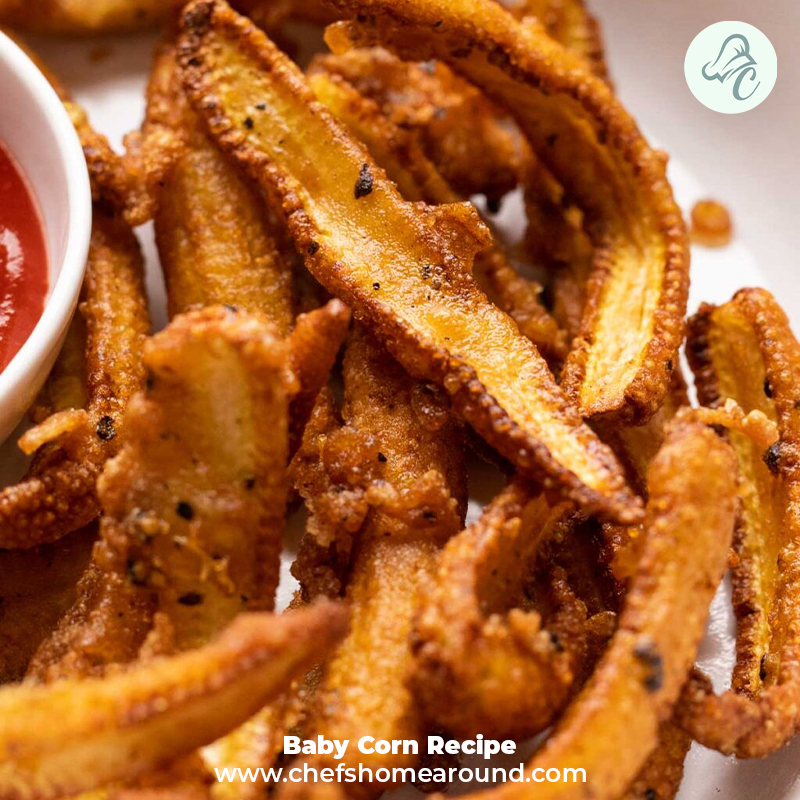
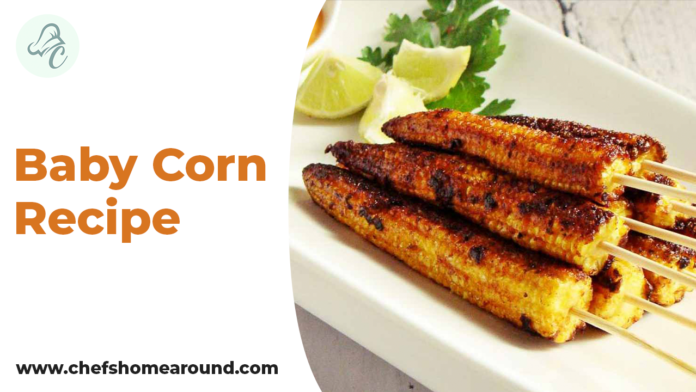
Baby Corn Recipe

Baby Corn is a highly versatile vegetable that can elevate the taste and texture of various dishes. Whether you are preparing salads, soups, cakes, curries, rice, pasta, or even sandwich stuffing, baby corn can be a delightful addition. One of the best things about the baby corn recipe is its crispiness and crunch, which enhances the overall flavour profile of the dish. Its unique texture and taste make it a favourite among people of all ages, including kids. So, whether you want to make a healthy salad or a savoury curry, baby corn is an ingredient that can effortlessly bring that extra level of satisfaction to your taste buds. So, dive in with us to make a fried baby corn recipe, which is healthy, tasty and, most importantly, prepared in just 20 minutes.

About Fried Baby Corn Recipe!

Fried Baby Corn Recipe is a delicious delicacy that tantalizes the taste senses and gives your cooking a distinctive touch. It is crispy, soft, and brimming with flavour. This dish will sate your cravings whether you’re a die-hard foodie or just looking for a novel and exciting snack. This meal is the ideal fusion of textures and flavours, with its golden and crispy surface giving way to the delicious sweetness of baby corn inside. Come along with us as we set out on a culinary adventure to learn how to create these delightful bits of fried perfection.

Ingredients Needed:

  • 1 cup baby corn, cleaned and trimmed
  • 1/2 cup all-purpose flour
  • 1/4 cup cornstarch
  • 1 teaspoon ginger-garlic paste
  • 1/2 teaspoon red chilli powder
  • 1/2 teaspoon turmeric powder
  • 1 teaspoon garam masala
  • Salt to taste
  • Oil for deep frying

For the batter:

  • 1/2 cup all-purpose flour
  • 1/4 cup cornstarch
  • A pinch of baking soda (optional)
  • Salt to taste
  • Water

For the dipping sauce:

  • 1/4 cup mayonnaise
  • 1 tablespoon tomato ketchup
  • 1 teaspoon sriracha sauce
  • Salt and pepper to taste
Baby Corn Recipe

Directions To Make Fried Baby Corn Recipe

  • All-purpose flour, cornstarch, ginger-garlic paste, red chilli powder, turmeric powder, garam masala, and salt should be combined with marinade ingredients. To create a smooth, thick batter, gradually add water. The coating should be sufficiently thick to cover the baby corn.
  • In a skillet or saucepan, warm the deep-frying oil over medium heat.
  • Ensure to uniformly coat each baby corn after dipping it into the batter. Any extra batter should drip off.
  • Place the coated baby corn into the heated oil with care. To prevent crowding the pan and causing the baby corn to cling together, fry the corn in batches.
  • The baby corn should be fried until crispy and golden. It ought to take 3 to 4 minutes. 
  • Use a slotted spoon to remove them, then set them on a dish covered with paper towels to drain any leftover oil.
  • Mix mayonnaise, tomato ketchup, sriracha sauce, salt, and pepper to make the dipping sauce. Your taste will determine how much sriracha sauce and ketchup to use.
  • All-purpose flour, cornstarch, baking soda (if used), and salt should be combined in a basin to produce the coating batter. To make a smooth batter with the consistency of pancake batter, gradually add water.
  • Each piece of fried baby corn is dipped into the batter and uniformly coated.
  • Put the baby corn that has been smashed back into the hot oil cautiously. Fry the baby corn for another 1-2 minutes or until it becomes crispy and golden brown.
  • Remove the double-fried baby corn from the oil and place it on a paper towel-lined plate to remove excess oil.
  • Serve the crispy fried baby corn hot along with the prepared dipping sauce.

MUST TRY: Pesarattu Recipe: A South Indian Delight!

Notes and Tips

  • Choose fresh baby corn that has firm kernels and a bright colour. Avoid ones that have imperfections or drying symptoms.
  • Before cooking, give the fresh corn a thorough cleaning and trimming. A smoother eating experience is ensured by removing any extra husk or silk.
  • The use of double frying methods results in an extra crispy exterior. The corn is cooked, the batter is set in the first fry, and the delicious crunch is produced in the second fry.
  • Keep the oil at a steady 350–375°F (175–190°C) for frying. Use a thermometer to get the ideal crispy texture without absorbing too much oil.
  • Smooth and not overly thick batter is required for coating. Baby corn should be uniformly coated, allowing a thin and crunchy layer to form after frying.
  • You can play around with the marinade by including a bit of your preferred herbs or spices. It might become your hallmark dish and improve your taste profile.
  • The dipping sauce’s components should be tweaked to get the ideal harmony of creaminess, tanginess, and a touch of spice. Adjust it to suit your preferences.
  • Avoid packing the pan too tightly while cooking the baby corn. Batch frying makes sure that every component has enough room to cook equally.
Baby Corn Recipe

Nutrition Information

(per serving)

  • Calories: 152 kcal
  • Carbohydrates: 19g
  • Fat: 8g
  • Sodium: 5mg
  • Sugar: 6g
  • Potassium: 275mg
  • Protein: 3g
  • Iron: 1mg
  • Calcium: 14mg

To Conclude!

The fried baby corn recipe is an example of the beauty that arises when simplicity and inventiveness are combined in culinary delights. This dish exemplifies the beauty of mixing straightforward components to produce something remarkable, from its modest beginnings to its metamorphosis into a crispy treat. A fried baby corn recipe may bring people together because of a common enjoyment of delicious cuisine, whether it is consumed as a beginning at parties or savoured as a fulfilling snack. So, put on your apron, channel your inner chef, and make these irresistible treats as we wrap off our culinary tour. Your creations will have a long-lasting effect on your palate and the palates of others fortunate enough to taste them.

If you try this recipe, please let us know. Please comment if you have questions about the recipe or want to share your version of the fried baby corn Recipe. Don’t forget to share it with your friends and family; I am sure they’ll love it too.

MORE SUCH RECIPES

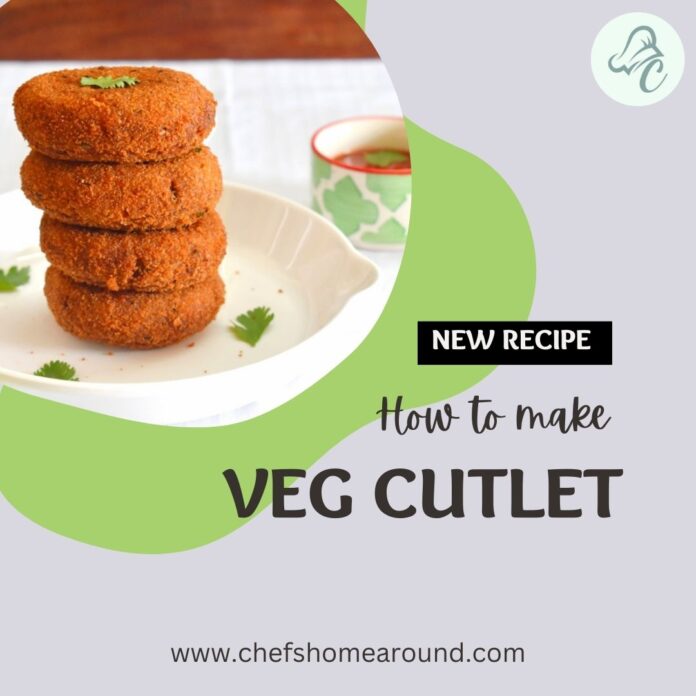
Indian Veg Cutlet Recipe

Eggless Brownie Recipe

0
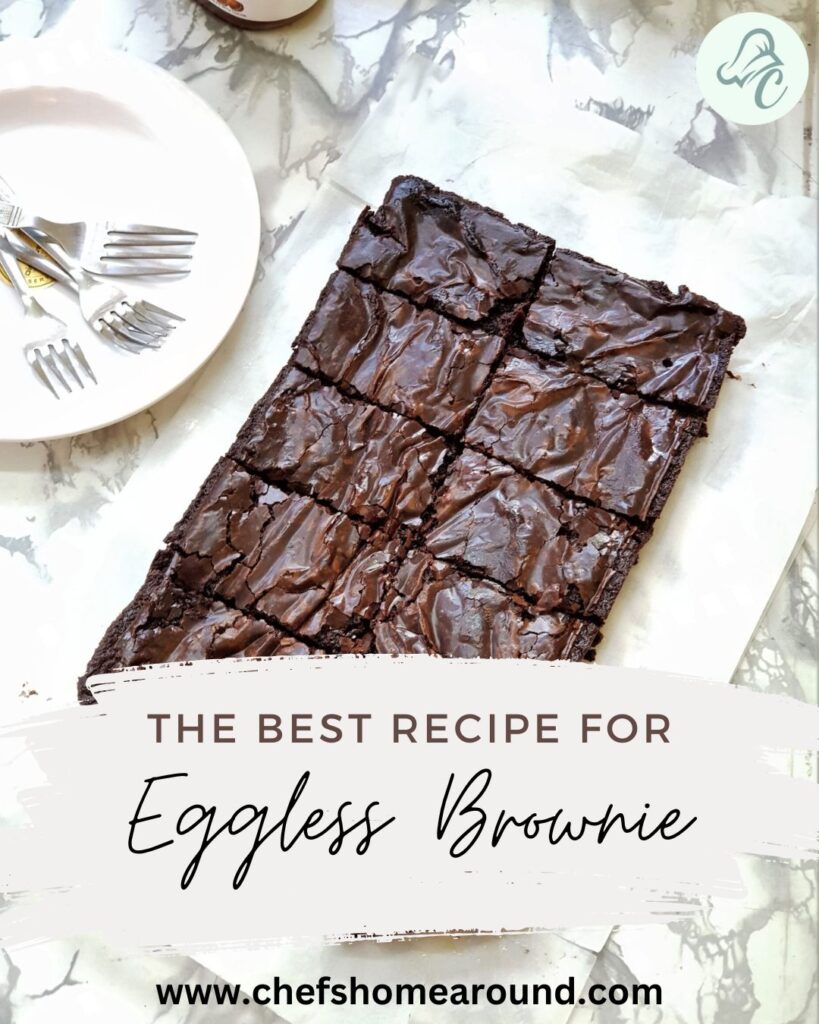
Eggless Brownie Recipe

Kindness is like sugar, it makes life taste a little sweeter.

Carla Yerovi

When it comes to chocolate recipes, one treat that stands the test of time is the beloved brownie. With its decadent chocolatey goodness, it’s hard not to love this indulgent dessert. And now, with our brand new recipe, you can enjoy the deliciousness of brownies more healthily. Our Eggless Brownie Recipe takes the classic brownie and twists it. Made with cocoa powder, this recipe boasts all the rich flavors you crave. Whether avoiding eggs or looking for a lighter alternative, our Eggless Brownie Recipe will satisfy your sweet tooth. So get ready to indulge guilt-free with this easy and yummy treat. Stay tuned as we dive into the step-by-step process of creating these scrumptious Eggless Brownies. It’s time to elevate your brownie game and discover a new level of chocolatey goodness.

About Eggless Brownie Recipe!

Brownies have always been an all-time favorite and with good reason. The combination of chocolatey goodness and decadent texture makes them irresistible to people of all ages. Our Eggless Brownie Recipe takes this classic dessert to a new level by eliminating eggs and incorporating all-purpose flour, making it a wholesome and guilt-free choice. This recipe is easy to make, requires minimal ingredients, and promises to satisfy your sweet tooth. So, if you’re ready to embark on a chocolatey adventure that will leave you craving for more, join us as we dive into the world of our tantalizing Eggless Brownie Recipe. Get your baking tools ready, and let’s indulge in this delectable treat that will become a new favorite for you and your loved ones.

Eggless Brownie Recipe

Ingredients Needed for Eggless Brownie Recipe

  • 100 gms Greek Yogurt
  • 120 gms Icing Sugar or Powdered Sugar
  • 120 gms Dark Chocolate chopped
  • 25 gms Butter
  • 90 gms all-Purpose Flour/Maida
  • 10 gms Cocoa Powder
  • 2 tsp Baking Soda
  • 1/4 tsp Salt
  • 1/2 cup chocolate chips
  • 1/2 cup walnuts

Steps To Make Eggless Brownie Recipe

  1. Greek yogurt and icing sugar are combined in a mixing basin and stirred until the sugar dissolves. If the sugar does not dissolve after pounding it (verify by pressing it between your fingers for no evidence of grittiness), wrap it in cling wrap and place it on your countertop.
  2. Chop your chocolates and put them in a different bowl in the meantime. Add some butter to it.
  3. Melt the chocolate and butter together using a double boiler until well combined. Put this away as well.
  4. In a small bowl, weigh the dry ingredients: flour, cocoa powder, baking soda, and salt. Leave it alone.
  5. Inspect your yogurt-sugar mixture; the sugar should have fully dissolved by this point. Add the melted chocolate mixture to this and combine well.
  6. On top of the liquid components, pass the dry ingredients through a sieve.
  7. Combine with a spatula to create a thick brownie batter.
  8. Now, place it in the square pan that has been prepared and bake it for 30 to 35 minutes at 160°C/320°F or until a skewer inserted in the center emerges with a few crumbs stuck to it.
  9. After 5-10 minutes more of sitting in the pan, pull it out using the hanging parchment paper. Allow it to cool completely on a wire rack for at least 1-2 hours before cutting it into thick squares. 

Tips to Make Eggless Brownie Recipe

  • Start by coating the inside of your cake pan with a thin layer of butter or oil, then by adding parchment paper hanging over the pan’s sides to make removing the baked brownies from the pan simpler.
  • By massaging the sugar in the yogurt between your clean fingertips, ensure it has thoroughly dissolved. There shouldn’t be any gritty sensations.
  • Compound chocolate would also be compatible with the recipe. But in terms of increasing the flavor, using couverture chocolate would make it the best eggless brownie recipe ever. 
  • Sieve the dry ingredients to get the lumps out of the baking soda and cocoa powder.
  • Brownie batter should have a thick consistency. Make sure you use Greek yogurt to do that. If not, hang your yogurt for a few hours to allow the whey to separate. 
  • This recipe will only work with something other than homemade yogurt. If you can’t find Greek yogurt, buy it store-bought and let it sit for a few hours. Please note that if producing hung curd, you may wish to start with 200–220 g of yogurt and then use 100 g of the thick part to make the dish.
  • This also applies to other standard advice like preheating your oven before baking and having all your ingredients at room temperature.

Frequently Asked Questions

How can I prepare these brownies more fudgy?

To do this, use less flour—roughly 65 to 75 gm—and cut the amount of baking soda to 1/4 tsp. For more fudgy brownies, bake for 28 to 30 minutes.

Can I skip baking soda?

You can cut it down to 1/4 teaspoon, but omitting it entirely won’t provide the desired benefits.

Can I substitute eggs with Greek yogurt?

The alternative won’t function. However, you can try our brownie recipe using eggs instead.

My brownies sink from the centre. What to do?

You must realize that because brownies cannot bake all the way through, there is a potential that the centre will set after baking. You may use a warm towel to gently push the sides of the brownies down when they have just come out of the oven. You might obtain an even top by doing this.

Can I change the pan size for this eggless brownie recipe?

Yes, double the recipe to fill an 8×8 or 9×13-inch pan.

Nutrition Facts

  • Calories: 197 kcal
  • Carbohydrates: 28g
  • Protein: 3g
  • Fat: 8g
  • Saturated Fat: 5g
  • Cholesterol: 7mg
  • Sodium: 88mg
  • Potassium: 140mg
  • Fiber: 2g
  • Sugar: 17g
  • Calcium: 26mg
  • Iron: 2mg

Conclusion

Moreover, the Eggless Brownie Recipe offers a delightful twist on the classic brownie, allowing you to enjoy the rich flavours of this indulgent dessert more healthily. Using cocoa powder and omitting eggs, this recipe is perfect for avoiding eggs or seeking a lighter alternative. With our step-by-step process, creating these scrumptious Eggless Brownies has never been easier. So go ahead and elevate your brownie game with this guilt-free treat and experience a new level of chocolatey goodness.

If you try this recipe, please let us know. Please comment if you have questions about the recipe or want to share your version of Yorkshire Pudding. Don’t forget to share it with your friends and family; I am sure they’ll love it too.

FOR MORE SUCH RECIPES:

Yorkshire Pudding Recipe

Coleslaw Sandwich Recipe

0
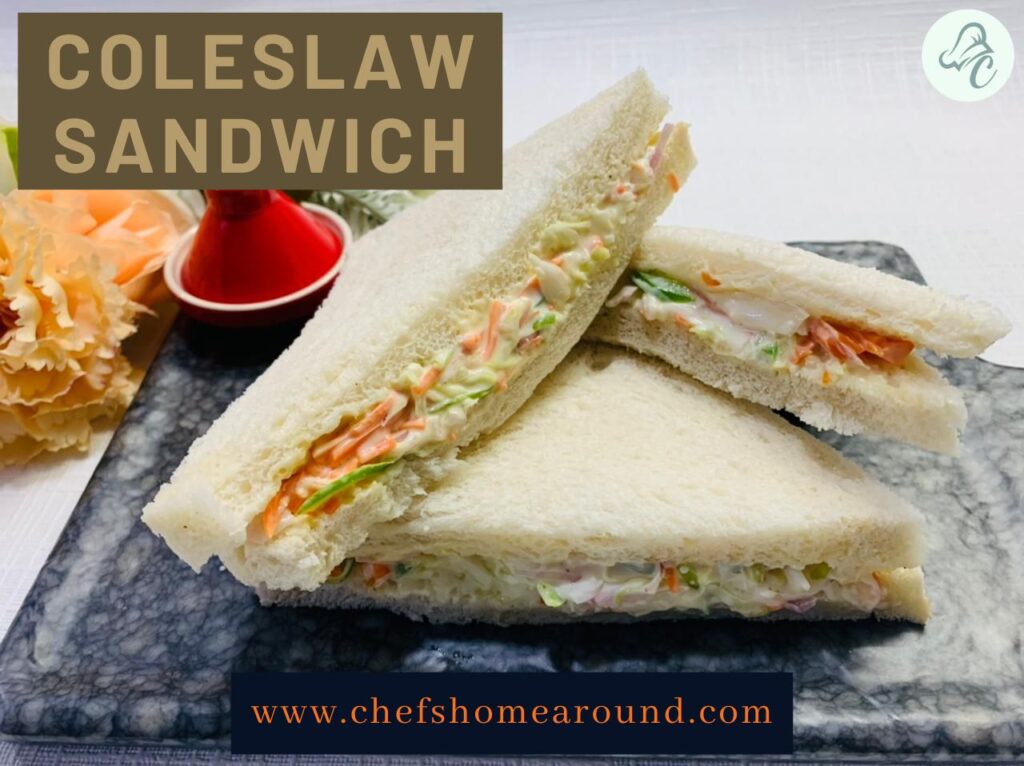
Coleslaw Sandwich

This delicious recipe is perfect for you if you crave a quick snack using bread. In less than 10 minutes, you can whip up a refreshing and tasty vegetarian sandwich using simple ingredients like bread slices, mayonnaise, onion, cabbage, carrot, and capsicum. Whether you need a quick bite or a satisfying lunch, this coleslaw sandwich recipe is here to satisfy your cravings. Follow the step-by-step instructions to create a delicious meal that makes you want more. So, let’s dive into the world of deliciousness and discover how to make this delightful treat in less than 10 minutes.

About Coleslaw Sandwich!

If you’re feeling adventurous, you can grill your coleslaw sandwich for a warm and toasty twist. Whether hosting a lively party or enjoying a cosy evening at home, this sandwich perfectly accompanies your favourite beverage. Pair it with a cup of tea or coffee, and you have a delightful snack that will satisfy your cravings. But it doesn’t end there. This versatile sandwich is also an ideal choice for road trips or picnics. Its convenient size and ability to stay fresh make it the perfect on-the-go treat. The combination of flavours and textures will surely make it a crowd-pleaser. So why wait? Try this irresistible sandwich recipe, and let your taste buds be the judge.

Coleslaw Sandwich

Ingredients to make Coleslaw Sandwich

  • ¼ cup finely chopped cabbage
  • ¼ cup finely chopped carrots
  • ¼ cup boiled or Steamed Corn kernels
  • 2 tbsp finely chopped capsicum
  • 2 tbsp finely chopped onions
  • ¼ cup Veg Mayonnaise
  • ½ teaspoon black pepper powder
  • 1 teaspoon sugar
  • ½ teaspoon lemon juice
  • salt as required
  • dried herbs like oregano, thyme, and basil – optional
  • red chilli flakes– optional
  • butter– optional
  • 8 to 10 slices of brown or white bread

Directions to make Coleslaw Sandwich

  • The vegetables should be rinsed and chopped finely by hand, in a food processor, or with a knife. The cabbage can be blanched if you’d like before being chopped.
  • If you are blanching, make sure to drain the water thoroughly.
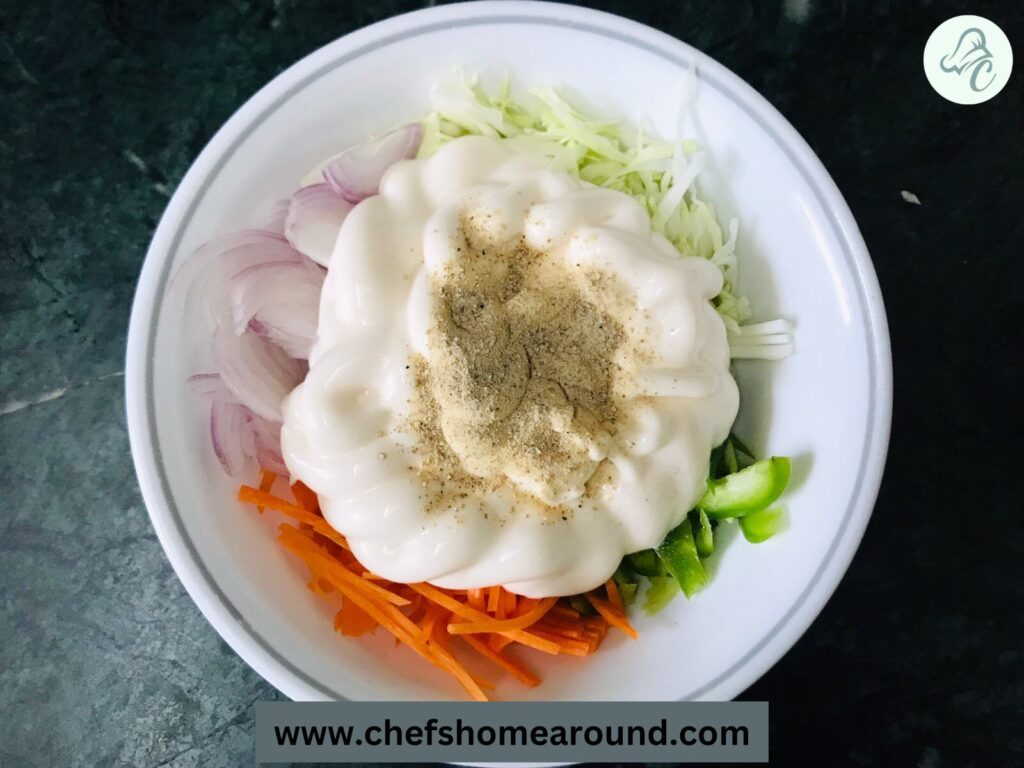
  • Add the chopped vegetables and the steamed corn kernels to a bowl. If you like, you may omit the corn.
  • Add mayonnaise, black pepper powder, a dash of salt, and a dash of sugar afterwards. 
  • Whenever necessary, add sugar and black pepper powder. 
  • Then, for a tang, add lemon juice. You may also use dried oregano, thyme, basil, and red chilli flakes.
  • Combine everything well. Taste the food and add salt, sugar, or black pepper if necessary.
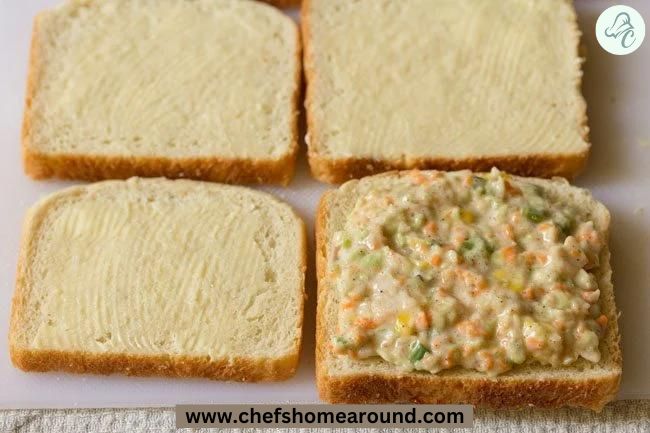
  • Take the bread pieces and cover them with butter. This step is optional.
  • Now cover the bread pieces with the vegetable mayonnaise filling.
  • Slice the sandwiches, then arrange them on the remaining buttered pieces. 
  • Serve coleslaw sandwiches with potato wedges, french fries, or dips like tomato ketchup, mayo, or cheese.
Coleslaw Sandwich

Notes and Tips

  • Slices of white bread were utilized. However, you may use any bread, such as multigrain or brown.
  • Although I usually use bread with crust, crustless bread also works well in sandwiches.
  • You could even grill or gently toast these sandwiches for a little more crunch.
  • You might include some dried oregano, thyme, basil herbs, and red chilli flakes.
  • I occasionally also add one finely chopped green chilli for a hotter flavour.
  • One of those adaptable recipes with no set ingredient requirements is this one. You may thus include other vegetables, such as boiling potatoes, red or green peppers, sweet corn, broccoli florets, steaming green peas, cucumbers, red cabbage, or almost any other vegetable you desire.
  • I would strongly advise eating the sandwich as soon as possible if it contains watery veggies, like cucumber or beetroot.
  • Since I enjoy the crispness and freshness of shredded cabbage, I incorporated it into this dish. The cabbage can alternatively be steamed or blanched before use.
  • The coleslaw may be made ahead of time and kept for two to three days in the refrigerator in an airtight container.

Frequently Asked Questions

What should I serve with a sandwich topped with homemade coleslaw?

Enjoy these sandwiches for a tasty lunch with French fries or potato chips. They go great with a platter of zucchini fritters, a bowl of pasta salad, or some sautéed mushrooms for brunch, in my opinion.

Can I prepare this recipe in advance?

The coleslaw may be prepared a day in advance and kept in the refrigerator in a covered container. Just before serving, assemble the sandwiches.

What other ingredients can I add to this recipe for coleslaw sandwiches?

You may also use dried oregano, thyme, basil, and red chilli flakes. You may add 1 green chilli, finely chopped, for a spicy flavour. Additionally, you may include cooked potatoes, steaming green peas, parsley, mint, celery, cilantro, cucumbers, red cabbage, or any other crunchy vegetables you choose. If you use watery vegetables like cucumber or beets, consume the sandwich as soon as it is made.

Coleslaw Sandwich

Nutrients Value

  • Calories: 416 Calories
  • Fat: 22g
  • Saturated Fat: 7g
  • Cholesterol: 20mg
  • Sodium: 586mg
  • Potassium: 198mg
  • Carbohydrates: 44g
  • Fiber: 4g
  • Sugar: 7g
  • Protein: 9g
  • Calcium: 107mg
  • Iron: 3mg
  • Magnesium: 38mg

To Conclude

Coleslaw sandwiches are a delightful and versatile option for any mealtime. Its creamy and lightly spiced cabbage salad can instantly elevate any dish to extraordinary. Not only are these sandwiches easy to make, but they also offer the opportunity to customize the coleslaw with various vegetables, making it a great choice for using leftovers. Whether enjoyed for breakfast, brunch, lunch, or as a snack, coleslaw sandwiches are a simple, light, and delicious option that will surely satisfy.

If you try this recipe, please let us know. Please comment if you have questions about the recipe or want to share your version of Coleslaw Sandwich. Don’t forget to share it with your friends and family; I am sure they’ll love it too.

MORE SUCH RECIPES
Egg salad recipe!

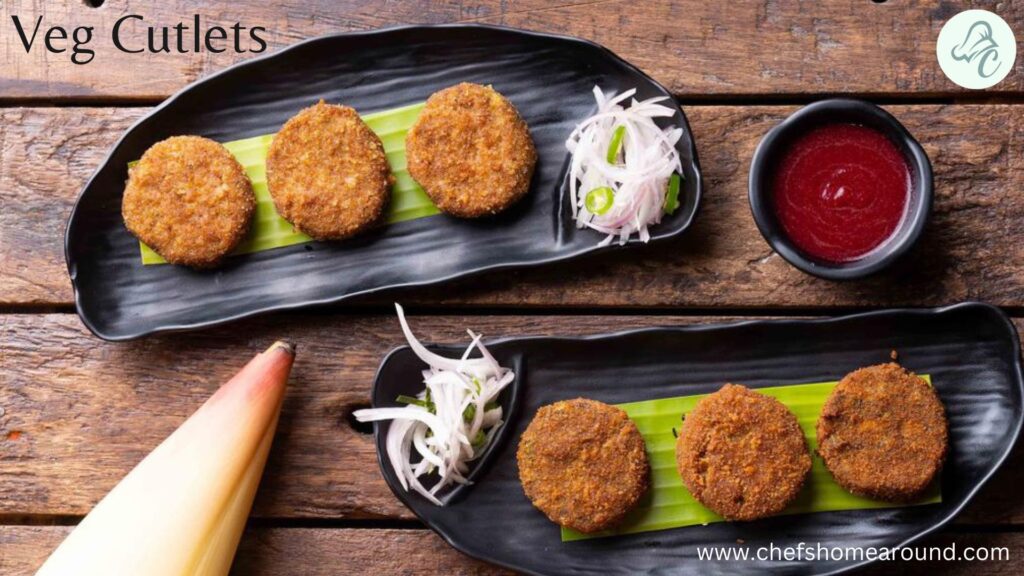
Indian Veg Cutlet Recipe!

Pesarattu Recipe: A South Indian Delight!

0
Pesarattu recipe

Are you ready to embark on a culinary journey to the land of flavorful spices and delicious breakfast delights? Look no further! Today, we will explore the rich and savory world of Pesarattu, a popular and nutritious dish hailing from southern India. You can prepare this for breakfast, snack, or brunch; these savory crepes are a perfect choice, especially when paired with sweet and spicy chutneys. Prepare to savor each bite of these delectable Pesarattu recipe and embark on a culinary journey like never before. So, grab your apron and dive into creating the perfect Pesarattu.

About Pesarattu!

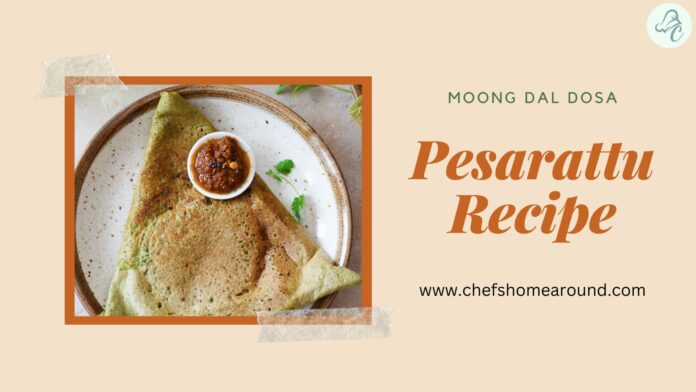
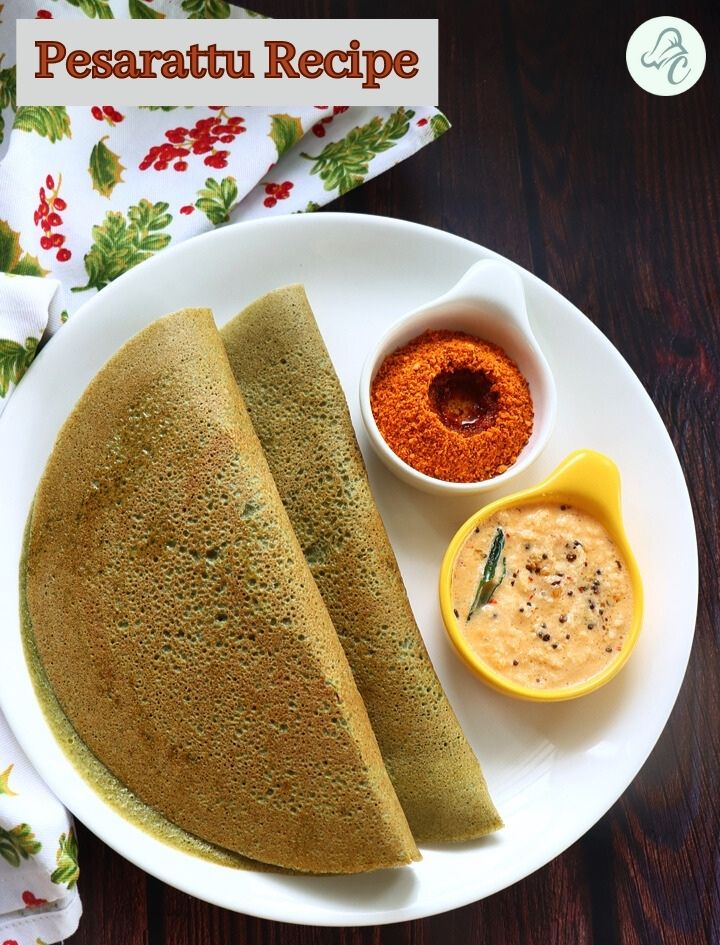
Pesarattu is a crepe-like pancake made from green gram lentils, packed with protein, and bursting with flavors that will tantalize your taste buds. The Pesarattu recipe is a delightful and nutritious dish that will tantalize your taste buds. This crispy, lightly spiced Moong Dal Dosa is a popular Andhra cuisine delicacy made from green mung beans or green gram, spices, and herbs.

Pesarattu Recipe

Ingredients to prepare Pesarattu

  • 2 cups Whole Green Moong Dal
  • 2 tablespoons Raw Rice
  • 1 inch Ginger
  • 1 Green Chilli
  • 2 teaspoon Cumin Seeds
  • Salt as needed
  • Oil as needed
  • 1 cup Finely chopped Onions

Directions to make Pesarattu

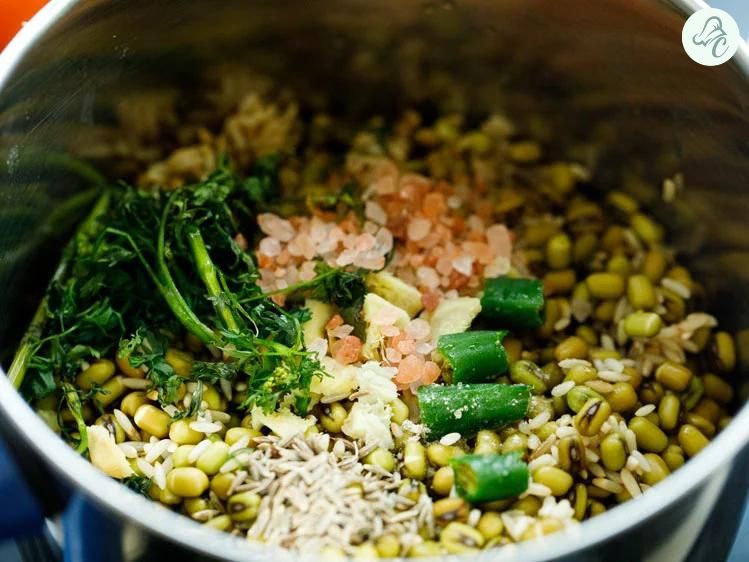
  • 2 cups whole green moong/pesalu and 2 tablespoons uncooked rice should be washed and soaked in a basin with enough water to cover them for 4-6 hours or overnight.
  • In a blender, combine the water after draining it with 1″ of ginger, 1 green chili, and 2 teaspoons of cumin seeds.
  • Sprinkle only as much water as is necessary to create a smooth batter.
  • Salt as necessary, and combine thoroughly.
  • The batter’s consistency should resemble that of idli batter.
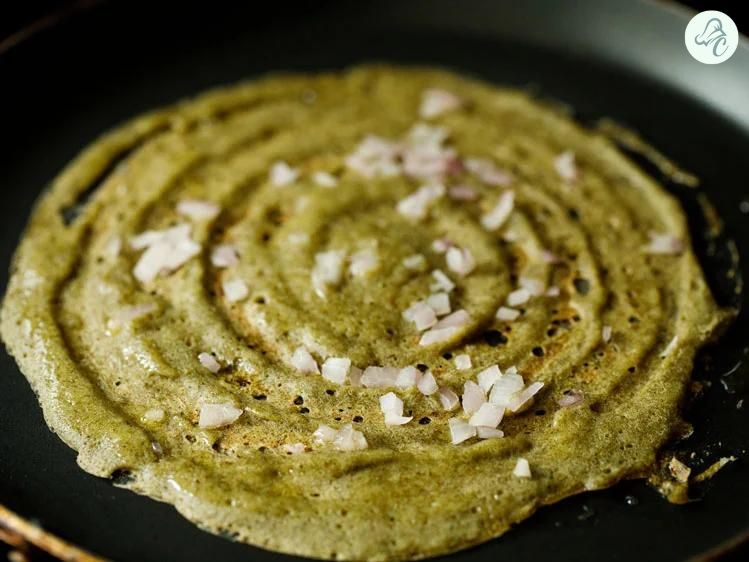
  • On a medium flame, preheat a cast iron dosa tawa. On the dosa tawa, pour a ladle’s worth of this Pesarattu batter and distribute it as thinly as possible.
  • Sprinkle finely chopped onions on top after drizzling oil all over the Pesarattu.
  • Until golden brown specks begin to emerge on the Pesarattu, let it cook at a low to medium temperature for a longer period.
  • Fold the Pesarattu in half after gently removing it from the tawa. With the remaining batter, repeat the process.
  • Serve heated with Allam Pachadi/Andhra Special Ginger Chutney and Coconut Chutney.

MUST TRY: Indian Veg Cutlet Recipe

Pesarattu Recipe

Notes and Tips

  • Adding ginger, green chili, and cumin seeds is necessary when creating the batter and improves the flavor. Additionally, ginger and cumin seeds facilitate simple digestion.
  • The dosa batter doesn’t need to ferment; it may be prepared immediately. The batter keeps well in the fridge for two to three days.
  • In addition, butter can be used instead of oil to produce Butter Pesarattu by spreading it all over the dosa.
  • This dosa can also be made using yellow moong, split green gram with husks, or sprouted moong. If you use yellow moong in this recipe, soak it for between one and three hours.
  • You may also use 2 to 3 tablespoons of rice flour for the rice grains in the batter. It can even be prepared without rice. However, the dosas will be less crispy then.
  • This moong dal dosa’s batter resembles a traditional dosa batter. If it’s too thick, add 1 to 2 teaspoons of water. Add 1 to 2 tablespoons of rice flour if it’s too thin.
  • Moreover, Feel free to experiment with different flavors, fillings, or variations to make it your own. Enjoy the process, and let the flavors of Pesarattu transport you to the enchanting world of South Indian cuisine.

Serving Suggestions

Pesarattu Recipe is traditionally served with a side of Allam Pachadi, a zesty ginger chutney, which complements the flavors of the pancake beautifully. However, explore other accompaniments such as coconut chutney, sambar (a lentil and vegetable stew), or a cooling yogurt-based dip. Garnish your Pesarattu with finely chopped onions, coriander leaves, or grated coconut to add freshness and visual appeal.

Frequently Asked Questions

In place of rice, may rice flour be used?

Most definitely. The soaked and drained lentils should be blended with two to three teaspoons of rice flour.

Can I use another type of flour for the rice flour?

You may use ragi, jowar flour, and chickpea flour (besan). However, remember that these flours’ mild flavor will impact how the pesarattu tastes.

Can I skip rice?

If you can, maintain the rice in the pesarattu recipe since it gives the dish a crunchy texture. It is unnecessary, so you may omit it if you don’t have it or would prefer not to use it.

I made a lot of moong dal. Can I use it in the pesarattu recipe?

No, cooked moong dal cannot be used to make the pesarattu dish.

How long should entire green mung beans soak compared to split yellow ones?

Green moong beans should be soaked for four to six hours or overnight. You can soak the split yellow moong lentils for one to three hours. The moong dal dosa will have a more crispy texture the shorter the lentils are soaked.

Can I make pesarattu using moong sprouts?

Yes, you can easily make pesarattu with moong sprouts. With the remaining ingredients listed in the recipe, grind the mung sprouts into a fine batter.

Pesarattu Recipe

Nutrition Facts

Calories: 86 kcal
Fat: 0.3g
Sodium: 12mg
Potassium: 292mg
Carbohydrates: 16g
Fiber: 4g
Sugar: 2g
Protein: 5g
Calcium: 33mg
Iron: 2mg

Final Words

Prepare a delectable Pesarattu Recipe, a nutritious and flavorful breakfast option that will transport your taste buds to the vibrant streets of South India. From its protein-packed lentils to its savory fillings, Pesarattu Recipe offers a delightful culinary experience that is both satisfying and nutritious. So, gather your ingredients, unleash your creativity, and savor the joy of a perfectly cooked Pesarattu. Get ready to impress your family and friends with this authentic South Indian delicacy.

If you try this recipe, please let us know. Please comment if you have questions about the recipe or want to share your version of Pesarattu Recipe. Don’t forget to share it with your friends and family; I am sure they’ll love it too.

MORE SUCH RECIPES

Spice Up Your Week with these Vegetable Stuffed Peppers!

Indian Veg Cutlet Recipe

0
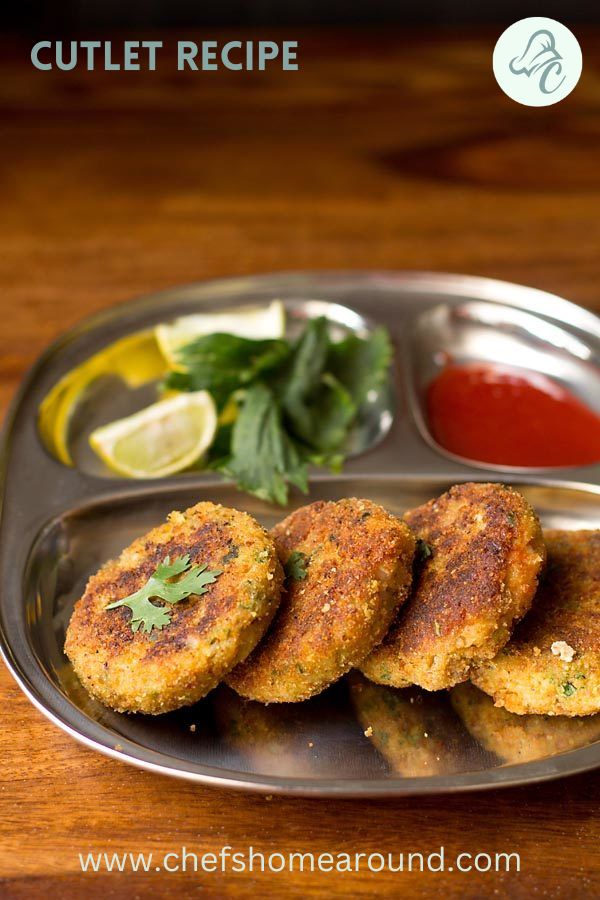
Cutlet recipe

Looking for a delicious and healthy snack option? Look no further than this vegetable Cutlet Recipe! These savory and tender patties are made with hearty veggies, savory spices, fresh herbs, and crispy breadcrumbs. Whether you’re a fan of Indian cuisine or just looking for a new snack, these veg cutlets are sure to please. Plus, you can prepare them exactly how you like with multiple cooking options. Keep reading for the recipe and step-by-step instructions on how to make these delicious vegetable cutlets.

About Veg Cutlet Recipe!

This delectable treat has been a staple in many households and is a popular go-to for those looking for a quick and tasty snack. With its crispy exterior and flavorful filling, it’s no wonder why Cutlet Recipe has become a sought-after recipe, especially for those who follow a vegetarian or vegan diet. Whether you’re serving it as an evening snack with a cup of tea or as an appetizer for your next party, Cutlet Recipe is sure to please.

Ingredients to gather for cutlet recipe

  • ½ cup chopped carrot or 1 medium carrot
  • ¼ cup chopped beans
  • 1 cup chopped potatoes
  • ½ cup green peas
  • 1-inch ginger
  • 1 green chili – about 1 teaspoon chopped
  • 1.5 teaspoon cumin powder
  • 2 garlic cloves – peeled and roughly chopped
  • ¼ teaspoon red chili powder or paprika
  • 1 teaspoon Coriander Powder
  • 3 to 4 tbsp breadcrumbs or bread pulp from 2 to 3 bread slices
  • ½ teaspoon Garam Masala
  • 2 tbsp coriander leaves
  • 2-3 tbsp oil
  • salt to taste

For Crumb Coating

  • 2 tbsp all-purpose flour
  • 3-4 tbsp water
  • ⅓ cup breadcrumbs
Cutlet Recipe

Directions for making cutlet recipe

Preparation

  • Clean, peel, and cut vegetables, including potatoes, carrots, and beans.
  • In a pressure cooker or steamer, boil or steam the vegetables until they are fork-tender.
  • Using a sieve, thoroughly drain all the water from the cooked vegetables. Warm up the prepared veggies and set them aside.
  • To make bread crumbs while the vegetables are cooling, pulse 4 to 5 pieces of bread in a food processor or blender until very fine.
  • Place the bread crumbs on a dish or tray and set aside.

Making Cutlet mixture

  • Place the cooked veggies in a bowl once they are heated. Use a potato masher to mash them. Instead of making a fine paste, leave it chunkier and add small vegetables. Place aside.
  • Use a mortar and pestle to pound the roughly chopped ginger, green chilies, and garlic into a semi-fine paste.
  • To the mashed veggies, add the ground ginger and green chili paste, cumin, red chili powder, garam masala powder, coriander powder, chopped coriander leaves, bread crumbs, and salt to taste.
  • Combine everything well. Check the flavor of the dough for the vegetable cutlets, and if extra salt or powdered spice powders are required, add them.

Breading

  • Combine water and all-purpose flour in a separate small bowl.
  • This combination has to be stirred and blended to create a lump-free paste or slurry.
  • Take the prepared cutlet mixture on a plate using a cutlet mould, or form small to medium-sized circular cutlets by flattening and rolling the mixture between your palms.
  • Gently dip a cutlet into the all-purpose paste, allowing the paste to coat the cutlet completely.
  • Then evenly and thoroughly coat the cutlet with breadcrumbs. Clean up any leftover breadcrumbs. Each cutlet should be breaded, crumb-coated, and placed aside.

MUST TRY: Chicken Cutlets

Pan-frying veg cutlet

  • Heat 2 to 3 teaspoons of oil for shallow frying in a skillet or frying pan. The extra bread crumbs from the vegetable cutlets should be dusted off before adding them to the medium-hot oil.
  • Flip your cutlets and cook the opposite side when the first is lightly golden. If necessary, add extra oil.
  • Repeat the flipping process a few more times, and cook the vegetable cutlets until they are all uniformly brown and crisp on both sides.
  • To remove extra oil, drain them on paper towels for the kitchen. Similarly, cook the remaining cutlets, using more oil if necessary.
  • Serve the cutlet hot or heated with tomato ketchup, mint chutney, coriander, or tamarind chutney. Additionally, you may use them to make sandwiches, wraps, and burgers.

Notes for cutlet recipe

  • The vegetable cutlet may be customized using your blend of spices, such as black pepper powder. By adding more green chilies, you may make them hotter.
  • Finely grind the garlic, ginger, and green chile with a pestle and mortar to create a coarse paste.
  • You could even use Rava (cream of wheat) to cover the vegetable cutlet instead of bread crumbs.
  • The vegetable cutlets are held together and kept from breaking while fried by adding soaked bread or bread crumbs to the batter.
  • Instead of pan-frying them, you may alternatively shallow fry them. These might be challenging to fry deep.
  • Carrots, potatoes, green peas, beans, cauliflower, broccoli, bell peppers, and maize are among the vegetables you may include. Avoid using watery or mushy veggies, such as okra, eggplant, pumpkin, and other gourds.
  • You may include shredded paneer, tofu, cheddar cheese, or soya granules for protein. Before adding the soya granules to the mashed vegetable combination, prepare them as directed on the package.
Cutlet Recipe

Nutrition Value

  • Calories: 142 kcal
  • Fat: 5g
  • Saturated Fat: 1g
  • Polyunsaturated Fat: 1g
  • Monounsaturated Fat: 4g
  • Sodium: 312mg
  • Potassium: 259mg
  • Carbohydrates: 20g
  • Fiber: 3g
  • Sugar: 3g
  • Protein: 3g
  • Calcium: 37mg
  • Iron: 1mg

Final Words

In conclusion, Vegetable Cutlet is a mouthwatering snack that satisfies your hunger pangs and your taste buds with its unique blend of mashed potatoes and green vegetables. It’s crispy texture and mild spiciness make it a perfect tea-time or evening snack. The dish can be enjoyed with dips and chutneys, such as green mint and tamarind chutney. So, make the most of the monsoons or any other occasion by preparing these delicious vegan cutlets and relish them with your favorite dips and chutneys.

So go ahead and give it a try – your taste buds will thank you. If you try this recipe, please let us know. Please comment if you have questions about the recipe or want to share your version of the Cutlet Recipe. Don’t forget to share it with your friends and family; I am sure they’ll love it too.

Related Recipes: 7 recipes that you can make in just no time!

Yorkshire Pudding Recipe

0
Yorkshire Pudding

Cooking is like love, It should be entered into with abandon or not at all.

Harriet Van Horne

What is Yorkshire Pudding?

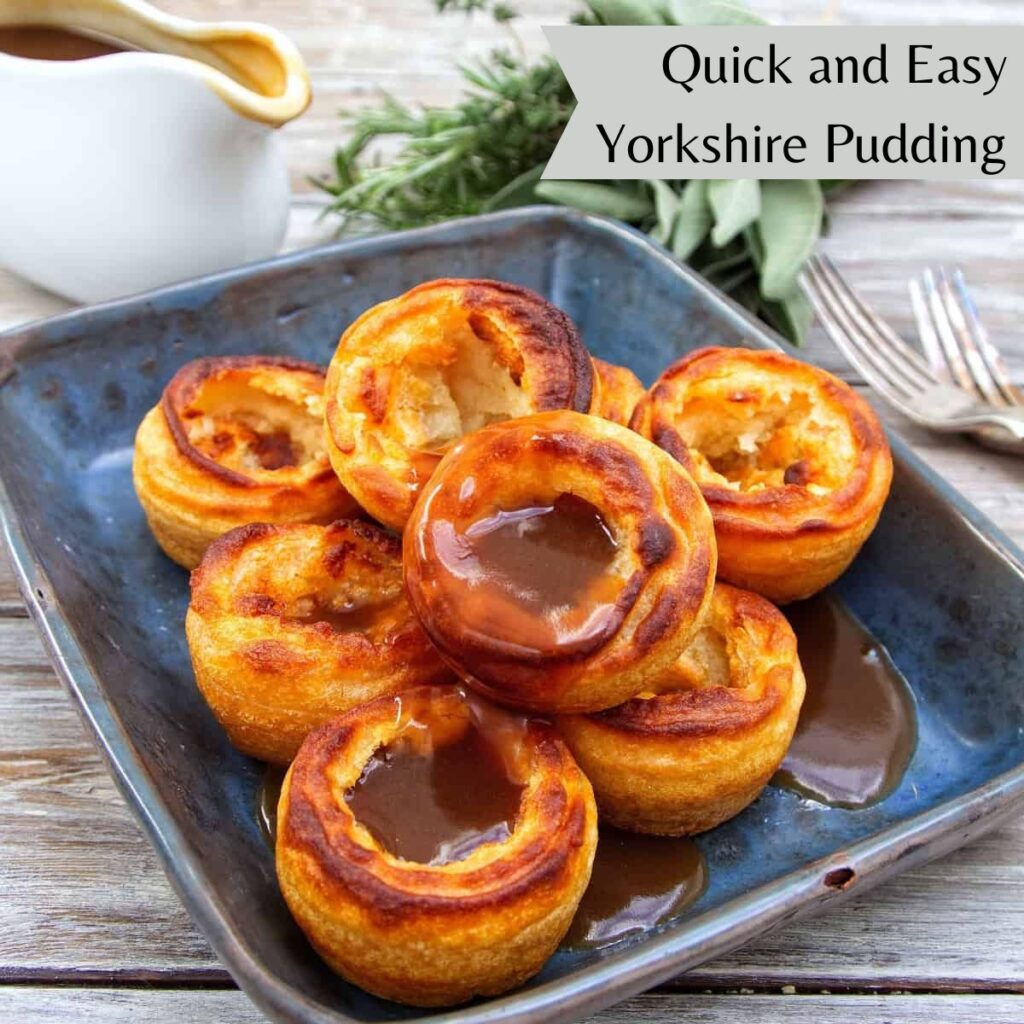
When it comes to classic British comfort food, few dishes can compare to the beloved Yorkshire pudding. This humble yet delicious dish has been a staple of Sunday roasts and family dinners for generations, and it’s not hard to see why. With its crispy, golden exterior and soft, fluffy interior, a well-made Yorkshire pudding is the perfect accompaniment to a hearty dinner. This classic dish may seem simple, but it has a secret to achieving the perfect puff. So gather your ingredients and get ready to elevate your roast dinner with this timeless recipe. But how do you get your Yorkshire puddings to rise and puff up just right? The answer lies in a few key tips and tricks, which we’ll explore in this post. Get ready to elevate your roast dinner game with the help of Yorkshire pudding.

Ingredients

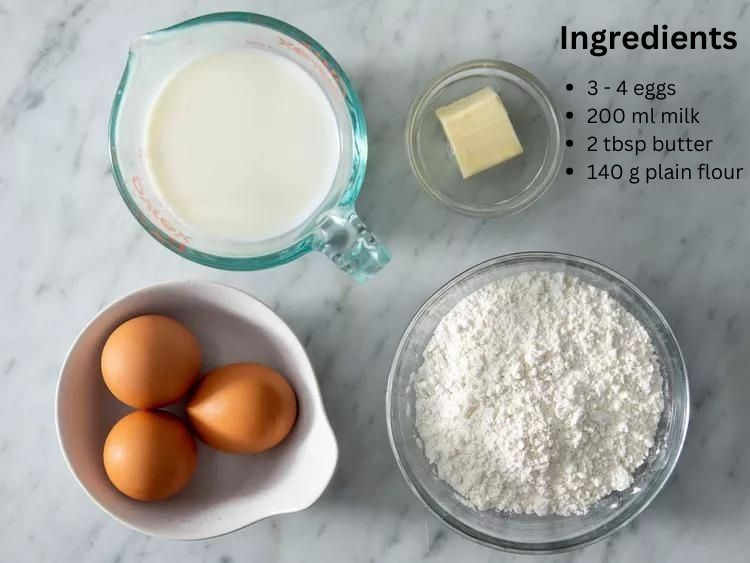
  • 140 g plain flour
  • 3 – 4 eggs
  • 200 ml milk
  • sunflower oil or butter

Steps to make Yorkshire Pudding

  • Preheat the oven to 230C/fan 210C/gas 8.
  • Place two 12-hole nonstick muffin pans or two 4-hole Yorkshire pudding tins in the oven to heat through after equally drizzling them with a little sunflower oil or butter.
  • Pour 140g of ordinary flour into a bowl and whisk 4 eggs in till combined to produce the batter.
  • Add 200 ml of milk gradually while whisking the mixture until lump-free. Add salt and pepper to taste.
  • Remove the heated pans from the oven, then pour the batter into a jug. Fill the holes with the batter carefully and evenly.
  • Return the pans to the oven, and bake for 20 to 25 minutes or until the puddings are puffy and golden.
  • Serve right away. Now, you can chill and freeze them for up to a month.

Notes and Tips

  • Remember to let the batter rest in the refrigerator. Your Yorkshire pudding will become flat and flavorless if you omit it.
  • The pudding can alternatively be baked in a popover pan, a 12-hole Yorkshire pudding pan, or a 9-by-13-inch baking dish.
  • When pouring the batter into the muffin tray, you want to hear it “sizzle.” That indicates that the oil is sufficiently heated. The batter will absorb oil if the oil is not hot, resulting in an oily, mushy, and thick pudding. The batter needs hot oil to build up and rise in the oven.
  • Please do not open the oven while it is baking. Like a souffle, treat these puddings. Do not peek! These will shortly deflate.

Frequently Asked Questions

Can I prepare this beforehand?

The batter can be chilled for overnight rest. The better, the longer you rest it. Letting the batter rest gives you a richer texture and a more nuanced flavour. They are delicate and will lose their crisp texture if you bake them in advance, so I advise waiting until you’re ready to eat them.

What distinguishes this dish from popovers?

Yorkshire pudding and popovers are different, despite sharing some of the same components. Popovers can be prepared in advance since they need time to chill, while Yorkshire pudding should be served immediately.

How should I keep leftovers?

Keep leftover homemade Yorkshire puddings in the refrigerator in an airtight container for up to five days. They may be warmed up in the oven or microwave. I advise baking them to keep them crisp outside. They may be put into freezer-safe airtight containers or bags and frozen for up to 3 months if you want to do so. To keep them crispy, thaw and reheat them in the oven.

Yorkshire-Pudding

Nutrition Facts

  • Servings: 6
  • Calories: 231 kcal
  • Total Fat: 15g
  • Saturated Fat: 8g
  • Cholesterol: 85mg
  • Sodium: 178mg
  • Total Carbohydrate: 18g
  • Dietary Fiber: 1g
  • Total Sugars: 2g
  • Protein: 6g
  • Vitamin C: 0mg
  • Calcium: 62mg
  • Iron: 1mg
  • Potassium: 103mg

Final Words

Moreover, this pudding is a timeless classic enjoyed for generations. The recipe is really easy to make with five simple ingredients and is foolproof. Whether you’re looking for a traditional English dish or a unique and tasty accompaniment, this recipe will surely please. Its crispy and flavorful exterior and soft and fluffy interior make it the perfect side dish for any holiday meal or Sunday roast.

Whether you are a seasoned cook or just starting, this traditional Yorkshire Pudding recipe will impress your guests and leave them wanting more. So go ahead and give it a try – your taste buds will thank you. If you try this recipe, please let us know. Please comment if you have questions about the recipe or want to share your version of Yorkshire Pudding. Don’t forget to share it with your friends and family; I am sure they’ll love it too.

For more such recipes!

Ice Cream Cake at Home.

Dump Cake Recipe.

Source: https://preppykitchen.com/

Homemade Ice Cream Cake Recipe

0
Ice Cream Cake Recipe

Desserts are the fairy tales of the kitchen- a happily ever after to supper.

Terri Guillemets

Homemade Ice Cream Cake

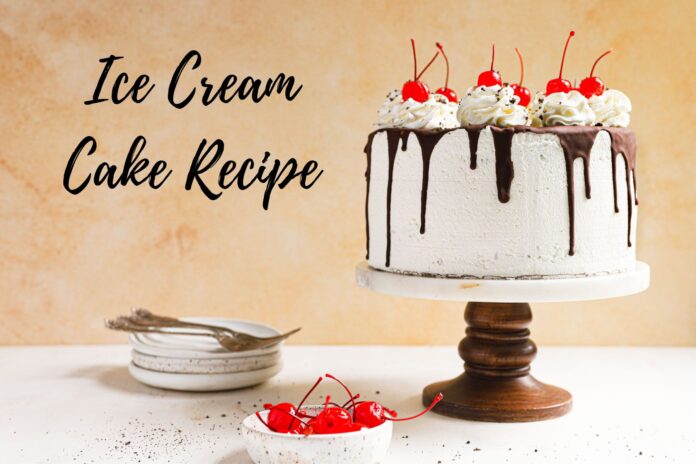
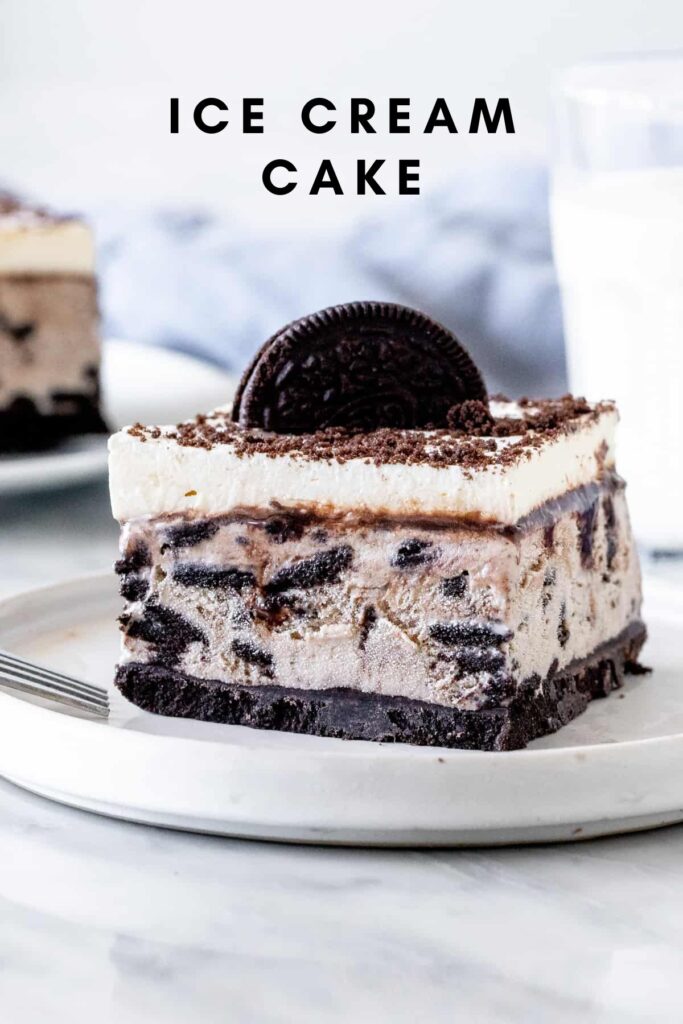
This Ice Cream Cake recipe offers a delightful combination of flavors and a customizable experience. Whether you have a penchant for classic vanilla, crave the rich taste of chocolate, or prefer the fruity burst of strawberry, this dessert allows you to indulge in your favorite ice cream flavor. With its creamy layers of ice cream, irresistible cookie crust, and optional personalized toppings, this dessert is sure to make any gathering or dessert time extra special. Similarly, you can select any cake mix that suits your taste buds; a moist chocolate cake, a fluffy vanilla sponge, or even a velvety red velvet base. So, let’s dive into this easy-to-follow recipe and embark on a journey of creating a delicious cake that will leave everyone smiling with every bite.

Ingredients to Gather

  • 1½ quarts ice cream
  • 1 8-inch chocolate cake layer
  • 14 Oreos
  • 1 cup hot fudge sauce
  • 1-pint heavy whipping cream
  • 3 tbsp powdered sugar
  • 2 tbsp vanilla extract

Directions to make

  • Using plastic wrap, line an 8-inch cake pan. The ice cream should be transferred to your prepared cake pan using a scoop. Put another plastic sheet on top, flatten, and freeze the mixture.
  • The 8-inch chocolate cake layer should be ready. Use a box mix or chocolate cake recipe, freezing the extra two layers.
  • Place it on a serving plate or cardboard circle once the ice cream layer is substantially cooled. Sprinkle the chopped cookies on top after spreading the fudge sauce over the surface. Place the ice cream layer on top after removing it from the freezer. As you prepare the whipped cream, cover it in plastic and freeze the crafted item.
  • Use an electric hand mixer to combine the cool whipping cream, sugar, and vanilla in the bowl of your mixer with the whisk attachment. Increase the speed to high gradually and continue mixing until incredibly soft peaks emerge. Hand whisks until the peaks are stiff, but avoid overwhipping the cream as it may curdle.
  • Take the cake out of the freezer, then top with whipped cream. The leftover whipped cream should be transferred to a piping bag with a big closed star (846) tip after being smoothed over the top and sides. Add some chocolate drips on the edge. Use warm fudge or a basic ganache made from two parts chocolate to one part cream to pipe a drop onto the top edge. Then, use the remaining whipped cream to conduct a scalloped pattern on the leading edge.
  • The cake is finished when the bottom border is pressed with cookie crumbs. The cake may be kept in the freezer until you eat it. The cake should be taken out of the freezer 15 minutes before serving to allow easy slicing.

Notes and Tips!

  • To get an even layer that is much simpler to stack on top of the cake, slightly soften the ice cream before putting it in the pan.
  • Before pouring the ice cream into the cake pan, carefully push any air bubbles out.
  • Make sure to leave some extra plastic wrap on the edges of the cake pan while lining it with the ice cream to make it easier to lift.
  • Keep your kitchen cold to prevent it from melting while working with it. You’ll need to refreeze your cake between steps if your kitchen is warmer. 
  • You may run your knife under hot water before slicing the cake to make it simpler.

More Ice Cream Cake Recipes!

  • Red velvet cake with cheesecake ice cream.
  • Funfetti cake with birthday cake ice cream.
  • Brown butter cake with chocolate chip cookie ice cream.
  • Triple chocolate cake with peanut butter cup ice cream.
  • Vanilla cake with strawberry puree and strawberry ice cream.
  • Peanut butter cake with Oreo ice cream cake.
  • White cake with chocolate and strawberry ice cream for a Neapolitan flavor combo.

You can prepare all these cake recipes whether it’s a birthday, a BBQ, or an anniversary, these recipes are sure to bring a smile to anyone’s face. You can get creative as much as you want in these recipes by using different ice cream flavors, adding layers of different sauces or fruits, or using different types of cookies for the crust. Feel free to customize it to your liking.

Ice cream cake

Frequently Asked Questions

How can an ice cream cake be kept from melting?

Just do your work quickly. Prepare your frosting for usage. Put your cake back in the freezer between each stage if necessary. Make your space as chilled as you can.

Is ordinary icing acceptable?

Stabilized whipped cream or another sort of whipped cream topping is the perfect icing to use on an ice cream cake since it has the same consistency as ice cream and will warm up at the same rate as ice cream. Buttercream is an option, but the butter will remain relatively firm even as the ice cream melts.

Can I keep my cake in the refrigerator?

Yes, obviously, you can! Transferring your cake from the freezer to the refrigerator 30 minutes before serving would be best. Your cake will melt if it is kept in the fridge regularly.

What time should I defrost my ice cream cake?

Before cutting, remove the cake from the freezer and put it in the refrigerator or remain at room temperature for 30 minutes.

Nutrition Value

  • Calories: 839kcal
  • Carbohydrates: 100g
  • Protein: 11g
  • Fat: 46g
  • Saturated Fat: 24g
  • Trans Fat: 1g
  • Cholesterol: 128mg
  • Sodium: 671mg
  • Potassium: 584mg
  • Fibre: 3g
  • Sugar: 67g
  • Calcium: 296mg
  • Iron: 4mg

To Conclude!

This homemade ice cream cake recipe is a delightful treat that is perfect for any occasion. Whether you’re celebrating a birthday, hosting a BBQ, commemorating an anniversary, or simply craving something sweet, this recipe will surely bring a smile to your face. With its luscious layers of creamy ice cream, delectable cookie crust, and indulgent toppings, this is a crowd-pleaser that will impress your guests and satisfy your dessert cravings. So go ahead and give it a try. Get creative with your choice of ice cream flavors and toppings, and enjoy this homemade delight’s sweet, frozen goodness.

If you try this recipe, please let us know. Please comment if you have questions about the recipe or want to share your version of Ice Cream Cake. Don’t forget to share it with your friends and family; I am sure they’ll love it too.

For more such recipes!

Dump Cake Recipe: An easy dessert for the entire family!

Source Link: https://preppykitchen.com/

Dump Cake Recipe

0
Dump Cake
Dump Cake

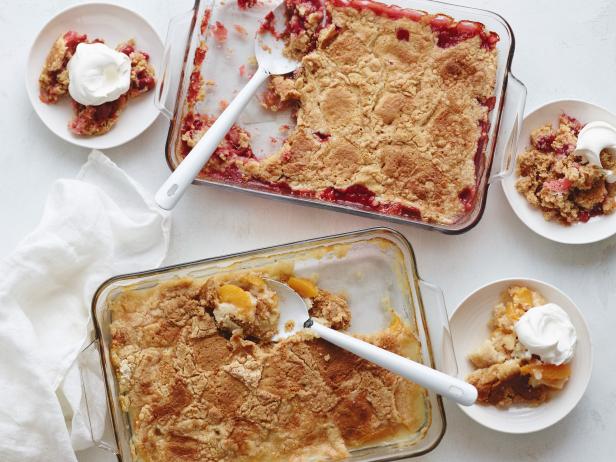
Dump cakes are an easy way to make desserts without having to worry about mixing or baking. The best part about this easy Dump Cake recipe is that it only takes 4 ingredients, 5 if you count the butter for greasing the baking dish. And in case you’re wondering, yes—there are several ways to make a dump cake.

You can use any combination of fruits or other ingredients if they fit within your calorie limit. The most common filling element is apple pie mix. You’ll need one box per cake layer; each pack has about 25 calories (75 calories per serving). Other options include mashed bananas or berries with whipped cream for a creamy sweetness.

What is Dump Cake?

Dump cake is a simple dessert made by dumping batter over fruit or other ingredients and baking it. It’s perfect for kids who don’t like to mix up batters or dig into pans but still want something sweet. They can also help with this recipe if they want to get their hands dirty.

The name “dump cake” comes from the technique used to make it — simply dumping everything into a pan before baking. The batter will be thick enough to rise around the fruit filling as an egg custard would in a traditional cobbler recipe when it bakes.

Ingredients:

  • 28 ounces/ 1 large can cherry pie filling
  • 15 ounces/ 1 can crushed pineapple
  • 18-ounce box yellow cake mix
  • 12 Tablespoons butter
  • Chopped nuts optional
  • Vanilla ice cream optional

Instructions:

  • Grease a 9″ x 13″ pan and preheat the oven to 350°F. Place the crushed pineapple in the pan’s bottom. Add the cherry pie filling on top after that.
  • Sprinkle the fruit with the cake mix. After that, sprinkle the top with roughly 24 thin slices of butter.
  • To ensure uniform melting, I arrange the butter in 6 rows across the top and 4 rows down. Adding nuts on top is optional.
  • Bake for 35 to 45 minutes or until bubbling and golden brown. Before serving, remove from the oven and let cool for a while.
  • If desired, garnish with whipped cream or vanilla ice cream.

Tips for making the dump cake:

You may top the cake mix with nuts like chopped pecans or walnuts if you want it to have an additional crunch.
The dump cake may be spiced up even more by using cinnamon, nutmeg, or apple pie spice.
With some whipped cream or a scoop of ice cream and a drizzle of caramel, this cake is excellent served.

It might be hard to determine when the cake has done baking since it is so gooey and moist. The traditional method of testing the doneness of the cake by inserting a toothpick will not work. Instead, check to see if the cake has crispy areas on top and is bubbling around the pan’s edges.

Favorite Variations:

  • Cherry: I used a can of pineapple and a can of cherries for this particular recipe. However, if you’d like, you could make a straightforward cherry dump cake and use two cans of cherries. But I enjoy how the pineapple gives it a little more sweetness.
  • Peach: Use 2 cans of sliced peaches in heavy syrup to make a peach dump cake. If you wish, you may also use 1 can each of sliced peaches and pineapple. Alternatively, prepare your own peach pie filling. Feel free to add additional cinnamon sugar if you want to give the dish a little more flavour.
  • Apple: Use two cans of apple pie filling to create an apple dump cake. Additionally, you can include other spices like cinnamon, nutmeg, or apple pie spice.
  • Blueberry: Use 4 cups of fresh blueberries or two cans of blueberry pie filling. Add 1/2 cup sugar when using fresh blueberries. You may add cinnamon, vanilla, or shredded coconut for flavouring. Additionally, it tastes fantastic with chopped nuts on top, such as pecans or almonds.

Nutrients Value:

  • Calories: 354 kcal
  • Carbohydrates: 59g
  • Protein: 2g
  • Fat: 12g
  • Saturated Fat: 7g
  • Cholesterol: 30mg
  • Sodium: 421mg
  • Potassium: 136mg
  • Fibre: 1g
  • Sugar: 23g
  • Calcium: 106mg
  • Iron: 1.1mg

How to store this cake?

You can store this cake in the refrigerator, covered in plastic, or in a container. It will keep for several days and takes well to reheat. It is a good option for breakfast too, reheat the cake with a scoop of yoghurt.

Dump cakes are typically baked at low temperatures for about 45 minutes until cooked through but can also be baked at higher temperatures if desired (around 350F). This keeps the crust from getting too dark while still allowing the inside of the cake to cook thoroughly to retain its moisture and flavour.

To Conclude:

You can prepare this luscious cake to make your evening more amazing. In case you want to have a small party at your home, then also you can just make it. This cake is considered one of the tastiest cakes that can be baked at home with no more difficult procedure. You just need to collect some of the ingredients and follow the simple steps. So there you go enjoying the delicious cake.

Please feel free to comment if you have any queries regarding the recipe or would want to offer your own take on the different variations of dump cakes. Don’t forget to tell your family and friends about it; I’m sure they’ll like it as well.

Want to try more such recipes:

How does a delicious carrot cake sound for breakfast?

Chimichurri Sauce Recipe

0
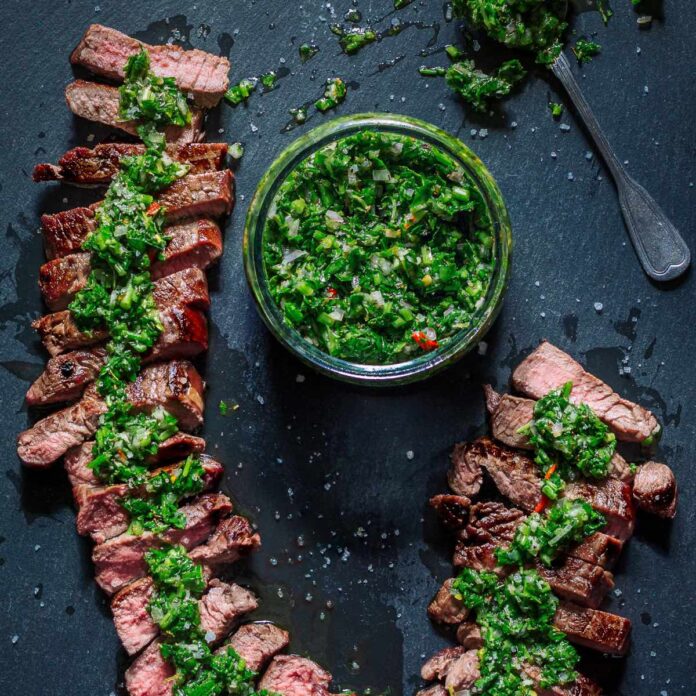
chimichurri-steak

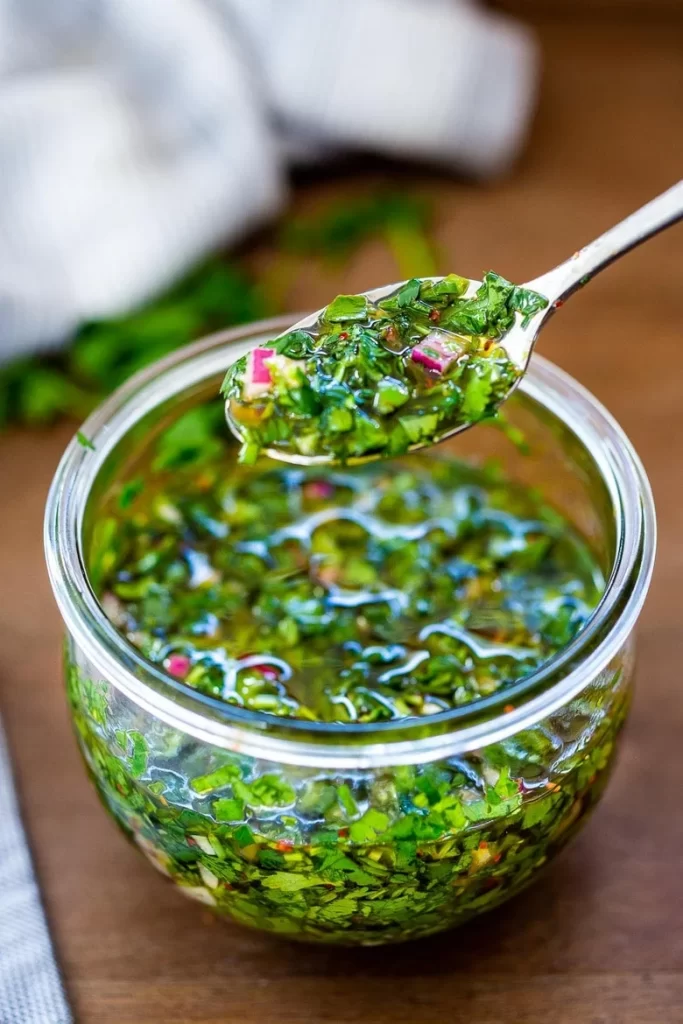
Are you looking for a delicious and easy way to add flavor to your grilled meats and vegetables? Look no further than chimichurri sauce! This Argentinean condiment is made with fresh herbs, garlic, olive oil, and vinegar and perfectly accompanies anything grilled.

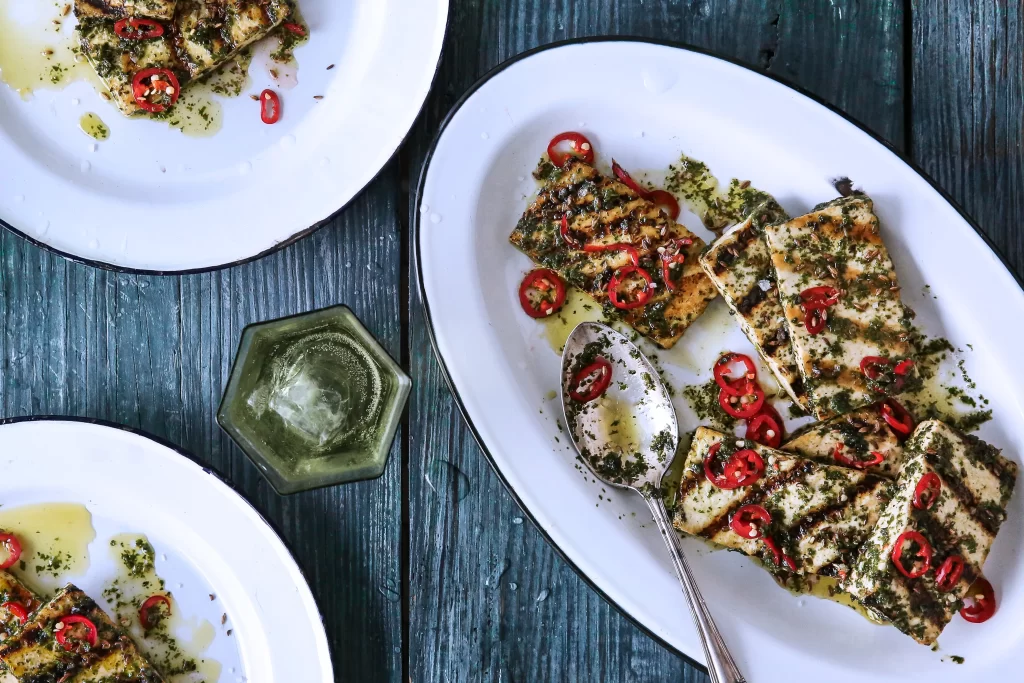
Chimichurri sauce is packed with flavor and is incredibly versatile. You can use it as a marinade for meats or a topping for grilled vegetables and fish. It also works great as a bread dip or a spread on sandwiches. And the best part? It takes just 10 minutes to prepare.

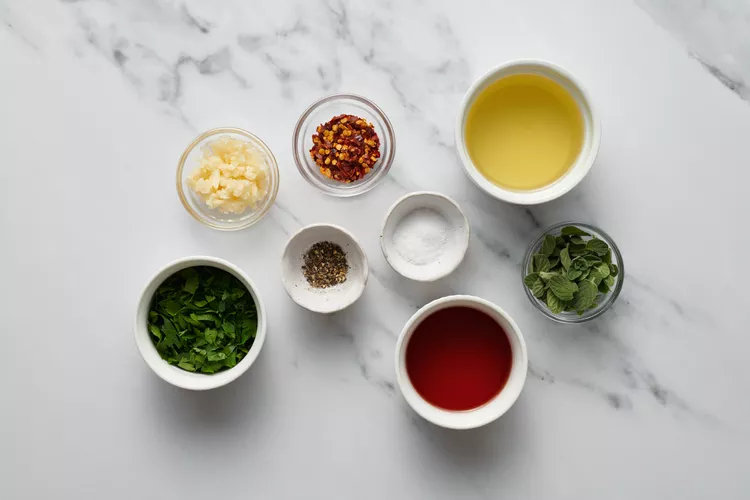
Ingredients

  • 1/2 cup olive oil
  • 2 tablespoons red wine vinegar
  • 1/2 cup parsley
  • 3-4 cloves garlic
  • 2 small red chilies
  • 3/4 teaspoon dried oregano
  • salt and pepper

Directions For Chimichurri Sauce

  • In a bowl, combine all of the ingredients. Before using, let the oil remain for 5 to 10 minutes to allow all of the flavors to be released. 
  • If you have the time, let it rest for longer than 2 hours.
  • Chimichurri may be made and stored in the refrigerator for up to 24 hours.
  • Use while grilling or barbecuing to baste meats (such as chicken or steaks). 
  • Instead of using it as a marinade, we use chimichurri to baste our steaks. But if you choose, you may marinate your food in it.
  • Add a few teaspoons to the meat as well before serving.

Recipe Notes

  • Before you begin, finely cut your parsley. I typically get a sizable handful, wash it, and cut it finely before measuring. If you don’t have enough, take a little more and continue to chop until you do.
  • Use four cloves of garlic if you enjoy its pungent flavor. Start with 2 cloves of garlic if you want a mellower flavor; combine everything, and let settle for a few minutes. Taste test after that. Add extra if you want it.
  • You may customize chimichurri to your preferences. Add additional chili, pepper, salt, or all of the above. You have the choice.
  • Red chili powder is optional. You can use half, none, or a huge chili instead of what we use. Alternatively, use 1-2 tablespoons of dried red chili flakes.
  • The ideal vinegar for chimichurri is red wine vinegar. Use lemon juice as a replacement. White vinegar and balsamic are not recommended.

Nutrients Value

  • Calories: 128kcal
  • Carbohydrates: 1g
  • Fat: 13g
  • Saturated Fat: 1g
  • Sodium: 3mg
  • Potassium: 61mg
  • Vitamin A: 425IU
  • Vitamin C: 21.5mg
  • Calcium: 12mg
  • Iron: 0.5mg

Final Words

This simple yet flavourful sauce can be made in just 10 minutes with a handful of ingredients that you can quickly gather from your nearby store. Moreover, you can use it as a topping for your morning eggs or stir it in your favorite beans or yogurt. This sauce is a must-have for your delicious barbecue or anything grilled; you want to have.

If you try this recipe, please let us know. Please comment if you have questions about the recipe or want to share your version of the chimichurri sauce. Don’t forget to share it with your friends and family; I am sure they’ll love it too.

MORE SUCH RECIPES:

Make this delicious enchilada sauce at home in just 5 minutes!

Mango Salsa Recipe

0
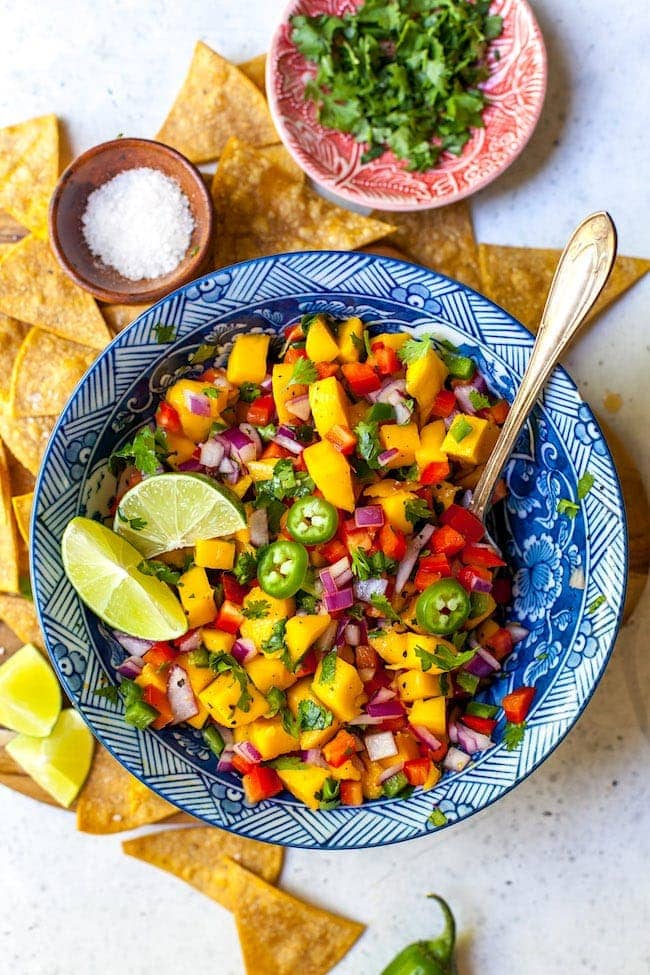
Mango salsa

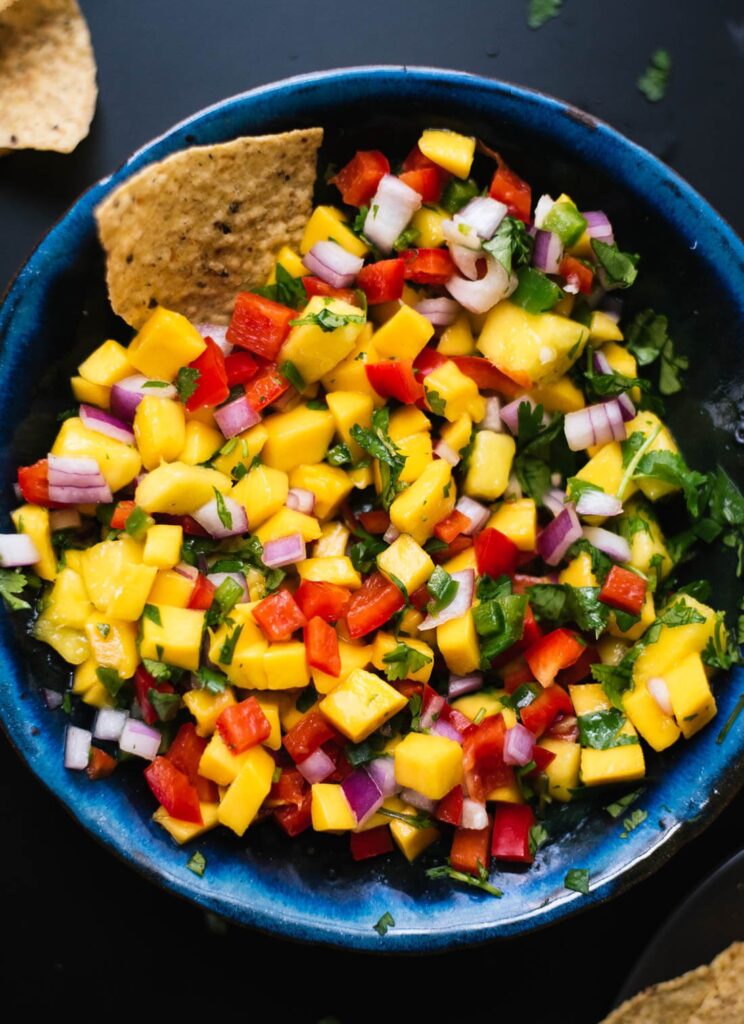
This simple and colorful mango salsa is super easy to make. It’s sweet, spicy, and absolutely delicious. Serve this fresh mango salsa with chips, on tacos or salads, or as a salad itself. It’s that good. The recipe yields about 3 cups of salsa.

Mango salsa is a fresh, fruity, spicy dip with chips, tacos, or salads. It’s also great as a salad itself. This simple and colorful mango salsa is super easy to make. The key ingredient in this recipe is mango. Mangoes are sweet and juicy fruits from Southeast Asia’s tropical evergreen tree.

Moreover, mangoes are rich in vitamins C & A and other essential nutrients like fiber & potassium, which help prevent cardiovascular disease & high blood pressure while strengthening your bones & teeth. They’re also loaded with antioxidants that help fight cancer inflammatory conditions like arthritis & Crohn’s Disease, along with viral infections such as flu viruses.

Ingredients

  • 1 cup chopped mangoes
  • 1/4 cup chopped onions
  • 1/4 cup bell pepper
  • 1/4 teaspoon black pepper
  • 1/4 teaspoon ground cumin
  • 1/8 teaspoon cayenne pepper
  • 1 teaspoon green chilies
  • 2 to 3 tablespoons coriander leaves
  • 2 teaspoons lemon juice
  • salt

Directions

To prepare the mango salsa:

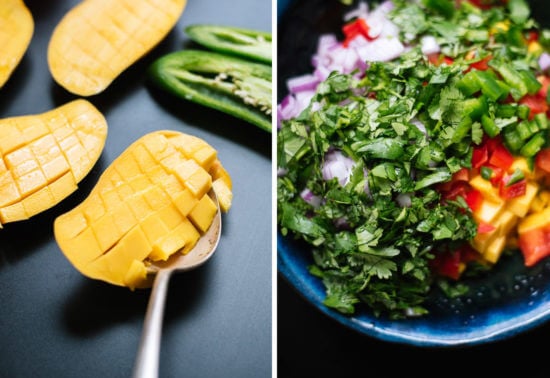
  • Mango should be peeled and cut into tiny chunks. Mangoes should be available in 34 to 1 cup of chopped form. 
  • Make use of ripe, delicious mangoes. Any sort of sweet, meaty mangoes will do.
  • Finely cut the red bell pepper and onion. Coriander leaves, and green chili pepper should also be chopped. Place aside.

Making the mango Salsa:

  • Mixing bowl with the diced mangoes added. 
  • The finely cut onions, red bell pepper (red capsicum), green chilies, and chopped coriander leaves should then be added.
  • Add cayenne pepper, red chili powder, cumin, or black pepper that has been crushed.
  • Add the lemon juice. If you’d like, you may add extra lemon juice.
  • Salt should be added last.
  • Combine everything well. Examine the flavor.
  • You can increase the number of green chilies in the salsa if you like hotter. Add extra mangoes if the dish is too hot.
  • Serve mango salsa alone or with tacos, nachos, or crackers.

Tips and Notes:

  • Use mangoes with firm flesh that are young, ripe, and delicious.
  • Add more or less of the green chilies, lemon juice, and ground spices depending on your preferred level of heat.
  • You can choose to add tomatoes.
  • For a delightful, more nutritious twist on your mango salsa, consider adding avocado, pineapple, or peaches.
  • Make the dish at a larger scale for potlucks or small gatherings.

Nutrition Content:

  • Calories: 106 kcal
  • Fat: 1g
  • Saturated Fat: 1g
  • Sodium: 595mg
  • Potassium: 351mg
  • Carbohydrates: 26g
  • Fiber: 4g
  • Sugar: 20g
  • Protein: 2g
  • Iron: 1mg
  • Calcium: 34mg

To Sum up!

In conclusion, this simple mango salsa is not only easy to make but also incredibly flavorful. With a perfect combination of sweetness and spiciness, it can be served with chips, on tacos or salads, or even as a salad itself. It is a versatile dish that you can enjoy as a snack or a meal, and with its vibrant colors, it is sure to impress your guests. With a yield of about 3 cups, this mango salsa is perfect for sharing or enjoying all by yourself. So, go ahead and give this recipe a try, and enjoy the deliciousness of this fresh and vibrant mango salsa.

If you try this recipe, please let us know. Please comment if you have questions about the recipe or want to share your version of mango salsa. Don’t forget to share it with your friends and family; I am sure they’ll love it too.

MUST TRY: Unleash the Flavor of Asia with Chicken Lettuce Wraps!