Home Blog Page 6

Mango Oats Chia Pudding Recipe for Breakfast

0
mango-oats-chia-pudding

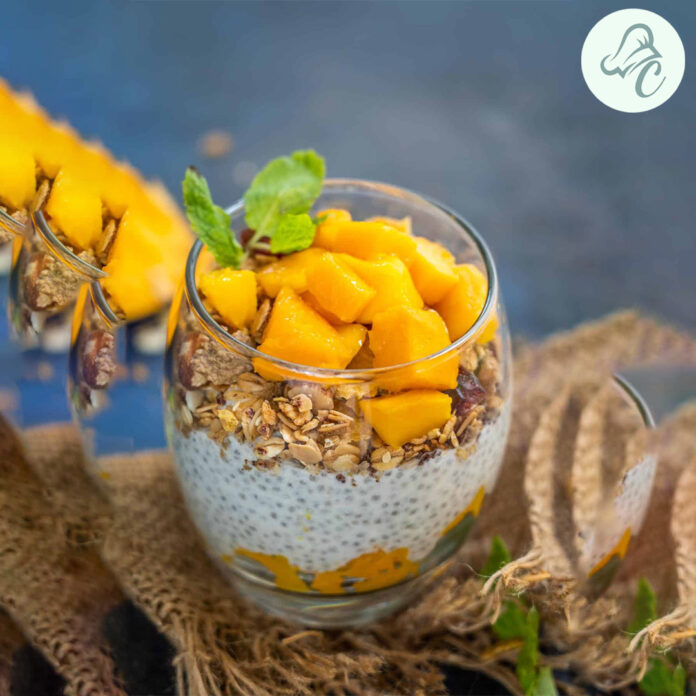
We’re discovering the delicious realm of mango pudding today, especially the Mango Oats Chia Pudding. This complete pack of nutritional value and tropical tastes, this easy-to-prepare meal bowl is perfect for a healthy and nutritious breakfast. This recipe is going to become a favorite, no matter your preference for mango pudding recipes, mango and chia pudding, or simply an original spin on your morning meal.

About Mango Oats Chia Pudding

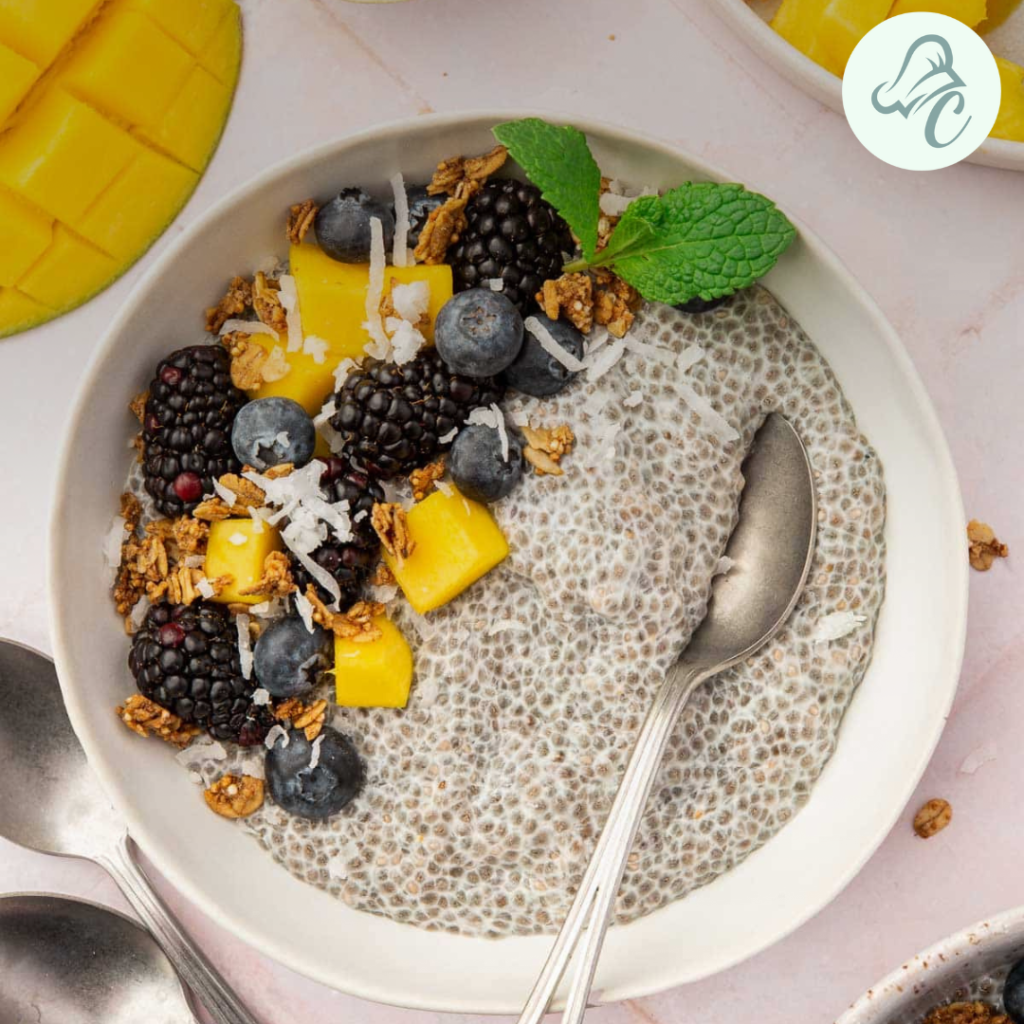
The mango oats chia pudding is a flexible and mouthwatering breakfast that combines the smoothness of chia pudding, the mango taste, and the dietary fiber of oats. This recipe offers an exciting way to begin your day with key vitamins and a power blast. It is ideal for people who love mango custard pudding or are interested in attempting out mango sago pudding because it captures the exceptional of both worlds. The mixture of oatmeal, chia seeds, and mango tastes extraordinary and packs a dietary punch that will help you jumpstart your day.
The History of Mango Pudding

Mango pudding is one well-liked dessert across many countries, especially in Asia like China, India, and Thailand. Traditionally it was made from pureed mangoes, milk blended with sugar sweetened with gelatin or agar-agar sometimes. In recent times, however, more ingredients such as oatmeal cereal have been added to make it suitable for people who prefer having different kinds of food. With the inclusion of oats and chia seeds into this ancient dessert, it can now be enjoyed as a healthy breakfast dish with all its originality still intact; hence retaining those cherished tropical flavors found in typical mango puddings.

Ingredients for this pudding:

To make this delicious mango oats chia pudding, you’ll need the following ingredients:

  • 1 ripe mango, peeled and chopped
  • 1/2 cup rolled oats
  • 2 tablespoons chia seeds
  • 1 cup almond milk (or any milk of your choice)
  • 1 tablespoon honey or maple syrup (optional)
  • 1/2 teaspoon vanilla extract
  • Fresh mint leaves and additional mango slices for garnish
Choosing the Right Mango

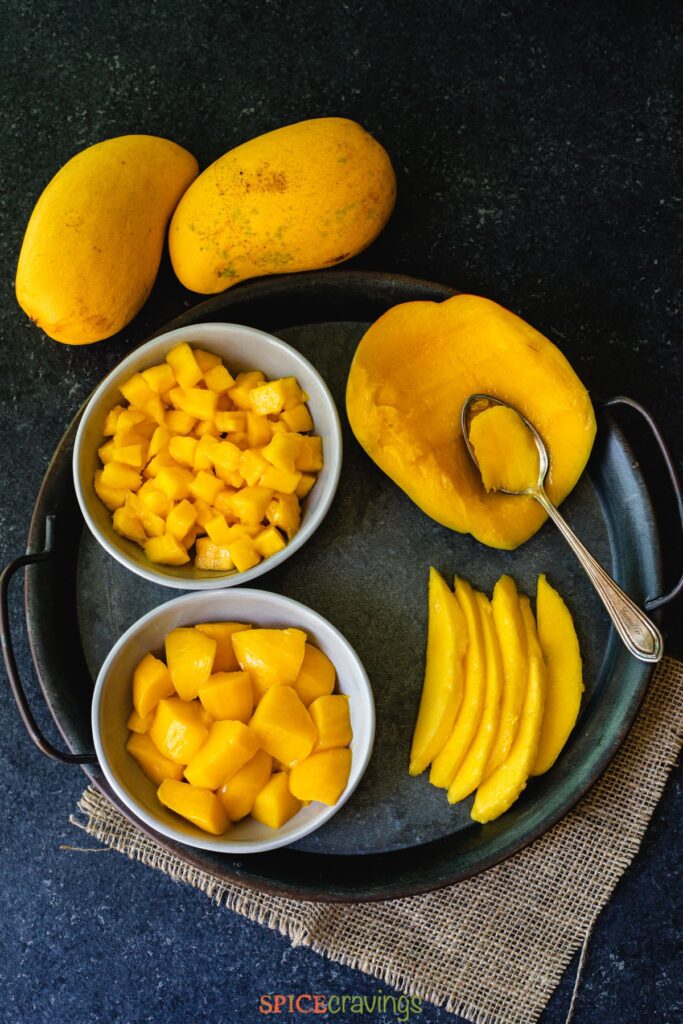
Choosing an appropriate mango is necessary to make an amazing mango pudding. Try for ripe mangoes that have a pleasantly sweet, flavorful scent that is a little soft to the touch. In addition to their rich flavor and sweetness, types like Alphonso, Haden, or Ataulfo are perfect options.

Instructions

  1. Prepare the mango puree: Blend chopped mango until smooth. Set aside a few pieces for garnish, if desired. The mango puree should be smooth and free of lumps. This ensures a creamy texture in your pudding.
  1. Mix the Pudding Base: In a bowl combine rolled oats, chia seeds almond milk, honey or maple syrup and vanilla extract. Stir well. Ensure chia seeds and oats are evenly distributed. The mixture should be well-mixed. This allows the chia seeds to absorb liquid evenly.
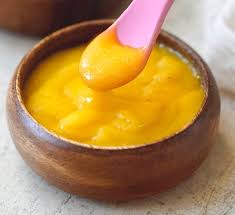
  1. Combine with Mango: Add the mango puree to the pudding mixture. Stir until well combined. The vibrant color of the mango puree will give the pudding a beautiful golden hue.
  1. Chill: Cover the bowl and refrigerate for at least 4 hours or overnight. This allows the chia seeds to swell. The oats will soften, creating a thick, creamy pudding. The longer the pudding sits the thicker it will become.
  1. Serve: Once set, give the pudding a good stir. Then spoon into bowls or jars. Garnish with fresh mint leaves and additional mango slices. The garnish adds a touch of freshness. It makes the dish look more appealing.

Tips for Making the Perfect Mango Oats Chia Pudding

  • Consistency: Adjust the thickness by including more milk if the pudding is simply too thick. The texture ought to be creamy, but now it is not runny.
  • Sweetness: Adjust the beauty by way of including more honey or maple syrup as consistent with your flavor. Remember, the natural sweetness of the mango will even contribute to the general flavor.
  • Overnight Soaking: For a smoother texture, soak the chia seeds and oats in a single day. This step is vital for achieving the proper consistency.
  • Freshness: Use ripe mangoes for their great taste and natural sweetness. Avoid the use of overripe mangoes, as they may be too mushy and have an effect on the texture of the pudding.

Health Benefits of this Yummy Pudding:

In addition, this mango oat chia pudding is tasty, but it comes with a ton of health benefits. Here’s an in-depth look at each of the key ingredient’s nutritional value:

  • Mangoes: They are full of antioxidants, fiber, and vitamins A and C. Mangoes are believed to have anti-inflammatory characteristics; they will additionally improve immunity and help with digestion.
  • Oats: Crucial factors along with iron, fiber, and protein are covered in oats. Because they lower cholesterol and normalize blood sugar levels, oats are excellent for heart health.
  • Chia seeds: rich in fiber, protein, and omega-3 fatty acids, they improve digestion and heart health. Chia seeds are an excellent complement to breakfast since they have the reputation of helping you feel fuller for longer.
  • Almond Milk: A low-calorie dairy product rich in vitamin E and calcium. Almond milk is also a terrific source of antioxidants and enables in preservation of bone health.

Benefits of Weight Management

Including mango oats chia pudding in your morning meal might assist in controlling your weight. The fiber from chia seeds and oats keeps you feeling full and content, which lessens the chance that you’ll nibble in the middle of the morning. 

Variations

According to me, such versatility is one of the biggest advantages of making mango oats chia pudding. Here are a few variations to keep your breakfast exciting: Here are the few modifications you can make to ensure that you do not get bored with the breakfast routine:

  • Mango and Sago Pudding: Expanding the image of a sago oat by replacing the oat with packed cooked sago to make the image richer. It is possible to cook sago in such accompanying ways since they balance each other on the plate /add a chew factor to the dish, while on the other hand, mango cubes have a smoother feel.
  • Mango Custard Pudding: But another layer can indeed be added again, for an additional touch of depth – a custard layer. It is also more preferable to be served in a smaller portion as a change from the sweet course.
  • Tropical Twist: In addition, it is also important to embrace the other fruits that may be grown in the tropics for instance pineapple or papaya. This fruit also assists in counterbalancing mangoes. Blend and should also add some freshness to the fruity taste.
  • Nutty Delight: There are ideas like adding almonds, cashews or nuts in certain areas so as to make the textures richer. Nuts also give an extra density of fats and proteins to the pudding, making it more nutritive from a nutritional point of view.

Storage and Meal Prep Tips

  1. Batch Preparation: Make several portions at once to be sure that during a rush morning, you will not spend a lot of time preparing food for your kids. Ideally, preserve them in tiny jars or small containers in case you wish to grab some in the morning for breakfast.
  2. Layering: It is ideal to make beautiful layers by rinsing the glass and layering the mango oats chia pudding with yogurt or another fruit puree.
  3. Refrigeration: To enhance the shelf-life of the pudding, it should be stored in the refrigerator in an air-tight box and it will remain fresh for up to 3 days.
  4. On-the-Go: To obtain your pudding on the go, use mason jars or any kind of portable container. This makes it a convenient option for breakfast at work or school.

FAQs

1. Are frozen mangoes acceptable for this dish?

Yes, you can use frozen mangoes; however, ice cream is preferred to be made from fresh mangoes. They just need to be thawed before blending into the recipe that they are going to be used for. Freshness is a problem when mangoes are not in season, but frozen mangoes can also be used conveniently.

2. Can I put together mango oats chia pudding beforehand or for how many days is it safe to consume the pudding?

Place it in the fridge and it will stay sparkling for up to a few days. After preparing the dish ensure to store it in a hermetic field in order for it to continue to sparkle.

3. Is it possible to prepare this pudding with vegan ingredients and substitutes?

Absolutely! Reduce the use of animal products by going for plant-based milk and natural sweeteners like maple syrup or agave. If you are going to use almond milk and not honey, this recipe is, by its nature, vegan.

4. Could this mango oats chia pudding be gluten-free?

Yes, as long as you buy gluten-free oats that have been certified to be gluten-free. Other oats usually contain gluten, but sometimes, due to contamination, you should use the one labeled as gluten-free oats.

Nutritional Value

Here’s a detailed nutritional breakdown per serving of mango oats chia pudding:

Calories:250 per serving
Protein: 6g
Fat: 8g
Carbohydrates:40g
Fiber: 7g
Sugar: 15g

This nutritional profile makes it a balanced meal, providing an awesome blend of macronutrients and vital nutrients and minerals.

Conclusion

Mango oats chia pudding is a delightful and nutritious way to begin your day. With its rich taste, creamy texture, and fitness benefits, it’s a breakfast that assesses all the packing containers. Easy to put together and flexible, it suits properly into any busy lifestyle even presenting a delicious break out to the tropics. Try this mango pudding recipe and discover the numerous ways you can experience mango and chia pudding. Don’t forget to check out our different associated recipes, like mango salsa recipes and Indian breakfast recipes, to make bigger your culinary horizons.

Happy cooking from Chef’s Home Around!
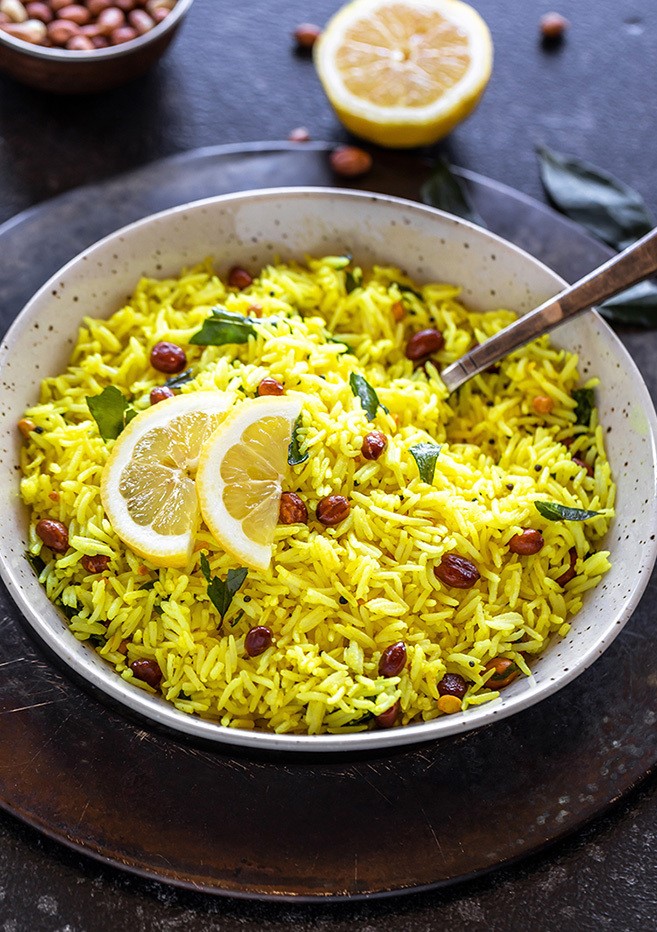
Lemon Rice Recipe: A Tangy Delight from South India

0
South Indian lemon recipe

If you are looking for the perfect dish, then you have got something that is delicious, colorful, and flavorful. We’ll be discussing the lemon rice recipe today, a traditional South Indian cuisine that has been tempting lips and palates for ages. The resulting dish is a great blend of aromatic spices, precisely cooked rice, and zesty lemon, making it a versatile addition to the plate. The following lemon rice recipe would taste beautiful as a summertime main course, a light food, or a refreshing side meal.

lemon rice recipe

About Lemon Rice Recipe

Lemon rice, which comes by the names “Chitranna” in Kannada and “Nimmakaya Pulihora” in Telugu, is a famous South Indian dish that is admired for its aromatic simplicity. This nourished meal, which has its origins in South Indian households, reflects the spirit of the region’s cuisine with its easy yet delicious recipe.

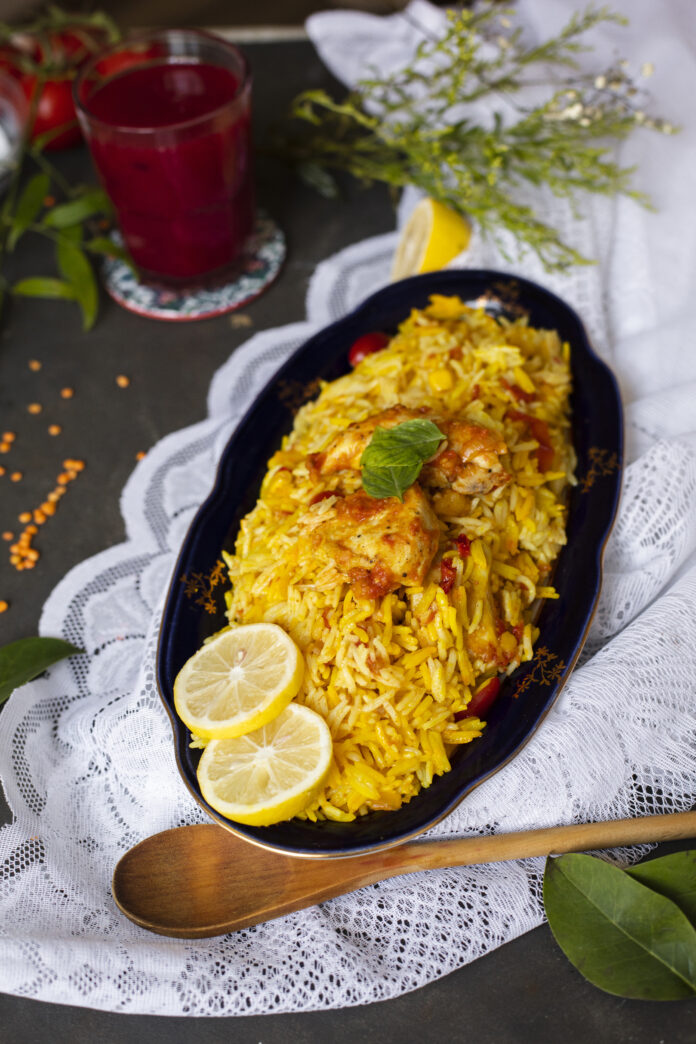
The basic ingredients of the lemon rice recipe include cooked rice, lime juice, turmeric, and a seasoning tadka of flavorful spices and pulses. This tempering gives the rice a bright yellow color and an acidic, intensely spicy aroma. The process additionally adds curry leaves, mustard seeds, urad dal, chana dal, dried red chilies, and peanuts or cashews for additional crunch.

Lemon rice is popular for its versatility and short practice using primary elements. Ideal for hot summer days, it’s light, clean, and easy to digest. Often prepared all through fairs and special events, it symbolizes prosperity and pleasure and is commonly supplied in temples as prasad (blessed meals). This dish is a lovely culinary delight, ideal for both seasoned cooks and beginners.

Ingredients:

  • 1 cup basmati rice or any long-grain rice
  • 2 tablespoons oil (vegetable oil, sunflower oil, or coconut oil)
  • 1 teaspoon mustard seeds
  • 1 teaspoon urad dal (split black gram)
  • 1 teaspoon chana dal (split chickpeas)
  • 2-3 dried red chilies
  • 1-2 green chilies, chopped (optional, for extra heat)
  • A pinch of asafetida (Hing)
  • 10-12 curry leaves
  • 1/4 teaspoon turmeric powder
  • 1/4 cup peanuts or cashews
  • Juice of 1-2 lemons (adjust according to taste)
  • Salt to taste
  • Fresh coriander leaves, chopped (for garnish)

Instructions:

  1. Cook the rice:
  • Use cold water to rinse a cup of rice until the water becomes clear.
  • In two cups of water, cook the rice until it’s firm but not mushy. For this, you can also use an instant pot or rice cooker.
  • After cooking, take a fork to fluff the rice and put it on a large dish or a tray to cool it. This makes it easier to maintain grain separation.
  1. Prepare the Tempering (Tadka):
  • Take two heaping tablespoons of oil and heat it over medium heat in a pan.
  • Add the mustard seeds (1 teaspoon) and let them crackle.
  • Add a teaspoon for both chana dal and urad dal. Fry to achieve a golden brown color.
  • Add 2 to 3 dried red chilies and cook for another second.
  • Put in a handful pinch of asafoetida (hing) and 10 to 12 curry leaves. For a few seconds, stir-fry.
  • Add 1/4 cup of cashews or peanuts and sauté until they get crispy and golden.
  • After adding 1/4 teaspoon of turmeric powder, quickly sauté.
  1. Combine the Rice and tempering:
  • Add the cooked and cooled rice to the pan with the tempering.
  • Gently mix everything together so that the rice is well coated with the tempering and turmeric. Be careful not to break the rice grains.
  • Add salt to taste, and mix well.
  1. Add lemon juice:
  • Turn off the heat and add the juice of 1-2 lemons. Adjust the lemon juice according to your taste preferences.
  • Mix well to ensure the lemon juice is evenly distributed.
  1. Garnish and Serve:
  • Garnish with chopped, fresh coriander leaves.
  • Serve the lemon rice warm or at room temperature. It pairs well with raita, papad, or a simple vegetable curry.
lemon rice

How to Make the Most Delicious Lemon Rice Recipe

  • Rice Texture: Check to see that the rice is cooked through without being overcooked. Once prepared, transferring the rice to a plate helps with grain separation.
  • Lemon Juice: Depending on your taste, reduce or modify the amount. lemon juice that is freshly squeezed has the most significant flavor.
  • Tempering: Take care to temper all things. This recipe acquires a lot of flavor through the combination of mustard seeds, lentils, and curry leaves together.

Health Benefits

Along with being delightfully tasty, lemon rice offers plenty of health benefits:

  • Loaded in antioxidants: Another one of the main antioxidants present in lemons is vitamin C.
  • Digestion Support: Asafetida (Hing) and the juice of lemons might help in digestion as well.
  • Nutrient-Dense: The grains and spices used to temper this dish give essential vitamins, minerals, and protein.

Variations for Lemon Rice Recipe

You may modify lemon rice to your preference according to your taste while having variations like:

  • Adding sautéed veggies, like bell peppers, carrots, and peas, to your cooked vegetable lemon rice.
  • While adding some grated coconut lemon rice, it may enhance additional flavor to this lemon rice.
  • For some additional spices and flavors, increase a dash of green chilies or just add a pinch of red chili powder to your lemon rice to make it spicy.

FAQs

Q: Is it possible to make lemon rice using leftover rice? 

A: This particular dish is great to make with leftover rice. It helps speed up the cooking process and helps keep the grains separate.

Q: How long is the duration of storage of lemon rice? 

A: Some of you can keep lemon rice in the fridge for as long as two days. Before serving, slightly heat it.

Q: Is there any gluten in lemon rice? 

A: Lemon rice is naturally free of gluten. Asafetida (Hing) contains wheat, so make sure that whatever brand you select is gluten-free.

Nutritional Value of Lemon Rice

A serving of lemon rice (approximately 1 cup) provides:

Calories:200
Carbohydrates:30g
Protein:5g
Vitamin C:15 mg
Fat:8g
Fiber:3g

Conclusion

This amazing and delicious lemon rice recipe will bring together the zestiness of lemon along with the aromatic flavors of South Indian spices in lemon rice. This lemon rice recipe will satisfy your cravings for immediate food or an appetizer to go with your curry. Give it an attempt, and permit the zesty flavors to brighten your day!

For more scrumptious recipes, take a look at our pesarattu recipe and Ritz crackers hen recipe on Chef’s Home. Happy cooking!

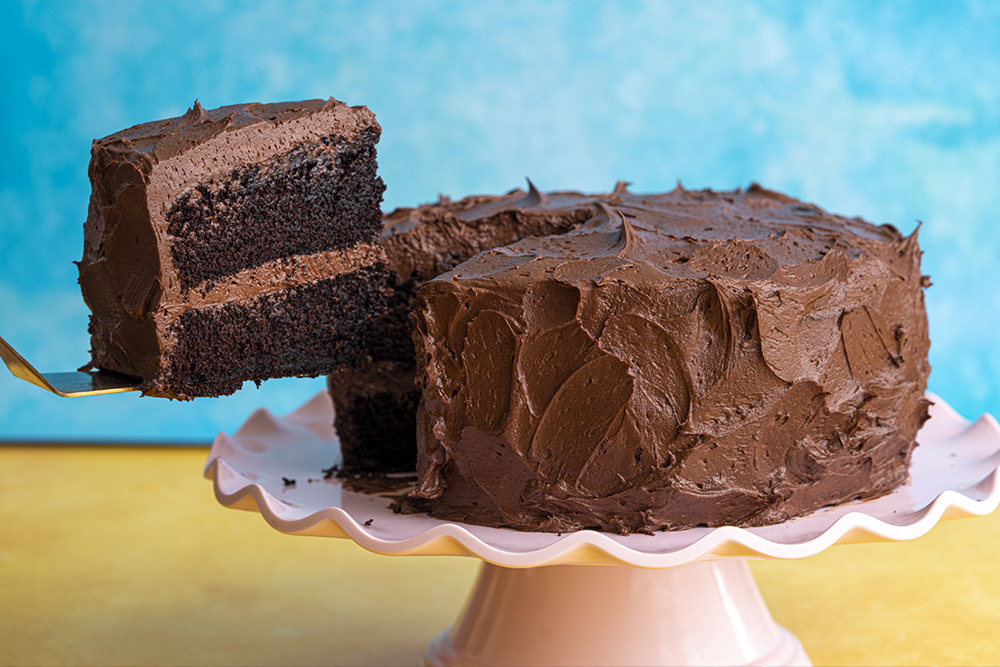
Delicious Gluten-Free Chocolate Cake Recipe

0
Gluten-free chocolate cake

Shouldn’t it be possible to indulge in a rather sinful dessert? However, if you have to follow the gluten-free plan, Well, lucky you! So, today, we are bringing you into the realm of a luscious and delicious gluten-free chocolate cake recipe. If you are celiac, gluten-sensitive, or just a glutton to try gluten-free versions, this recipe will give you an intensely soaked cake with a more traditional chocolate cake. And if you need a dairy-free option, it works great with almond milk. Loaded with guilt-free goodness GET THE GUILT-FREE FAVORITE BUNDLE and get ready to taste the closest thing to a dessert for everyone!

gluten-free cake

About Gluten-Free Chocolate Cake

Gluten-free chocolate cake is a good replacement for a normal chocolate cake if a person does not have gluten or if he/she has a preference for gluten-free products. There are significant tips to making a wonderful gluten-free cake, and one of them is to employ an excellent gluten-free atta/flour blend typically comprising rice flour and potato starch, and sometimes sweet potato flour and corn flour. This brings fusion, allowing the cake to have a soft texture, yet it remains moist and does not crumble.

However, it is also important to understand that this type of cake can easily be made non-dairy with the use of almond milk, or any other milk present on the market. This ease makes it a good option, especially for people with more than one restrictive diet or people with chewing difficulties. Nonetheless, what you will discover when applying these modifications is that this cake has an equivalent level of quality to a cake ordinarily containing gluten.

Ingredients

Dry Ingredients

  • 1+3/4 cups gluten-free atta/flour (with corn flour)
  • 1+1/2 cups granulated sugar
  • 1+ 3/4 cup cocoa (unsweetened)
  • 1+1/2 teaspoons baking powder
  • 1+1/2 teaspoons baking soda
  • 1+teaspoon salt

Wet Ingredients

  • 2 large eggs
  • 1 cup almond milk (or non-dairy milk)
  • 1/2 cup vegetable or melted coconut oil
  • 2 teaspoons vanilla extract
  • 1 cup boiling water
gluten-free cake pie

Instructions

  • Preheat the Oven: First, in preparation to bake your loaf, preheat your oven to 350°F or 175°C. Preheat the oven to 350°F and grease two 9-inch round baking pans with gluten-free atta/flour, or line them with parchment paper.
  • Combine dry ingredients: In a large bowl, whisk the gluten-free atta/flour, sugar, cocoa powder, baking powder, baking soda, and salt all together in a mixing bowl.
  • Add Wet Ingredients (except boiling water): Now, it’s time to incorporate the wet ingredients into the dry ones, mixing the eggs with the almond milk, vegetable oil, and finally vanilla extract. Mix for 2 minutes until the batter is well mixed and free of lumps.
  • Stir in Boiling Water: Just mix boiling water until only incorporated into the batter and avoid overmixing. It will be quite runny.
  • Divide the batter into pans and bake circles: Cake mixture for about 30 to 35 minutes, or until a tooth with a point inserted within the cake comes out clean.
  • Cool the Cakes: Allow cakes to remain in the pans for ten minutes before they are removed from the pans to cool on a wire rack until completely cold.

Tips for the Perfect Gluten-Free Cake

  • Check your flour mix: Make sure your gluten-free flour has corn flour, which acts like gluten.
  • Measure carefully: Use a kitchen scale for exact amounts, especially with gluten-free flour.
  • Don’t mix too much: Overmixing can make a heavy cake. Mix only until the ingredients are together.
  • Room Temperature Ingredients: Make sure your eggs and almond milk are at room temperature to ensure a smoother batter.
  • Greasing the Pans: Grease your pans well to prevent sticking, and consider using parchment paper for an easy release.

Health Benefits

  • This is a type that has no gluten, and it is rather healthy for anyone who has celiac disease or gluten intolerance.
  • To avoid the use of milk, it is replaced by almond milk for people with dairy intolerance or people who prefer taking vegan foods.
  • Compared to diverse types of gluten-free flour, this might be lower in carbs, and depending on the variety used, it could be even lower in carbs than conventional desserts.
  • Cocoa powder has many benefits as an antioxidant that might help you lessen the onset of infection and improve heart health.
  • One of the many nutrient-dense and uploading ingredients you may use is almond milk. This will generally assist you in uploading more vitamins, including vitamin E, that are great for your skin.

Variations

  • Nut-Free: In a similar way, if you are intolerant, then avoid taking almond milk but take other dairy product substitutes like oat milk.
  • Vegan: Use flax eggs as egg replacers, and these can be made by using ground flax seed and water, where you mix 1 tablespoon of flax seed with 3 tablespoons of water to replace one egg.
  • Extra Rich: A spoonful of instant coffee granules is also to be added to intensify the chocolaty taste.
  • Frosting Options: For the final touches, apply a layer of ganache made from melted chocolate and heavy cream, a delightful buttercream frosting, or a vegan-friendly coconut cream frosting.
  • Add-ins: A dash of dairy-free chocolate chips or chopped nuts would be well appreciated in this dish.

FAQs

1. What about other gluten-free flour blends?

Yes, but if it lacks corn flour, be sure to add a little, or your cake will be crumbly.

2. Can I make this cake vegan?

Absolutely! To make this recipe vegan, you can substitute flax eggs and almond milk.

3. How should I store this cake?

Can be stored at room temperature in an airtight container for 3 days or refrigerated for up to 1 week. Any subsequent portions can also be frozen for later storage.

4. I am wondering whether it is possible to substitute almond milk with normal milk.

Yes, you can use normal milk or any other milk you prefer or normally use in your diet.

5. What Type of Frosting Should I Apply to This Cake?

For this cake, you can choose a dense and fudgy chocolate ganache, a simple buttercream frosting, or a light whipped cream topping.

Nutritional Value (Per Serving)

Calories:250
Fat:12g
Carbohydrates:34g
Protein:3g
Fiber:2g

Conclusion

This delicious cake without gluten is perfect for any time. It will be a hit when you share it as a sweet or as a snack. Try it and tell us what you make at Chef’s Home! For more good meals without gluten, make sure to try our other foods, like our carrot cake and protein pancake. This cake is the perfect example of how flavor and feeling can still happen when baking without gluten. Have a guilt-free baking!

Aam Panna Recipe: Beat the Heat with This Tangy Delight

0
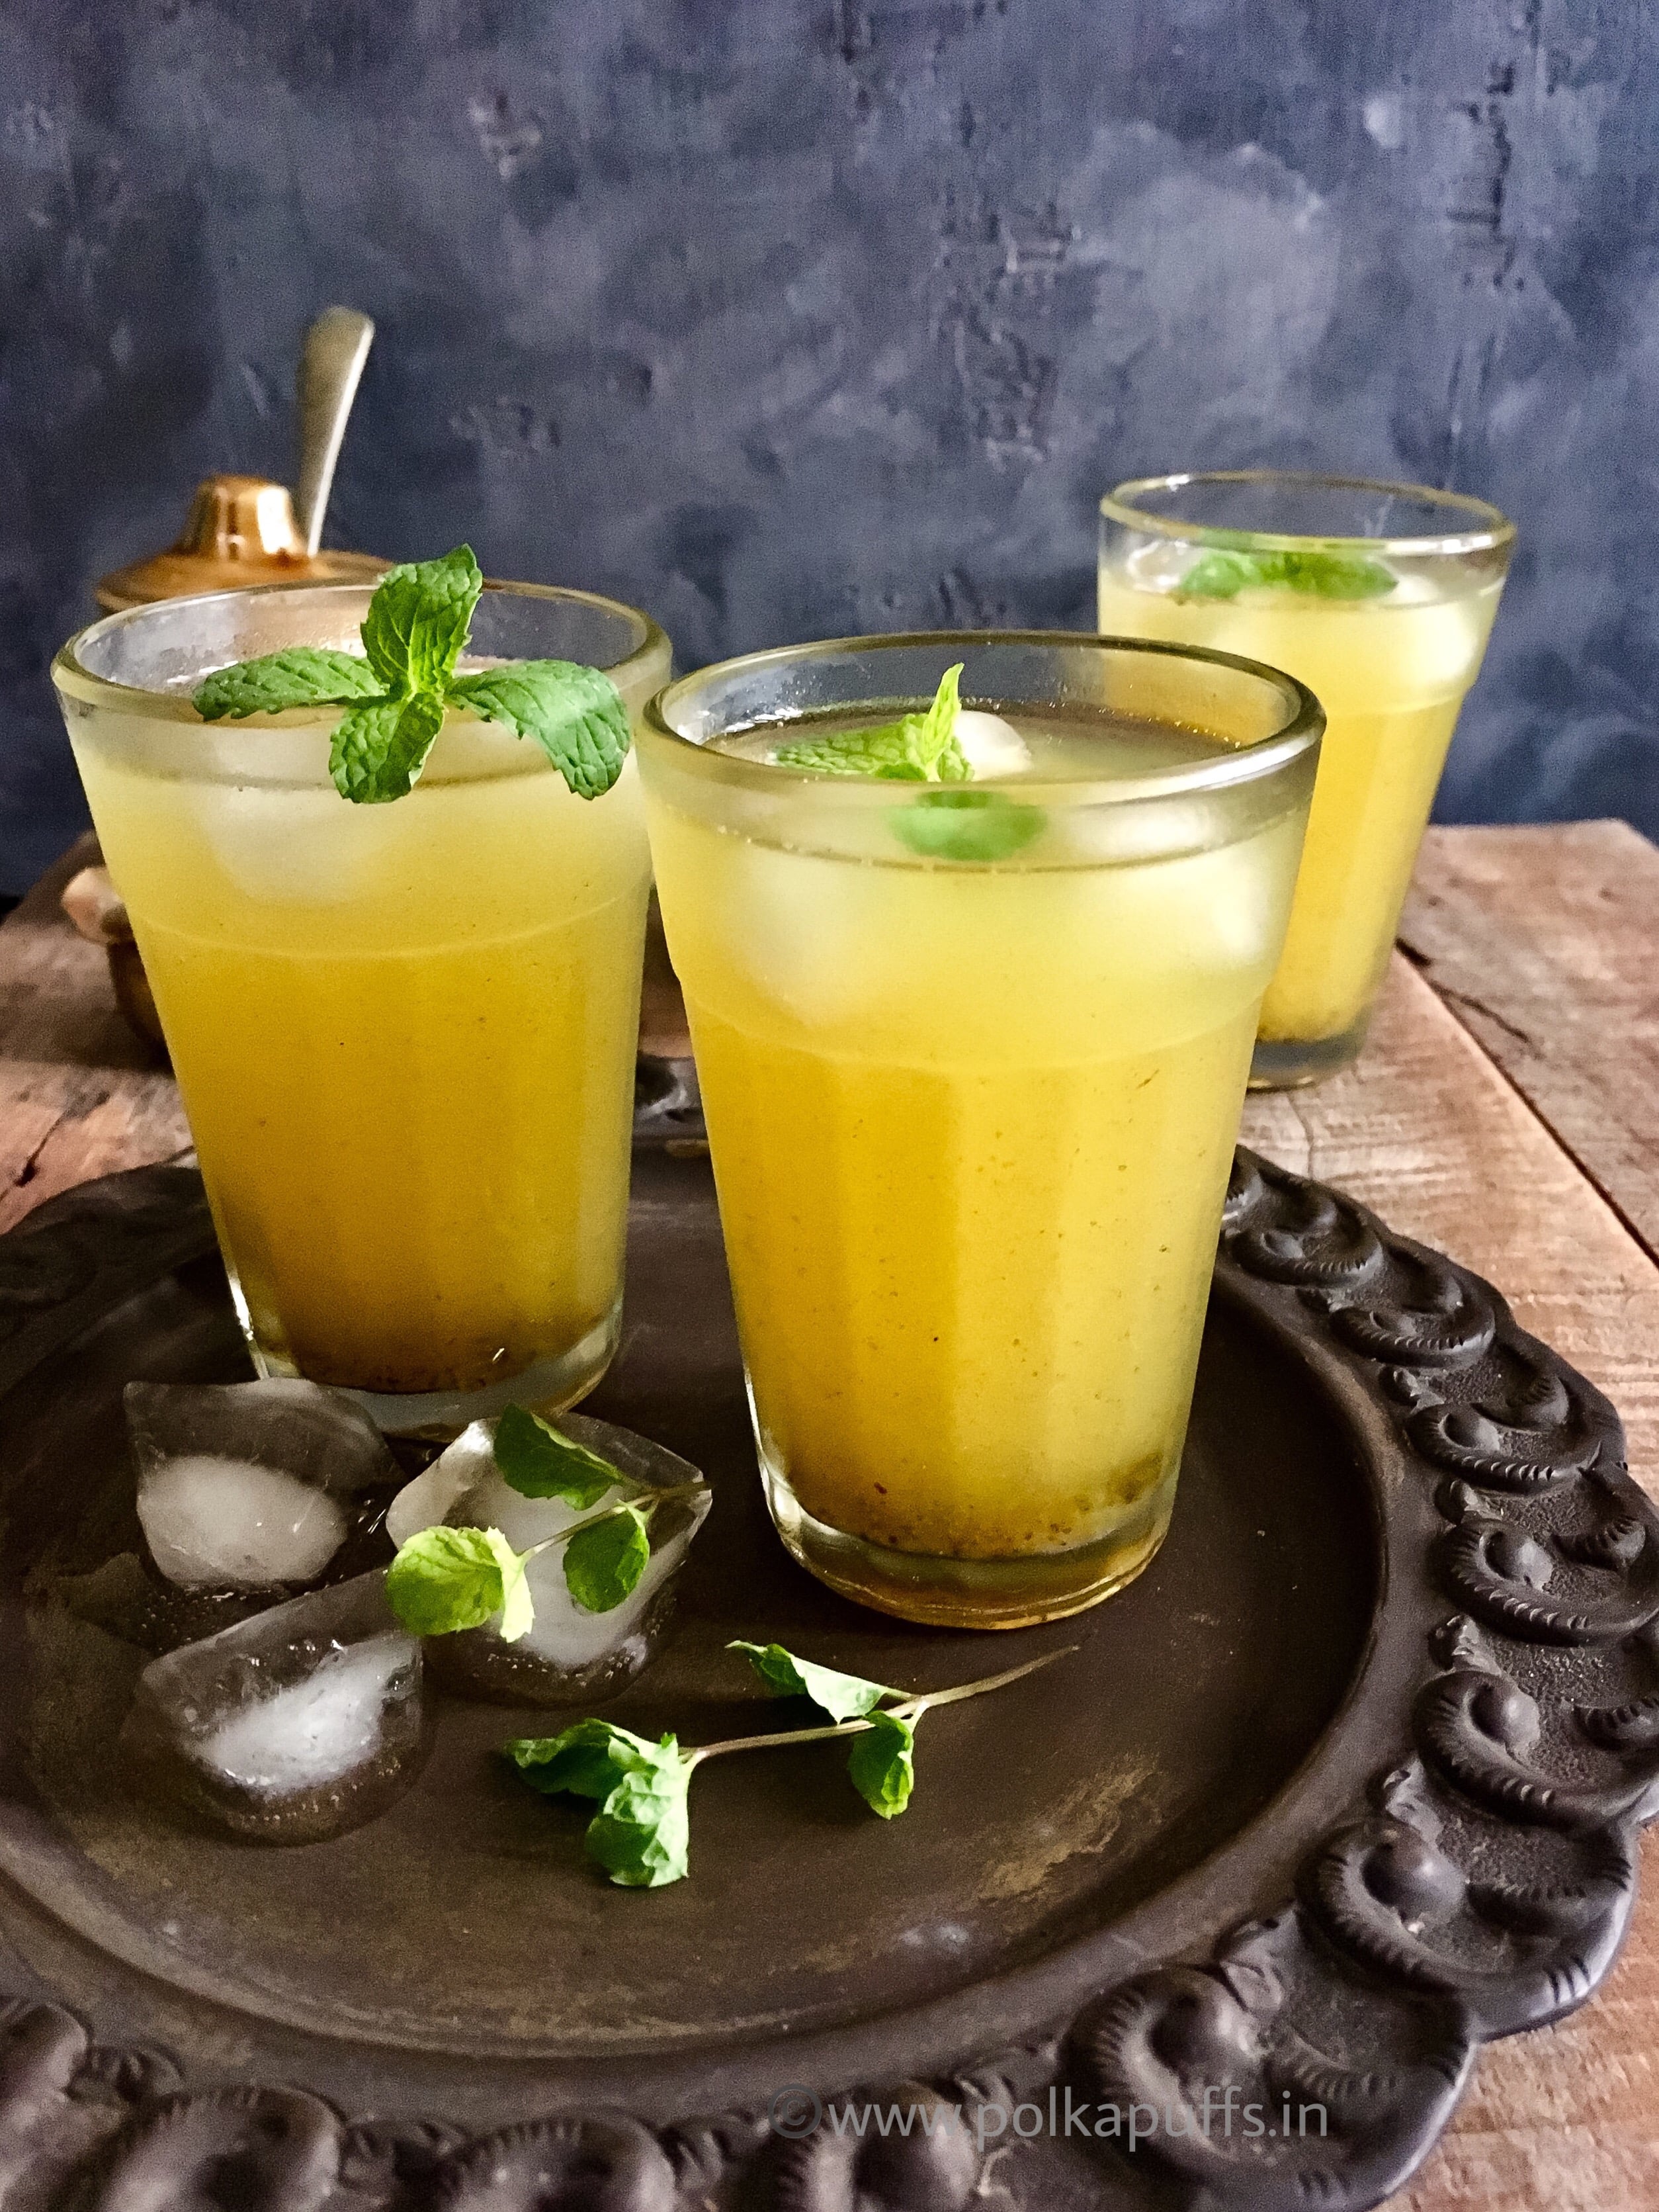
Aam panna drink

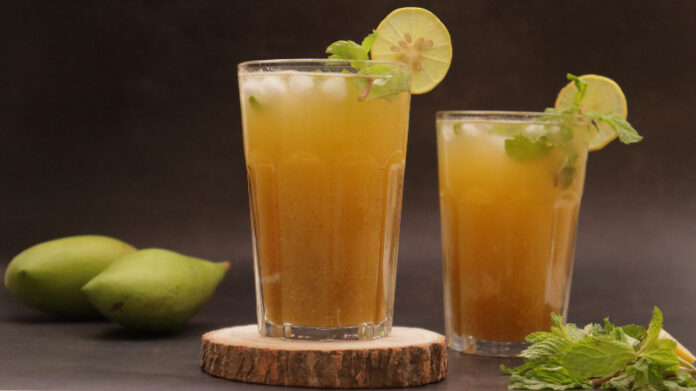
As the temperature rises and the summer season’s warmth intensifies, there is nothing more fulfilling than a refreshing summer drink to quench your thirst and revitalize your senses. Today, we are pleased to introduce you to the Aam Panna recipe, a traditional Indian summer drink that has been loved for generations. 

Aam Panna isn’t simply any regular drink; it is a flavorful combination of tangy raw mangoes, fragrant spices, and fresh mint that creates a symphony of flavors in every sip. This pleasant concoction isn’t only a treat for your flavor buds; it is additionally a powerhouse of fitness blessings, making it a crucial addition to your summer repertoire. 

Join us as we delve into the records, training, and myriad blessings of this wonderful beverage, ensuring you can effortlessly recreate this conventional recipe at home.

aam-panna-recipe

About Aam Panna

Aam Panna holds a special place in Indian families, specifically for the duration of the extremely hot summer months. Originating from the Indian subcontinent, this drink has been a cross remedy for heat exhaustion and dehydration for hundreds of years. The word “Aam” means mango in Hindi, and “Panna” refers to a drink or sharbat. Together, Aam Panna signifies a mango-based drink that is as nutritious as it is delicious.

The magic of Aam Panna lies in its specific mixture of raw, raw mangoes, sugar or jaggery, and a mix of spices like roasted cumin, black salt, and black pepper. This combination is then superior to the refreshing taste of mint, creating a beverage that is cooling and invigorating. Traditionally, Aam Panna is consumed to combat the harsh consequences of the summer sun, thanks to its potential to cool down the frame and top off lost electrolytes.

One of the most endearing qualities of Aam Panna is its versatility. It can be adjusted to fit a person’s tastes, whether or not you select it sweeter, spicier, or more minty. This adaptability has helped Aam Panna preserve its popularity throughout unique regions and generations. Whether served at family gatherings, fairs, or truly as a day-by-day refresher, Aam Panna is evidence to the rich culinary history of India.

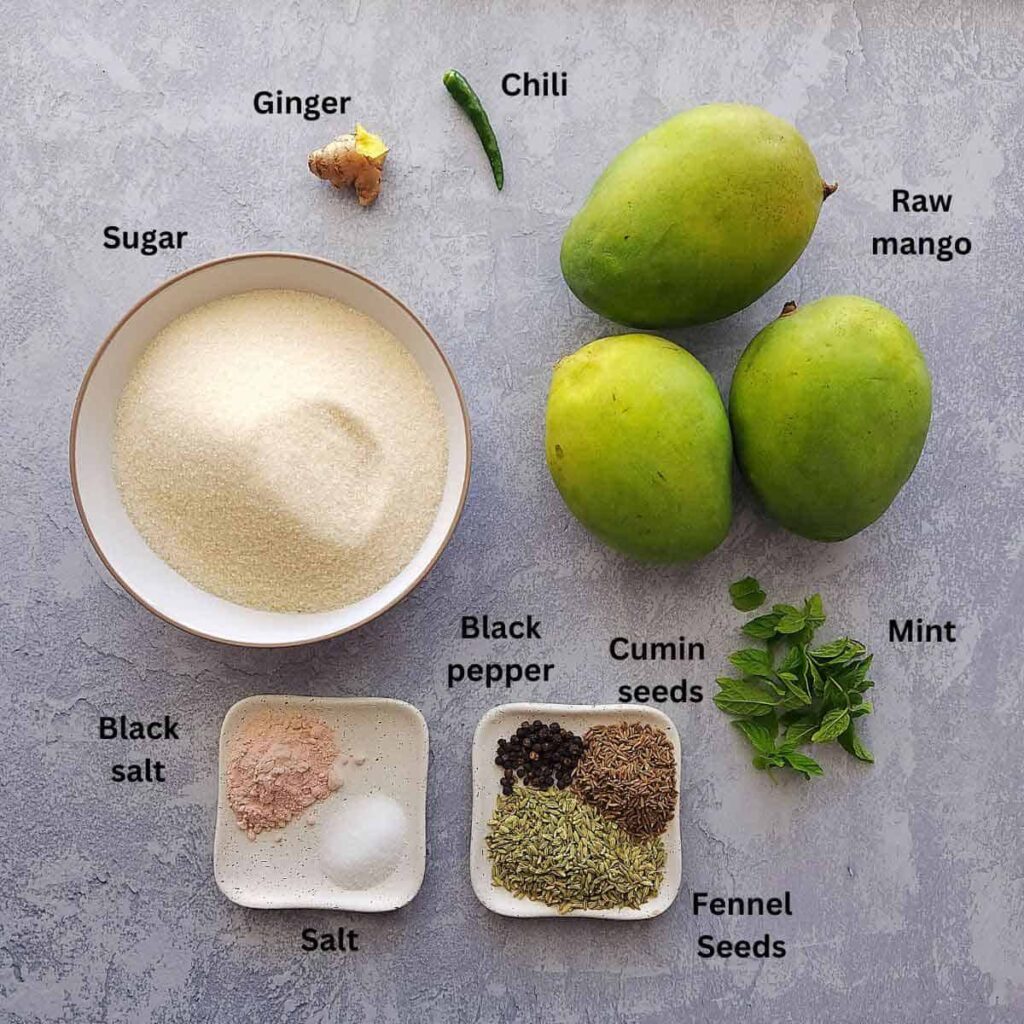
raw-mangoes-image

In this blog, we can guide you through the step-by-step method of creating Aam Panna, explore its numerous health benefits, and share guidelines and variations to help you ideal this conventional drink. By the end, you’ll be well-equipped to put together and revel in Aam Panna, bringing a touch of conventional Indian refreshment to your property. Let’s get started on this delicious journey!

Ingredients for Aam Panna recipe

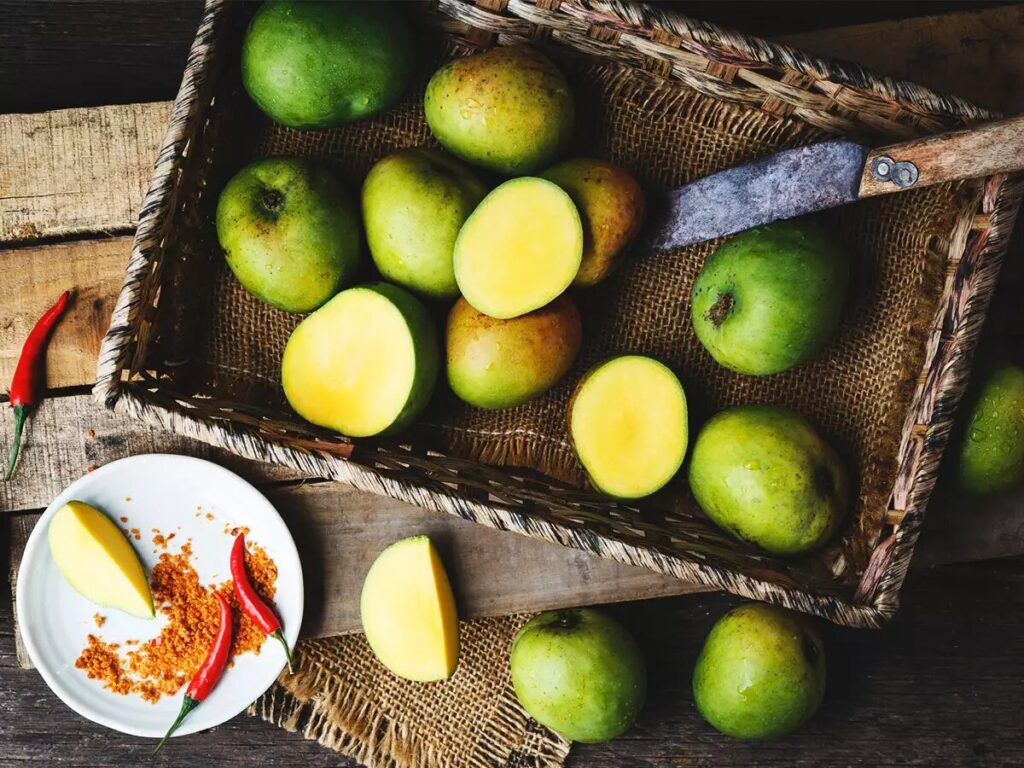
  • 2 large raw green mangoes
  • 1 cup sugar or jaggery (adjust to taste)
  • 1 teaspoon roasted cumin powder
  • 1 teaspoon black salt
  • 1/2 teaspoon black pepper (optional)
  • 1/2 cup fresh mint leaves
  • 4-5 cups water
  • Ice cubes (optional)
aamm-panna-masale

Preparation for Aam Panna recipe

  1. Boil the Raw Mangoes: Start by washing the raw green mangoes thoroughly. Boil or steam them until they are soft and cooked through. This usually takes about 15–20 minutes.
  2. Cool and Peel: Once the mangoes are soft, let them cool. Peel off the skin and extract the pulp, discarding the seeds.
  3. Blend the Mango Pulp: In a blender, combine the mango pulp, sugar or jaggery, roasted cumin powder, black salt, black pepper (if using), and fresh mint leaves. Blend until smooth.
  4. Mix with Water: Transfer the mango mixture to a large pitcher. Add water and mix well. Adjust the water quantity to achieve your desired consistency.
  5. Chill and Serve: Refrigerate the Aam Panna for at least an hour before serving. Serve chilled, with ice cubes if desired.
aam-panna-cooler-drink

Health Benefits of this Recipe:

  • Cooling Effect: Aam Panna helps cool down the body temperature, making it ideal for hot climates.
  • Hydration: Keeps you hydrated and replenishes electrolytes lost through sweating.
  • Digestive Aid: The spices like cumin and black salt aid in digestion and help prevent stomach issues.
  • Rich in nutrients: Packed with vitamins A and C, essential for maintaining good health.

Variations

  • Sweetener Swap: Use jaggery instead of sugar for a deeper, richer flavor.
  • Spice it up: Add a pinch of chili powder for a spicy kick.
  • Minty Fresh: Increase the amount of mint leaves for a more pronounced minty flavor.

Serving Suggestions

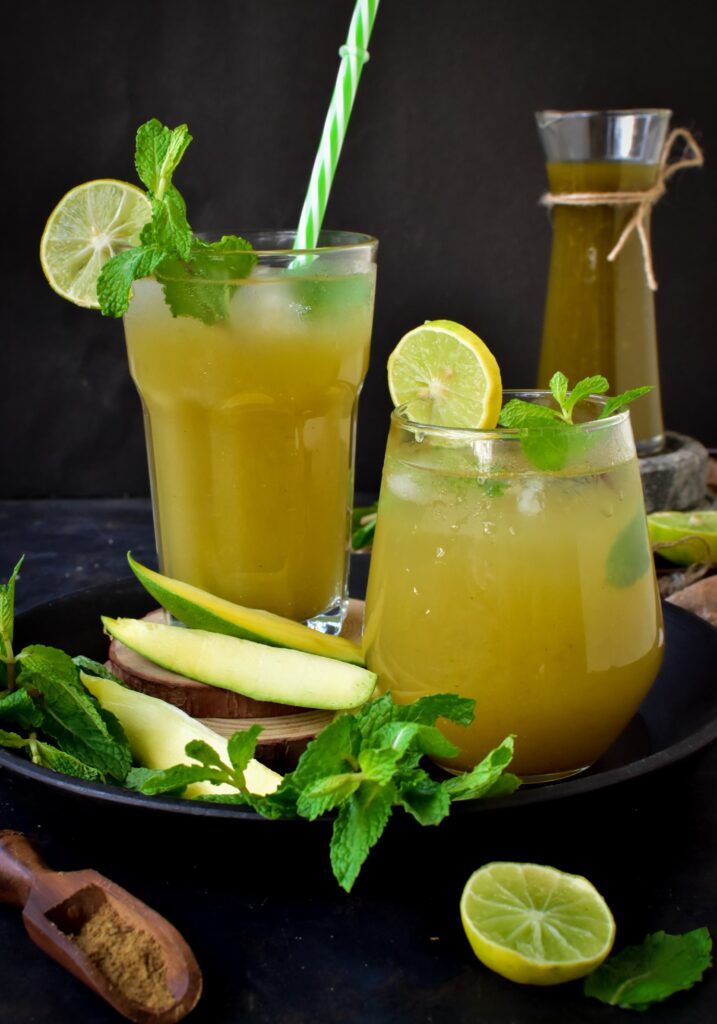
  • Serve Aam Panna chilled in tall glasses with a sprig of mint for garnish.
  • Pair it with light summer snacks like cucumber sandwiches or fruit salads.

Tips for the Perfect Aam Panna

  • Adjust Sweetness: Taste and adjust the sweetness according to your preference.
  • Strain the Pulp: For a smoother drink, strain the mango pulp before blending.
  • Use Fresh Spices: Freshly roasted and ground spices will enhance the flavor of your Aam Panna.

FAQs

1. Can I store Aam Panna? 

  •  Yes, you can store it in the refrigerator for up to 3 days.

2. Can I use ripe mangoes? 

  •  Traditional Aam Panna is made with raw green mangoes, but you can experiment with ripe ones for a different flavor.

3. Is Aam Panna good for kids? 

  •  Absolutely! It’s a healthy and hydrating drink suitable for all ages.

Nutritional Value

Calories:Approximately 100–150 per serving
Carbohydrates:25-30g
Vitamin C:20–25% of daily requirement
Vitamin A:15-20% of daily requirement

Conclusion

Aam Panna is an adorable and refreshing drink that no longer only effectively quenches your thirst but additionally gives numerous health advantages. Easy to put together and comparatively tasty, it’s a must-have summer-season drink. Try this Aam Panna recipe from Chef’s Home and enjoy a tangy deal that completes family love. For more fresh summer season beverages just like the Mango Banana Smoothie or precise delights like Gond Katira, discover our internet site and keep your kitchen vibrant and exciting all summer season long!

Indian Breakfast Recipes: A Delicious Start to Your Day

0
Indian breakfast recipes
indian breakfast recipes

Breakfast is the most important meal of the day, and what better way to start it than with a delightful twist on traditional Indian breakfast recipes? From the nutritious Quinoa Upma to the exotic Avocado and Egg Toast, these recipes not only bring a unique flair to your morning routine but also pack a punch of health benefits. Dive into this culinary journey with us and explore these five fantastic breakfast recipes that are sure to make your mornings brighter and tastier.

Healthy indian breakfast

About

Indian cuisine is known for its vibrant flavors, aromatic spices, and a plethora of nutritious ingredients. Our curated selection of breakfast recipes aims to combine these elements in innovative ways, offering a fresh take on traditional dishes. Whether you’re looking for something quick and easy, or a bit more elaborate, these recipes cater to all tastes and preferences.

Healthy Indian Breakfast Recipes:

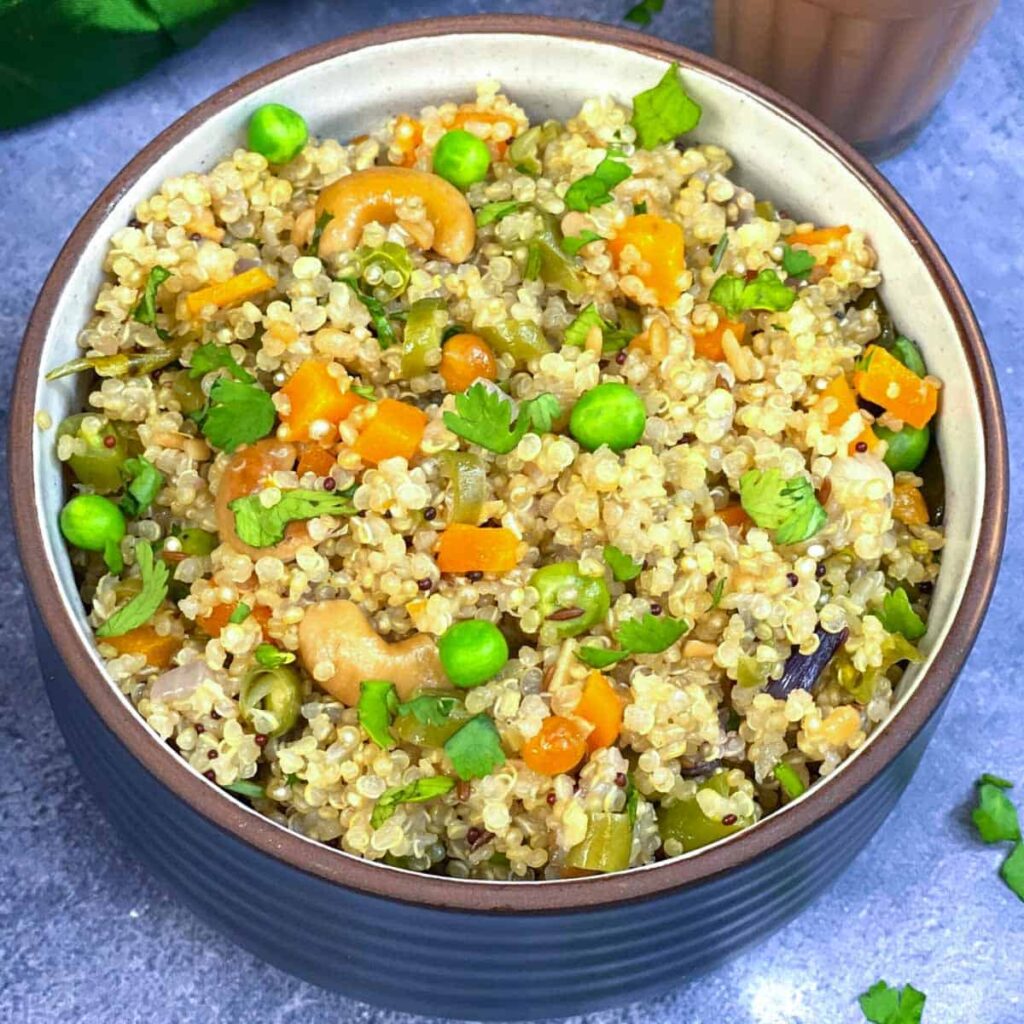
Quinoa Upma

A modern twist on the traditional Upma, this recipe uses quinoa, a superfood known for its high protein content and health benefits.

Ingredients:

  • 1 cup quinoa
  • 1 tbsp oil
  • 1 tsp mustard seeds
  • 1 tsp urad dal
  • 1 tsp chana dal
  • 1 onion, finely chopped
  • 1 carrot, diced
  • 1/2 cup green peas
  • 1 green chili, chopped
  • 1-inch ginger, grated
  • Curry leaves
  • Salt to taste
  • Lemon juice and coriander leaves for garnish
Quinoa Upma

Instructions:

  1. Rinse quinoa and cook it in 2 cups of water until soft. Set aside.
  2. In a pan, heat oil and add mustard seeds, urad dal, chana dal, and curry leaves.
  3. Add onions and sauté until golden brown.
  4. Add ginger, green chili, carrot, and peas. Cook until vegetables are tender.
  5. Mix in cooked quinoa and salt. Stir well and cook for a few more minutes.
  6. Garnish with lemon juice and coriander leaves. Serve hot.

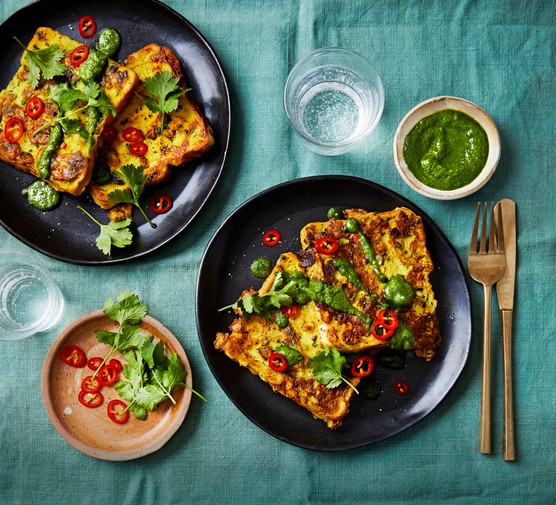
Masala French Toast

Add an Indian twist to the classic French toast with this savory version that’s perfect for breakfast or brunch.

Ingredients:

  • 4 slices of bread
  • 2 eggs
  • 1/4 cup milk
  • 1 onion, finely chopped
  • 1 tomato, finely chopped
  • 1 green chili, chopped
  • Coriander leaves, chopped
  • 1/2 tsp turmeric powder
  • 1/2 tsp red chili powder
  • Salt to taste
  • Butter or oil for frying
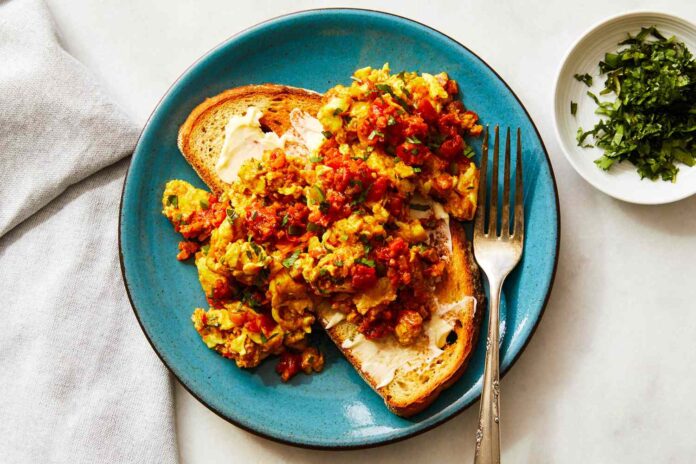
French toast

Instructions:

  1. In a bowl, beat eggs with milk, turmeric powder, red chili powder, and salt.
  2. Add chopped onion, tomato, green chili, and coriander leaves to the mixture.
  3. Heat butter or oil in a pan.
  4. Dip each bread slice into the egg mixture, ensuring it’s well-coated.
  5. Fry the bread slices until golden brown on both sides.
  6. Serve hot with a side of green chutney or ketchup.

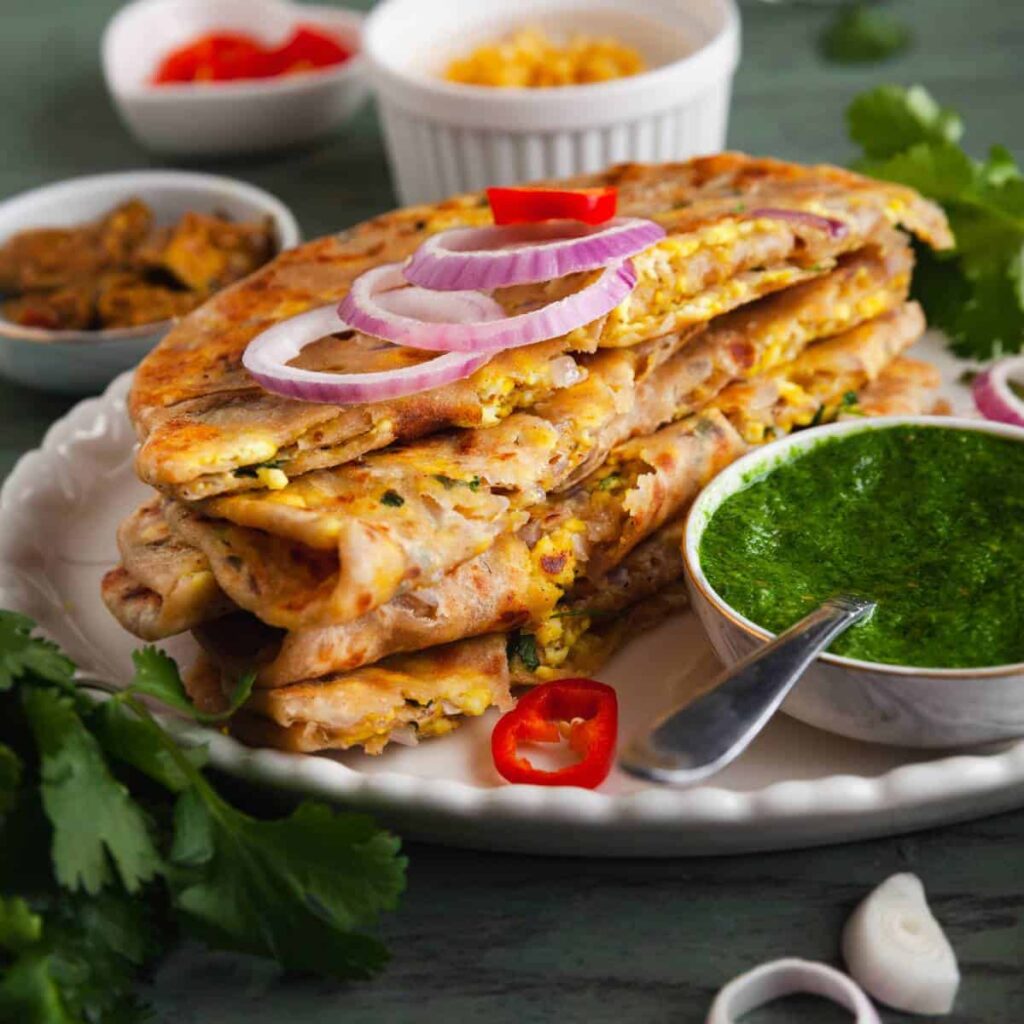
Paneer Stuffed Paratha

These stuffed parathas are filled with a delicious paneer mixture, making them a wholesome and filling breakfast option.

Ingredients:

  • 2 cups whole wheat flour
  • Water for kneading
  • 1 cup grated paneer
  • 1 onion, finely chopped
  • 1 green chili, chopped
  • Coriander leaves, chopped
  • 1 tsp garam masala
  • 1 tsp cumin seeds
  • Salt to taste
  • Ghee or oil for cooking
Paneer stuffed paratha

Instructions:

  1. Knead the whole wheat flour with water to make a soft dough. Let it rest for 15-20 minutes.
  2. In a bowl, mix grated paneer, chopped onion, green chili, coriander leaves, garam masala, cumin seeds, and salt.
  3. Divide the dough into equal portions and roll each portion into a small disc.
  4. Place a spoonful of the paneer mixture in the center of the disc and fold the edges to seal.
  5. Roll the stuffed dough gently into a paratha.
  6. Cook on a hot tawa with ghee or oil until golden brown on both sides.
  7. Serve hot with yogurt or pickle.

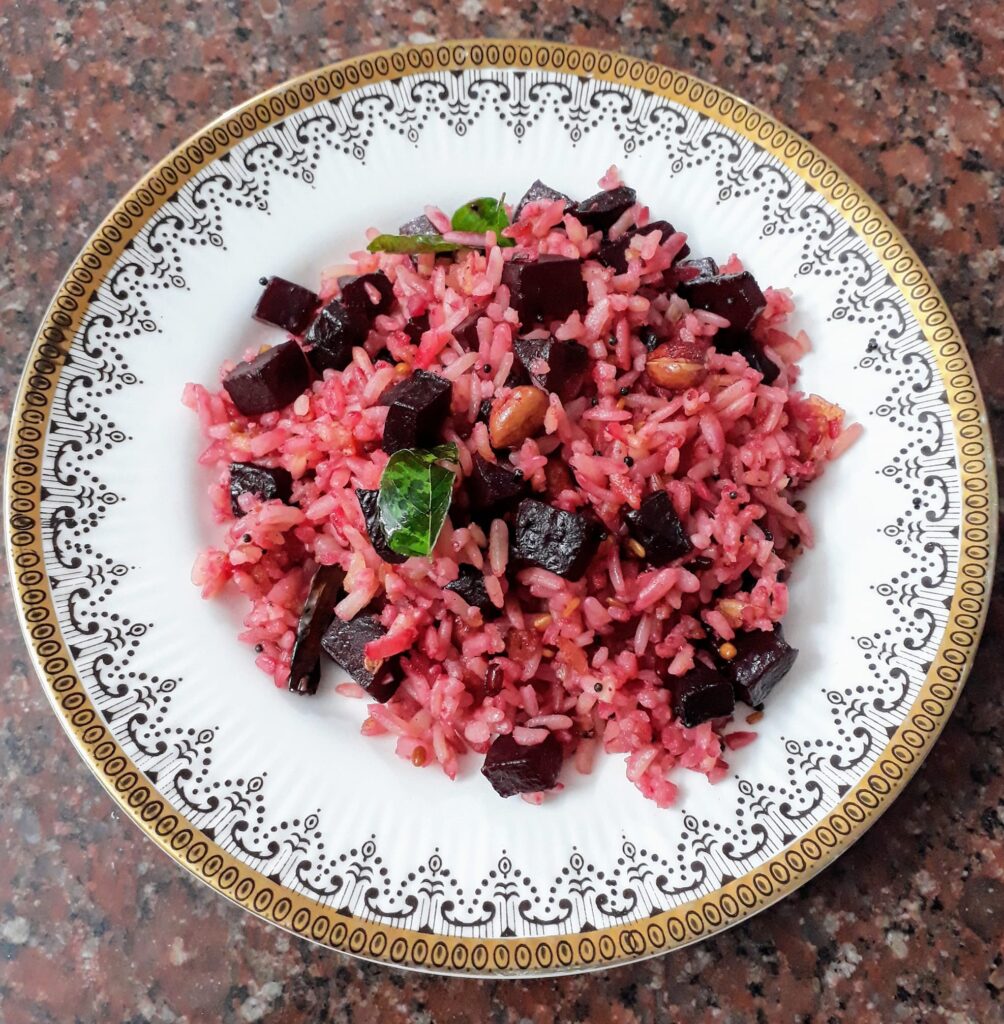
Beetroot Poha

This colorful and nutritious poha is enhanced with the goodness of beetroot, making it a vibrant start to your day.

Ingredients:

  • 1 cup poha (flattened rice)
  • 1 beetroot, grated
  • 1 onion, finely chopped
  • 1 green chili, chopped
  • 1/2 tsp mustard seeds
  • 1/2 tsp turmeric powder
  • Curry leaves
  • Salt to taste
  • Lemon juice and coriander leaves for garnish
  • 2 tbsp peanuts (optional)
Beetroot Poha

Instructions:

  1. Rinse poha under cold water and drain well. Set aside.
  2. In a pan, heat oil and add mustard seeds, curry leaves, and peanuts.
  3. Add chopped onions and green chili, and sauté until onions are translucent.
  4. Add grated beetroot and turmeric powder. Cook until beetroot is tender.
  5. Mix in the poha and salt. Stir well and cook for a few more minutes.
  6. Garnish with lemon juice and coriander leaves. Serve hot.

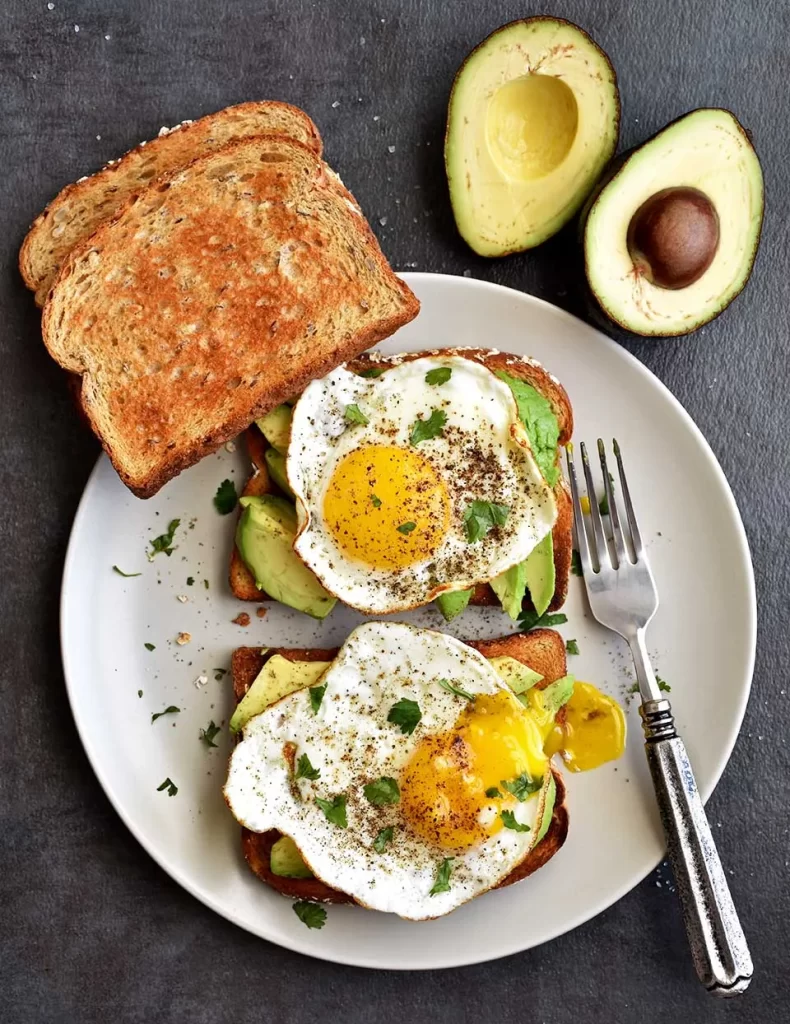
Avocado and Egg Toast

This fusion recipe combines creamy avocado and protein-rich eggs on toast, creating a delicious and nutritious breakfast.

Ingredients:

  • 4 slices of whole grain bread
  • 1 ripe avocado
  • 2 eggs
  • 1 small onion, finely chopped
  • 1 green chili, chopped
  • Coriander leaves, chopped
  • Salt and pepper to taste
  • Butter or oil for cooking
Avocado and Egg Toast

Instructions:

  1. Toast the bread slices until golden brown.
  2. In a bowl, mash the avocado and mix with chopped onion, green chili, coriander leaves, salt, and pepper.
  3. Spread the avocado mixture evenly on the toasted bread slices.
  4. Heat butter or oil in a pan and fry the eggs sunny-side up.
  5. Place a fried egg on top of each avocado toast.
  6. Serve immediately, garnished with additional coriander leaves if desired.

Benefits of these recipes:

  • Quinoa Upma: High in protein and fiber, gluten-free, and rich in essential amino acids.
  • Masala French Toast: A good source of protein from eggs, with added vitamins and minerals from vegetables.
  • Paneer Stuffed Paratha: High in protein and calcium from paneer, providing sustained energy.
  • Beetroot Poha: Rich in iron, fiber, and antioxidants from beetroot.
  • Avocado and Egg Toast: High in healthy fats and protein, promoting satiety and energy.

.

Tips for Perfect Breakfasts

  1. Prep Ahead: Chop vegetables and prepare batters the night before to save time in the morning.
  2. Fresh Ingredients: Use fresh ingredients for the best flavor and nutritional benefits.
  3. Adjust Spices: Modify the level of spices according to your taste preferences.
  4. Serving: Serve these dishes hot to enjoy their full flavors.
  5. Presentation: Garnish with fresh herbs and a squeeze of lemon for added zest and appeal.

Serving Suggestions

  1. Quinoa Upma: Serve with a side of coconut chutney and a cup of masala chai.
  2. Masala French Toast: Accompany with green chutney and a glass of freshly squeezed orange juice.
  3. Paneer Stuffed Paratha: Pair with a bowl of raita and a pickle of your choice.
  4. Beetroot Poha: Serve with a dollop of yogurt and a handful of fresh pomegranate seeds.
  5. Avocado and Egg Toast: Enjoy with a spicy tomato chutney and a refreshing mint lassi.

Nutritional Value

Quinoa Upma:

Calories:250 per serving
Protein:8g
Carbohydrates:40g
Fat:6g
Fiber:5g

Masala French Toast:

Calories:220 per serving
Protein:10g
Carbohydrates:25g
Fat:8g
Fiber:2g

Paneer Stuffed Paratha:

Calories:300 per serving
Protein:12g
Carbohydrates:40g
Fat:10g
Fiber:4g

Beetroot Poha:

Calories:180 per serving
Protein:4g
Carbohydrates:30g
Fat:5g
Fiber:6g

Avocado and Egg Dosa:

Calories:290 per serving
Protein:12g
Carbohydrates:30g
Fat:15g
Fiber:8g

FAQs

  1. Can I use other vegetables in these recipes?

Absolutely! Feel free to substitute or add any vegetables you like.

  1. Are these recipes suitable for kids?

Yes, these recipes are nutritious and can be enjoyed by children. Adjust the spice levels to suit their taste.

  1. Can I make these recipes vegan?

Yes, you can substitute paneer with tofu, use plant-based milk, and skip the eggs to make these recipes vegan.

  1. How can I store leftovers?

Store leftovers in airtight containers in the refrigerator. Reheat gently before serving.

Conclusion

These fancy Indian breakfast recipes offer a delightful and nutritious start to your day. With their unique twists and health benefits, they are sure to become favorites in your kitchen. Whether you’re looking to impress guests or simply enjoy a special breakfast, these recipes are the perfect choice. Try them out and experience the vibrant flavors and wholesome goodness they bring to your mornings!For more delicious breakfast ideas, check out our Coleslaw Sandwich and Indian Veg Cutlet recipes. Enjoy your culinary journey!

Gond Katira: Refreshing Sharbat, Delicious Pudding, Nutritious Smoothie

0
gond katira recipe
gond katira recipe

Gond Katira, also known as Tragacanth Gum, is a natural, edible gum derived from the sap of the Astragalus plant. This versatile ingredient has been cherished in traditional Indian and Middle Eastern cuisine for centuries. Known for its cooling properties, Gond Katira is especially popular during the hot summer months. It not only aids in hydration but also offers numerous health benefits such as improved digestion, enhanced skin health, and a boost in immunity. Today, we will explore three delightful recipes featuring Gond Katira: a refreshing sharbat drink, a delectable pudding, and a nutritious smoothie.

About Gond Katira

Gond Katira is a natural gum exudate that is rich in dietary fiber and has various medicinal properties. It is often used in Ayurvedic treatments and is known for its cooling effects on the body. This gum swells up in water, forming a gel-like substance that is used in various culinary and medicinal applications.

Culinary Uses

Gond Katira is commonly used in Indian and Middle Eastern cuisines, particularly in sweets, drinks, and desserts. Some popular uses include:

  • Cooling Drinks: Mixed with water, lemon juice, and sugar to create a refreshing summer drink.
  • Desserts: Used in puddings and other traditional sweets for its thickening properties.
  • Ice Creams: Added to give a smooth texture.

Benefits of Gond Katira

Gond Katira offers numerous health benefits, making it a valuable addition to your diet:

  1. Cooling Properties:
  • Natural Cooler: Gond Katira has a natural cooling effect on the body, making it ideal for consumption during hot summer months.
  • Heat Stroke Prevention: Helps prevent heat strokes by keeping the body temperature regulated.
  1. Digestive Health:
  • Aids Digestion: Rich in dietary fiber, it aids digestion and helps prevent constipation.
  • Soothes Stomach: Acts as a demulcent, soothing the stomach lining and reducing acidity.
  1. Nutrient-Rich:
  • High in Fiber: Promotes a healthy digestive system and helps in maintaining bowel regularity.
  • Rich in Nutrients: Contains essential minerals like calcium, magnesium, and potassium.
  1. Hydration and Skin Health
  • Hydration: Helps in maintaining hydration levels, especially during hot weather.
  • Skin Benefits: Its hydrating properties also benefit the skin, keeping it moist and supple.
  1. Weight Management
  • Low in Calories: Provides a feeling of fullness without adding extra calories, making it helpful for weight management.
  1. Immunity Boost
  • Boosts Immunity: Contains compounds that help enhance the immune system and protect against infections.

Some Recipes of Gond Katira:

1. Gond Katira Sharbat (Cooling Summer Drink)

Ingredients:

  • 1 tablespoon Gond Katira
  • 2 cups water
  • 1 tablespoon lemon juice
  • 2 tablespoons sugar or honey
  • A pinch of cardamom powder (optional)
  • Ice cubes (optional)

Instructions:

  1. Soak the Gond Katira: Soak 1 tablespoon of Gond Katira in 2 cups of water overnight or for at least 6 hours. The gum will swell and become gelatinous.
  2. Prepare the Drink: In the morning, drain any excess water from the soaked Gond Katira.
  3. Mix Ingredients: In a glass, add the soaked Gond Katira, lemon juice, sugar or honey, and a pinch of cardamom powder. Stir well.
  4. Serve Chilled: Add ice cubes if desired and serve the sharbat chilled for a refreshing summer drink.

2. Gond Katira Pudding (Traditional Dessert)

Ingredients:

  • 2 tablespoons Gond Katira
  • 3 cups milk (or almond milk)
  • 4 tablespoons sugar
  • 1/2 teaspoon cardamom powder
  • 2 tablespoons chopped nuts (almonds, pistachios)
  • A few strands of saffron (optional)
  • 1 teaspoon rose water (optional)

Instructions:

  1. Soak the Gond Katira: Soak 2 tablespoons of Gond Katira in water overnight or for at least 6 hours. The gum will swell and become gelatinous.
  2. Prepare the Milk Base: In a saucepan, heat the milk until it comes to a gentle boil. Add sugar and stir until dissolved.
  3. Add Gond Katira: Drain any excess water from the soaked Gond Katira and add it to the milk. Stir well.
  4. Flavor the Pudding: Add cardamom powder, saffron strands, and rose water. Mix thoroughly.
  5. Simmer and Thicken: Let the mixture simmer on low heat for about 10-15 minutes, stirring occasionally, until it thickens to a pudding-like consistency.
  6. Garnish and Chill: Pour the pudding into serving bowls, garnish with chopped nuts, and refrigerate for at least 1-2 hours before serving.

3. Gond Katira Smoothie (Healthy Breakfast Option)

Ingredients:

  • 1 tablespoon Gond Katira
  • 1 cup yogurt (or dairy-free alternative)
  • 1 banana
  • 1/2 cup mixed berries (strawberries, blueberries, raspberries)
  • 1 tablespoon honey or maple syrup
  • 1 teaspoon chia seeds (optional)
  • 1/2 teaspoon vanilla extract (optional)

Instructions:

  1. Soak the Gond Katira: Soak 1 tablespoon of Gond Katira in water overnight or for at least 6 hours. The gum will swell and become gelatinous.
  2. Prepare the Smoothie Base: In a blender, add yogurt, banana, mixed berries, honey or maple syrup, chia seeds, and vanilla extract.
  3. Add Gond Katira: Drain any excess water from the soaked Gond Katira and add it to the blender.
  4. Blend Until Smooth: Blend all the ingredients until smooth and creamy.
  5. Serve Immediately: Pour the smoothie into a glass and enjoy a healthy and nutritious breakfast.

Serving Suggestions

  • Gond Katira Sharbat: Serve chilled with a slice of lemon and mint leaves for garnish.
  • Gond Katira Pudding: Serve chilled with a sprinkle of chopped nuts and saffron strands on top.
  • Gond Katira Smoothie: Serve immediately with fresh berries and a mint leaf for garnish.

Tips to make Gond Katira:

  1. Soaking Time: Ensure you soak Gond Katira for at least 6 hours to achieve the desired gelatinous texture.
  2. Sweeteners: You can substitute sugar with healthier options like honey, jaggery, or maple syrup.
  3. Flavor Enhancements: Add flavors like cardamom, saffron, or rose water to enhance the taste of your recipes.
  4. Stirring: Make sure to stir well to avoid lumps and ensure an even distribution of ingredients.
  5. Chill Before Serving: For the best experience, chill the sharbat and pudding for at least an hour before serving.

Nutrition Values (Per Serving)

Gond Katira Sharbat

Calories:50
Protein:1g
Carbohydrates:12g
Fat:0g
Fiber:1g
Sugar:10g

Gond Katira Pudding

Calories:180
Protein:5g
Carbohydrates:30g
Fat:5g
Fiber:2g
Sugar:20g

Gond Katira Smoothie

Calories:150
Protein:4g
Carbohydrates:28g
Fat:2g
Fiber:3g
Sugar:18g

FAQs

  1. What is Gond Katira?

Gond Katira, or Tragacanth Gum, is a natural, edible gum derived from the sap of the Astragalus plant. It is commonly used in traditional Indian and Middle Eastern cuisines for its cooling properties and health benefits.

  1. How do I store Gond Katira?

Store Gond Katira in an airtight container in a cool, dry place. It can last for several months when stored properly.

  1. Can I use Gond Katira in other recipes?

Yes, Gond Katira can be used in various recipes such as drinks, and desserts, and even as a thickening agent in soups and sauces.

Conclusion

Gond Katira is a wonderful and versatile ingredient that not only enhances the flavor and texture of your recipes but also provides numerous health benefits. Whether you’re cooling off with a refreshing sharbat, indulging in a delicious pudding, or starting your day with a nutritious smoothie, Gond Katira is sure to become a favorite in your kitchen. Try these recipes and experience the magic of Gond Katira for yourself. For more delightful and healthy recipes, don’t forget to explore our Sattu Sharbat Recipe and Best Refreshing Smoothie Recipe. Stay cool, stay healthy, and happy cooking!

Sattu Sharbat: A Refreshing and Nutritious Summer Beverage

0
sattu sharbat drink
sattu sharbat

Today, we’re diving into the world of traditional Indian beverages with a spotlight on the Sattu Drink, also known as Sattu Sharbat. If you loved our Beetroot Smoothie and Banana Walnut Smoothie, you’ll find this drink just as delightful and beneficial. Let’s explore what makes this drink so special and how you can easily prepare it at home.

About Sattu

Sattu is a flour made from roasted black chickpeas, also known as chane ka sattu. This nutritious ingredient is a staple in the Indian states of Bihar, Jharkhand, Uttar Pradesh, and West Bengal. Sattu is prized for its high protein content and numerous health benefits, making it a versatile addition to both drinks and dishes.

Benefits of Sattu Drink

Sattu drink is not only refreshing but also packed with nutrients:

  • High in Protein: Sattu provides a significant amount of plant-based protein.
  • Cooling Effect: Perfect for hot summer days, it helps keep the body cool.
  • Rich in Nutrients: It’s a good source of fiber, iron, manganese, and magnesium.
  • Hydrating: Helps in maintaining hydration levels.
  • Digestive Health: The high fiber content aids in digestion and prevents constipation.

About Sattu Sharbat

Sattu Sharbat is a popular drink in many Indian households, especially during the scorching summer months. This drink can be made in two delicious variations: sweet and savory. Both versions are quick, easy, and require minimal ingredients.

How to Make Sattu Sharbat

Sweet Sattu Sharbat

Ingredients:

  • 4 tablespoons sattu flour (roasted gram flour)
  • 2 cups chilled water or milk
  • 2 tablespoons sugar or jaggery
  • A pinch of cardamom powder (optional)
  • Chopped nuts (optional)

How to Sweet Sattu Sharbat:

  1. Mix Sattu Flour with Water or Milk: A bowl with sattu flour, with chilled water or milk being gradually added and stirred to form a smooth mixture.
  2. Add Sweetener and Mix: Add sugar or jaggery to the sattu mixture with a spoon, stirring it in.
  3. Optional Additions: Add cardamom powder and chopped nuts to the mixture for extra flavor.
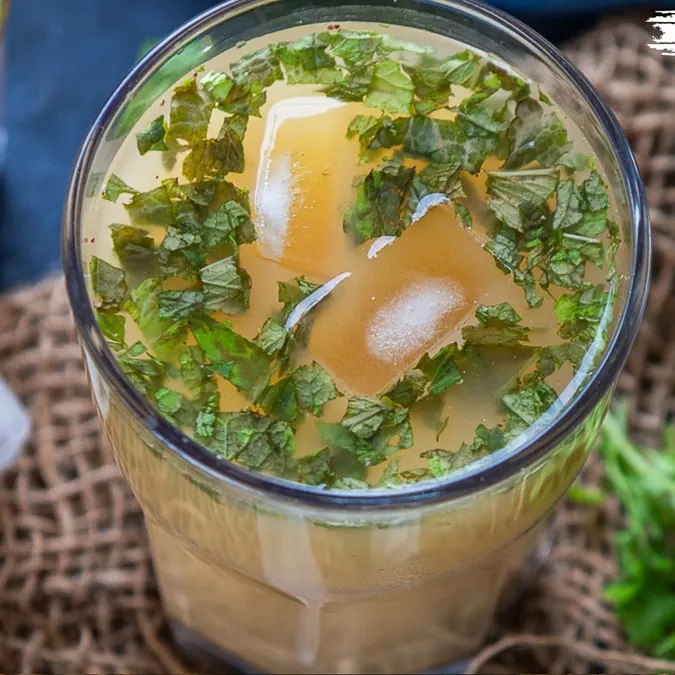
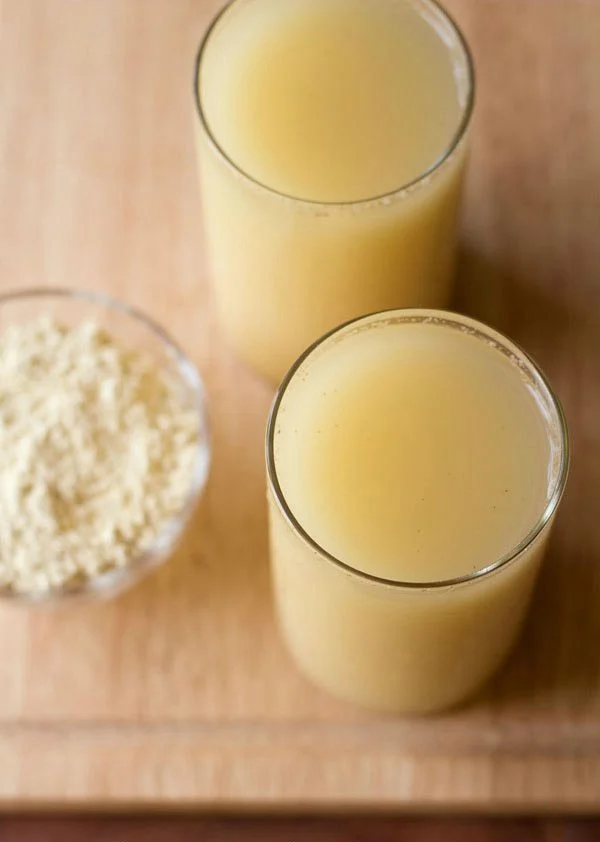
  4. Serve chilled: The finished sweet sattu sharbat is served in a glass, garnished with chopped nuts.

Savory Sattu Sharbat

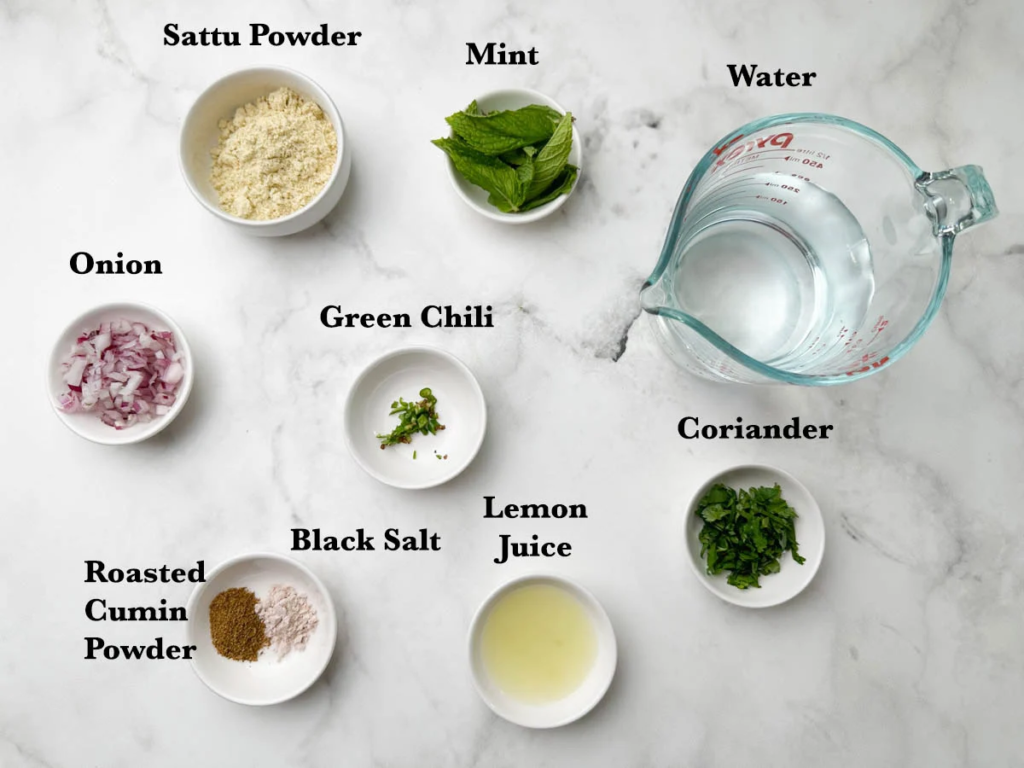
Ingredients:

  • 4 tablespoons sattu flour
  • 2 cups chilled water
  • 1 teaspoon salt
  • 5-6 mint leaves
  • 1/2 chopped onion
  • 1 teaspoon roasted cumin powder
  • 1 tablespoon lemon juice
  • 2 tablespoons chopped coriander leaves
  • 1 finely chopped green chilli (optional)
  • A pinch of black salt (optional)

How to Savory Sattu Sharbat:

  1. Mix Sattu Flour with Water: In a bowl with sattu flour, with chilled water being gradually added and stirred to form a smooth mixture.
  2. Add Spices and Lemon Juice: Add salt, roasted cumin powder, and lemon juice to the sattu mixture, with a spoon, stirring it in.
  3. Optional Additions: Add chopped coriander leaves and green chili to the mixture for extra flavor.
  4. Serve chilled: The finished savory sattu sharbat is served in a glass, garnished with coriander leaves.

Tips to make the Best Sattu Drink

  1. Use any sweeteners: If you do not want to add sugar, you can add healthy additions like jaggery or honey.
  2. Give a stir before serving: Please make sure to give the drink a good stir before serving, as the sattu powder settles down in the bottom.
  3. Use chilled water: Serve chilled only. You can also add ice cubes.
  4. Adjust consistency: Adjust the consistency of the sattu drink by adding more sattu powder or water according to your preference.

Serving Suggestions

  • For a Refreshing Twist: Add a few mint leaves to the savory version for an extra burst of freshness.
  • As a Meal Replacement: Sattu Sharbat can be a great option for a light meal or breakfast due to its high protein and fiber content.
  • Pair your Sattu Sharbat with light snacks like roasted chickpeas, nuts, or fruit slices for a balanced mini-meal.

Nutritional Value (Per Serving)

Calories:Approximately 150-200 kcal
Protein:8-10 grams
Carbohydrates:20-25 grams
Fat:2-4 grams
Fiber:5-7 grams
Iron:10-15% of the daily recommended intake
Magnesium:20-25% of the daily recommended intake

FAQs

1. What is Sattu?

Sattu is a flour made from roasted black chickpeas. It is a staple in certain Indian states and is known for its high nutritional value.

2. Can I use any other flour instead of sattu flour?

Sattu flour is specifically made from roasted black chickpeas and has a unique flavor and nutritional profile. Other flours might not give the same taste or benefits.

3. Can I make Sattu Sharbat with warm water?

Sattu Sharbat is best enjoyed chilled, especially during summer. Using warm water might alter its cooling effect and texture.

4. Is Sattu Drink good for weight loss?

Yes, Sattu Drink is high in protein and fiber, which can help in weight management by keeping you full for longer.

5. Can I store Sattu Drink?

It’s best to consume Sattu Drink fresh. However, you can store it in the refrigerator for up to a day. Make sure to stir well before drinking.

Conclusion

Sattu Sharbat is a versatile and nutritious drink that offers a perfect balance of taste and health benefits. Whether you prefer the sweet version or the savory one, this traditional Indian beverage is sure to refresh you on a hot summer day. Give it a try and enjoy the wholesome goodness it brings. Don’t forget to check out our other delicious recipes like the Red Velvet Beet Smoothie and Banana Walnut Smoothie. Stay cool and healthy with Chefs Home!

Enjoy this nutritious and refreshing Sattu Sharbat this summer, and don’t forget to check out our other delicious recipes like the Red Velvet Beet Smoothie and Banana Walnut Smoothie. Stay cool and healthy with Chefs Home!

From Bar to Home: Mastering the Pornstar Martini

0
Pornstar Martini

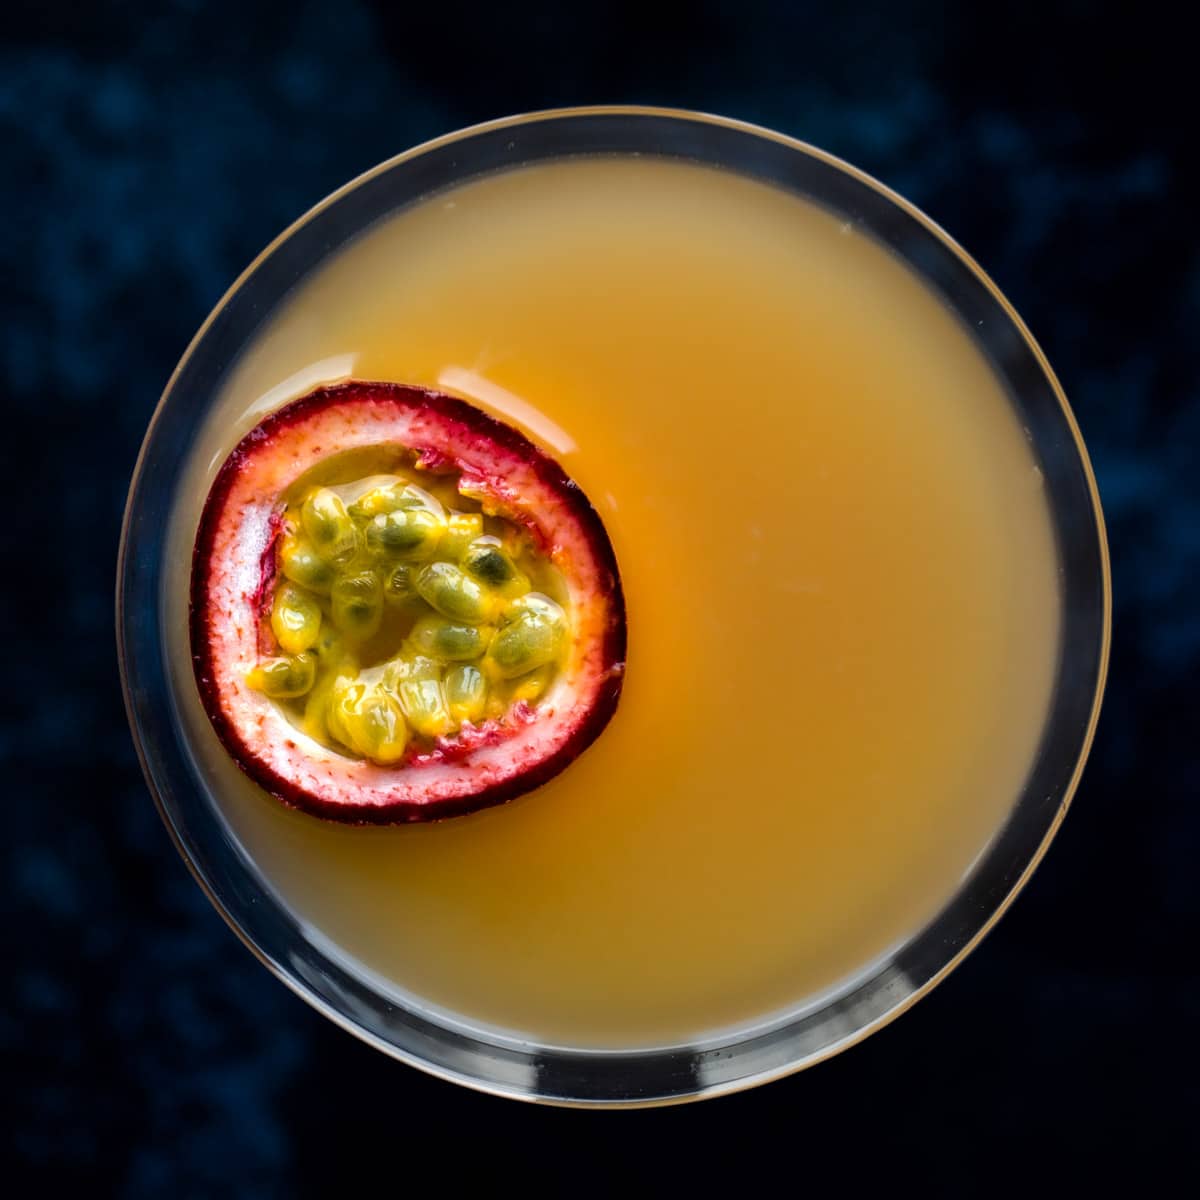
Today, we are here with you to share our new recipe for Pornstar Martini. From the refreshing Shamrock Shake to the Healthiest Smoothie Recipes, we have a wide range of culinary delights for you to explore. Pornstar Martini, a cocktail that promises to elevate your cocktail game. With its sweet and tangy notes of fresh passion fruit, aromatic hints of vanilla, and a zesty kick from lime juice, this drink is a true crowd-pleaser.

Martini drink

About Pornstar Martini

Pornstar Martini, also known as a passion fruit martini, boasts a fresh, velvety flavor with sweet and tangy notes of fresh passion fruit and an aromatic hint of vanilla. The addition of lime juice adds a zesty kick that enhances the overall flavor profile of the drink. It’s a delightful and exotic cocktail that’s a favorite in the UK.

If there’s one cocktail that will grab your attention, it has to be this one. Inspired by the controversial pornstar martini (find out why it’s so named below), our version of this tropical cocktail features passion fruit, vanilla vodka, prosecco, and a splash of lime for a drink to remember. It has a real fruity, tropical flavor, making it an ideal choice if you don’t like the taste of strong cocktails.

Origin of the Pornstar Martini

The Pornstar Martini was created in 2002 by Douglas Ankrah, a renowned bartender from London. Ankrah was inspired by the flavors of passion fruit and vanilla, aiming to create a cocktail that was both exotic and enticing. The name “Pornstar Martini” was intended to reflect the bold, glamorous, and slightly risqué nature of the drink. Despite its provocative name, the cocktail has become a staple in bars across the UK and beyond, celebrated for its vibrant flavor and unique presentation.

Ingredients and Equipment

Ingredients:

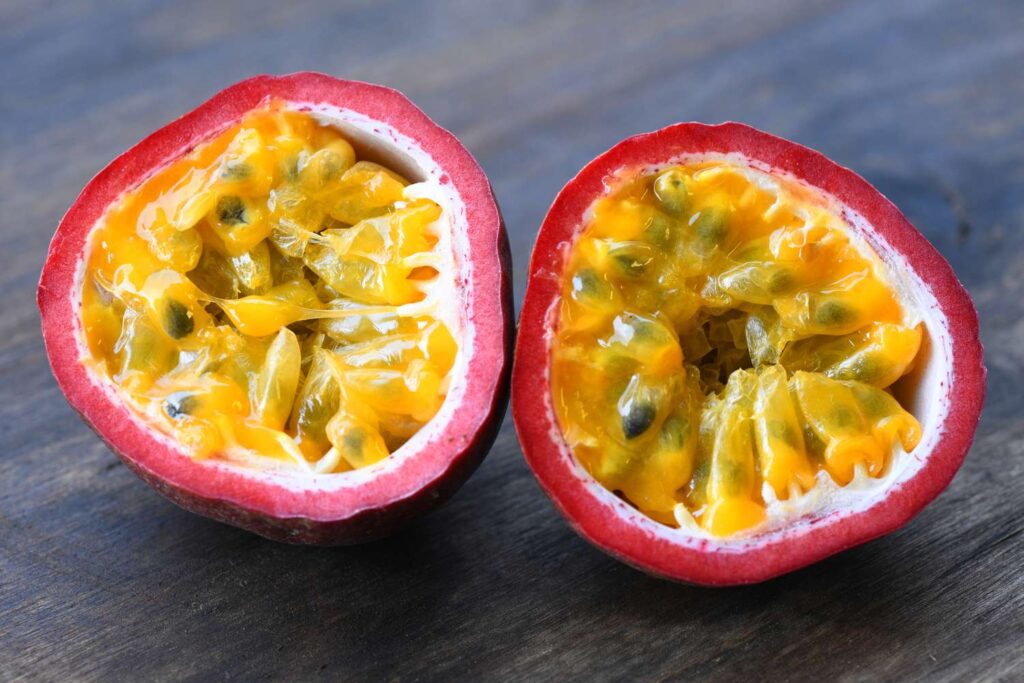
  • 1 fresh passion fruit
  • 50ml vanilla vodka
  • 15ml passion fruit liqueur (such as Passoã)
  • 15ml lime juice
  • 10ml vanilla syrup
  • Prosecco (served on the side)
  • Ice cubes

Equipment:

Step-by-Step Recipe

Step 1: Prepare the Passion Fruit

Cut the passion fruit in half and scoop out the seeds and pulp into a cocktail shaker.

Passion Fruit

Step 2: Add the Liquids

Pour in the vanilla vodka, passion fruit liqueur, lime juice, and vanilla syrup.

Step 3: Shake It Up

Add a handful of ice cubes to the shaker, secure the lid, and shake vigorously for about 15 seconds until well mixed and chilled.

Step 4: Strain and Serve

Strain the mixture into a chilled martini glass. Use a fine-mesh strainer to catch any passion fruit seeds.

Step 5: Garnish

Garnish the cocktail with the remaining half of the passion fruit, placed on top of the drink.

Step 6: Serve with Prosecco

Serve a shot of prosecco on the side. This can be poured into the cocktail to taste or enjoyed separately as a palate cleanser.

Tips and Variations

Tips:

  • For a sweeter drink, adjust the amount of vanilla syrup to your preference.
  • Ensure your martini glass is well chilled before serving for the best experience.
  • Passion Fruit Liqueur, such as Passoa. There aren’t many passion fruit liquor alternatives to Passoa but you might want to try this Boe Passion Gin which would replace both the vodka and the Passoa in this cocktail recipe.

Variations:

  • Tropical Twist: Add a splash of pineapple juice for an extra tropical flavor.
  • Spicy Kick: Infuse the vodka with a slice of jalapeño for a spicy version of the Pornstar Martini.
  • Non-Alcoholic Version: Substitute the vodka and passion fruit liqueur with passion 
  • fruit juice and vanilla extract for a mocktail version.

Serving Suggestions

The Pornstar Martini is best enjoyed immediately after preparation while it’s still cold. The shot of prosecco served on the side can be sipped in between sips of the martini or poured into the cocktail for added effervescence. For an extra touch of elegance, consider serving with a sugared rim on the martini glass.

Approximate Nutrition Information per Serving:

Calories220-250 kcal
Total Fat0g
Saturated Fat0g
Cholesterol0mg
Sodium2-5mg
Total Carbohydrates18–22g
Dietary Fiber1-2g
Sugars15-18g
Alcohol ContentApproximately 18–20 grams of alcohol

Conclusion

The Pornstar Martini is a cocktail that promises to delight and impress with its bold flavors and elegant presentation. Whether you’re enjoying it at a bar or making it at home, this drink is sure to be a hit. At Chef’s Home, we love exploring and sharing unique recipes, and the Pornstar Martini is a perfect addition to our collection. Don’t forget to check out our other recipes, like the Shamrock Shake Recipe and Best Smoothie Recipes for more delicious drinks to try.

Cheers to making unforgettable cocktails at home!

FAQs

Why is it called a Pornstar Martini?

The name “Pornstar Martini” was coined by its creator, Douglas Ankrah, in 2002. It was intended to evoke a sense of glamour, boldness, and a slightly risqué edge, making the cocktail intriguing and memorable.

Can I make a non-alcoholic version of a Pornstar Martini?

Yes, you can make a non-alcoholic version by substituting the vodka and passion fruit liqueur with passion fruit juice and a few drops of vanilla extract. Serve with a splash of sparkling water or non-alcoholic prosecco.

What type of vodka should I use?

For the best flavor, use high-quality vanilla vodka. If you don’t have vanilla vodka, you can use regular vodka and add a bit more vanilla syrup to maintain the desired flavor profile.

Mango Cheesecake Delight- A No Bake Recipe

0
Mango Cheesecake

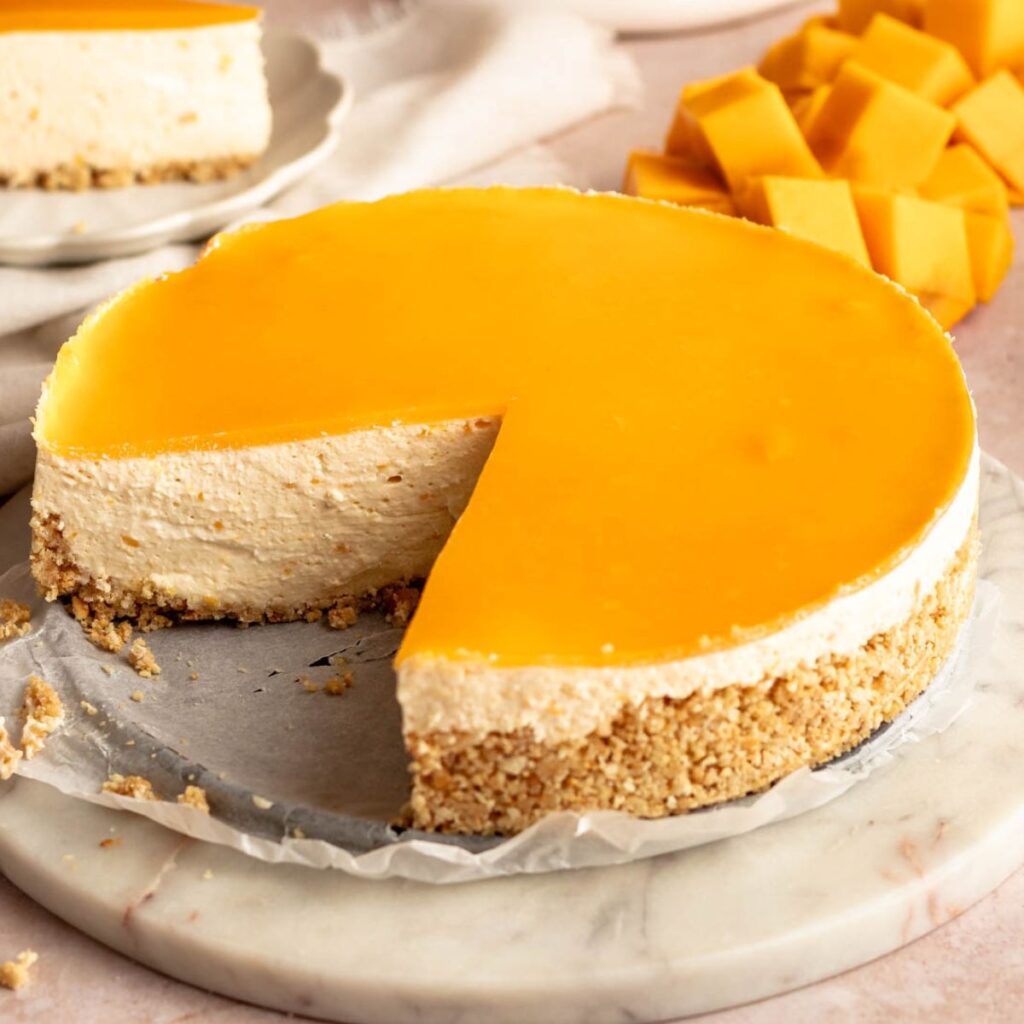
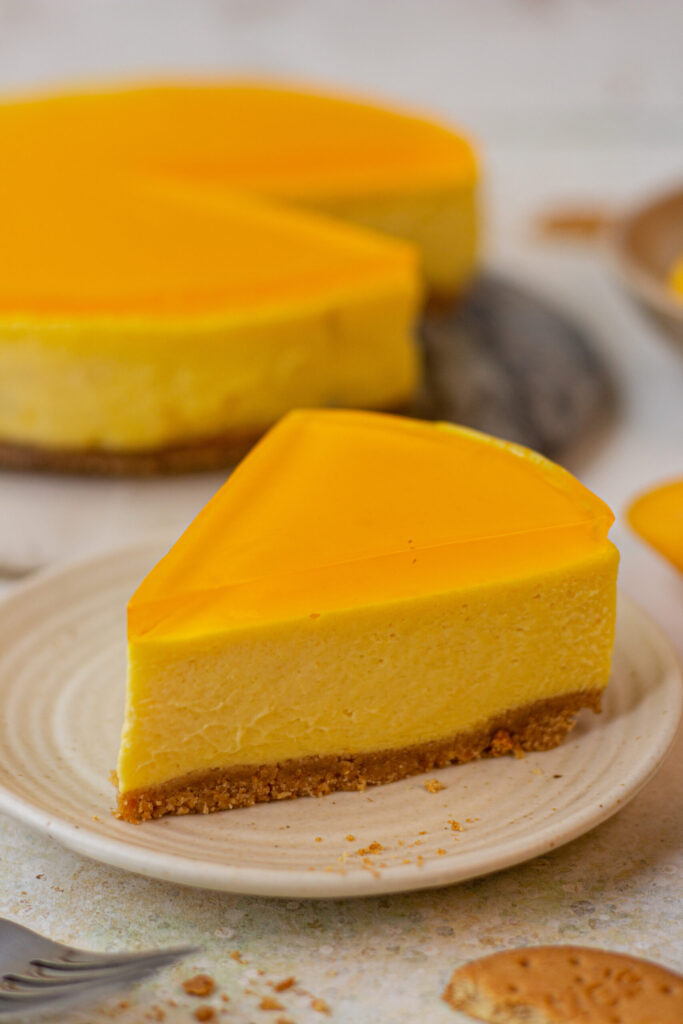
Have you ever tried Eggless No-Bake Mango Cheesecake? If not, don’t worry we are here to share the recipe with you! This incredibly tasty cheesecake is the ideal treat for any occasion because it blends cream cheese’s rich, creamy texture with the tropical flavour of mango puree. This mango cheesecake is impressive whether serving it at a party or just treating yourself.

Don’t forget to try some of my other well-liked dessert recipes, including the Carrot Cake Recipe and the Eggless Brownie Recipe, if you prefer sweets. Let’s explore the world of mango cheesecake now.

About Mango Cheesecake

When mangos are in season, mango cheesecake is a perfect treat to make. Though canned mango pulp works great for convenience, fresh mangoes give the cheesecake a lively taste. This dish is ideal for hot summer days because it’s easy to prepare and doesn’t need the use of an oven.

Mango Cheesecake

Why choose a no-bake mango cheesecake?

There are several reasons why this eggless no-bake mango cheesecake recipe is a must-try:

  1. Ease of Preparation: No need to fuss with baking or worrying about getting the perfect texture. This no-bake recipe ensures a smooth, creamy cheesecake every time.
  2. Vegetarian-Friendly: By using agar-agar or China grass instead of gelatine, you can make this dessert completely vegetarian.
  3. Delightful Flavours: The combination of fresh mango puree and rich cream cheese creates a taste sensation that is both refreshing and indulgent.

Ingredients:

For the crust:

  • 1 1/2 cups digestive biscuits or graham crackers, crushed
  • 1/2 cup unsalted butter, melted

For the cheesecake filling:

  • 2 cups cream cheese, softened
  • 1 cup heavy whipping cream
  • 1 cup mango puree (fresh or canned)
  • 1/2 cup granulated sugar
  • 1 tablespoon lemon juice
  • 2 teaspoons vanilla extract

For the mango layer:

  • 1 cup mango puree
  • 2 tablespoons sugar
  • 2 teaspoons gelatin (or agar-agar for a vegetarian option)
  • 1/4 cup water

Instructions to make Mango Cheesecake:

Step 1: Preparing the Crust

  1. Crush the digestive biscuits or graham crackers into fine crumbs using a food processor or by placing them in a ziplock bag and crushing them with a rolling pin.
  2. In a bowl, combine the biscuit crumbs with the melted butter until well-mixed.
  3. Press the mixture firmly into the bottom of a 9-inch springform pan to form an even layer.
  4. Refrigerate the crust while you prepare the filling.

Step 2: Making the Cheesecake Filling

  1. Cream cheese should be smooth and creamy after being beaten in a big basin.
  2. Beat in the vanilla essence and powdered sugar until thoroughly blended.
  3. Beat the heavy cream in a separate dish until firm peaks form.
  4. Till everything is completely blended, gently fold the whipped cream into the cream cheese mixture.
  5. As directed on the container, dissolve the gelatin or agar-agar in a small amount of boiling water. Allow it to cool somewhat before combining it with the cheesecake filling.
  6. Add the pureed mango and stir until the filling is well combined and smooth.

Step 3: Preparing the Mango Layer

  1. In a small saucepan, combine the mango puree and sugar.
  2. Dissolve the gelatin or agar-agar in 1/4 cup of water, then add it to the saucepan.
  3. Heat the mixture over medium heat, stirring constantly until the gelatin or agar-agar is completely dissolved.
  4. Remove from heat and let it cool to room temperature.

Step 4: Assembling the Cheesecake

  1. Using a spatula to distribute the filling evenly, pour the cheesecake mixture over the prepared crust.
  2. Gently cover the cheesecake filling with the cooled mango layer.
  3. Make sure the mango layer is evenly distributed throughout the surface by using a spatula.

Step 5: Chilling the Cheesecake

  1. Place plastic wrap over the cheesecake and place it in the refrigerator to set it, for at least 4 hours. Best served chilled overnight.
  2. Before serving, carefully remove the springform pan and run a knife along the edge of the cheesecake to release it from the pan.

Substitution of Ingredients

To achieve the perfect texture and flavour, this recipe uses gelatin to set the mango layer. However, if you prefer a vegetarian option, you can substitute gelatin with agar-agar or China grass. These alternatives work just as effectively, allowing you to enjoy a guilt-free dessert.

Tips and Variations

  • Fresh vs. Canned Mango: Mango puree in a can is a handy substitute for fresh mangos, but fresh mangoes have the finest flavour.
  • Vegetarian Option: Agar-agar sets the layers exactly as well as gelatin and is an excellent vegetarian alternative.
  • Texture: Stir in tiny chunks of fresh mango into the cheesecake mixture for a chunkier texture.
  • Serving Size: You may double this recipe for a bigger party or divide it for a smaller cheesecake.

Serving Suggestions

After the cheesecake is completely set, take it out of the springform pan and place it on a serving platter. Cut into slices and present cold. For an added flavour boost, this mango cheesecake goes great with a side of fresh mango slices or a dab of whipped cream.

Nutritional Information (per serving):

Calories: Approximately 350–400 kcal
Total Fat: 25-30g
Saturated Fat:15-20g
Cholesterol:60-70mg
Sodium:200-250mg
Total Carbohydrates:30-35g
Dietary Fibre:1-2g
Sugars:20-25g
Protein: 5-7g

FAQS

1. Can I make this cheesecake in advance?

Yes, you can! It’s even better if you make it a day ahead. Just be sure to wrap it tightly with plastic wrap and store it in the refrigerator until you’re ready to serve.

2. Is agar-agar readily available in India?

Yes, agar-agar is commonly available in Indian grocery stores, usually in both powder and strip form. It’s a great vegetarian alternative to gelatin and works just as well for setting the layers in the cheesecake.

3. Can I make a smaller portion of this cheesecake?

Yes, you can easily halve the ingredients to make a smaller cheesecake. Simply adjust the quantities accordingly and use a smaller pan for the crust and filling.

More Eggless Dessert Ideas

If you enjoy this no-bake mango cheesecake, you should try our Eggless Brownie Recipe, which is very fudgy and doesn’t require any setting agents. Would you perhaps prefer a more conventional Carrot Cake Recipe? It produces a dense, filling dessert that is sure to delight a large group of people.

You’ll quickly find that this eggless, no-bake mango cheesecake is your go-to dessert choice. It has a gorgeous appearance, is simple to prepare, and tastes deliciously tropical. It is a delicious lunch that will fulfil everyone’s sweet craving and be appropriate for any occasion. Enjoy!

Caramel Custard Recipe- Make Caramel Pudding at Home

0
Caramel Custard

A Custard dessert with a sweet coating of transparent caramel sauce is also known as crème caramel, flan, caramel pudding, or caramel custard. One of the world’s most well-known desserts goes by various names. This flavor is dependent on the caramel you prepare. This custard will get bitter if you heat the caramel for an extended period. So take caution when making the caramel. We’ve included step-by-step instructions so you can comprehend them. The moment your heart starts to melt is when you take the first taste. It was that excellent. Making caramel custard is often rather difficult. In an oven over a water bath, it is cooked.

About Caramel Custard!
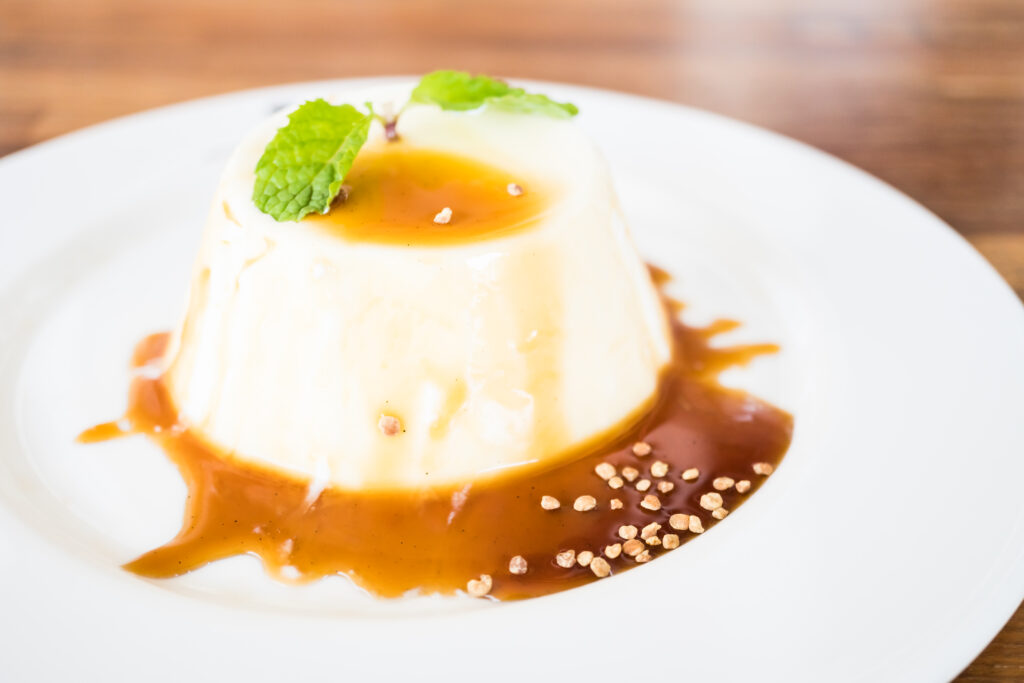
Caramel custard, also known as flan or crème caramel, is a delicious dessert that combines creamy custard with a sweet caramel sauce. Although some prefer it warm, it is good cold. It is a well-liked dish well-known worldwide for its smooth caramel taste. It just requires a small number of ingredients and is easy to create. Here’s a classic recipe for making caramel custard:

Ingredients Needed

Caramel

  • 1 Cup Sugar
  • ¼ Cup Water
  • ½ Teaspoon Lemon Juice or Vinegar

Custard

  • 220 Millilitres Milk
  • ½ Inch Piece Cinnamon
  • A Pinch Grated Nutmeg
  • 4 Eggs
  • 1/2 Cup Sugar
  • 1 Teaspoon Vanilla Extract

Directions to make Caramel Custard:

1. Prepare the Caramel: 

  • Combine 1 cup of granulated sugar and 1/4 cup of water in a heavy-bottomed saucepan.
  • Heat the mixture over medium-high heat without stirring.
  • Allow the sugar to melt and cook until it turns a deep amber color. Swirl the pan occasionally to ensure even caramelization. Be careful not to burn it; it should take 10-12 minutes.
  • Once the caramel reaches the desired color, pour it into your custard dishes or ramekins. Tilt the containers to coat the bottoms with caramel evenly. Set them aside to cool and harden.

2. Prepare the Custard:

  • Preheat your oven to 325°F (160°C).
  • In a mixing bowl, whisk together 4 large eggs, 1/2 cup granulated sugar, and 1 tsp of vanilla extract until well combined.
  • Heat 2 cups of whole milk over medium heat in a separate saucepan until warm but not boiling. You should see steam rising from the milk.
  • Gradually pour the warm milk into the egg mixture while continuously whisking. This is called tempering, and it prevents the eggs from curdling.
  • Strain the custard mixture through a fine-mesh sieve into another bowl to remove solids or air bubbles.

3. Assemble and Bake: 

  • Pour the custard mixture evenly into the caramel-coated dishes or ramekins.
  • Place the custard dishes in a deep baking pan and fill the pan with hot water until it reaches about halfway up the sides of the custard dishes. This creates a water bath (bain-marie), which helps the custard cook evenly and prevents cracking.
  • Carefully transfer the baking pan with the custard dishes into the preheated oven.
  • Bake for about 40-50 minutes or until the custard is set around the edges but still slightly jiggly in the center.
  • Remove the custard dishes from the water bath and cool to room temperature.

4. Serving: 

  • Once the caramel custards have cooled, cover them with plastic wrap and refrigerate for at least 2 hours or overnight.
  • To serve, run a knife around the edge of each custard to loosen it. Place a serving plate on top of the custard dish, flip it over, and gently tap the container to release the custard.
  • The caramel sauce will flow over the custard, creating a beautiful presentation.

MUST TRY: Pesarattu Recipe: A South Indian Delight!

caramel custard

Notes and Tips

  • Although custards are simple, baking them requires gentle, loving attention. Curdling may be avoided by using a water bath and slow cooking.
  • After measuring the milk into a 4-cup glass measuring cup, heat it in the microwave on High for about 5 minutes or until it is extremely warm.
  • Ensure the baking pan has 2-3 cm of water. The baking pan should be covered with the foil, placed in the oven, and cooked for 45 minutes.
  • Remove the tray from the oven once 45 minutes are up, and keep it there with the foil covering it until it cools. The caramel will continue to cook slowly.
  • Now, this part of the recipe requires the most effort. When cool, wrap in plastic wrap and refrigerate in the refrigerator for 3 to 4 hours.
  • When it’s time to serve, run a thin-bladed, sharp knife down the ramekins’ sides, being careful not to wobble or slip the blade—doing so will squish the set custard within.
  • Place a serving saucer on top of the ramekin and turn them upside down while holding them both so the saucer is on the table.
  • Lift the ramekin off gently. Tapping the top or waiting a few minutes should help if the custard won’t come out.

Nutrition Facts

(Per Serving)

  • Calories: 243kcal
  • Carbohydrates: 49g
  • Protein: 5g
  • Fat: 4g
  • Saturated Fat: 2g
  • Cholesterol: 88mg
  • Sodium: 53mg
  • Potassium: 116mg
  • Fiber: 0.1g
  • Sugar: 49g
  • Calcium: 82mg
  • Iron: 0.4mg

To Conclude

Finally, creating caramel custard is a culinary experience that blends the simplicity of a few basic ingredients with the artistry of getting the ideal caramelization. The end product is an aesthetically pleasing and very tasty dish with its silky custard and sweet caramel sauce. This traditional recipe gives a taste of pure bliss, whether making it for a special event or indulging your lovely appetite. Consequently, grab your supplies, follow the instructions, and make a delicious caramel custard with your taste buds humming. You’ll enjoy this traditional dessert in no time with a bit of perseverance and flavour.

If you try this recipe, please let us know. Please comment if you have questions about the recipe or want to share your version of the caramel custard recipe. Don’t forget to share it with your friends and family; I am sure they’ll love it too.

MORE SUCH RECIPES

Fried Baby Corn Recipe