Home Blog Page 10

Banana Bread Recipe

0
Banana Bread

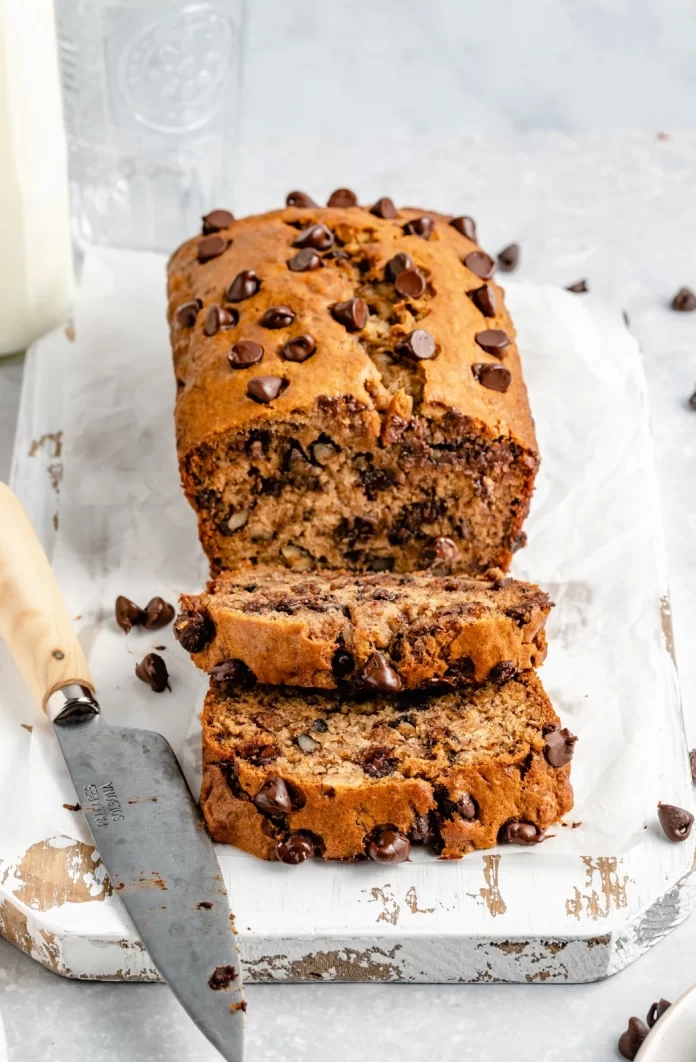
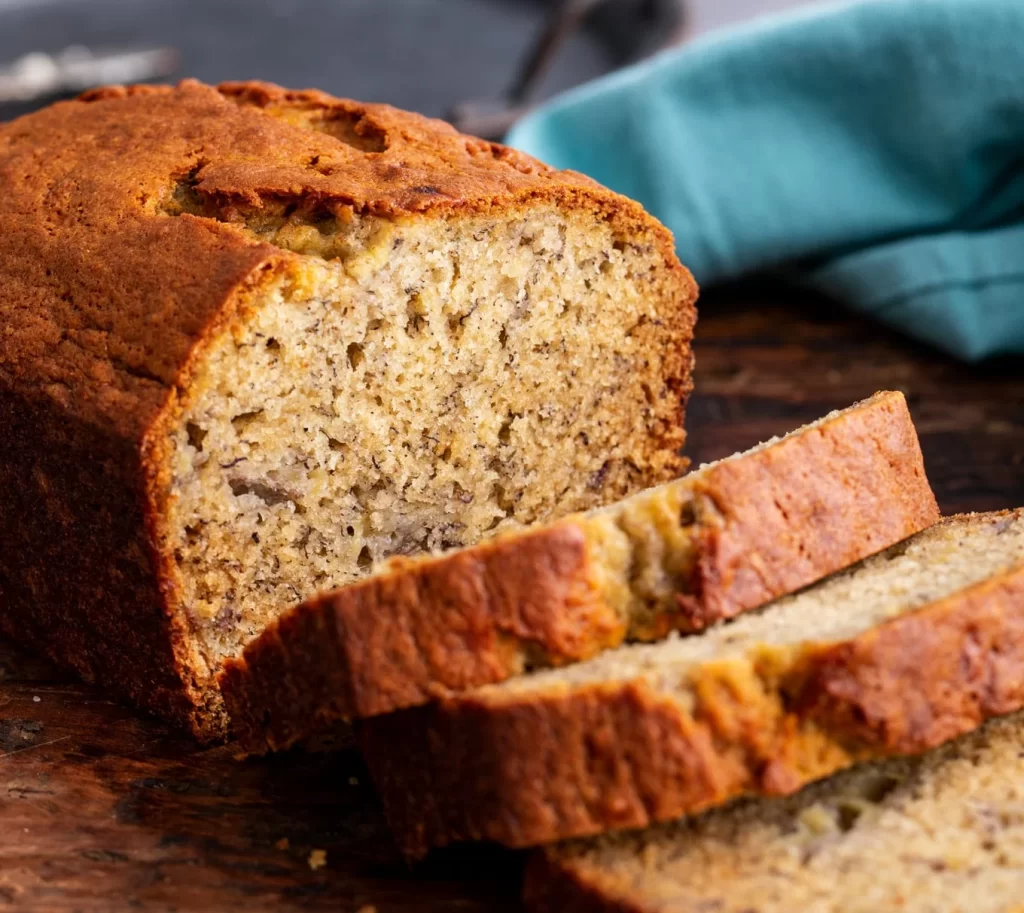
Are you looking for a delicious, moist banana bread recipe? If so, look no further than this banana bread recipe. It has all the flavours of the bread, like bananas, honey, and cinnamon. The best thing about this banana bread recipe is that a fancy mixer is not required. You need a mixing bowl, a fork to whisk the eggs, and a strong spoon to stir the batter. The amount of sugar is negotiable. White sugar was asked for in the original recipe in the amount of one cup, but most people—including myself—do just fine with 3/4 cup, and many are content with 1/2 cup.

If desired, you can add a cup of chopped nuts, raisins, or chocolate chips; alternatively, you can bake banana-nut muffins with the dough in muffin pans. Even further, you could make chocolate banana bread. But, for now, here’s the very basic banana bread recipe if you have ripped bananas at your place.

Ingredients

  • 2 to 3 medium-ripe bananas
  • 1/3 cup unsalted butter, melted
  • 1/2 teaspoon baking soda 
  • 1 pinch salt
  • 3/4 cup sugar
  • 1 large egg
  • 1 teaspoon vanilla extract
  • 1 1/2 cups all-purpose flour

Equipment

  • 18×5-inch loaf pan
  • Parchment Paper
  • Large bowl
  • Whisk or fork
  • Stand Mixer
  • Stapula

MUST READ: No bake cookies – the no-microwave recipe that’s super tasty!

How to Make Banana Bread?

Prepare the pan and preheat the oven: Baste an 8 × 4-inch loaf pan with butter and preheat the oven to 350°F (175°C).

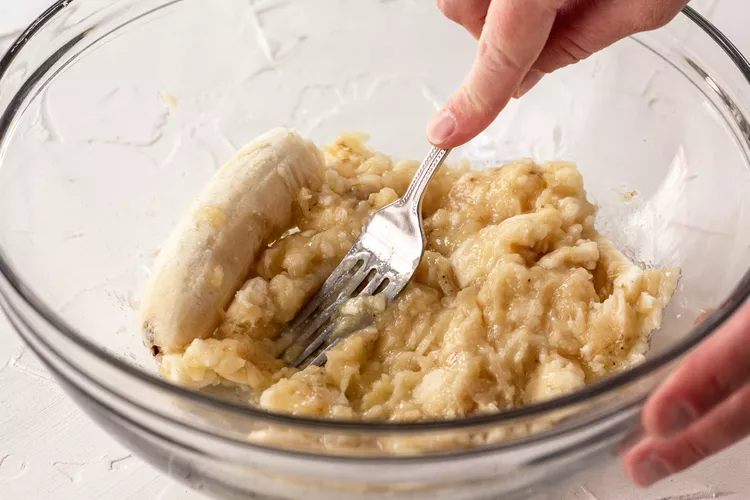
Mash the Bananas: Bananas should be mashed with a fork in a mixing basin before being combined with the butter. The mashed bananas are combined with melted butter.

Mix the ingredients: Mix all the remaining ingredients in the mixture, such as baking soda, salt, sugar, egg and vanilla extract.

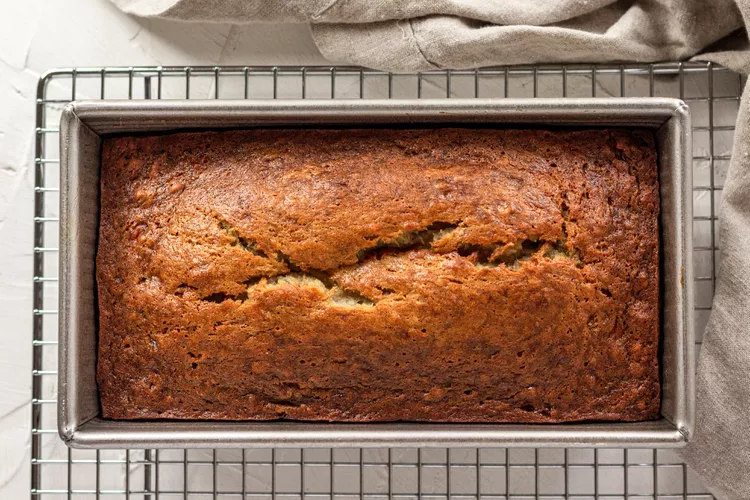
Bake the Bread: Put the flour in the mix and pour the batter. 350°F/175°C for 55 to 65 minutes, or until a wooden skewer or toothpick inserted into the middle of the cake comes out clean. In contrast to moist batter streaks, a few dry crumbs are acceptable. Loosely tent the loaf with foil and bake it for an additional few minutes if the exterior of the loaf is browned but the inside is still damp.

Cool and Serve: Remove from oven, let cool in pan for a few minutes, then serve. When ready to serve, remove the banana bread from the pan and let it cool fully. Slice, then dish. (Using a bread knife makes it easier to cut pieces that won’t crumble.)
Recipe Notes!

  • Banana muffins: Line a pan with paper liners and fill each cup to about 3/4 full to prepare muffins. After 20 minutes, check to see whether the muffins are done. By this, you can prepare 8 to 10 muffins.
  • Storage Options: Wrap bread securely in plastic wrap, cover it with aluminium foil and freeze for up to 3 months. Alternatively, wrap leftovers in plastic wrap and keep them at room temperature for several days.
  • For this recipe, a mixer is not necessary. Cleanup is simple as well. You can combine everything in one bowl if you’d like.
  • For this recipe, an 8 x 4-inch loaf pan is required. Bake for 47 to 57 minutes if using an 8 1/2 x 4 1/2-inch pan. Bake for 45 to 55 minutes if using a 9 x 5 pan. Remember that a flatter loaf will result from using a bigger pan.
  • Overripe bananas are the ones that make the greatest banana bread. The bananas inside should be soft and browning, and the yellow skins should be partially roasted.

Nutrition Content

  • Calories: 220 kcal
  • Total Fat: 7g
  • Saturated Fat: 4g
  • Cholesterol: 35mg
  • Sodium: 85mg
  • Carbohydrates: 37g
  • Sugar: 19g
  • Protein: 3g
  • Calcium: 9mg
  • Iron: 1mg

Final words

When it comes to making bread, I use a variety of flavours to create different flavours and textures that are perfect for me. I like to keep things simple with bread, butter, and milk. But what about you? What’s your favourite bread recipe? I’d love to hear about it! Tell me in the comments below!

Please feel free to comment if you have any queries regarding the recipe or would want to offer your own take on the banana bread. Don’t forget to tell your family and friends about it; I’m sure they’ll also like it.

READ ALSO: Hashbrown casserole- the perfect dish for brunch with friends!
Hashbrown Casserole Recipe

0
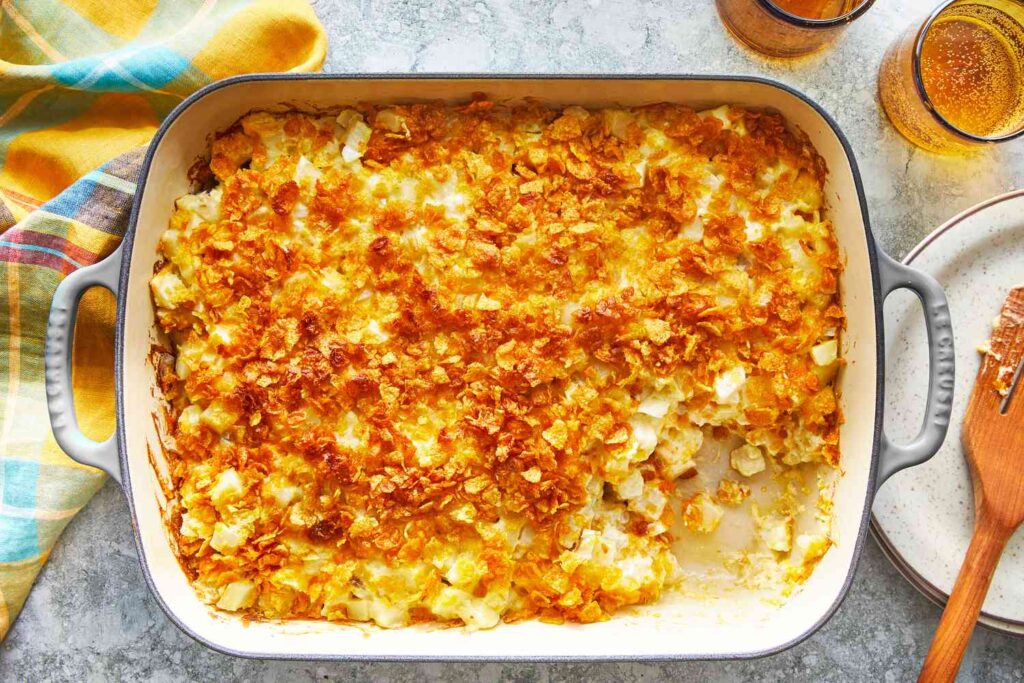
Hashbrown Casserole

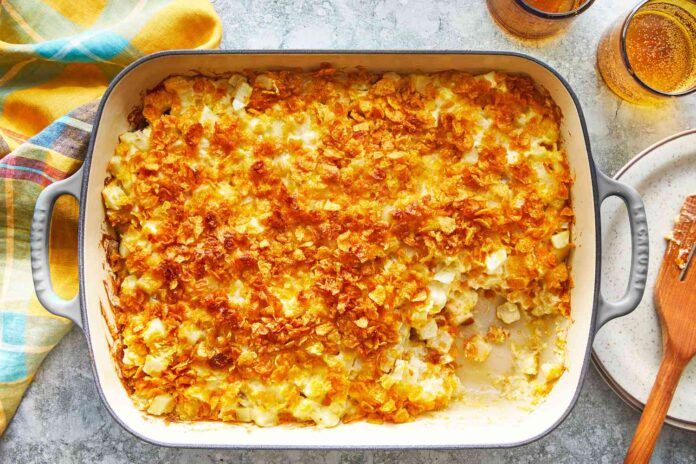
The best thing about hashbrown Casserole is that they’re so easy to make. All you need is potatoes, chicken soup and cheese. That’s it. The only problem with hashbrowns is that there are so many ways to make them! And if you ask any cook or food blogger for the “best” way to make them, chances are they’ll give you three different recipes with no end in sight.

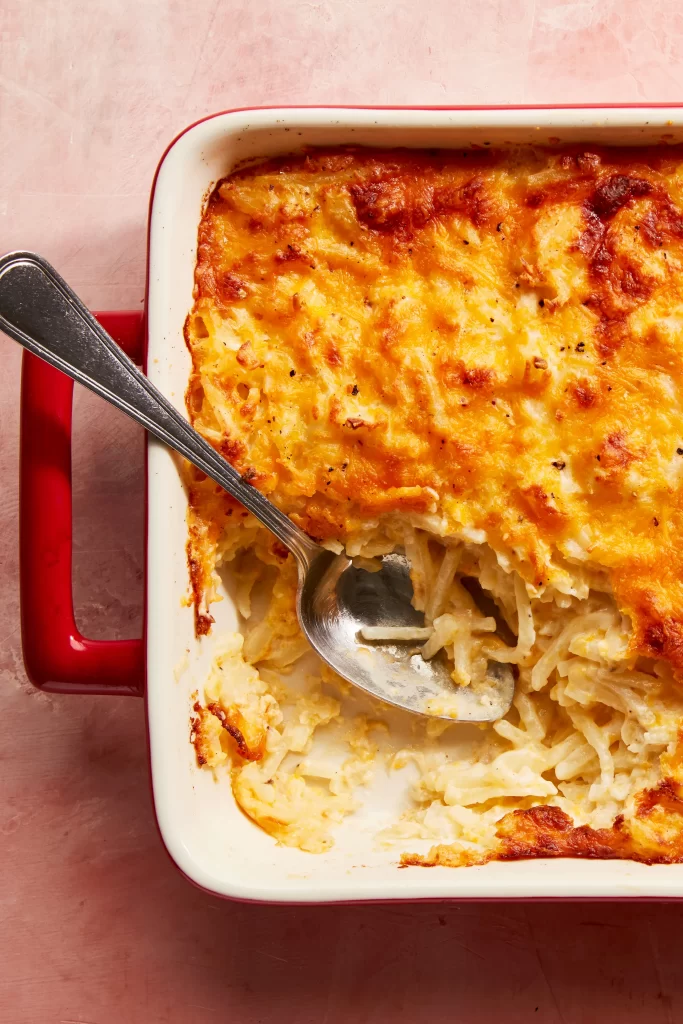
Making hashbrown casserole is a great way to use leftover potatoes or make some extra for weeknight dinner. No matter what type of potato you use, this recipe will work well for you. This hashbrown casserole recipe takes just 5 minutes of prep time and then it’s ready to bake in the oven for about 30 minutes. The end result will be perfectly cooked potatoes with a delicious cheese topping that everyone will love.

We will show you how to make a classic hashbrown casserole recipe from scratch — but as always, we encourage you to experiment with other ingredients and flavors.

Ingredients to Make Hashbrown Casserole

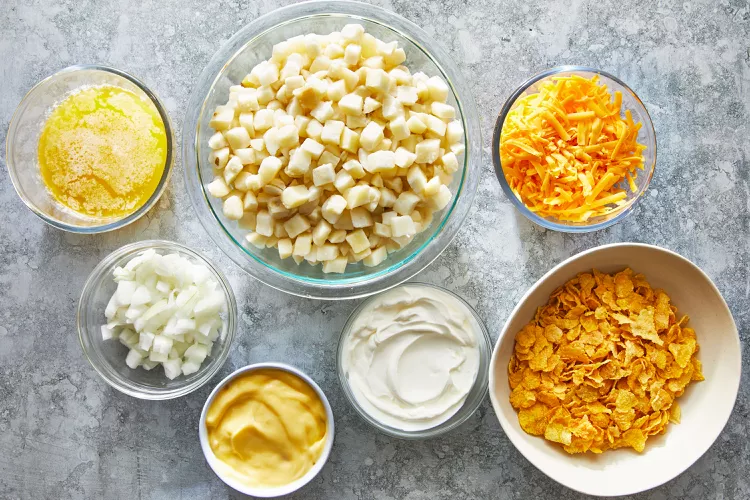
  • 1 (2 pounds) package frozen hash brown potatoes, thawed
  • 1 (10.5 ounces) can cream of chicken soup
  • ½ teaspoon dried thyme
  • 2 cups shredded Cheddar cheese
  • 1 (8-ounce) container sour cream
  • 1 cup butter, melted, divided
  • ½ cup chopped onion
  • ½ teaspoon salt
  • ½ teaspoon black pepper
  • 1 cup crushed cornflakes

Instructions for Making Hashbrown Casserole

  • Set the oven to 350 degrees Fahrenheit. Using nonstick cooking spray, coat a 13×9 inch baking dish and put it aside.
  • Frozen hash browns, onion powder, dried thyme, salt, pepper, and 1 cup of shredded cheese should all be combined in a big saucepan.
  • In a medium-sized saucepan, add the butter and the cream of chicken soup.
  • The mixture should be heated and stirred over medium-high heat until the butter has melted.
  • Stir in the sour cream after taking the skillet from the heat.
  • Add the soup mixture to the hash brown mixture, then stir to combine.
  • After pouring the mixture into the prepared pan, add the remaining 1 cup of cheese on top.
  • Bake for an hour or until bubbling and heated. Serve right away.

Tips and Notes!
  • You can also use crushed buttery crackers like Ritz Crackers instead of Cornflakes.
  • Before adding the frozen hashbrowns to the casserole mixture, defrost and drain them for optimal results to avoid sogginess.
  • Do your own cheese slicing. Although pre-shredded cheese is more practical, freshly-shredded cheese melts more smoothly and evenly.
  • You can keep your hashbrown casserole in the refrigerator for 4-5 days. For the best results, wrap in plastic wrap or move to an airtight container.
  • Reheat your casserole by placing it in the oven at 350 degrees F for 15 to 20 minutes, or until thoroughly heated.
  • Also, you may microwave individual slices for 15 to 30 seconds to reheat them.

Nutrition Facts

  • Calories: 398 kcal
  • Carbohydrates: 24g
  • Protein: 11g
  • Fat: 30g
  • Saturated Fat: 16g
  • Cholesterol: 79mg 
  • Sodium: 721mg
  • Fibre: 2g
  • Sugar: 1g
  • Calcium: 252mg

Conclusion

This hashbrown casserole is the perfect breakfast or brunch recipe. It’s quick and easy, can be made in advance or on a weeknight and tastes like comfort food but without all the guilt.

It takes just 5 minutes of prep time, and then it needs to be baked for 30-35 minutes. Once you remove it from the oven, let it cool slightly before slicing it into portions (about 10 minutes). You can also freeze leftovers in individual serving sizes if needed.

If you have questions about the recipe or want to share your version of the hashbrown casserole, please feel free to comment. Don’t forget to share it with your friends and family; I am sure they’ll love it too.

READ ALSO: Enjoy this mouth-watering Italian pie for your Easter!
No Bake Cookies Recipe

0
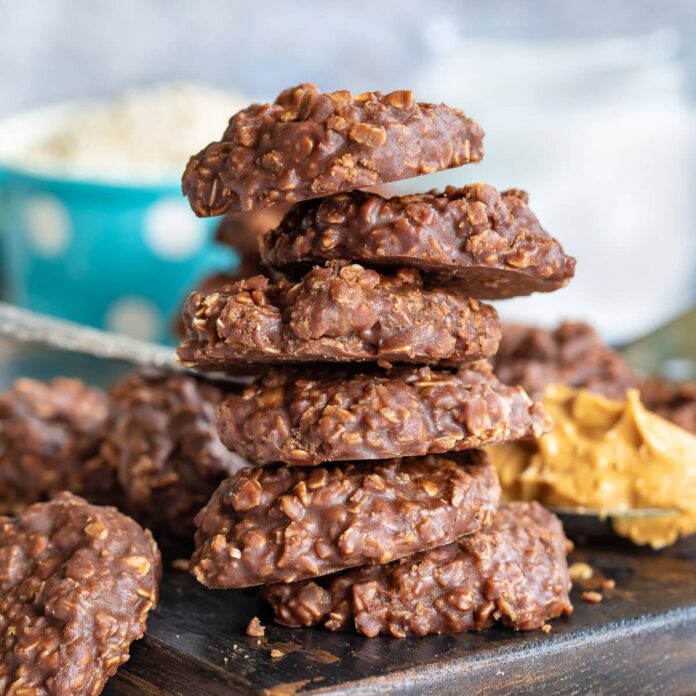
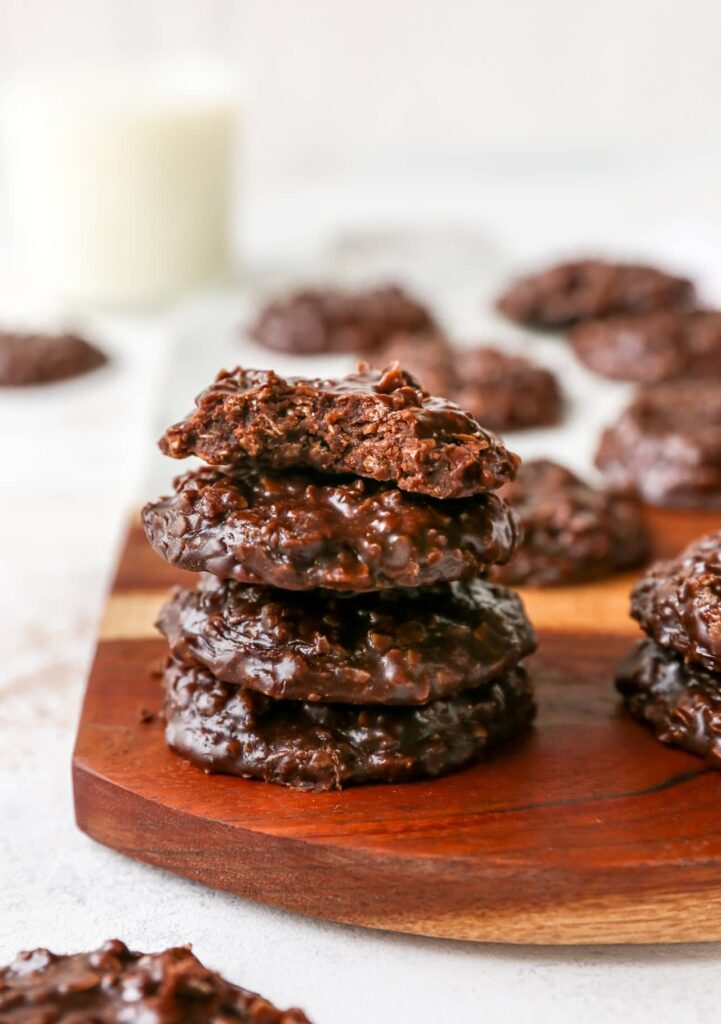
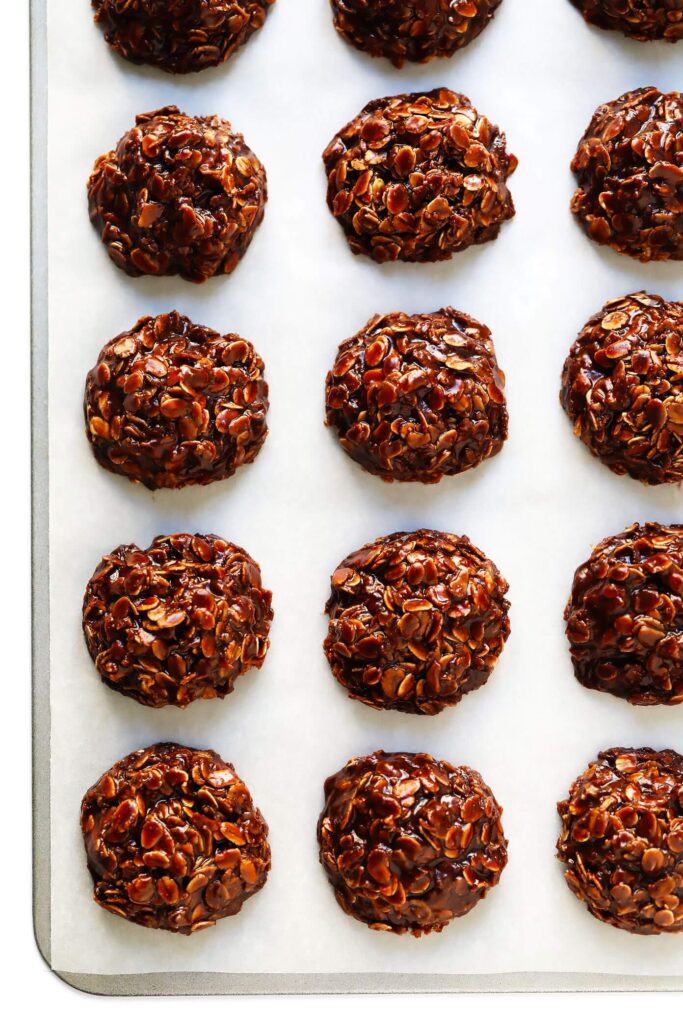
no bake cookies

This is a no bake cookies recipe, which means there’s no need for ovens or microwaves. Mix all the ingredients in a bowl, roll them into balls, and leave them for about 30 minutes. When they’re ready to eat, pop them into your mouth—they’ll be chewy with just enough chocolate flavor from the cocoa powder! Or, if you prefer something sweeter than chocolate, try adding some Nutella and cut down on the amount of peanut butter by half.

I think this is one of those recipes that people remember most from their childhoods — it’s simple but so good! And I’ve found that even adults love these no bake cookies because they’re easy to make and delicious every time (no matter what toppings you choose!).

The recipe below is my favourite no-bake cookie recipe because it’s incredibly easy to make, and you can use any nut butter (or even regular butter) as the base, then add whatever else takes your fancy—non-dairy chocolate chips, raisins, or nuts are all good options.

Ingredients

It’s quick, easy and always delicious — plus, it only requires a few ingredients! There are endless variations on this classic treat, but they all require the same few simple ingredients. To make these cookies, you’ll need the following:

  • 1/2 unsalted butter
  • 350g granulated sugar
  • 32 g unsweetened cocoa powder
  • 1/2 cup milk
  • 1 tsp vanilla extract
  • 160g creamy peanut butter
  • 3 cups quick oats
  • large pinch kosher salt
  • waxed paper

MUST TRY: Ritz Crackers Chicken Recipe – the perfect easy weeknight meal!

Instructions to make

  • Line around 29 cupcake liners or two baking sheets with parchment paper, whatever you like.
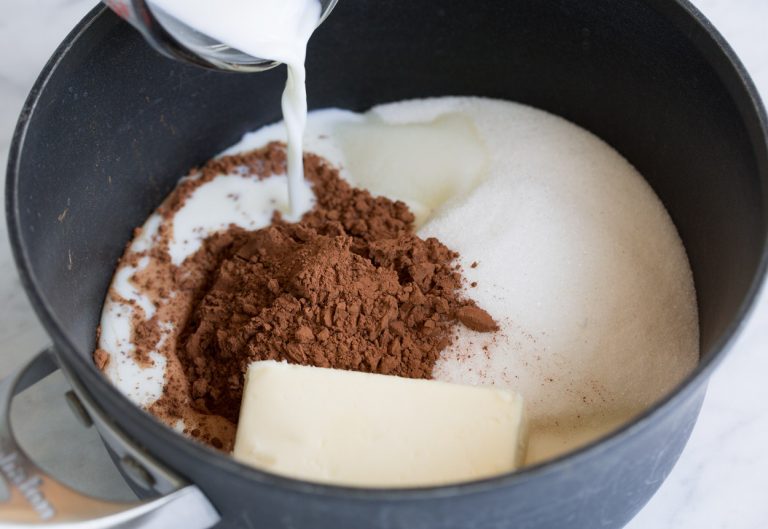
  • Butter, sugar, cocoa, and milk should be combined in a 2.5 to a 3-quart medium pot.
  • Cook while constantly stirring over medium heat until it entirely boils.
  • Let the mixture boil for 60 seconds without stirring.
  • Remove from the heat and immediately add the peanut butter, vanilla, and quick oats.
  • The mixture should be thoroughly blended before being dropped into cupcake liners or onto prepared baking sheets using a medium (2 Tbsp) cookie scoop or two spoons.
  • Allow the cookies to rest at room temperature for at least 20-30 minutes until set.
  • To speed up the procedure, place the cookies in the refrigerator.
  • Now, keep these cookies in an airtight container for some time.

Tips and Notes

  • Before counting down those 60 seconds, the liquid must begin fully boiling (bubbling up), not merely coming to a simmer (where the edges of the mixture bubble up).
  • Use just fast oats; don’t use old-fashioned oats, in my opinion. The cookies won’t be as tender or set up nearly the same way.
  • The dish should ideally turn out perfect for you, but if they’re too wet the next time, boil them for 15 seconds longer; if they come out dry, boil them for 15 seconds less. The time the liquid is cooked affects how the dough sets up and how moist the cookies turn out.
  • Although I like creamy peanut butter, you may substitute hard peanut butter in this recipe by adding 1/4 cup to ensure the consistency is unaffected.
  • Rather than margarine, use actual butter. It has an unpleasant flavor that will affect the flavor of the cookies, and because water has been added, the final product won’t be as delicious.
  • Then, follow the recipe’s instructions and add a little extra cocoa and peanut butter; this makes the cookies a little richer than you recall. Like it says in the recipe, I also reduced the sugar by 1/4 cup.

Nutrients Value

  • Calories: 215 kcal
  • Total Fat: 8g
  • Cholesterol: 9mg
  • Sodium: 57mg
  • Sugar: 15g
  • Carbohydrates: 33g
  • Protein: 4g
  • Calcium: 23mg
  • Iron: 1.6mg
  • Fibre: 3g

To sum up!

I love these no bake cookies because they’re so versatile—they don’t have to be eaten just as a snack with tea or coffee but also make great additions to lunchboxes and school lunches. Moreover, they keep well for several days in an airtight container, so they don’t need to go stale before you get around to eating them all up.

This is super easy and takes just 15-20 minutes to prepare. If you have questions about the recipe or want to share your version of no bake cookies, please feel free to comment. Don’t forget to share it with your friends and family; I am sure they’ll love it too.

READ ALSO: Enjoy this mouth-watering Italian pie for your Easter!

Traditional Italian Easter Pie Recipe

0
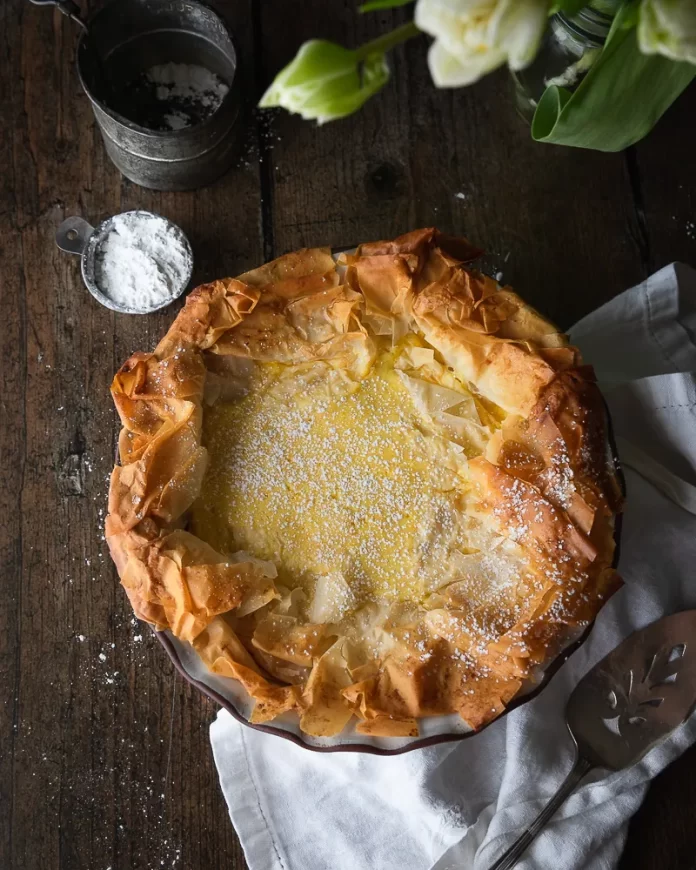
Easter Pie

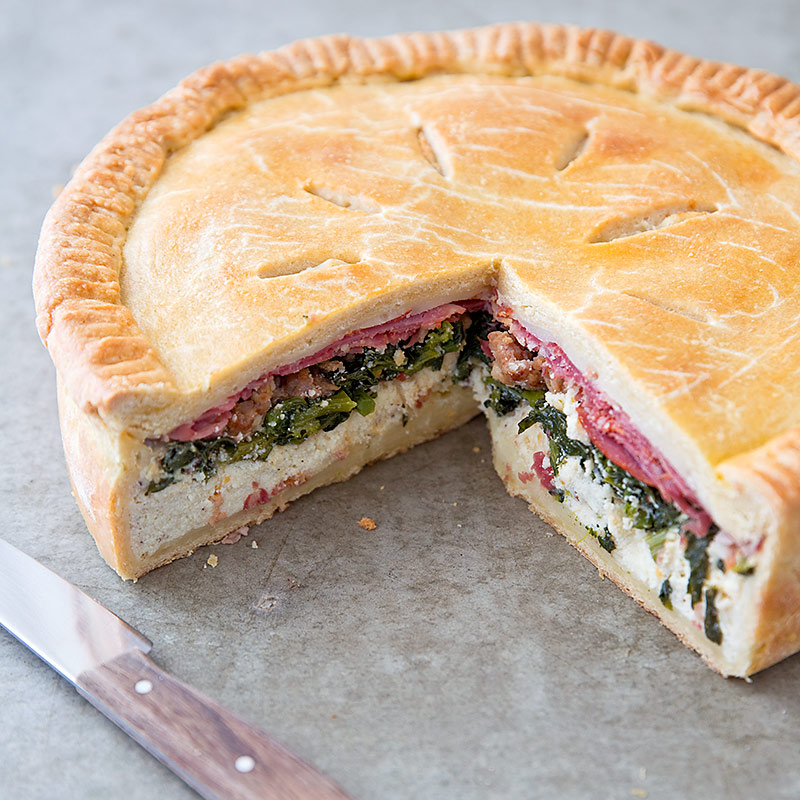
This quick and easy recipe will have you enjoying this dish in no time. The traditional Italian Easter Pie with a deliciously cheesy ricotta filling is perfect for your Easter menu or any occasion. This recipe makes at least four pies, which are enough for two people.

This recipe is perfect for you if you’re looking for a delicious and easy-to-make Easter pie. It has all the ingredients needed to make an Italian Easter Pie — eggs, ricotta cheese, pine nuts, and vanilla extract — but it’s also super simple to make. The only thing that makes this recipe special is how much flavour can be packed into a small amount of food. Let’s get to the recipe!

Ingredients For Italian Easter Pie

  • 3-4 cups powdered sugar
  • 3 large eggs
  • 2 teaspoons pure vanilla extract
  • 1 tablespoon orange zest
  • 1 container whole milk ricotta cheese
  • 1/2 cup cooked short-grained rice
  • 1/3 cup toasted pine nuts
  • 6 sheet fresh phyllo sheets
  • 3/4 stick unsalted butter, melted

Directions to Make

  • In a food processor, blend all the ingredients, such as sugar, eggs, vanilla, orange zest, and ricotta, until smooth.
  • Now, put the rice and pine nuts and stir well together.
  • Now, set this mixture aside for some time.
  • Set the oven to 375 degrees Fahrenheit.
  • Butter a 9-inch glass pie plate sparingly.
  • One phyllo sheet should be placed over the dish’s bottom and up its sides, extending over the edges.
  • Melted butter should be brushed over the phyllo.
  • A second layer of phyllo dough should be placed on top, laid out the other way from the first sheet.
  • The remaining phyllo sheets may be layered similarly, alternately buttering each sheet after each layer.
  • Put the ricotta mixture in the dish using a spoon.
  • To thoroughly cover the filling, fold the protruding phyllo dough over the top. Apply melted butter all over.
  • Around 35 minutes into baking the pie, check whether the phyllo is turning golden and the filling is set.

Recipe Notes

  • The crust: You can also use store-bought frozen pie crusts or even roll out your dough at home. If you decide on homemade crusts, keep them in the freezer until ready to use (or bring them in an insulated bag).
  • The filling: My favourite part of this pie is the ricotta cheese filling! It’s creamy but not too rich, and it tastes fantastic when baked in a flaky crust — making it even better than bread.
  • Keeping all these ingredients the same is essential because they will give your dish a distinctive taste.

Nutrition Value

  • Calories: 294 kcal
  • Fat: 18g
  • Saturated Fat: 9g
  • Cholesterol: 96mg
  • Sodium: 113mg
  • Protein: 9mg
  • Carbohydrates: 25g
  • Fibre: 0g
  • Sugar: 9g

Final words

This recipe is very easy to prepare and will make your easter look more impressive. Prepare these deliciously cheesy Italian pies for your easter celebrations in just no time and serve your guests. Moreover, you can make these pies at any time of the year if you’re craving them.

If you have questions about the recipe or want to share your take on different types of easter pies, please feel free to comment. Don’t forget to share it with your friends and family; I am sure they’ll love it too.

READ ALSO: Make this tomato bruschetta ideal for any outdoor party!

10 Most Popular Super Bowl Food Recipes

0

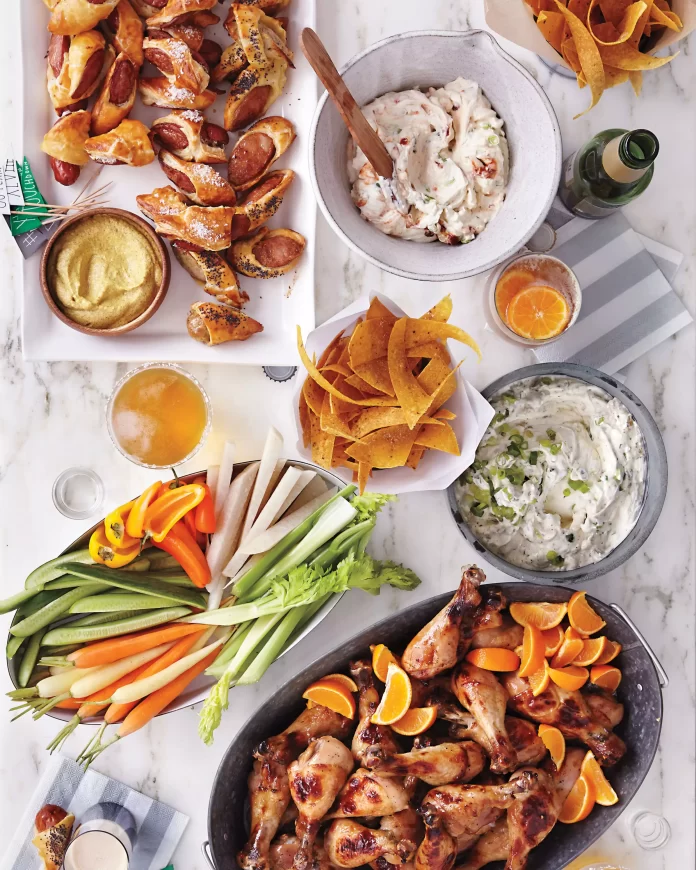
As any football fan can tell you, The Super Bowl is the biggest athletic event of the year. Yet, the ever-popular game day meal is just as important as the game itself. Everyone asserts that the main focus of the Super Bowl is football. However, the cuisine served alongside the game comes in second place. For a game day watch party, everything from pizza to Super Bowl dips to chicken wings should be served. As a result, we’ve compiled a list of the most popular Super Bowl recipes ever.

In this article, you’ll find heartier foods like chili recipes, outrageous fish cake, pesto pasta that is the ultimate comfort food, and bite-sized Super Bowl treats like homemade sushi and tomato bruschetta in a blanket.

You’ve come to the perfect location if you want to have ideas for the super bowl recipes! Enjoy some of the menu’s shareable snacks, such as Italian pizzelle cookies, chicken satay strips, and ritz cracker chicken. Alternatively, try these original takes on chicken dishes (including chicken nuggets and cutlets). Whichever cuisine you offer, include a football-shaped snack board and some Super Bowl sweets to ensure a successful evening.

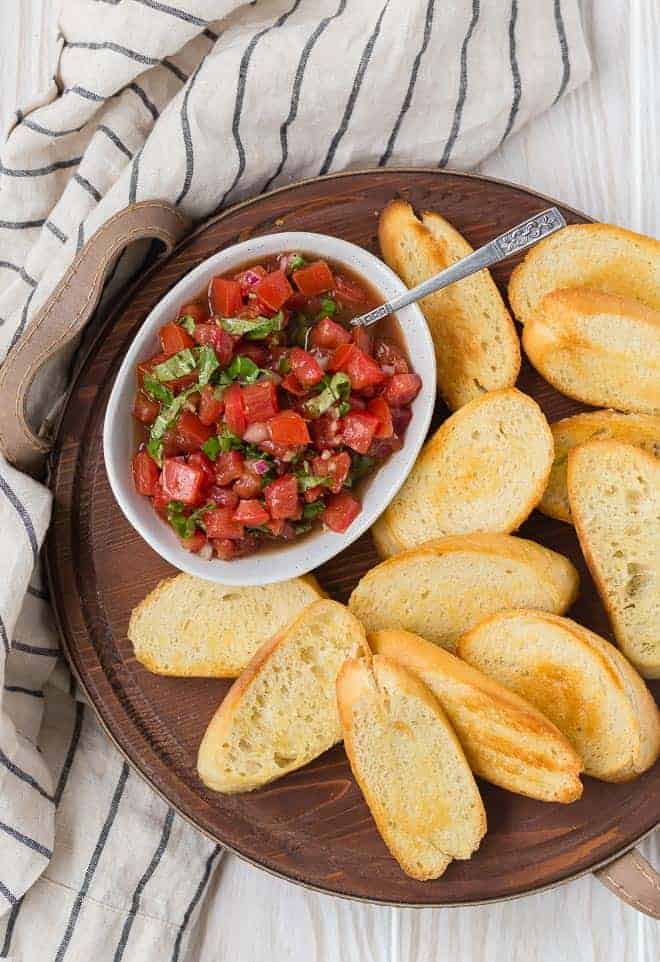
1. Tomato Bruschetta

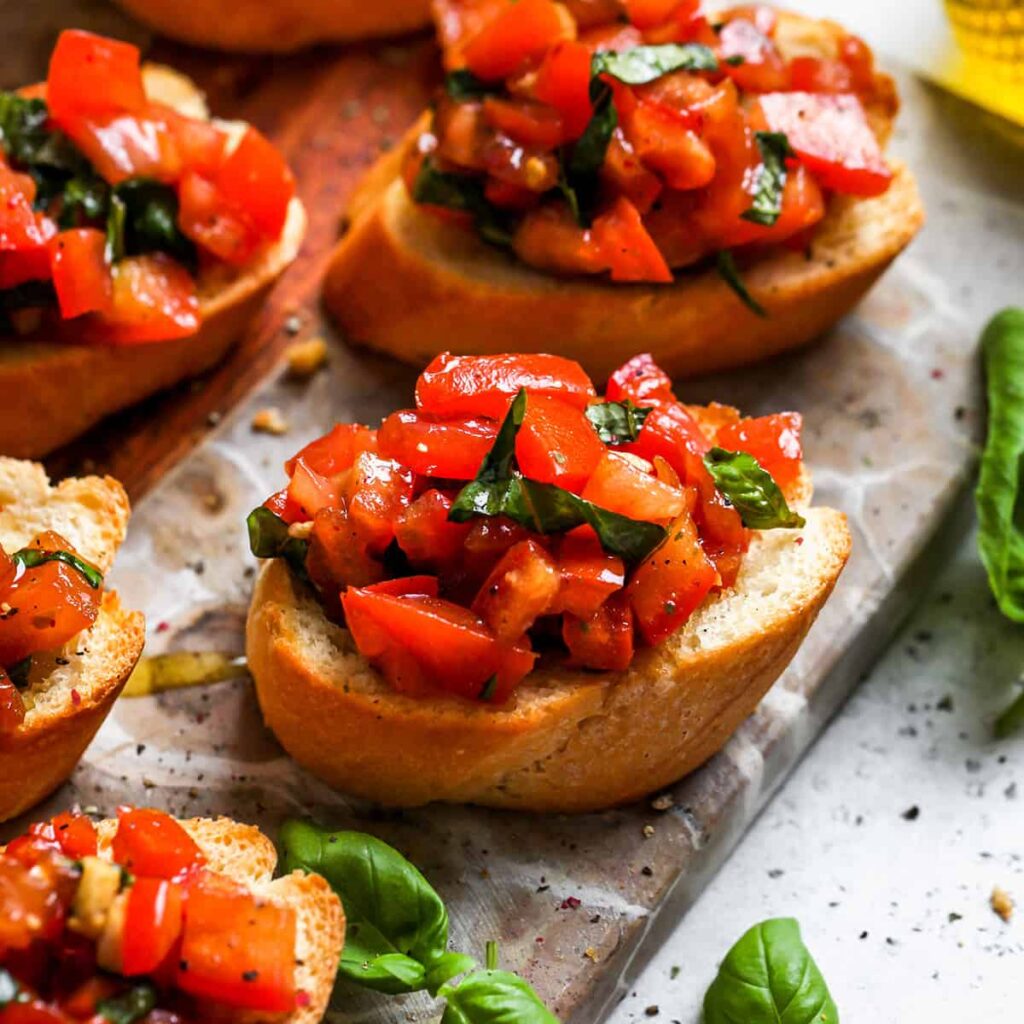
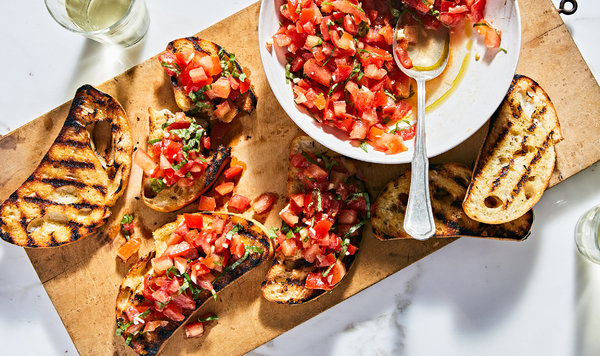
This easy-to-make tomato bruschetta recipe is an Italian flair; the actual stars are fresh, luscious summer tomatoes and deliciously crispy bread. This quick and delectable vegan snack can be prepared in just 10 minutes with only 5 common ingredients, making it ideal for every party.

Get the Tomato Bruschetta Recipe

Super bowl food recipes

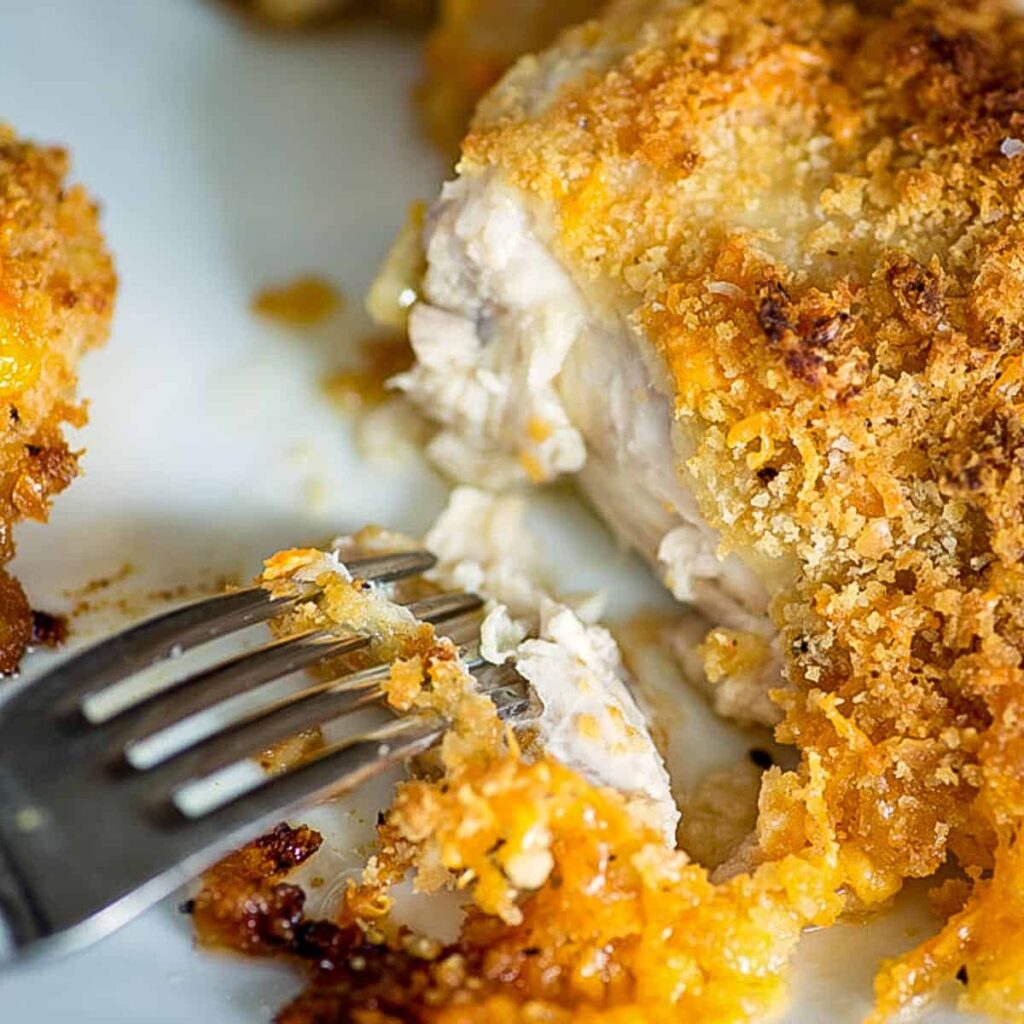
2. Ritz Crackers Chicken

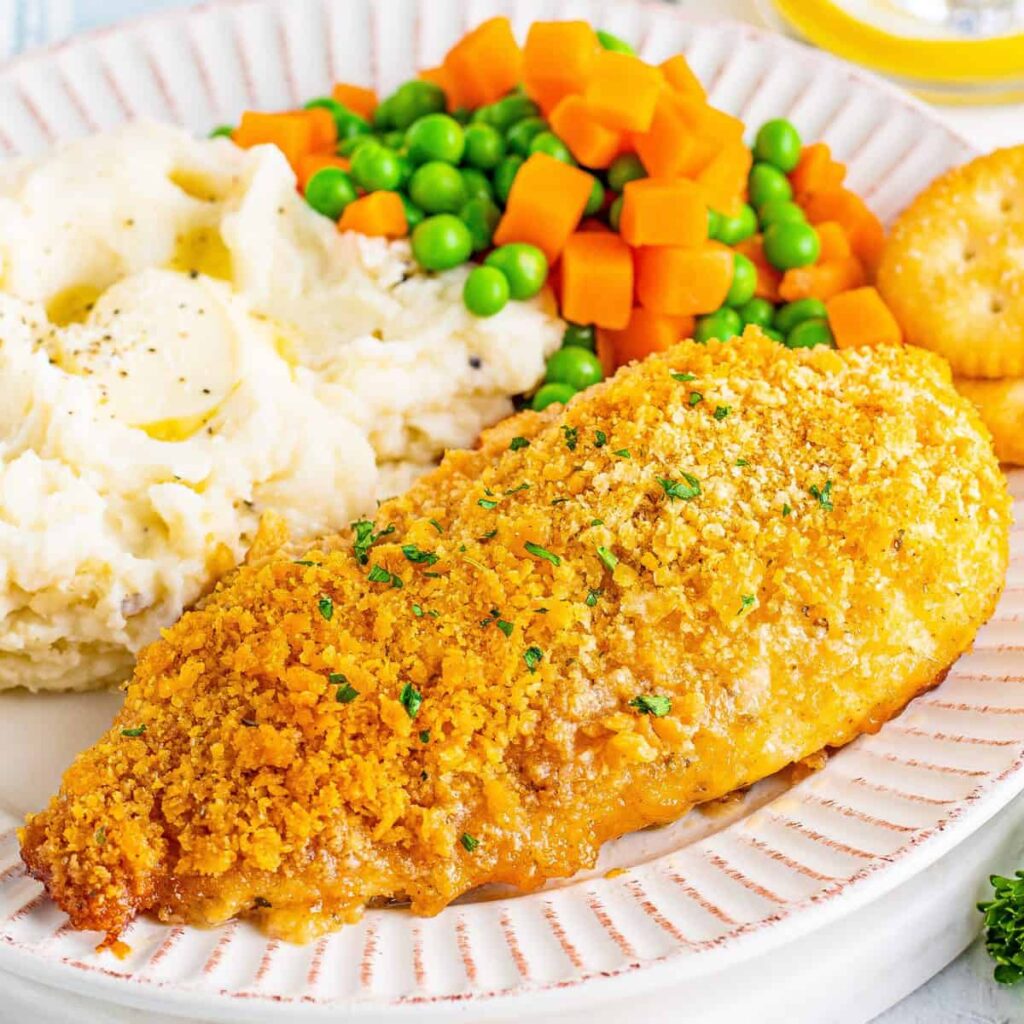
This Ritz crackers chicken recipe is a perfect dish for every party. Moreover, it uses boneless, skinless chicken breasts — which are always the best choice for a healthy diet because they contain less fat than other cuts of meat. If desired, you can also use this recipe for ground chicken; adjust your cooking time accordingly.

Get this recipe of Ritz Crackers Chicken here!

Ritz Cracker Chicken Recipe

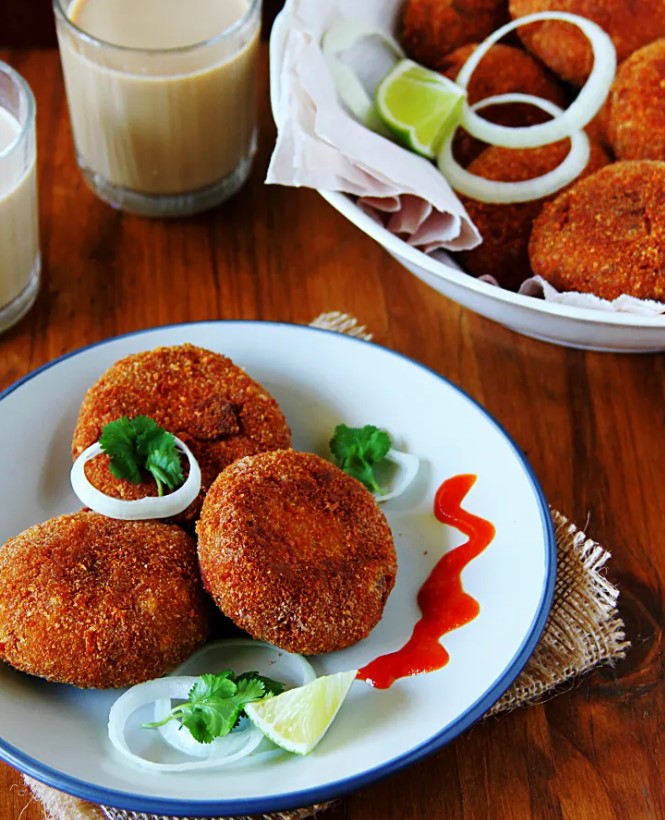
3. Chicken Cutlets

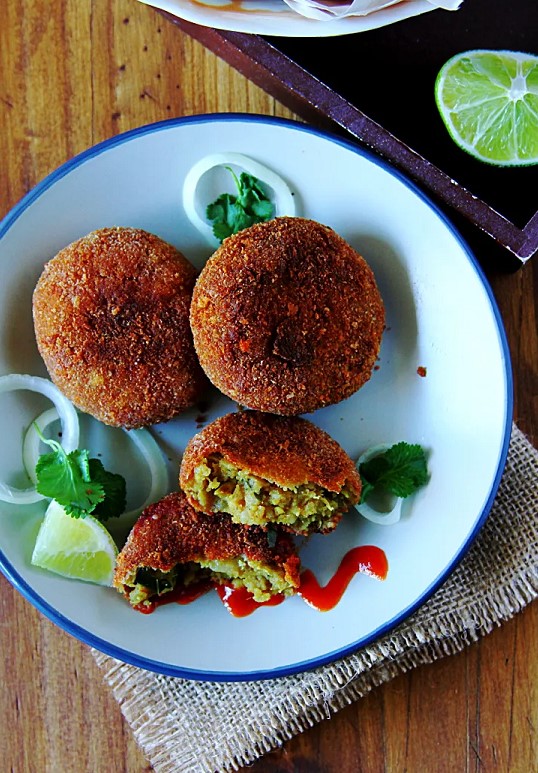
Chicken Cutlets are basically crispy, deep-fried patties that are filled with vegetables and a spicy chicken combination. They make a very delicious starter or snack idea that you can prepare for any house party. At our house, these crunchy chicken cutlets are one of the most loved snacks.

Get the Chicken Cutlets Recipe

Super bowl food recipes

4. Pesto Pasta

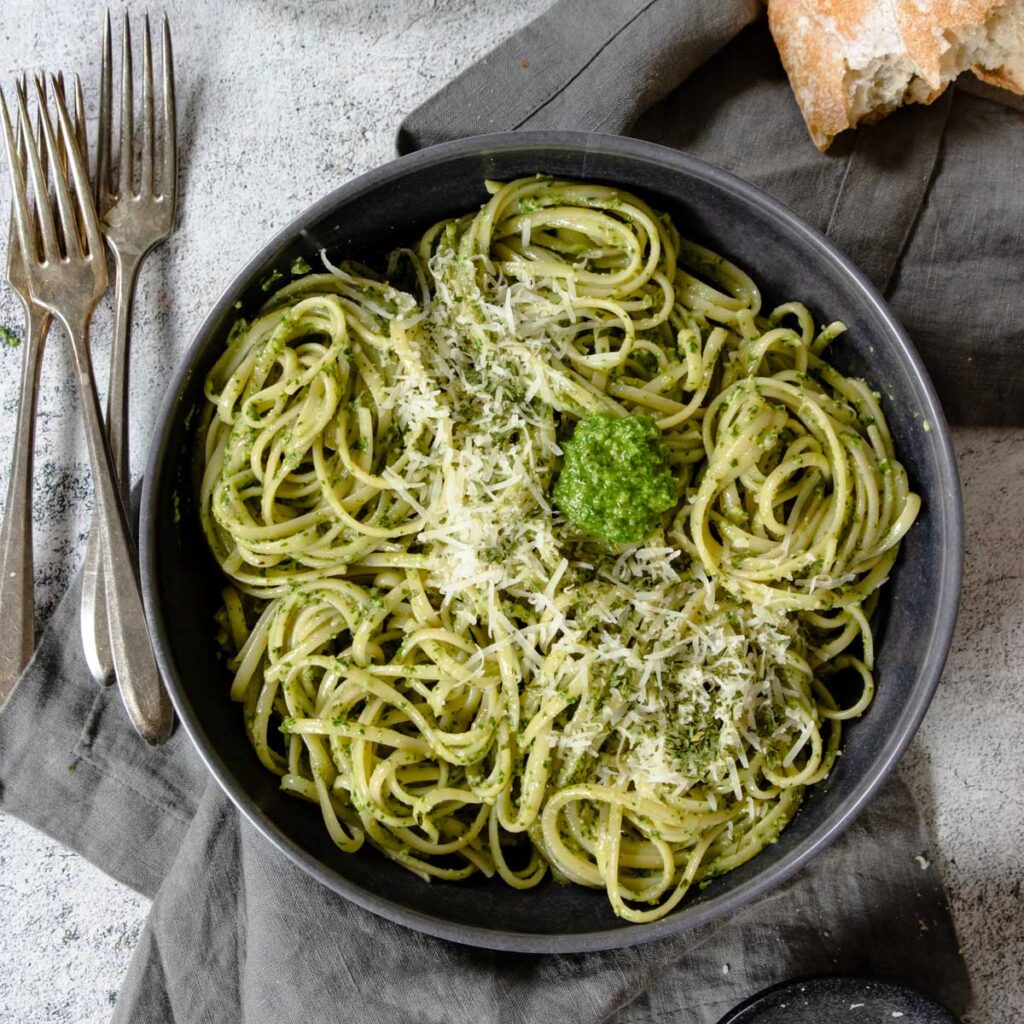
This easy-to-make pesto pasta is a perfect meal for every weeknight party! I prefer adding a handful of arugula, but you can use any of your favorite soft greens instead. You can have it hot or cold, whatever you like. It won’t take you more than 30 minutes to get ready! Simply cook the pasta, make the basil pesto, and put it all together until your dinner is ready. It may be used as a side dish or as a main course, too.

Get the Pesto Pasta recipe here!

Super bowl food recipes

5. Homemade Sushi Rolls

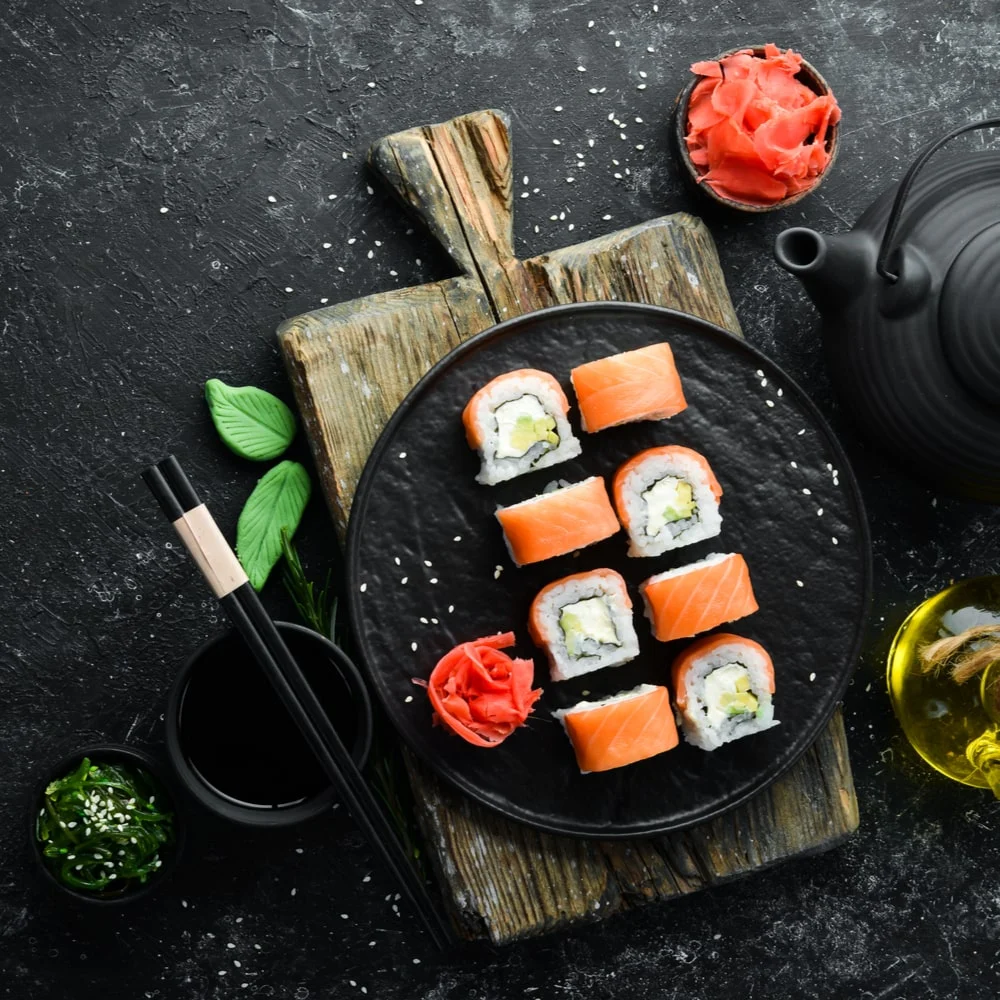
Homemade Sushi is way cheaper than ordering from a restaurant. You can easily prepare Sushi rolls with your favorite ingredients. It depends upon you on whatever you want to put as a filling in your sushi rolls. You can use various types of ingredients and techniques, so be creative in making your sushi rolls. Make your party more interesting by making these delicious Sushi Rolls.

Get the Homemade Sushi Rolls Recipe

Super bowl food recipes

6. Thai Fish Cakes

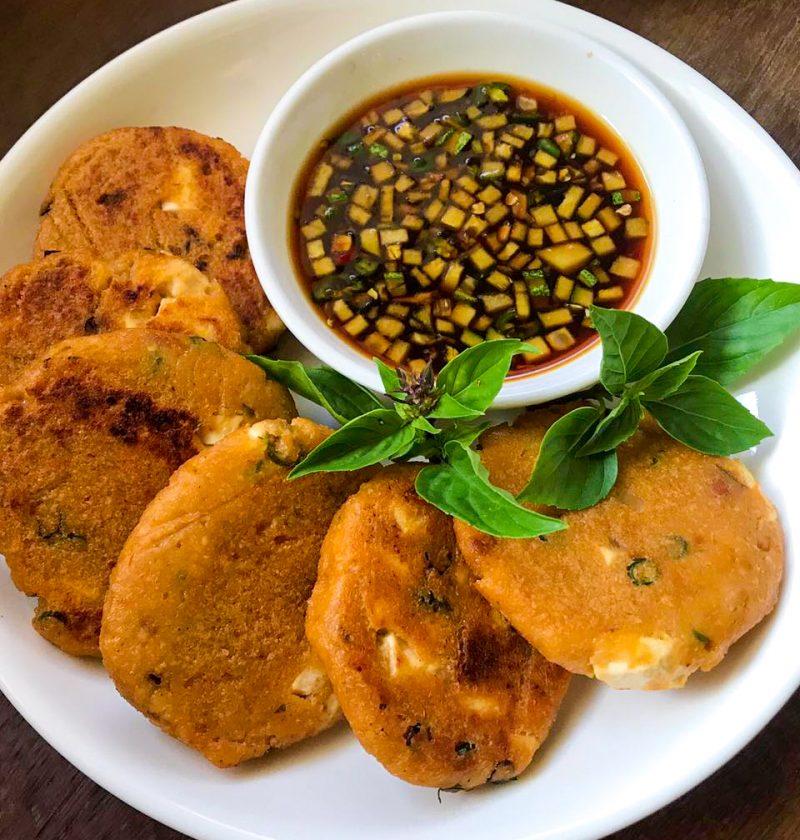
A light, real-crowd favorite, and full-of-flavors recipe are easy to make and great for any party or family get-together. The green beans add a nice taste to your fish cakes, the red curry paste adds a tremendous taste to level up your treat, and the sweet chili dip makes it even tastier. The equipment you need to make this recipe is just a food processor.

Get the recipe for Thai Fish Cakes.

Super bowl food recipes

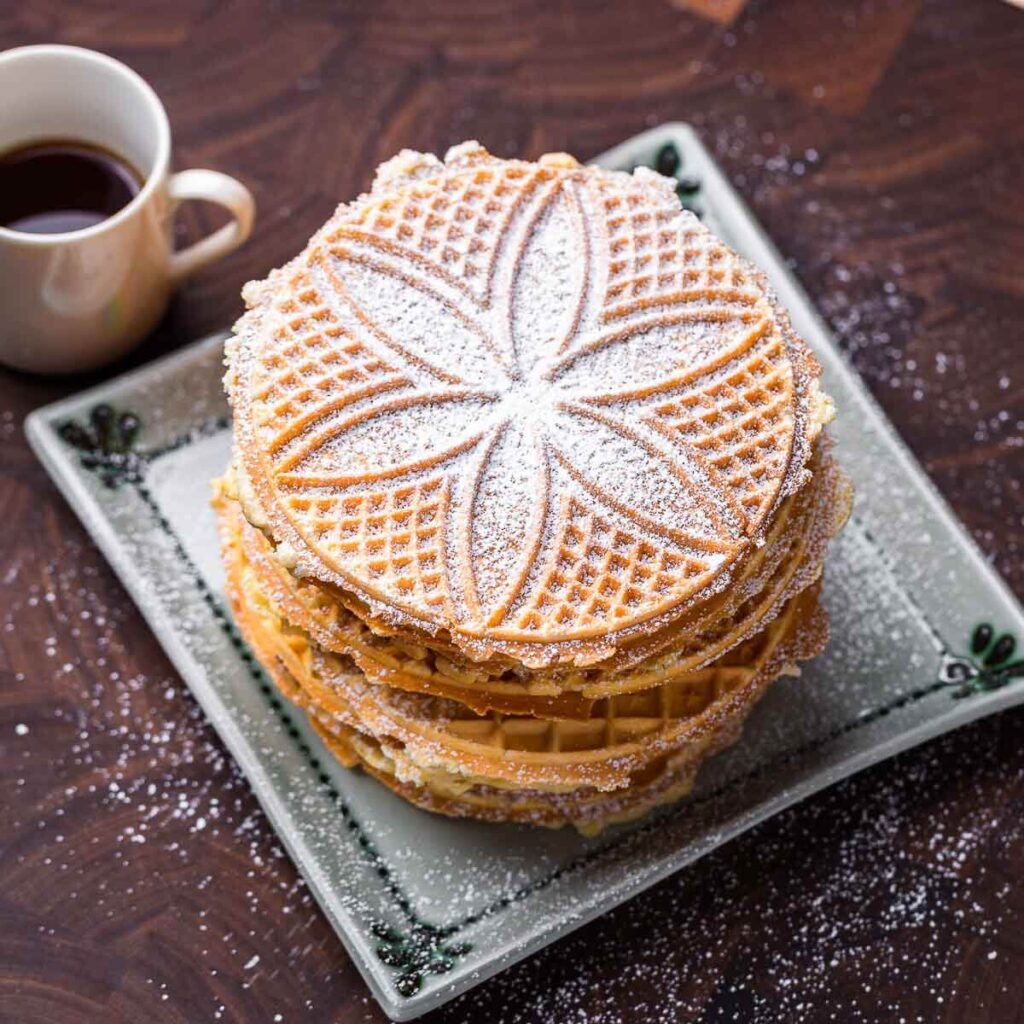
7. Italian Pizzelle Cookies

These easy-to-make classic Italian cookies are the most crispy and buttery delight. No American holiday is complete without these pizzelle cookies. We’ve made them a bit more neutral with a splash of good quality vanilla, but you can always use the more traditional anise extract or seed if that’s what you prefer. All you need to make these cookies are these 6 ingredients and 1 pizzelle maker.

Get the Italian Pizzelle Cookies recipe!

Super bowl food recipes

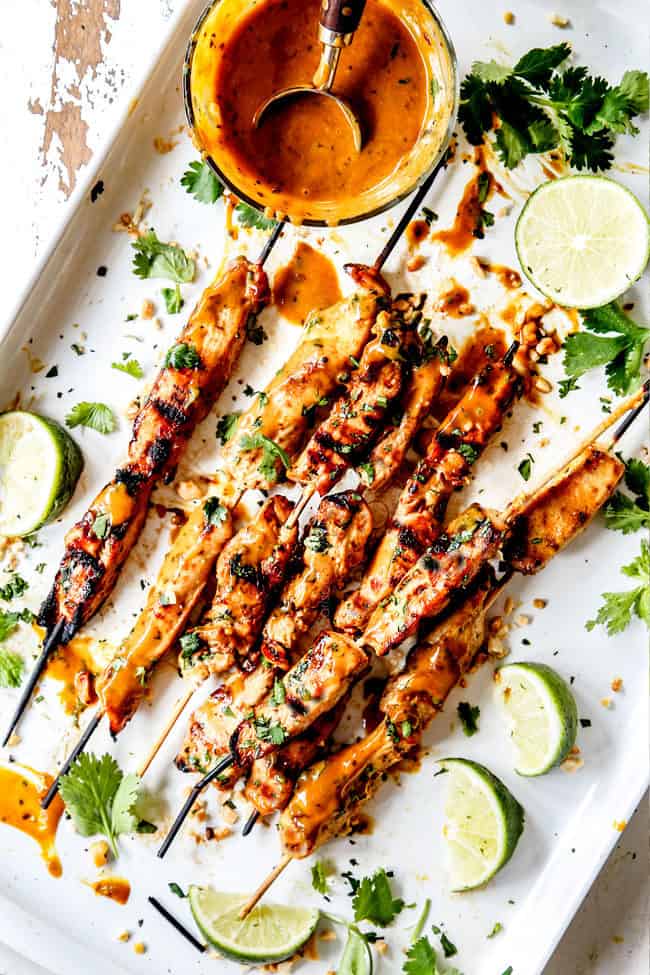
8. Chicken Satay Strips

No one can ever resist eating these chunky chicken satay strips, which are great for family game nights and a simple get-together dinner. It’s an easy yet mouthwatering snack everyone adores and will surely be a hit on the dining table. The chicken breasts are sliced into strips, shortening the whole process and ensuring that every piece is equally coated and crunchy.

Get the Chicken Satay Strips Recipe

Chicken Satay Strips

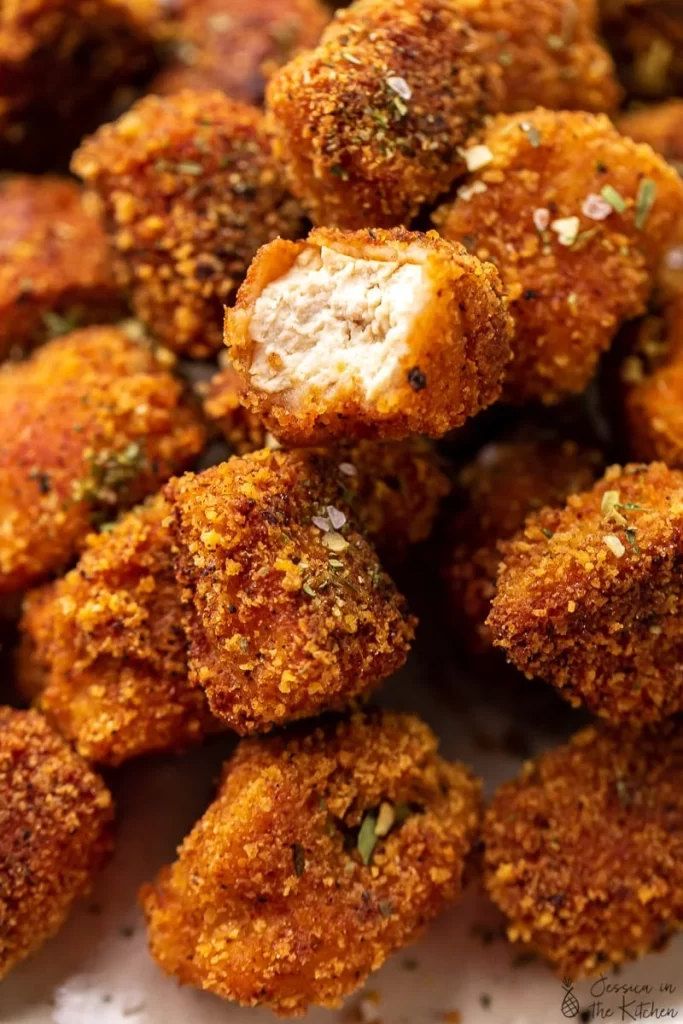
9. Chicken Nuggets

Nobody can resist eating crunchy, super flavorful chicken nuggets. This delicious cum healthy recipe takes just 20 minutes to prepare. It is the most popular and easy-to-make recipe among kids and adults. These breaded bites of perfection are the perfect feast when you want to have comforting food that you can enjoy for a party. This is super easy to make, and you can make a bunch of these and freeze them. So you can fry them whenever you need them.

Get the Chicken Nuggets here!

Chicken Nuggets

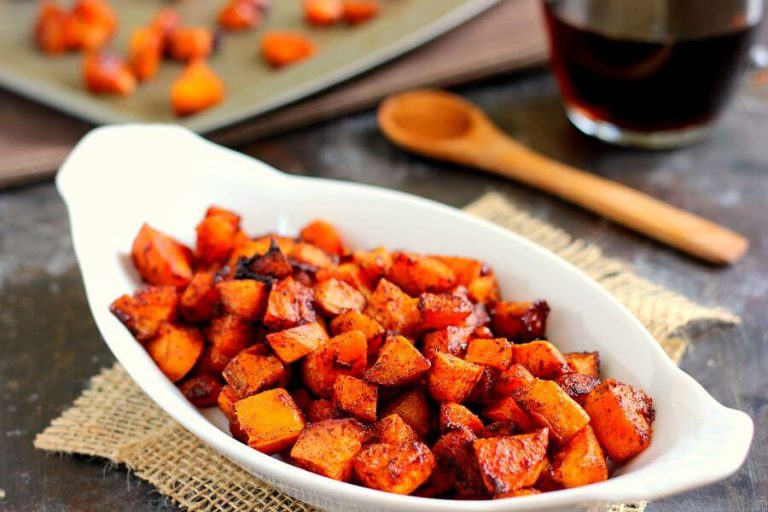
10. Roasted Sweet Potatoes

This incredibly simple roasted sweet potato covered in delicious maple syrup can become a perfect side dish for the evening of your game night this time. As we all know, maple and cinnamon do great together; this recipe is all about that. This recipe is so easy to prepare that it just needs a last-minute preparation. This melt-in-the-mouth, the finger-licking dish is a favorite for everyone, whether a kid or a well-grown gentleman. The delicious taste of sweetness and sourness mixed in a dish makes it more authentic.

Get the Roasted Sweet Potatoes Recipe

Super bowl food recipes

Conclusion

There are many popular Super Bowl recipes with different ingredients, and we have tried to add every best possible recipe to make your event unforgettable. Some are make-it-your-own-type dishes that require only a few ingredients, like delicious chicken satay strips and pizzelle cookies.

This list comprises the most popular and easy-to-make recipes to make on your Game Victory Day. If you have questions about these recipes or want to share your take on different types of recipes, please feel free to comment. Don’t forget to share it with your friends and family, and I am sure they’ll love it too.

10 Best Holi Foods That You Need to Try!

0
Holi Dishes

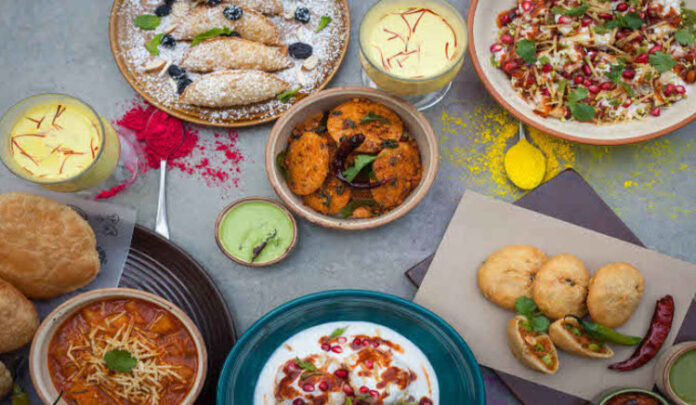
The most popular Indian festival, Holi, is around the corner. This festival of colours is observed differently in every region. On this occasion, people tend to eat different dishes like gujiya, malpua, dahi bhalla, and much more. This is how we have always celebrated the festival of colours, but every year there is an increased desire to get doused in the coloured water and eat some of the most delicious foods.

As we all know, no party is complete without delicious food and beverages, especially in India. Thus, while experimenting with colourful gulal, you’d also like to sip cool drinks and eat hot appetizers. Although the cuisine of India differs from place to place, there are several treats that everybody appreciates at this joyous celebration.

The following list includes both classic dishes and some brand-new sweets that will make your visitors drool. Discover the mouthwatering selection of foods you may cook and eat during Holi by scrolling down.

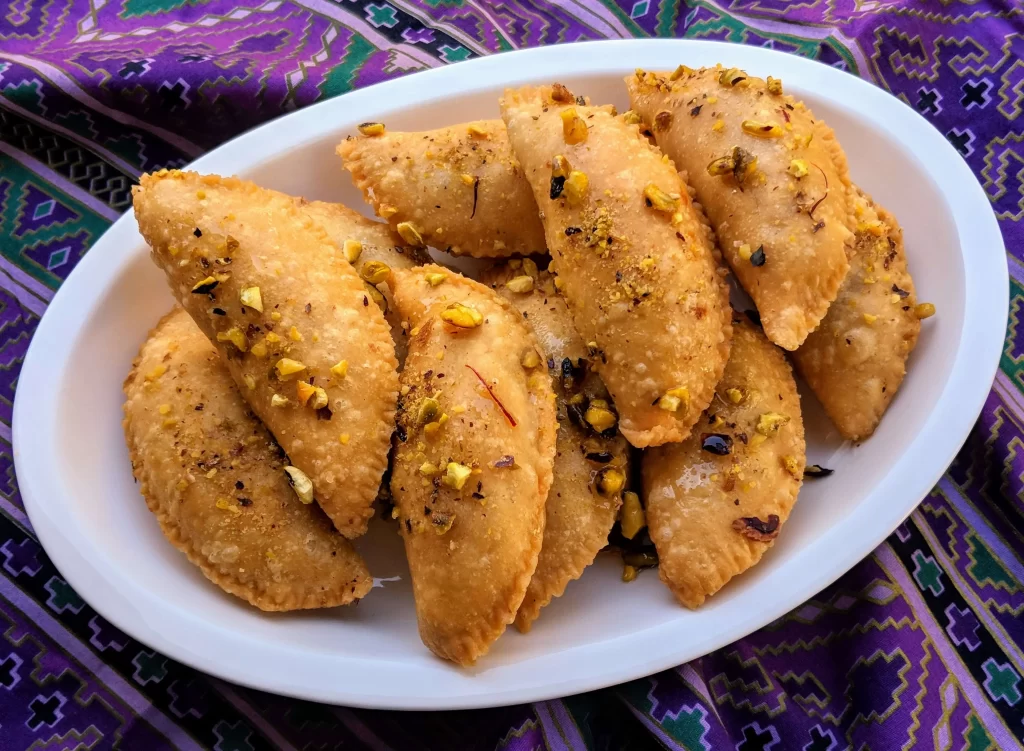
1. Gujiya

This is the most basic and classic dessert for Holi. On this important day, you must have the traditional Holi dessert. This delicacy will bring back childhood memories of Holi thanks to its mouthwatering fillings and crunchy exterior. Whether baked or fried, you must prepare and serve this treat to your friends and family.

Gujiya

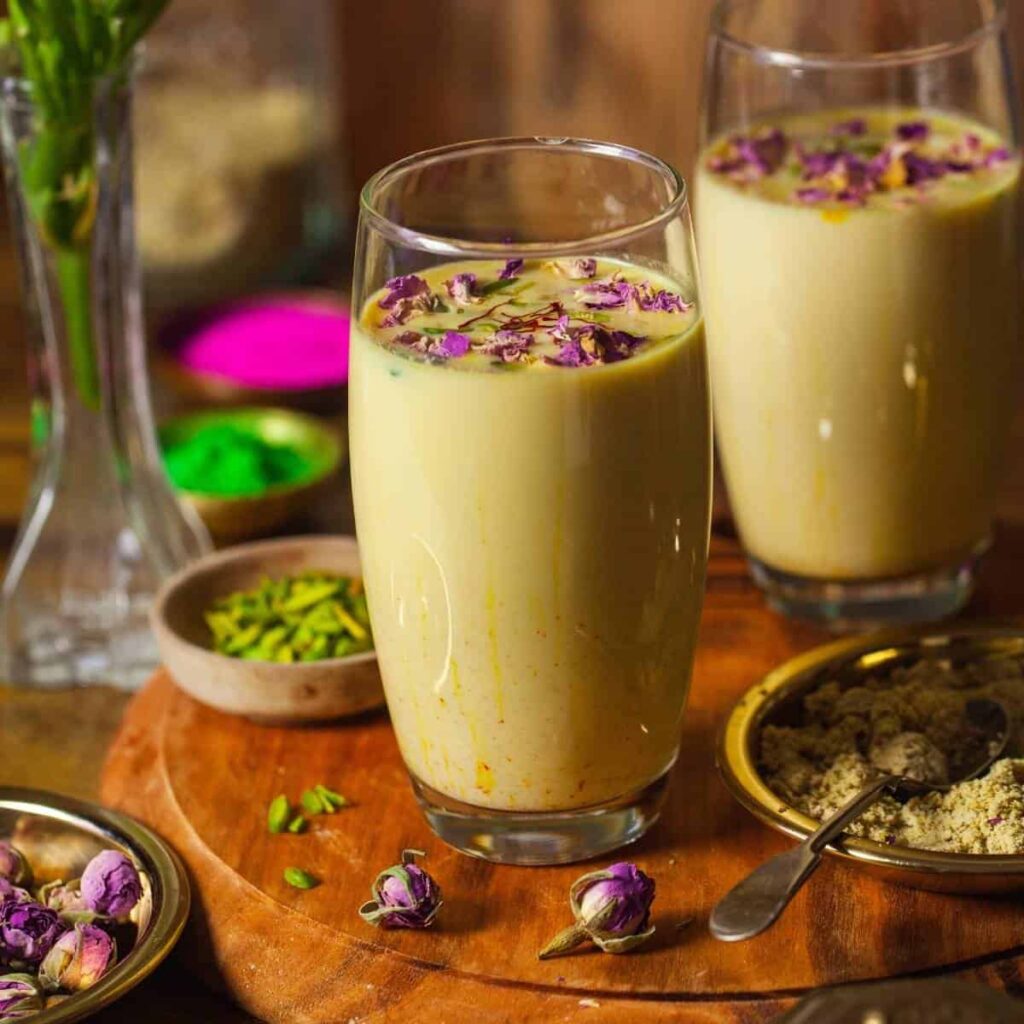
2. Thandai

You would undoubtedly think about thandai when you consider Holi. You may find a recipe for this delectable beverage that meets your preferences among various options. This drink is made with milk and a variety of spices and will surely revive you in the spring heat.

Thandai

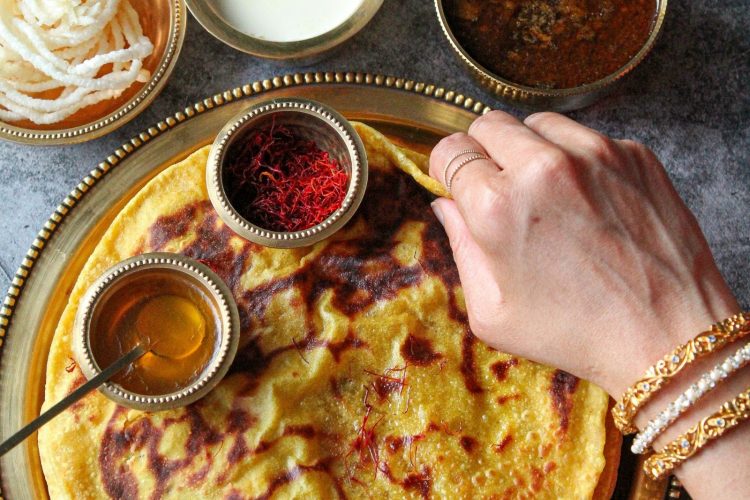
3. Puran Poli

You must take advantage of a flavorful explosion from the delectable Puran Polis. This delicious meal is light, simple to prepare, and really delicious. Its sweet and savoury flavour, enhanced by adding sugar and chana dal, will attract you and anyone who tastes it.

Puran Poli

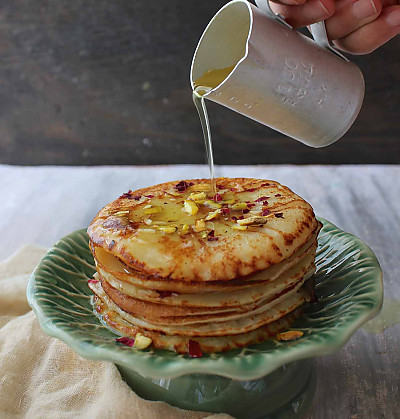
4. Malpua

You may create your own Malpua collection with a great selection of recipes that offers something for everyone. Include these delicious pancakes on your Holi menu, and watch everyone’s faces light up with glee. These are your ticket to sweet and savoury nirvana.

Malpua

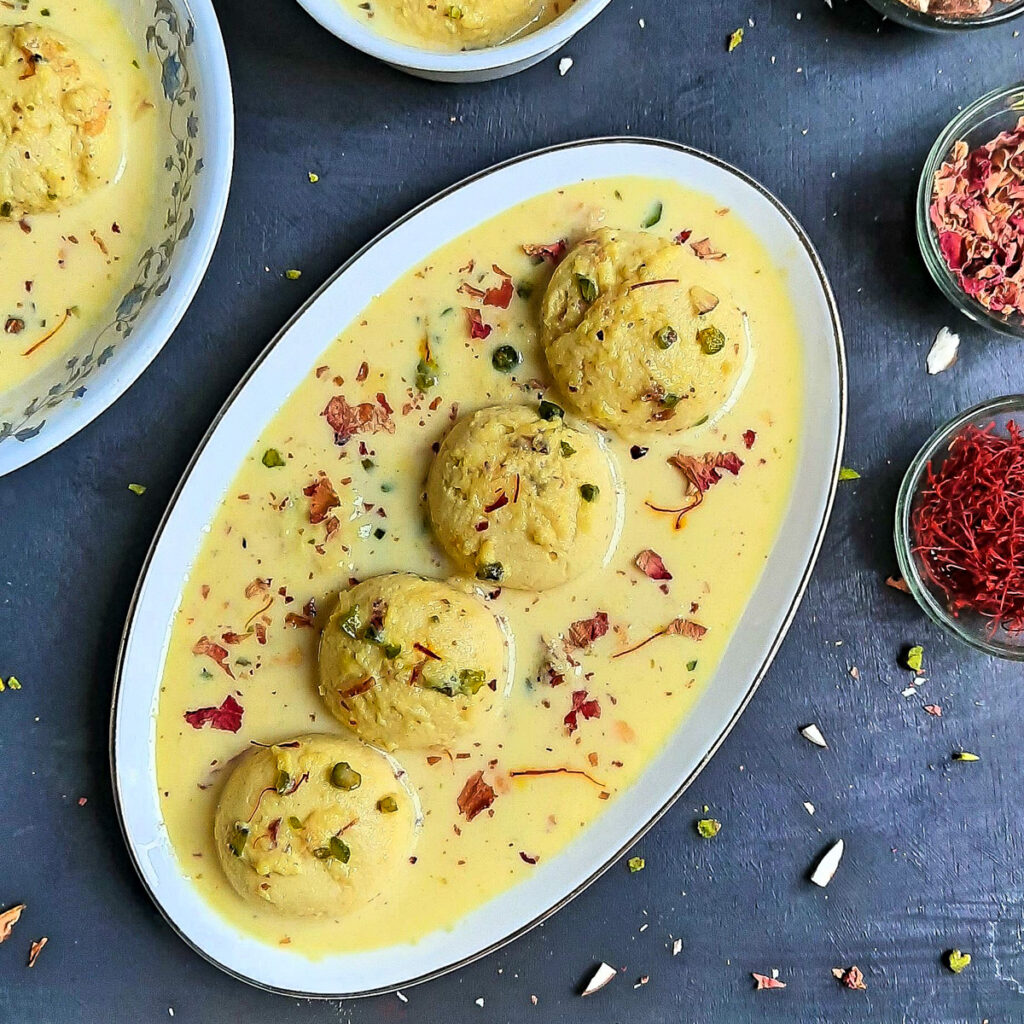
5. Rasmalai

Rasmalai is necessary for every Hindu event, and Holi is no exception. This delicacy defines sweet goodness—a creamy pleasure with mouthwatering chenna. You may personalize the dessert by adding saffron strands or fruit essence and use it to spruce up your dessert table.

Rasmalai

MUST READ: Try out these healthy and easy smoothie recipes at home!

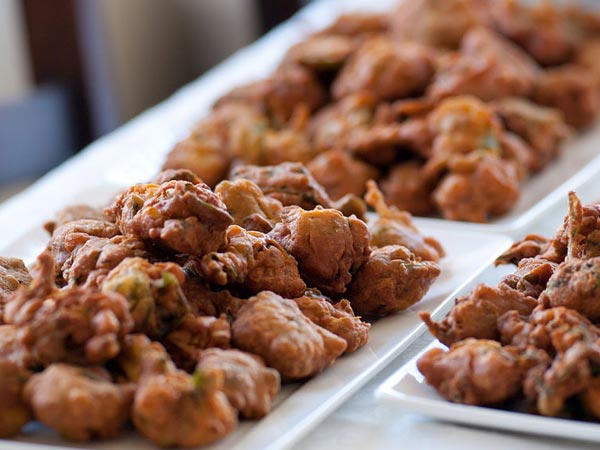
6. Bhang Pakora

Bhaang is a very popular drink for Holi, which you can serve in your drinks menu. But Bhang Pakora or fried fritters are the must-have snack option for every Holi Party. You can easily serve this with onion or combine it with meat, spinach, potato, cheese or other vegetables. These fried fritters originated in India but are now common across the region. They are made with a light batter similar to onion bhajis.

Bhang Pakora

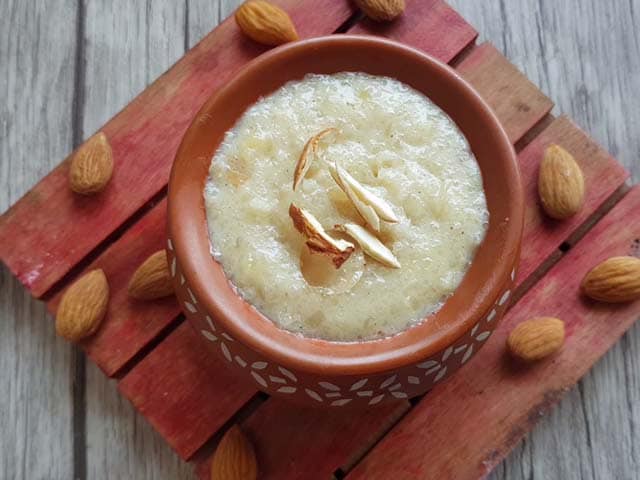
7. Badam Phirni

Badam Phirni is a sweet dish made out of milk, which is basically a thicker version of kheer and has a very creamy texture. You must prepare this recipe if you’re tired of repeatedly eating the same desserts. This dish sometimes referred to as kheer in the area, can be eaten as a main course or as a dessert. Whether or not it has been sweetened will depend. Moreover, the main components of phirni are rice, broken wheat, or tapioca, which has been boiled with milk and sugar.

Badam Phirni

8. Coconut Milk Murukku

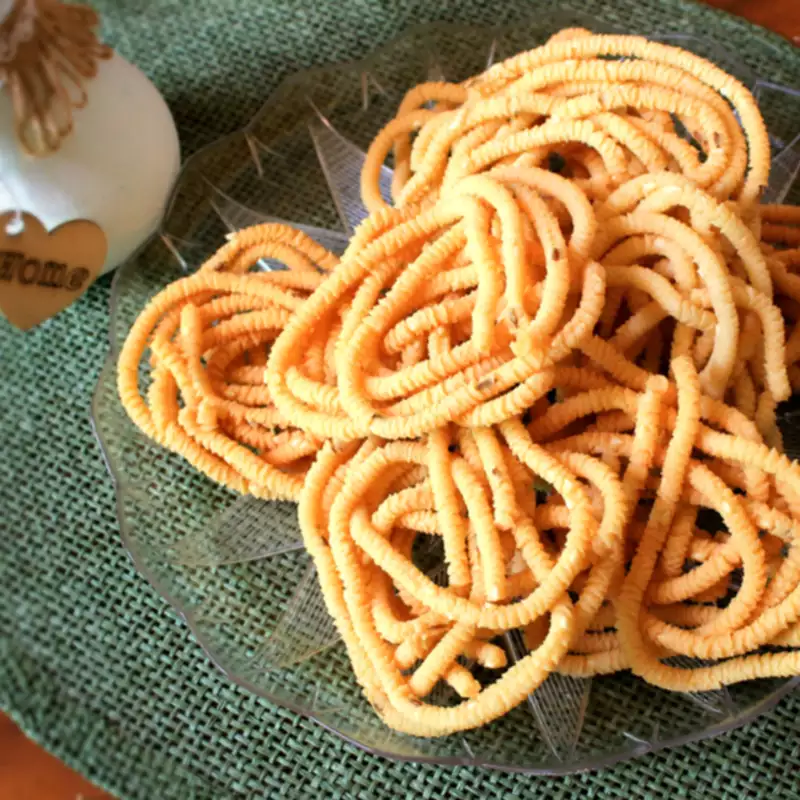
 If you want to eat something crispy, Coconut milk murukku is the best option. It’s crunchy, twisted, and completely unique. With this delicious snack, you may give your Holi celebrations a fresh touch and make it everyone’s favorite treat. This recipe may be produced in 30 to 40 minutes using coconut milk, rice flour, and urad dal flour, so don’t pass it up. 

Coconut Milk Murukku

9. Dahi Bhalle

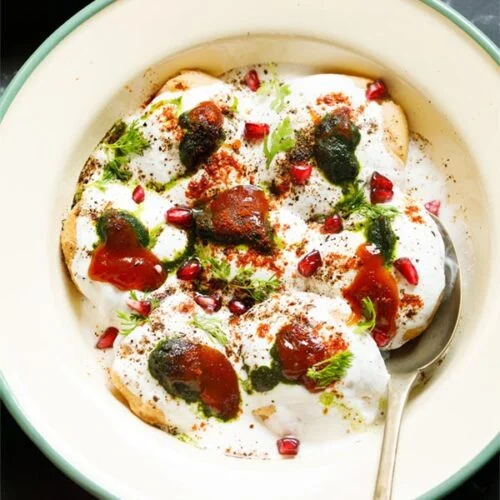
Everyone’s favourite dish Dahi Bhalla is also considered a must for the holi party. Every household loves this meal because it is the ideal fusion of curd and spices. Furthermore, This dish is guaranteed to please when paired with sweet or green chutney. Enjoy this delectable treat to revive yourself after a fun-filled morning in the sun.

Dahi Bhalle

10. Dal Kachori

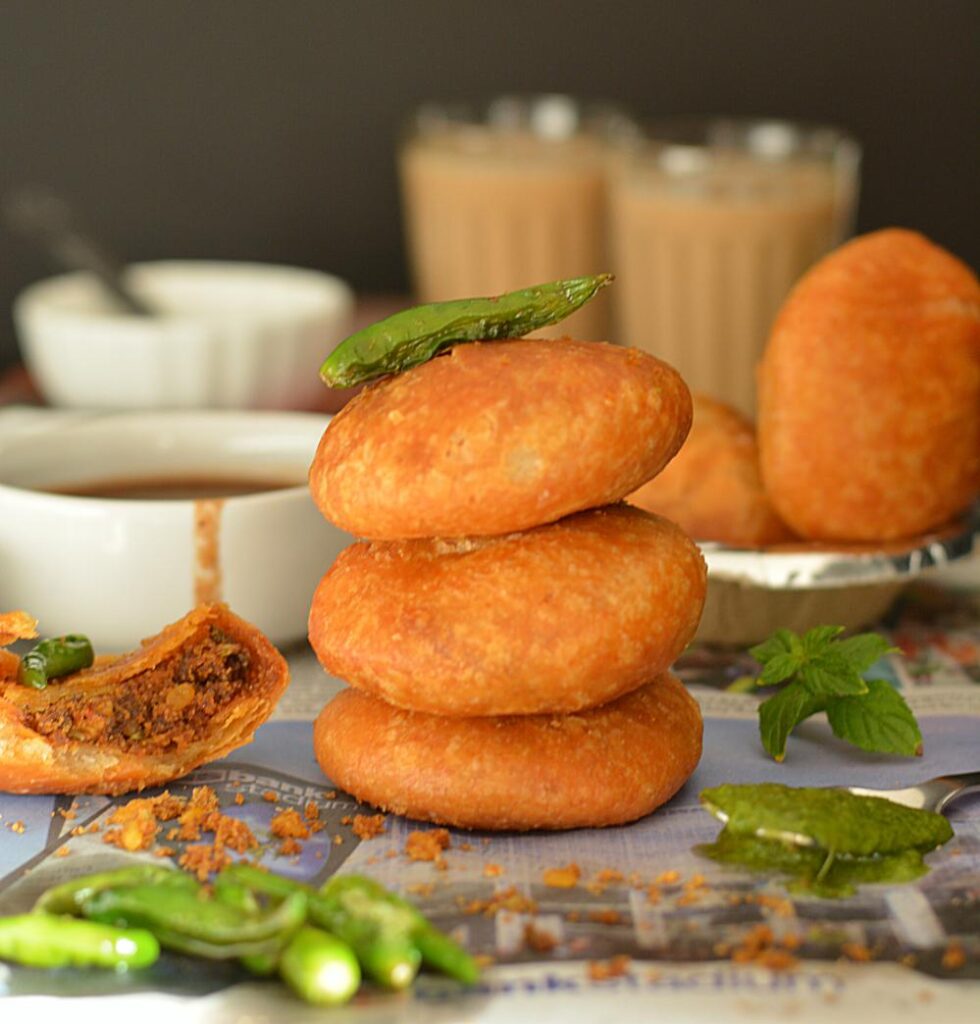
Finally, this one is North India’s most well-liked snack. With one mouthful, you’ll understand why. This is a food that you can’t resist since it is filled with arhar dal, spices, and cooked crisp. Moreover, There are several different types of kachoris, the two most well-known being khasta and dal. You can prepare any one of them.

Dal Kachori

Conclusion

You don’t have to spend hours for preparing recipes for your friends and guests, all the recipes are easy to make. Lastly, these are the perfect recipes when you want to enjoy a rocking party with your friends, family, and kids too. 

If you have questions about the recipe or want to share your take on different types of Holi dishes, please feel free to comment. Don’t forget to share it with your friends and family, and I am sure they’ll love it too.

READ ALSO: Make this tomato bruschetta ideal for any outdoor party!

Fresh Tomato Bruschetta Recipe

0

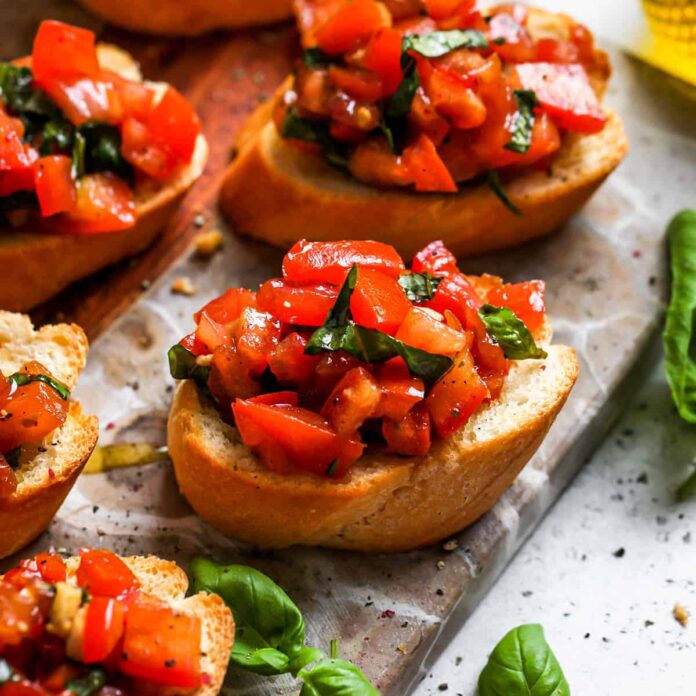
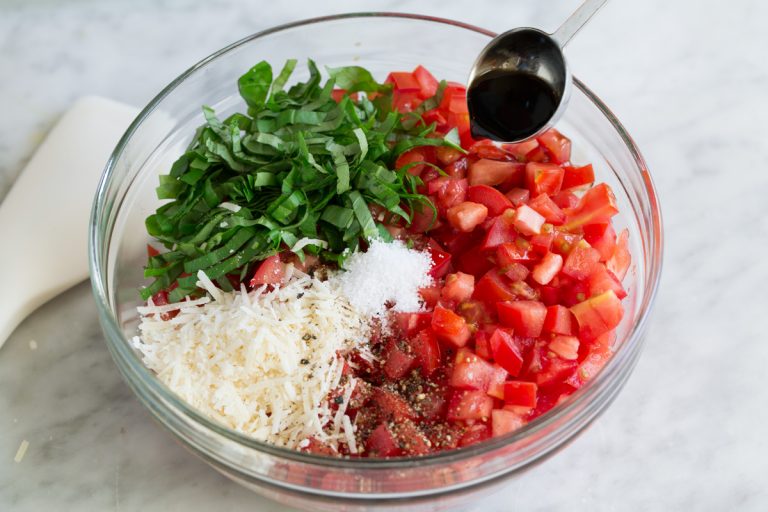
In this easy-to-make tomato bruschetta recipe with an Italian flair, the actual stars are fresh, luscious summer tomatoes and deliciously crispy bread. This quick and delectable vegan snack can be prepared in just 10 minutes with only 5 common ingredients, making it ideal for any outdoor party.

The Italian antipasto (first course) known as bruschetta is composed of toasted, garlic-rubbed bread that is topped with a variety of delectable toppings. While some varieties include beans, cheeses, or vegetables, others ask for meat items. The Tomato Bruschetta variant appears to be the most well-liked worldwide. To make it, fresh diced tomatoes, fresh Italian herbs like basil and oregano, extra virgin olive oil, and garlic are combined before being spooned over bread.

Ingredients

  • 1/4 cup extra virgin olive oil
  • 1 1/2 Tbsp minced fresh garlic
  • 26 oz. roma tomatoes, diced (about 7-8)
  • 1/4 cup finely shredded parmesan cheese
  • 1 Tbsp balsamic vinegar, or more to taste
  • 3/4 tsp kosher salt, then more to taste
  • 1/2 tsp freshly ground black pepper
  • 1/4 cup chopped basil ribbons (chiffonade)
  • 1 loaf hearty french bread, sliced into 1/2-inch thick slices (about 12 slices)

Directions to make Tomato Bruschetta

  • To make a tomato sauce: In a small skillet or saucepan, warm the olive oil slowly. Add the garlic and cook for about a minute, stirring occasionally, until it just begins to turn golden.
  • Place in a big mixing basin. Let it cool while you cut the basil and tomatoes.
  • In a bowl with the cooled oil mixture, add the tomatoes.
  • Add salt, pepper, balsamic vinegar, parmesan, and basil. Thoroughly toss the mixture.
  • Serve immediately with toasted bread (spoon some of the juices along with it). If desired, add extra parmesan as a garnish.
  • Place the oven rack a few inches below the broil and prepare the broiler to toast bread.
  • Arrange the bread pieces on a baking sheet measuring 18 by 13 inches.
  • Slices should be broiled on the first side for approximately a minute or until golden brown (don’t walk away; keep an eye on them; they’ll brown rapidly).
  • Next, flip the slices to the other side and broil that side until it becomes golden.

Notes

  • If preferred, you may alternatively use the more conventional technique and toast the bread at 400 degrees while rotating the loaf every halfway through (about 10 – 15 minutes). After toasting, you may additionally massage slices with one of the garlic cloves (raw and cut in half).
  • While bruschetta is best when eaten immediately, leftovers can be stored in the fridge for a few days.

Nutrition Facts

  • Calories: 162kcal
  • Fat: 6g
  • Saturated Fat: 1g
  • Cholesterol: 1mg
  • Sodium: 358mg
  • Potassium: 205mg
  • Carbohydrates: 23g
  • Fiber: 2g
  • Sugar: 3g
  • Protein: 5g
  • Calcium: 49mg
  • Iron: 1mg

Conclusion

This recipe is very easy to follow and can be made in less than 20 minutes, so you don’t have to spend hours preparing them for everyone. This tomato bruschetta is the perfect feast when you want to have a comforting snack that you can enjoy with your friends, family, and kids too. 

If you have questions about the recipe or want to share your take on different types of bruschetta, please feel free to comment. Don’t forget to share it with your friends and family, and I am sure they’ll love it too.

READ ALSO: Ritz Crackers Chicken Recipe – the perfect easy weeknight meal!

Ritz Crackers Chicken Recipe

0
Ritz Cracker Chicken Recipe

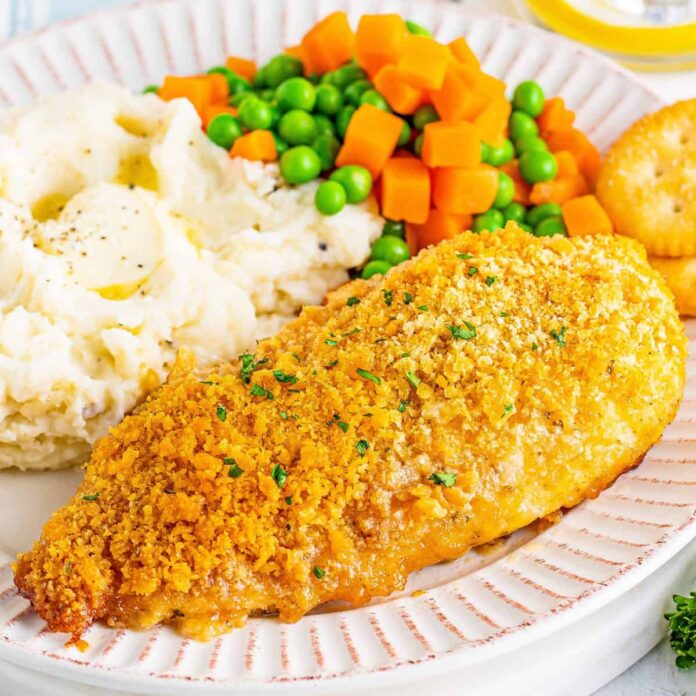
This Ritz crackers chicken recipe is a perfect dish for dinner time. Moreover, it uses boneless, skinless chicken breasts — which are always the best choice for a healthy diet because they contain less fat than other cuts of meat. If desired, you can also use this recipe for ground chicken; adjust your cooking time accordingly.

This dish comes together in just 30 minutes — making it an ideal choice when you’re looking for something quick but delicious. And don’t worry if you don’t have any Ritz crackers on hand: You can use any type of small chips instead — potato chips are especially good. Plus, it only requires three ingredients: chicken breasts, butter and Ritz crackers.

Ingredients Needed

  • 4 boneless chicken breasts
  • ½ teaspoon kosher salt
  • ½ teaspoon black pepper
  • 2 large eggs
  • 1 ½ cups crushed Ritz crackers
  • 1 teaspoon garlic powder
  • 1 teaspoon onion powder
  • 1 teaspoon Italian seasoning
  • ½ teaspoon paprika
  • ½ cup salted butter

How to Prepare Ritz Crackers Chicken?

  • Turn the oven on to 375°F. Set a 9×13-inch baking dish aside and spray it with cooking spray.
  • Sprinkle salt and pepper on the chicken breasts on both sides, then put them aside.
  • With a fork, beat the eggs in a medium-sized shallow basin and put them aside.
  • Now, combine crushed crackers, garlic powder, onion powder, Italian seasoning, and paprika in a medium-sized shallow bowl.
  • Coat the chicken by dipping it into the egg and letting any extra drop off. Place the chicken in the mixture of cracker crumbs, pressing the crumbs into the chicken on all sides.
  • In the baking dish, put the chicken. Use the leftover chicken in the same manner.
  • Take 1/4 cup of the remaining cracker mixture and sprinkle it on the chicken. 
  • Now, Instead of placing it on top of the chicken, place the chopped butter around it. Bake.
  • If it is not done after 30 minutes of baking, put it back in the oven for another five minutes or until the internal temperature reaches 165°F. 
  • The cooking time will vary depending on the size of the chicken breasts.
  • Serve right away after optionally garnishing with dry parsley.

Notes and Tips!

  • Any butter cracker ought to work with this dish.
  • If you have a salt sensitivity, you can substitute unsalted butter for salted butter in this recipe, leave out the extra salt, and use unsalted Ritz crackers.
  • Serve alongside your preferred side dishes.
  • In order to seal in the flavours and juices, I like to cook my chicken breasts at a higher temperature.

Nutrition Content

  • Calories: 610kcal
  • Carbohydrates: 16g
  • Protein: 53g
  • Fat: 36g
  • Saturated Fat: 18g
  • Cholesterol: 287mg
  • Sodium: 787mg
  • Potassium: 929mg
  • Fibre: 1g
  • Sugar: 2g
  • Calcium: 77mg
  • Iron: 3mg

Final Thoughts

This recipe is very easy to follow and can be made in less than 30 minutes, so you don’t have to spend hours preparing them for everyone. This Ritz crackers chicken is the perfect feast when you want to have a comforting snack that you can enjoy with your friends, family, and kids too. 

If you have questions about the recipe or want to share your take on different types of chicken, please feel free to comment. Don’t forget to share it with your friends and family, and I am sure they’ll love it too.

MUST TRY: Chicken Cutlets – A quick, easy and delicious recipe for house parties!

Crispy Chicken Cutlets Recipe

0

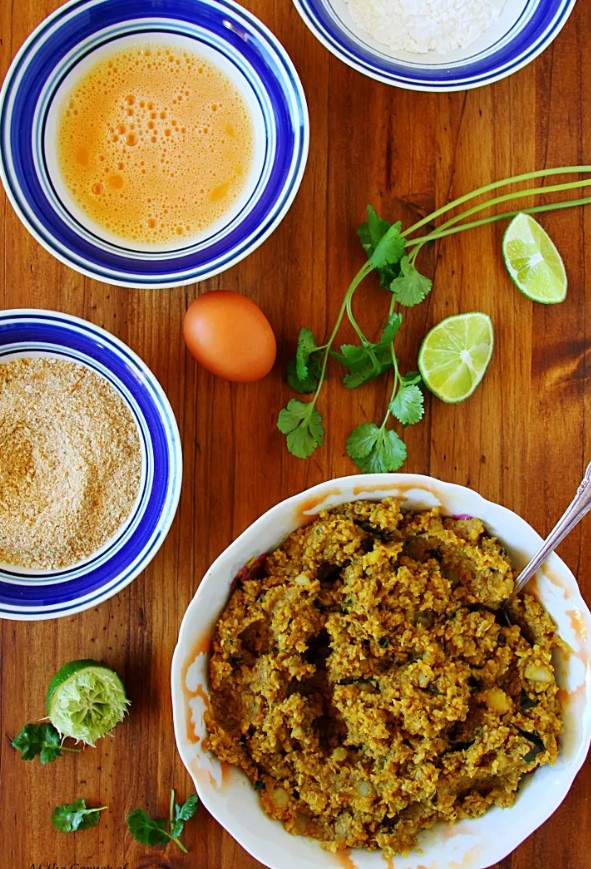
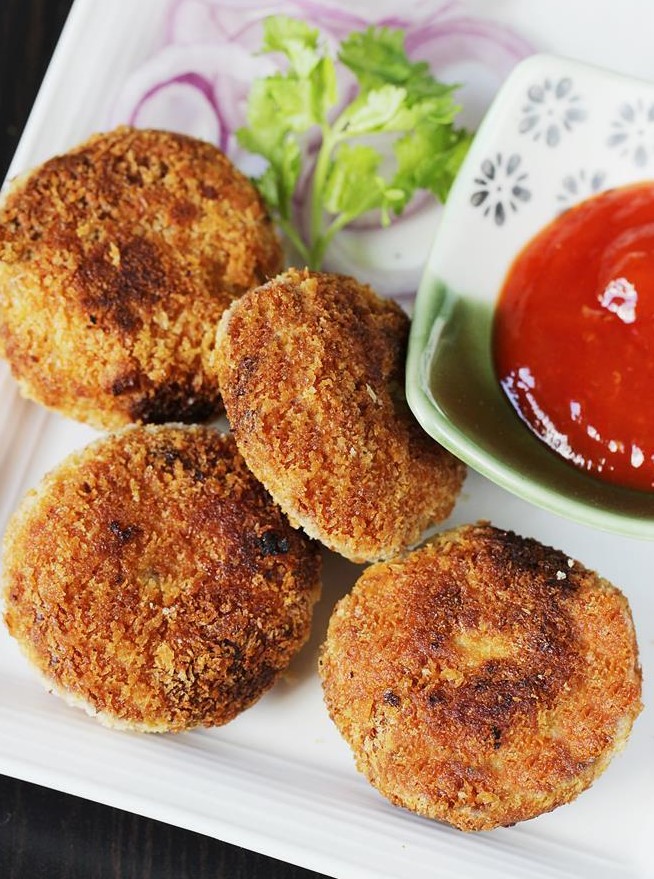
Chicken Cutlets are basically crispy, deep-fried patties that are filled with vegetables and a spicy chicken combination. They make a very delicious starter or snack idea that you can prepare for any house party. At our house, these crunchy chicken cutlets are one of the most loved snacks.

Chicken cutlets are easy to make and can be cooked in under 30 minutes. They are also a great way for kids to get protein in their diet since they are very nutritious and low in fat. This dish is so appealing to kids because of its simplicity and ease of preparation; all you need is a knife, some breadcrumbs, butter, and some spices. Moreover, you can serve these cutlets as an entree with sides like pasta or rice or as an appetizer with bread or crackers.

Ingredients to Make Chicken Cutlets

  • 500 gms Chicken (boneless, boiled, and shredded)
  • 2 cups Potatoes (boiled and mashed)
  • ¼ cup Carrot (finely chopped)
  • ⅓ cup Capsicum (finely chopped)
  • ½ cup Onions (finely chopped)
  • 1.5 tsp Green chilies (chopped)
  • 2 tsp Garlic (finely chopped)
  • ½ tbsp Ginger (grated)
  • 1.5 tsp Garam masala powder
  • ½ tbsp Cumin powder (roasted)
  • 1 tsp Cumin seeds
  • ¼ cup Coriander leaves
  • 50 gms Bread crumbs
  • Juice of one medium lemon
  • Salt and pepper as required
  • 2 tbsp Oil

For Coating

  • Maida/all-purpose flour as required
  • Bread crumbs, as required
  • Slightly beaten egg whites 
  • Oil

Directions to Make Chicken Cutlets

  • First, put the oil in the pan.
  • Add the cumin seeds and cook them briefly when the oil is hot.
  • Add the grated ginger and chopped garlic after that, and cook until lightly golden. However, when the fragrance begins to release, add the chopped onion and cook until soft and pink.
  • After that, add the carrot and bell pepper, and sauté for 4-5 minutes. Now, turn off the heat and let it cool.
  • Then, combine the boiling potatoes, chicken that has been shredded, sautéed vegetables, green chilies, garam masala powder, cumin powder, bread crumbs, and coriander leaves in a big bowl.
  • When the cutlet mixture is prepared, divide it into equal portions of the size of lemons. Next, form each of them into patties.
  • Take one cutlet first, then dust it with flour.
  • After that, cover the cutlet with bread crumbs after dipping it in beaten egg white. Then, for the second coat, coat it with bread crumbs after being dipped once more in egg white.
  • Repeat these steps now for everyone. Moreover, the cutlets should be chilled for 30 to 45 minutes.
  • Heat the oil sufficiently in a deep pan or kadhai after the cutlets are ready for frying.
  • Slide the patties gently into the heated oil, then cook the cutlets in it until they are crisp and golden brown.
  • Take them out onto absorbent paper after they’re finished.
  • Serve them hot with your favorite ketchup; additionally, you can use sauces or dips.

Notes and Tips!

1. Baked Chicken Cutlets

To prepare roasted chicken cutlets, just arrange them in a line on a baking sheet and then coat both sides of each cutlet with oil. Consequently, bake them for 30 minutes, or until they are crisp and golden brown, in a preheated oven at 400 degrees F (200 degrees).

2. Chicken Cutlets Without Gluten

To make gluten-free chicken cutlets, replace the regular all-purpose flour with gluten-free all-purpose flour or gluten-free corn flour, and the bread crumbs with gluten-free crushed corn flakes. Additionally, you may use gluten-free bread crumbs.

Nutrition Value

  • Calories: 94kcal
  • Carbohydrates: 4g
  • Protein: 4g 
  • Fat: 6g
  • Saturated Fat: 1g
  • Cholesterol: 15mg
  • Sodium: 33mg
  • Potassium: 127mg
  • Calcium: 14mg
  • Iron: 1mg

To Sum Up!

This recipe is very easy to follow, and you can make these cutlets in less than 30 minutes, so you don’t have to spend hours preparing them for everyone. Moreover, These chicken cutlets are the perfect feast when you want to have a comforting snack that you can enjoy with your friends, family, and kids too. 

Furthermore, If you have questions about the recipe or want to share your take on different types of cutlets, please feel free to comment. Don’t forget to share it with your friends and family, and I am sure they’ll love it too.

ALSO READ: Try making these Chicken Satay Strips for brunch

Best Smoothie Recipes

0

Welcome to our blog dedicated to the world of smoothie recipes ! If you’re looking for a delicious and nutritious way to start your day or satisfy your craving for a refreshing treat, you’ve come to the right place. From tropical delights bursting with the goodness of fruits like mangoes, pineapples, and bananas, to green powerhouses packed with leafy greens and superfoods, we’ve got a smoothie recipes for every palate and dietary preference. Whether you’re a smoothie enthusiast or just starting to explore this vibrant world, our recipes will guide you to create smoothies that are not only delicious but also packed with vitamins, minerals, and antioxidants.

1. Healthy Carrot Smoothie

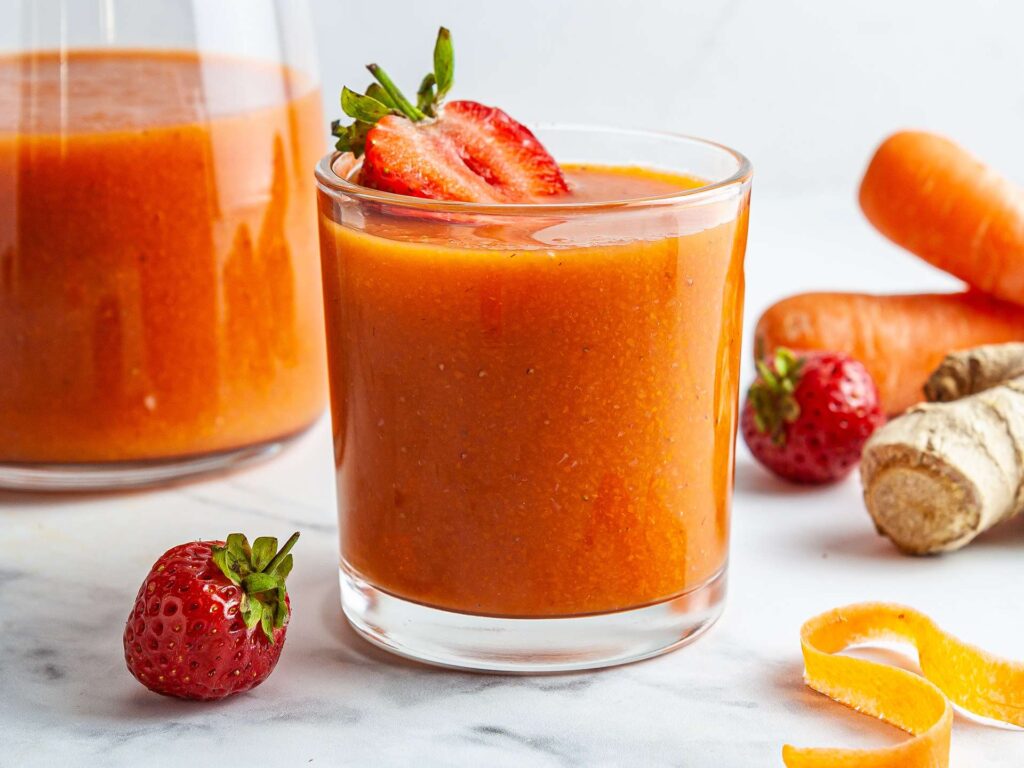
This healthy carrot smoothie is made with pineapple, banana, walnuts, and yummy carrot cake spices. It’s an easy recipe that you can make at home or take with you on the go! This simple blend makes for an excellent breakfast or brunch and keeps you full all morning. The mixture of carrots, pineapple, and banana gives this drink its creamy texture, while the walnuts add some healthy fats that will keep you energized throughout the day.

healthy carrot smoothie
Image Source: https://foodaciously.com

Ingredients

  • 1 cup chopped carrots
  • 1/2 cup frozen sliced banana
  • 1/2 cup plain greek yoghurt
  • 1/2 cup vanilla cashew milk
  • 1/4 cup frozen diced pineapple
  • 2 tbsp toasted walnuts
  • 1 tbsp flaked coconut
  • 1/4 teaspoon cinnamon
  • pinch nutmeg
  • shredded carrots
  • coconut
  • crushed walnuts

Directions to make

  • Blend the carrots, banana, greek yoghurt, cashew milk, pineapple, walnuts, coconut (if used), cinnamon, and nutmeg together in a blender.
  • Blend everything together until smooth.
  • Enjoy straight away, and top as desired with more coconut, shredded carrots, or cracked walnuts.
  • TO STORE: Smoothies are best consumed right after mixing. However, if necessary, leftovers can be kept in the refrigerator for up to a day.

Nutrition Value

  1. Calories: 185kcal
  2. Fat: 0.7g
  3. Carbohydrate: 46.9g
  4. Fibre: 6.7g
  5. Sugars: 31.1g
  6. Protein: 2.2g
  7. Calcium: 42.9mg
  8. Iron: 0.7mg
  9. Magnesium: 41mg

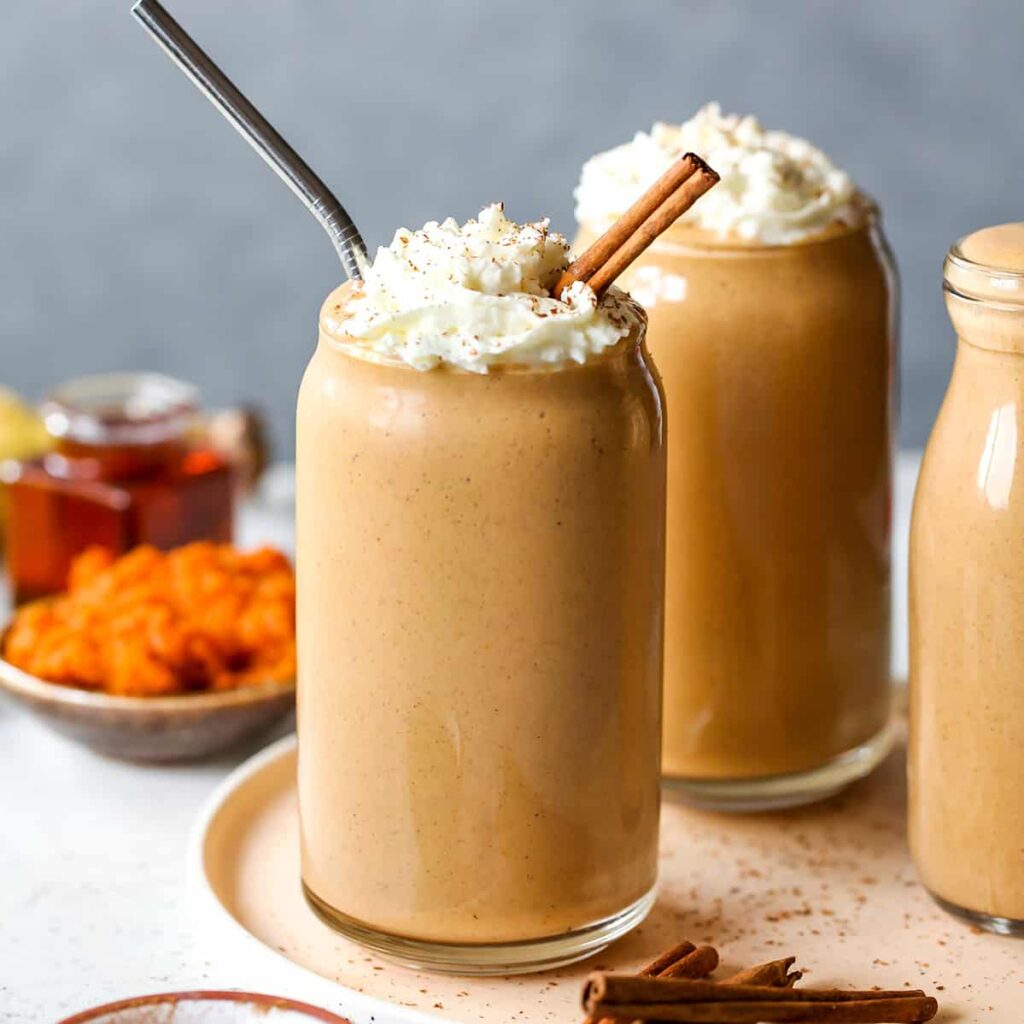
2. Pumpkin Coconut Smoothie

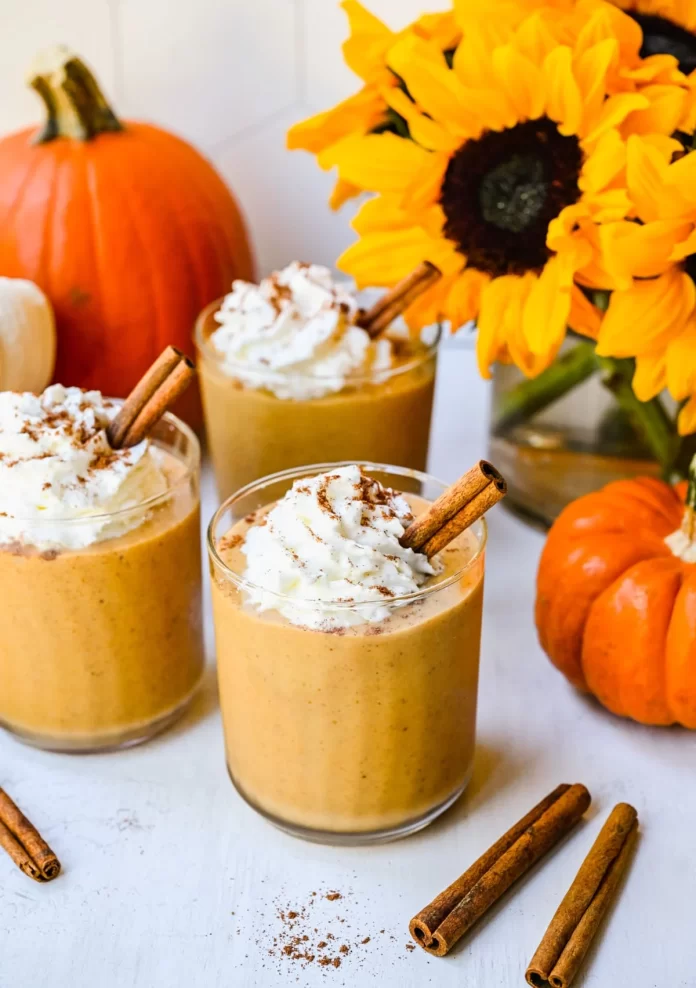
This Pumpkin Coconut Smoothie is a quick and easy way to get your daily dose of vitamins, minerals and antioxidants. This pumpkin coconut smoothie recipe is creamy, sweet, and appetizing, with no dairy or added sugar.

Pumpkin is rich in Vitamins A and C as well as iron and potassium. These nutrients are essential for healthy bones, hair, and nails, as well as helping fight off diseases like cancer and heart disease. Plus, since this smoothie has no added sugar, you won’t have to worry about the after-effects of drinking too much sugar. You can also use pumpkin to improve your skin by applying it directly or drinking it in smoothies like this!

Ingredients

  • 1 cup coconut milk
  • ¼ cup organic pumpkin puree
  • 2 teaspoons pumpkin pie spice
  • 1 frozen banana sliced
  • 1 cup ice

Directions to Make

  • Add all the ingredients, such as coconut milk, pumpkin, pumpkin pie spice, banana, and ice, in a blender.
  • Blend it on high speed until smooth.

Nutrition Value

  • Calories: 292kcal 
  • Carbohydrates: 20g 
  • Protein: 3g 
  • Fat: 24g 
  • Saturated Fat: 21g 
  • Sodium: 18mg 
  • Potassium: 522mg 
  • Fibre: 2g 
  • Sugar: 8g 
  • Calcium: 42mg 
  • Iron: 4.7mg

Conclusion

You can make both of these smoothies in just 10 minutes, and the recipe is very easy to follow. This smoothie is very healthy and nutritious and will help you keep full throughout the day.

If you have questions about the recipe or want to share your take on different types of smoothies, please feel free to comment. Don’t forget to share it with your friends and family, and I am sure they’ll love it too.

MUST READ: Winter Smoothie Recipe