Home Blog Page 11

Russian Salad Recipe

0

This is basically vegetable-studded potato salad with mayonnaise. It is a popular salad eaten all over the world at family gatherings and festive events. You can make this salad vegetarian by leaving out the ham. It is not necessary to chill potatoes, carrots, and eggs completely after boiling them. The ingredients in this Russian salad are low-fat but high in protein and fibre, which means that it will keep you full for longer than other foods. You can also add your own favorite vegetables to make this dish even healthier and tasty.

Ingredients

  • Kosher salt and black pepper
  • 3 medium yellow potatoes (about 1 pound)
  • 5 thin carrots
  • 10 ounces frozen peas
  • 4 large eggs
  • 3 ounces boiled ham
  • 1 cup drained cornichons
  • 1 scant cup mayonnaise

How to Make Russian Salad

  • Take a large pot, add water, and bring it to a boil. Add salt to it.
  • Put the sliced potatoes in boiling water and cook for 15 minutes. 
  • Now, add the carrots to the potatoes while they boil for another 10 minutes. When readily punctured with a cake tester or a very thin knife blade, remove the potatoes and carrots with a spider and place them aside in a basin.
  • Add frozen peas to boiling water. Using a spider, remove each floating pea to a different dish until all the peas have been done.
  • Now, add the eggs to the pot and boil for another 10 minutes.
  • Peel the potatoes and carrots under cool running water by gently massaging them with your fingers while the eggs cook. To chill, rinse the peas under cold running water.
  • Drain the cooked eggs and peel them under running cold water.
  • To achieve consistency, neatly dice the peas, carrots, ham, eggs, and cornichons into pieces about the same size (and rather tiny). Place them all in a big basin and stir gently.
  • Mix the mayonnaise and cornichon brine in a small basin, then drizzle the mixture over the salad. 
  • Use a rubber spatula or your fingers to gently stir the salad until it is well coated. Add a few generous grinds of black pepper to the dish.
  • You can keep it in a fridge for a night or eat it straight away.

Recipe Notes!

  • You may use veggies like potatoes, edamame beans, sweet corn, baby corn, french beans, capsicum (bell pepper), broccoli, cabbage, snow peas, green peas, and potatoes.
  • You can use the mayonnaise of your choice. An excellent option is always homemade mayo.
  • Slices of tomato, cucumber, or sliced bell pepper can be used as a garnish. When serving, you can pile the salad on a bed of lettuce leaves or add lettuce leaves as a garnish.
  • For lettuce leaves, give them a thorough water rinse. Drain the water, and then use a kitchen towel or kitchen napkin to fully dry the items. As an alternative, dry them using a salad spinner.
  • This salad can also be eaten cold. The salad has to be kept in the refrigerator for a few hours to get cool.
Russian salad
Image Source: https://hamariweb.com

Nutrition Content

  • Calories: 138 kcal
  • Fat: 2g
  • Saturated Fat: 1g
  • Cholesterol: 5mg
  • Sodium: 874mg
  • Potassium: 521mg
  • Carbohydrates: 28g
  • Fiber: 5g
  • Sugar: 10g
  • Protein: 3g
  • Calcium: 36mg
  • Iron: 1mg
  • Magnesium: 33mg

To Sum Up!

You can make this salad in just about 15 minutes, and the recipe is very easy to follow. This Russian salad is really healthy and nutritious and will help keep you full throughout the day. It can be served at dinners and lunches, whatever you like.

Please feel free to comment if you have any queries regarding the recipe or would want to offer your own take on the different types of salads. Don’t forget to tell your family and friends about it; I’m sure they’ll also like it.

MUST READ: Lemon Chicken Salad Recipe!

Lemon Chicken Salad Recipe

0

This winter spa salad is flavored with lemon chicken, which boosts its taste on a different level. This salad is stuffed with lemon chicken, chickpeas, spinach, pomegranates, Cara Cara oranges, avocado, shallots, and herbs. The combination of these ingredients will make your body feel warm and full as well as invigorate your mind. It’s also very easy to prepare this dish at home so you don’t have to worry about going out for lunch or dinner. With this salad, you can easily make sure that your diet stays exciting because it is loaded with protein and healthy fats.

Ingredients:

For the Salad:

  • 1 lb. boneless skinless chicken breasts
  • 2 Cara Cara oranges, peeled and cut into pieces
  • 1 avocado, cut into slices
  • 1/2 cup pomegranate arils
  • 2 cups spinach, torn or cut into small pieces
  • 1 14-ounce can of chickpeas, rinsed and drained
  • 1 shallot, thinly sliced
  • a handful of chopped fresh herbs like parsley or mint

For the Chicken Marinade:

  • 1/3 cup olive oil
  • 2 tablespoons apple cider vinegar
  • juice of one half of a lemon
  • 1/2 teaspoon salt

Dressing:

  • 3 tablespoons mayonnaise or Greek yoghurt
  • 1–2 tablespoons champagne vinegar
  • 2 teaspoons Dijon mustard or other grainy mustard
  • salt, pepper, and/or honey to taste
Winter spa salad
Image Source: https://pinchofyum.com

Directions to make Lemon Chicken Salad

  • Combine the marinated ingredients in a bowl. Place in a dish with the chicken, cover, and chill for 30 minutes or up to 2 hours (while preparing other things).
  • Mix the ingredients for the dressing in a bowl.
  • In a pan or on a griddle, heat the oil. Grill the chicken pieces until done, then discard any excess marinade. Before cutting, let stand for a few minutes to cool.
  • Combine the dressing and the other salad ingredients, including the chicken. Add more salt, pepper, and perhaps a dab of high-quality olive oil to taste. Serve and Enjoy.
Winter spa salad
Image Source: https://pinchofyum.com

Tips and Notes!

  • Find sugar-free mustard if cutting back on sugar is crucial to you.
  • The dressing can be rather tart, especially if Greek yoghurt is used. You may counteract this by using less vinegar or mustard or by adjusting the amount of honey used to give extra sweetness.

Nutrition Value

  • Serves: 4
  • Calories Per Serving: 525
  • Total Fat: 30.3g
  • Cholesterol: 84.5mg
  • Sodium: 690.4mg
  • Total Carbohydrate: 32.6g
  • Dietary Fiber: 10.7g
  • Sugar: 10.6g
  • Protein: 34.5g
  • Iron: 3.5mg
  • Potassium: 1082mg
  • Phosphorus: 400mg

Final Words

You can make this salad in just about 15 minutes, and the recipe is very easy to follow. This salad option is really healthy and nutritious, and it will help keep you full throughout the day.

Please feel free to comment if you have any queries regarding the recipe or would want to offer your own take on the different types of salads. Don’t forget to tell your family and friends about it; I’m sure they’ll also like it.

ALSO READ: Delicious Salads that make for a quick and nutritious meal

Winter Smoothie Recipe

0

During the colder months, you may want to try this warming winter smoothie inspired by Ayurveda. A diet high in vegetables, fruits, and warming spices nourish your body without cooling it. You can have it as a snack in the afternoon, a recovery beverage after a workout, or even for breakfast in the morning.

This creamy, not-so-sweet smoothie has everything you want. One blender, 10 minutes, and 10 ingredients are all you need to make this smoothie. It is made with ripe bananas, carrots, and zucchini (or cauliflower). For more natural sweetness and fiber, I’ve been using fewer bananas and substituting more carrots. It can also be too sweet if there is excessive banana added to protein powder.

Ingredients to Make Winter Smoothie

  • 1/2 ripe banana (previously peeled, sliced, and frozen)
  • 1 small carrot, peeled and chopped
  • 1/4 cup sliced zucchini (or chopped raw or steamed then frozen cauliflower)
  • 1 scoop plain or vanilla protein powder (if using unsweetened / plain, add a banana for sweetness)
  • 1 cup dairy-free milk (we prefer cashew)
  • 1 Tbsp hemp seeds
  • 1 Tbsp peeled, minced fresh ginger*
  • 1/4 tsp ground turmeric* (or sub 4x the amount fresh turmeric)
  • 1/8 tsp ground cinnamon*
  • 1 pinch black pepper* (increases bioavailability of turmeric)
  • 1 tsp spirulina (optional)

Directions to make

  • Starting with the smaller quantity of dairy-free milk, combine all the ingredients in a high-speed blender. Blend on high until creamy and smooth, adding additional dairy-free milk (or water) if necessary. Greens and/or spirulina are optional ingredients that make the smoothie more nutritious and appealing to the eye.
  • Taste the dish and make any necessary taste adjustments by adding additional spices for added warmth, more ginger for more zing, or banana or protein powder for added sweetness.
  • Serve right away and Enjoy. If desired, garnish with more ground turmeric or hemp seeds (optional). Though finest when fresh, keep leftovers covered in the fridge for up to 24 hours. Additionally, you may add leftovers to future smoothies by freezing them in ice cube trays.
warming winter smoothie

Notes and tips!

  • For each smoothie, substitute 1 tsp of my Golden Milk Mix for the ginger, turmeric, cinnamon, and black pepper.
  • Instead of using frozen ingredients, use cold or room-temperature ingredients.
  • Spices such as cinnamon, black pepper, turmeric, clove, cayenne, and ginger can be very helpful if needed to help stimulate digestion.
  • It may be more beneficial to consume dairy-free milk like cashew or macadamia rather than coconut milk, which can be more cooling to the body
  • In place of frozen bananas, add roasted winter squash, such as butternut squash or sweet potato
  • Taking your drink in the afternoon, when your digestive fire is strongest, rather than in the morning when it is weaker.

Nutrition Content

  • Calories: 269 kcal
  • Carbohydrates: 28.1 g
  • Protein: 17.3 g
  • Fat: 12.3 g
  • Cholesterol: 0 mg
  • Sodium: 196 mg
  • Potassium: 631 mg
  • Fiber: 5.9 g
  • Sugar: 12.1 g
  • Calcium: 53.32 mg
  • Iron: 2.55 mg

Final Words

You can make this smoothie in just 10 minutes, and the recipe is very easy to follow. This smoothie is very healthy and nutritious and will help you keep full throughout the day.

Please feel free to comment if you have any queries regarding the recipe or would want to offer your own take on the different types of smoothies. Don’t forget to tell your family and friends about it; I’m sure they’ll like it as well.

ALSO READ: Learn How To Make Creamy Espresso Martini Perfect For Post-Dinner Drink

Quick and Nutritious Salad Recipes

0

If you wish to eat something healthy but exciting, then there is no better option than Roasted Cauliflower Salad or Broccoli Salad. These two are great options to have for lunch or dinner if you are on a diet plan as well.

1. Roasted Cauliflower Salad

This Roasted Cauliflower Salad is made up of a unique combination of ingredients that comes together in a salad that makes it 100% yum. The flavour and texture of this salad are crunchy as well as vibrant. It is a perfect meal for lunch or dinner.

Ingredients for Roasted Cauliflower Salad:

  • 1 medium head cauliflower, cut into florets
  • 3 large carrots, cut into 1 inch (2.5 cm) pieces
  • 1 tablespoon ground cumin
  • 2 teaspoons paprika
  • kosher salt, to taste
  • black pepper, to taste
  • 2 tablespoons olive oil
  • ¼ medium red onion, thinly sliced
  • 1 cup fresh Italian parsley(35 g), roughly chopped

Directions to make:

  • To make this salad, heat your oven to 425F or 220°C. Line a parchment paper with a baking sheet.
  • Take a large bowl and combine all the ingredients like cauliflower, carrots, cumin, paprika, salt, pepper, and olive oil in it. Toss thoroughly until coated.
  • Place the veggies in a single layer on the baking sheet after roasting.
  • Creating the dressing: Mix the tahini, water, lemon juice, and garlic in a medium bowl. Olive oil should be added gradually while whisking until the dressing is emulsified.
  • Add salt and pepper to taste.
  • Again, add the onion and parsley to a large basin. Stir thoroughly after adding the roasted cauliflower and carrots.
  • Serve the salad after drizzling it with the dressing.

Nutrition Value!

  • Calories: 218
  • Carbohydrates: 20.9 g
  • Protein: 6.9 g
  • Fat: 13.7 g
  • Saturated Fat: 1.9 g
  • Trans Fat: 0 g
  • Cholesterol: 0 mg
  • Sodium: 701 mg
  • Sugar: 9.2 g
  • Calcium: 78 mg
  • Iron: 2.1 mg

2. Broccoli Salad

There is nothing better than this tangy broccoli salad recipe! It’s healthy, too, thanks to the delicious Greek yoghurt (no mayo). Broccoli salad makes a great lunch or potluck dish. There are 6 side servings you can offer with this salad. This salad benefits from the added flavour of roasted cauliflower.

Ingredients for Broccoli Salad:

  • 1 lb broccoli, chopped into small pieces (2 medium heads of broccoli, florets only)
  • ½ cup red onion, diced
  • ⅓ cup roasted sunflower seeds
  • ⅓ cup dried cherries, chopped (or dried cranberries)
  • ½ cup grated sharp cheddar cheese

For Dressing:

  • ½ cup plain 2% or full-fat Greek yoghurt (not fat-free)
  • 2 tbsp extra virgin olive oil
  • 1 ½ tbsp white vinegar
  • 1 tbsp honey
  • ½ tsp fine sea salt
  • Plenty of freshly ground black pepper

Instructions to prepare:

  • Take a medium bowl and add the broccoli, red onions, sunflower seeds and dried cherries. Set aside.
  • In a small mixing bowl, combine all the dressing ingredients( like yoghurt, olive oil, vinegar, honey, salt and pepper ).
  • Pour this mixture over the broccoli mixture and combine it well until everything is coated.
  • If necessary, add more salt, pepper, or vinegar to get the flavours to pop up.
  • In the meantime, the broccoli will soften and the salad will become even more flavorful.

Nutrition Value!

  • Calories Per Serving: 169
  • Total Fat: 9.6g
  • Saturated Fat: 1.4g
  • Cholesterol: 1.7mg
  • Sodium: 226.5mg
  • Total Carbohydrate: 18.2g
  • Sugars: 11.1g
  • Protein: 5.3g
  • Calcium: 65.8mg
  • Iron: 1.2mg

To sum up!

You can make both of these salads in just about 30 minutes and the recipe is very easy to follow. These salad options are healthy and nutritious and will help keep you full throughout the day.

Please feel free to comment if you have any queries regarding the recipe or would want to offer your own take on the different types of salads. Don’t forget to tell your family and friends about it; I’m sure they’ll like it as well.

MUST TRY: Egg Salad Recipe

Quick And Easy Pesto Pasta Recipe

0

This easy-to-make pesto pasta is a perfect meal for a weeknight dinner! It is my personal preference to add a handful of arugula, but you can use any of your favourite soft greens instead.

You can have it hot or cold, whatever you like. It won’t take you more than 30 minutes to get ready! Simply cook the pasta and make the basil pesto, put it all together, and your dinner is ready. It may be used as a side dish or as a main course too.

Pesto pasta
Image Source: https://momsdinner.net

Ingredients For Pesto Pasta

  • 6 ounces spaghetti, reserve 1/2 cup starchy pasta water
  • 1/3 to 1/2 cup basil pesto or vegan pesto
  • Extra-virgin olive oil, for drizzling
  • Fresh lemon juice, as desired
  • 4 cups arugula
  • 2 tablespoons pine nuts
  • Pinches of red pepper flakes
  • Sea salt and freshly ground black pepper
  • Freshly grated Parmesan or vegan Parmesan

Directions to Make Pesto Pasta

  • According to the guidelines on the box, cook the pasta in a big saucepan of salted boiling water. 
  • Before draining, save 1/2 cup of the starchy cooking liquid. After draining, mix the spaghetti with a little hint of olive oil.
  • Add the pesto and 1/4 cup of the saved pasta water to a large pan over low heat and whisk to mix. 
  • If extra pasta water is required to make a loose sauce, add it along with the pasta and toss it to coat. The thickness of your pesto will determine how much water is required.
  • Turn off the heat and Add the salt, pepper, and lemon juice to taste. 
  • Now, add the arugula, tossing until just beginning to wilt. Serve after adding the pine nuts and red pepper flakes as garnish.

Recipe Notes!

  • If you want your pasta juicy and saucy, use only boiled pasta water.
  • To make your pasta creamy, add heavy cream which is totally optional.
  • Pesto Sauce shouldn’t be used for hearty dishes. While the pasta is still hot, and away from the heat, combine the pesto sauce.
  • Due to oxidation, pesto turns black when exposed to air for a prolonged period.
  • The pesto sauce shouldn’t be processed in the food processor for too long or it will become bitter.
  • Feel free to choose whichever pasta you want and cover it with the green pesto sauce. I prefer penne(the tubular shape) or spaghetti (the long noodle shape).
  • If you want your pasta to be a healthy meal, feel free to add some mixed vegetables. Simply boil the veggies and toss them into the finished product. 

Nutrition Content

  • Calories: 542kcal
  • Carbohydrates: 45g
  • Protein: 13g
  • Fat: 36g
  • Saturated Fat: 9g
  • Cholesterol: 36mg
  • Sodium: 1875mg
  • Potassium: 351mg
  • Sugar: 3g
  • Calcium: 158mg
  • Iron: 2mg

To Sum Up

It is such a great dish to eat on a cold winter night when you want something hearty but not too heavy. I hope that you enjoy this Creamy Pesto Sauce Pasta. It is a delicious, healthy, and easy meal that the whole family will love!

If you have questions about the recipe or want to share your version of pesto pasta, please feel free to comment. Don’t forget to share it with your friends and family, I am sure they’ll love it too.

MUST TRY: Shrimp Alfredo Pasta

Quick Creamy Potato Soup Recipe

0

This ultra-creamy potato soup is a hearty, old-fashioned comfort food. A delicious combination of crispy stock, rich cream, and sharp cheese. Warm yourself up on a chilly day with a bowl of this deliciously tasty soup!

This extremely flavourful soup will leave you with a mouthful of veggies. The soup can be served both thick and blended (whatever you like). Both are delicious and are made the same way except for the last step. To thicken the soup, puree or mash about half of the potatoes with a potato masher or immersion blender. In the end, Load your soup with your favourite toppings for the ultimate taste.

creamy potato soup
Image Source: https://sugarspunrun.com

Ingredients to Gather For Creamy Potato Soup

  • 3 tbsp olive oil
  • 2 cups onion
  • 1 cup chopped carrot
  • 1 tbsp minced garlic
  • 1 teaspoon fresh rosemary
  • 1/4 teaspoon crushed red pepper flakes
  • 3 tbsp all-purpose flour
  • 4 cups stock or broth
  • 4 cups chopped potatoes
  • 1 bay leaf
  • salt and fresh ground black pepper
  • 1/4 cup cream
  • 1 cup shredded cheese

For serving

  • chopped parsley
  • chives or scallions
  • sour cream
  • crumbled cooked bacon
  • hot sauce

Directions to make:

  • In a medium-sized Melt the butter in a large, heavy-bottomed pot (such as a Dutch oven) over medium heat. Stir in the celery, carrots, and onions after the butter has melted. Cook for 5 to 6 minutes, stirring periodically until they start to soften.
  • Stirring the contents of the saucepan while you heat for 30 seconds, add the garlic, rosemary, red pepper flakes, 1/2 teaspoon salt, and 1/4 teaspoon black pepper.
  • Spread the flour over the veggies and stir-fry for approximately a minute, or until it turns a medium golden colour. It will have a toasted, caramelised butter-like aroma.
  • Make sure that there are no lumps of flour, and whisk together 2 cups of the stock.
  • Add the remaining stock and stir to combine. The soup should be heated up, brought to a boil, and then simmered.
  • Cook the potatoes with the bay leaf after adding them for about 20 minutes while slightly covered.
  • Add the cream and cheese after lowering the heat and removing the bay leaf.
  • After checking the seasoning, add additional salt and pepper as necessary. Serve with fresh herbs on top or, for a thick and blended soup, mash or mix roughly half the potatoes in the soup using an immersion blender.

Tips and Notes!

  • Instead of using flour, add a spoonful of cornflour to the cream (or milk) and whisk it into the soup to make it gluten-free (the cornflour acts as a thickener). Alternately, mix roughly half of the soup to thicken it and omit the flour and cornflour.
  • I usually start with a small amount of salt and then add more if required, but you will need different amounts of salt depending on the type/brand of broth you use in your soup.
  • If you want it fully creamy then you can puree it all, remember to do it in batches, about a cup of soup at a time. I usually like my soup with chunks of potato in it and prefer to make a puree of just half of it.

Nutrition Information:

  • Calories: 521kcal
  • Carbohydrates: 47g
  • Protein: 12g
  • Fat: 32g
  • Saturated Fat: 17g
  • Cholesterol: 87mg
  • Sodium: 1326mg
  • Potassium: 1176mg
  • Sugar: 7g
  • Calcium: 182mg
  • Iron: 2mg

To sum up:

Nothing is more enjoyable than cuddling up with a mug of creamy potato soup on a chilly winter night. Or day! This extremely tasty potato soup will be definitely there on your menu for the day or for weekends.

Please feel free to comment if you have any queries regarding the recipe or would want to offer your own take on Creamy Potato Soup. Don’t forget to tell your family and friends about it; I’m sure they’ll like it as well.

ALSO READ: Warm yourself up with homemade Hot Chocolate on a cold evening

Top 6 Healthy Winter Foods That Keep Your Body Warm!

0

When someone says “winter,” what comes to mind? Hefty, scratchy wool clothing? Cracked heels and chapped lips? Winter is undoubted all these things, but did you know it is also the ideal season for boosting immunity? At this time, people are more greedy. Amazingly, the body’s system functions better, and food is more easily absorbed in the cold. This helps the body receive more nutrition.

So how can one strengthen their immune system during the winter? It is common knowledge that meals that strengthen the immune system are healthy, clean, fresh, organic, and simple to digest. These include dairy products, whole grains, legumes, nuts, seeds, fresh produce, dried fruits, and ghee. In addition, several spices also offer anti-microbial qualities that shield us against illnesses and colds. Additionally, they stimulate the activity of digestive enzymes and cellular metabolic processes, ensuring full nutritional absorption.

Introduction To Winter Foods

Our bodies want warm, nourishing foods rich in calories throughout the winter. For this urge to be sated, we require warming meals. Any vegetable that takes a long time to grow and whose edible part grows below the ground is usually warming and good for the winter. A few nuts, oilseeds, dry fruits (like dates), and certain nuts, are also warming. Additionally, you should eat more spices at this time of year than throughout the summer.

Lean dairy, meat, fish, and chicken are all animal products under the warming category. Proteins, whole-grain cereals, and good fats also provide the energy you need to stay warm. The healthiest winter green vegetables include palak, methi, sarson, muli, and pudina. Root vegetables also include potatoes, onions, garlic, radish, yams, sweet potatoes, beets, and turnips.

Winter Foods

Stay Cozy with These Must-Have Winter Foods

1. Soups

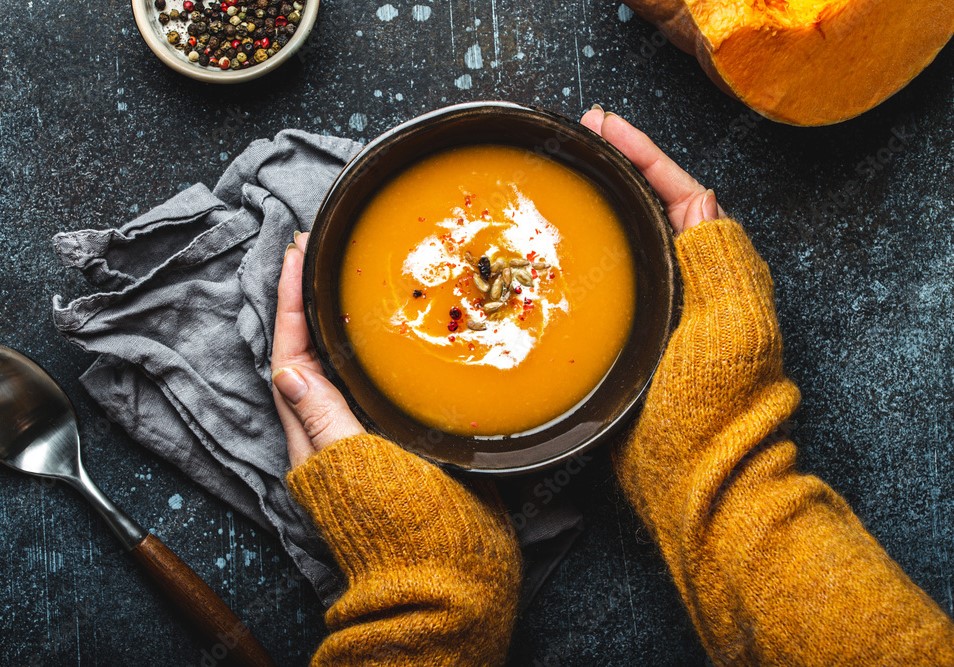
As we all know, Soups are the best option as they have a very high amount of vegetables and keep your whole body warm in the winter season. Pulses, gourds, and barley soups are healthy options and can also be a main meal if you add carbs. You can have the healthiest meal of the day with a dash of spices such as cumin, cinnamon, and ginger. These are very healthy options for moms-to-be. Lactating mothers can enjoy soup at midnight or in the evening. Soups are a great evening snack for kids that will fill their tummies and keep them warm at the same time.

MUST TRY: Butternut squash soup

2. Cereals

Oatmeal, porridge, and whole wheat dishes are great ways to start the day. Even if we often want pizzas and pastas, it is advisable to consume them just sometimes since they will not keep our bodies warm and will only have a transient impact because simple carbs dissolve fast. Pregnant women and new mothers can enjoy vegetable-enriched porridges or oats. Children can be served a whole wheat sandwich, hot milk with cornflakes, or buns with egg or veggie filling.

3. Dry fruits and nuts

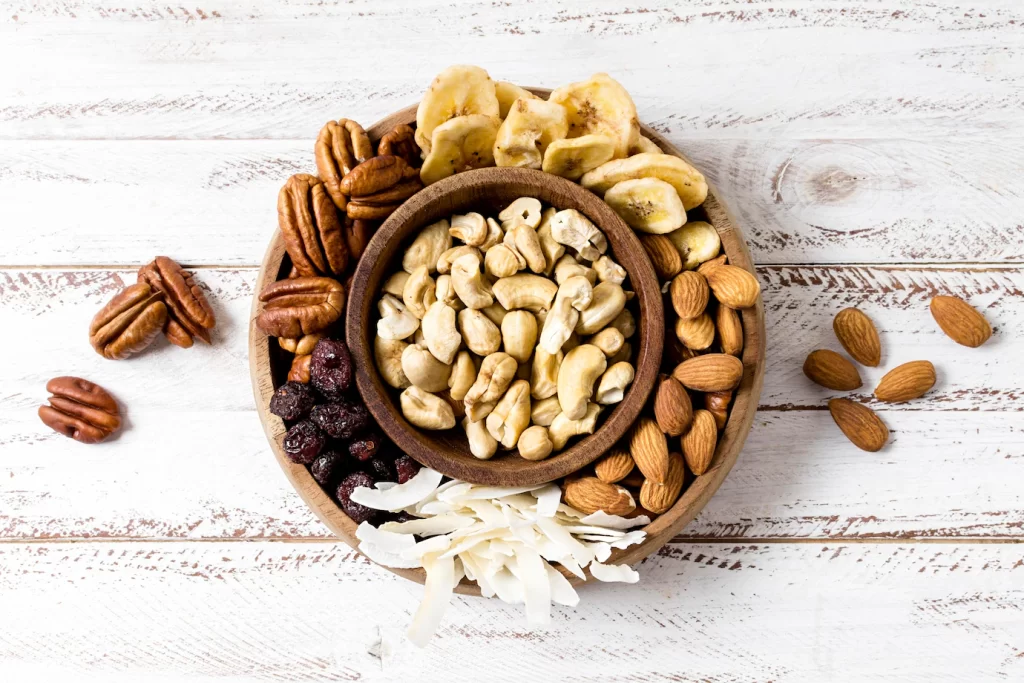
Walnuts, cashews, and almonds are excellent sources of healthy fats that also helps in maintaining body temperature. Figs, dates, and olives are also suitable alternatives, As they are frequently consumed in nations that experience extreme cold. Dates are a great source of iron; when combined with a hot herbal concoction, you will get all the iron you need. A handful of dried fruits can be consumed by pregnant women each day.

Lactating moms can also enjoy a handful of dry fruits and a laddoo made of dried fruits. Kids who like dry fruits can also receive a mouthful every day. You may also add a powdered dry fruit mixture to their milk.

Dry fruits and nuts

4. Meat

Meat may be consumed by non-vegetarians since it boosts body warmth during metabolism and is a valuable source of iron and proteins. If your doctor authorizes it, you can include meat in your pregnancy diet. It aids in reaching your iron needs.

It is quite fine for a breastfeeding woman to have included chicken after a week of having given birth. Soups and mild curries are always a good place to start. Once you’re used to it, you may gradually incorporate additionally fried or roasted meat into your diet. Chicken can be included in an infant’s diet once they reach the age of one year.

5. Honey

Honey, either alone or in salads, can also aid in the winter because it is traditionally used to treat coughs and colds. It can be part of the diet of a pregnant or breastfeeding woman as long as she does not possess a history of diabetes. Only at the age of one year infants can start to consume honey.

6. Spices

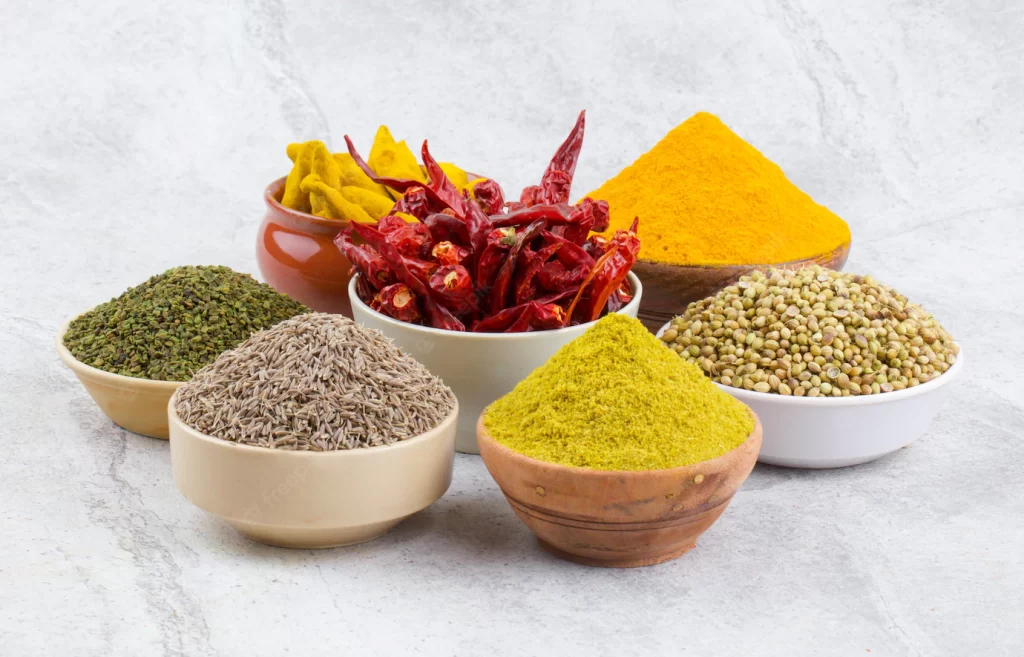
Spices are an excellent source of thermogenesis. Because spices are frequently used in Indian food, this quickly becomes a part of our everyday diet. Ginger, cumin, pepper, sesame, and cinnamon are among the standouts. Ginger can be used in tea, soup, or as a condiment in any curry. Cumin helps your body stay warm for extended periods of time. As a result, add cumin liberally to your dishes. Cinnamon powder can be used to boost the flavor and metabolism of salads, hot cocoa, and lattes. Spices can be added to soups or regular meal preparations for pregnant women.

Spices

Final Words

The chilly weather might cause you to miss your workouts and even put you on a mood swing that can cause you to overeat out of stress and boredom. Incorporate both proteins and carbs into your diet. This will prevent hunger sensations brought on by low blood sugar and balance the soothing brain chemical serotonin. The ideal ratio is two-thirds vegetables and salads and one-third protein.

Pay attention to your way of living as well. The immune system can be compromised rather than strengthened by staying up late, working at night, eating irregularly, exposing oneself to stress and weariness, and sleeping during the day. Spend the winter months this year remaining warm and healthy.

ALSO READ: Winter Smoothie Recipe

Easy Homemade Hot Chocolate Recipe

0

Hot chocolate is a must-have drink for the winter season, and the best recipe helps make it an even more delicious beverage. Vanilla extract rounds out all that chocolaty flavour and makes this one of the perfect homemade hot chocolate ever.

Warm yourself up with homemade hot chocolate on a cold evening. Make this recipe with real chocolate, whole milk, and vanilla instead of powdered stuff. Serve it hot, topped with whipped cream. The best thing about hot chocolate is that it gets ready in just 5 Minutes.

Ingredients to make hot chocolate:

  • 7-8 ounces dark, semi-sweet, or bittersweet chocolate 
  • 4 cups whole milk (or non-dairy milk)
  • 1 tablespoon powdered sugar
  • 1 teaspoon vanilla extract
  • 1/8 teaspoon salt
  • 1-2 tablespoons whipped cream

Directions to make hot chocolate:

Preparing the chocolate:

  • Firstly, chop the semi-sweet chocolate into as small pieces as you can.
  • The pieces must dissolve easily in the liquid. Keep it aside for some time.

Heating the milk:

  • Place the milk and sugar in a medium saucepan.
  • Heat the milk until it simmers and begins to boil gently. Stir the milk on the stovetop so the sugar dissolves.
  • If desired, flavour the milk with herbs or spices, bring it to a simmer, turn off the heat, and let it soak for 10 minutes.

Melt the chocolate:

  • Add the chocolate and stir well until it completely melts. Add the vanilla extract and salt to the pan.
  • Continue heating for another 4 minutes, stirring constantly.
  • You can also add a splash of liquor if you wish. 
  • Divide hot chocolate among mugs. Add whipped cream to the top.
  • You can also sprinkle some cocoa powder, chocolate shavings, or gratings on top if you like.

Notes and Tips!

  • Milk: Use full-fat or whole milk. Milk that has been toned or skimmed can curdle.
  • Chocolate: Cocoa chocolate yields are great to use. The chocolate must be kept at room temperature.
  • Melting Chocolate: Be careful not to overboil the milk while mixing it with the chopped chocolate since this may cause the chocolate to become gritty or release fat.
  • Whipped cream: You can add only cream if you like. Remember that the whipped cream should be at room temperature, not cold or cooled. The beverage will turn lukewarm if the whipped cream is cold. Heavy cream or whipped cream are further options.
  • Sweeteners: Depending on the type of chocolate, you can add more or less sweetness. White sugar, maple syrup, or raw, unrefined sugar can all be added.
  • Almond milk is a suitable replacement for vegans. Almond milk should only be warmed, not boiled.

Nutrients Value:

  • Calories: 323kcal
  • Carbohydrates: 42g
  • Protein: 9g
  • Fat: 13g
  • Cholesterol: 27mg
  • Sodium: 121mg
  • Potassium: 403mg
  • Sugar: 38g
  • Calcium: 309mg
  • Iron: 1.1m

Final thoughts:

Nothing is more enjoyable than cuddling up with a mug of rich hot chocolate on a chilly winter night. Or day!

And I use this homemade hot chocolate recipe when I need something to truly uplift my mood. In fact, no matter the weather, there is always a block of chocolate in the kitchen whenever the urge comes.

Please feel free to comment if you have any queries regarding the recipe or would want to offer your own take on Hot Chocolate. Don’t forget to tell your family and friends about it; I’m sure they’ll like it as well.

MUST TRY: Learn How To Make Creamy Espresso Martini Perfect For Post-Dinner Drink

Rose Cookies Recipe!

0

Rose cookies are well-liked and a daily brunch snack option. They are known as the Rose De Coque in Goa, Achu Murukku in Tamil, and Achapam in Malayalam. This dish can be made with egg or without egg and is a little bit sweet and crunchy in taste.

Rose Cookies are crispy, deep-fried, sweet cookies that are very popular in South India. Despite being so addictive, they can be enjoyed at any time of year. You can even store these cookies in an airtight container for a few weeks. Make sure it is completely cooled down before storing.

Crispy Rose Cookies
Image Source: https://www.indidiet.com

Ingredients

  • 1 large egg
  • 1/3 cup of sugar
  • 1 cup all-purpose flour
  • 1 cup rice flour, fine
  • 1 tsp Vanilla extract / Vanilla bean paste
  • 1 – 1 1/2 cup coconut milk
  • A pinch of salt
  • 1 tsp black sesame seeds
  • Oil for deep frying

Directions to Make Rose Cookies

To make the batter for cookies:

  • Firstly crack the egg into a big mixing basin. Lightly stir.
  • After adding sugar, Whisk it thoroughly.
  • Mix in the vanilla and salt.
  • Mix gently after adding the rice flour and all-purpose flour.
  • To create a batter, add the coconut milk and stir. The batter must not be too thick or thin.
  • Add additional coconut milk/ water or all-purpose flour to adjust the consistency.
  • Add the sesame seeds and stir.
  • Mix everything up until it resembles dosa batter.

To Fry Cookies:

  • Heat the oil in the frying pan over medium heat.
  • Dip the rose cookie mould into the oil, and allow it to heat up for 1-2 minutes.
  • Consider removing excess oil from the rose cookie mould and filling it approximately 3/4 of the way with batter. 
  • Put the cookie mould in the oil right away. 
  • Give the iron a gentle shake in a few seconds to help the cookie come off, or remove it with a fork.
  • Flip the cookie gently to cook the other side once it has browned. 
  • When the cookies are golden brown, pour off any extra oil and transfer them to a tray covered with kitchen paper to let the extra oil drip out. 
  • For the remaining batter, repeat the procedure.
  • After the cookies have cooled completely, serve them or store them in an airtight container.

Notes and Tips!

  • If you fully dip the cookie mould into the batter, you will have difficulty removing
  • It’s crucial that the batter has the right consistency. As you fry the first few cookies, you might need to modify the batter’s consistency to get the correct consistency. If it’s too thick, mix in more water or coconut milk. Add a little all-purpose flour and mix it in if it’s too thin.
  • The cookies shouldn’t be overly sweet. Feel free to increase the sugar to your personal desire. Cook a few cookies, taste them and adjust sweetness as necessary.
  • When the oil is still on the lighter side, remove the cookies from it. Once removed from the oil, they will continue to become somewhat darker.

To Sum up!

This extremely classic snack with the rich aroma of South Indian cuisine is a must-have on your party menu. Incredibly simple and always a favourite, Rose Cookies are very easy to prepare, and also the best part about making these are the crunchiness these cookies provide. You can have these cookies as an afternoon snack daily.

If you have questions about the recipe or want to share your version of Rose Cookies, please feel free to comment. Don’t forget to share it with your friends and family, I am sure they’ll love it too.

MUST TRY: Prepare these Homemade Sushi Rolls with your favorite ingredients

Homemade Sushi Rolls

0

Homemade Sushi is way more cheaper than ordered from the restaurant. You can easily prepare Sushi rolls with your favorite ingredients. It depends upon you on whatever you want to put as a filling in your sushi rolls. You can use various types of ingredients and techniques, so be creative in making your sushi rolls.

This is the simplest recipe to make sushi rolls at home, you just need to gather some ingredients and start. Let’s dive right in to make these delicious Sushi Rolls.

Ingredients to Make Sushi Rolls

  • 1 batch sushi rice, cooled to room temperature
  • 5 sheets nori seaweed sheets
  • 1 cucumber, cut into small strips
  • 2 avocados, peeled and sliced into thin strips
  • 10 ounces smoked salmon or sushi-grade raw fish, sliced into thin strips
  • toasted sesame seeds
  • spicy mayo 

To Serve with:

  • soy sauce
  • 2 tbsp pickled ginger
  • wasabi paste for serving

Directions to Make

  • Following the instructions written on the packet and cook the rice.
  • Observe the directions on the package while cooking rice. Mix the salt, vinegar, and sugar in a small bowl until the sugar is dissolved. Mix thoroughly and pour this over the cooked rice. Keep them aside to cool.
  • Slice the vegetables into small strips as you wait. I enjoy slicing the salmon, avocado, and carrots into chunks that are each approximately 4 inches (10 cm) long.
  • Placing the mat on your work surface now (see note 2) and covering it with the nori sheet with the rough side facing up. Spread the rice evenly over the nori sheet (see note 3), leaving unfilled a 0.5-inch (1.5-cm) border. It should be farther away from you at the rice-free end.
  • In the center of the rice, arrange a thin row of salmon, cucumber (or carrot), and avocado.
  • Roll everything firmly after moistening the rice-free end with water (the mat helps you get a nice round shape, and applying pressure when rolling ensures the roll stays tight).
  • Slice and serve with pickled ginger, wasabi paste, and/or soy sauce.

Tips and Notes

  • Freezing is not recommended at all.
  • If you don’t possess a bamboo sushi mat, you can use a clean dish towel to roll sushi.
  • You can even drizzle the mayo on the top or mix it in the fillings instead.
  • You can use smoked salmon, or you can even use fresh tuna or salmon.
  • Rice won’t adhere to the mat if it is wrapped in plastic.
  • Rice will be sticky, so use cold water to prevent your fingers from becoming too stuck.
  • Make cautious not to pile each sheet with too much rice. The ratio of filling to rice should be appropriate. I “measure” using my measuring cup. For 1 nori sheet, 1.5 to 2 cups of rice should be extremely lightly packed.
  • Rice won’t stick to your hands if you wet them with cold water.
  • Without the cut-offs, you should receive 8 pieces each roll, for 40 pieces. This ought to feed 4-5 people.
  • The appropriate length of your sushi roll can be 7 inches (17 cm).

Nutrition Value

Calories: 190kcal

Carbohydrates: 11g

Protein: 10g

Fat: 12g

Saturated fat: 5g

Cholesterol: 40mg

Sodium: 92mg

Sugar: 1g

Conclusion

This extremely classic dish with the rich aroma of Japanese cuisine is a must-have on your party menu. Incredibly simple and always a favorite, Homemade Sushi Rolls are very easy to prepare, and also the best part about making these are the fillings which will be completely up to you; whatever you want to add, you can.

If you have questions about the recipe or want to share your version of Sushi Rolls, please feel free to comment. Don’t forget to share it with your friends and family, I am sure they’ll love it too.

MUST TRY: Prepare these delicious Thai Fish Cakes at your New Year’s Eve Party