Table of Contents
The Sweet That Makes Every Festive Celebration Feel Complete
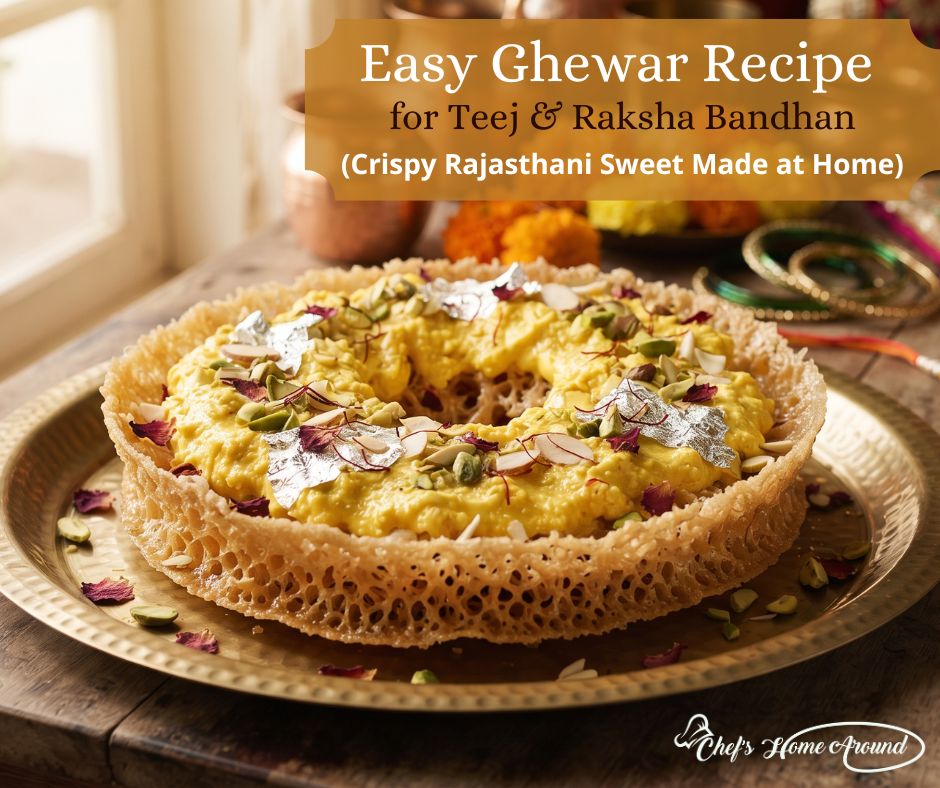
The moment the monsoon arrives, you know the festive season isn’t far behind. Markets fill up with colourful bangles, mehendi cones, festive outfits, and of course… rows of beautifully golden ghewar displayed in sweet shops.
For many of us, Teej and Raksha Bandhan don’t feel complete without this iconic Rajasthani dessert. But here’s the thing—while buying ghewar is easy, making it at home often feels like a challenge.
Sach batao… have you ever looked at a ghewar recipe online and thought, “This looks way too complicated. I’ll just buy it from the market instead.”
You’re definitely not alone.
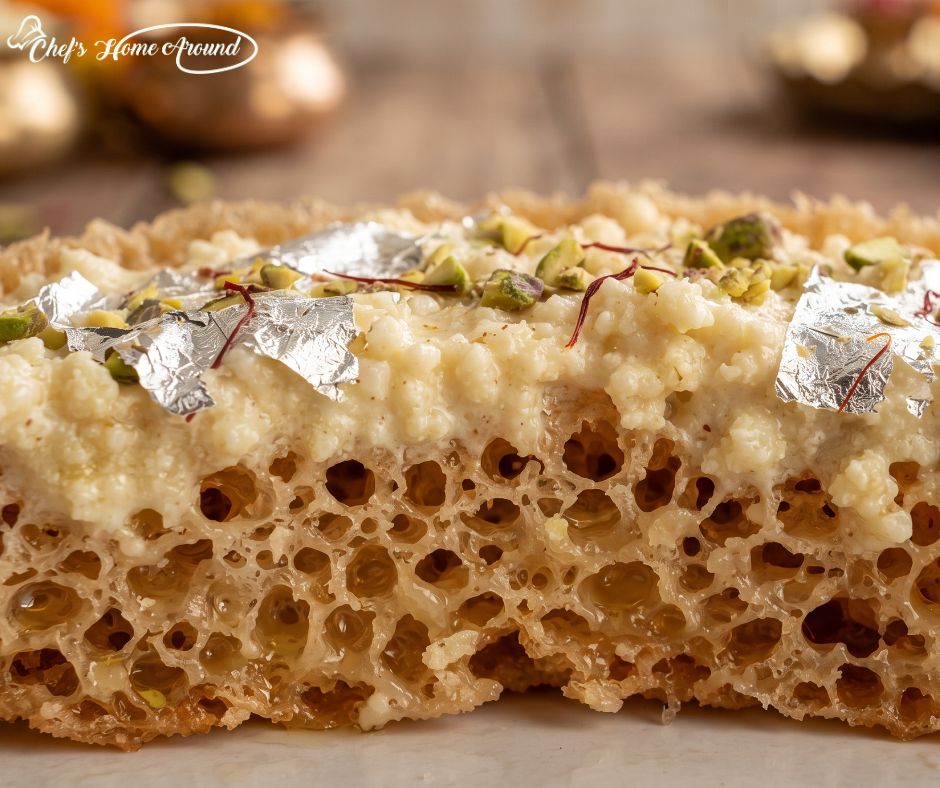
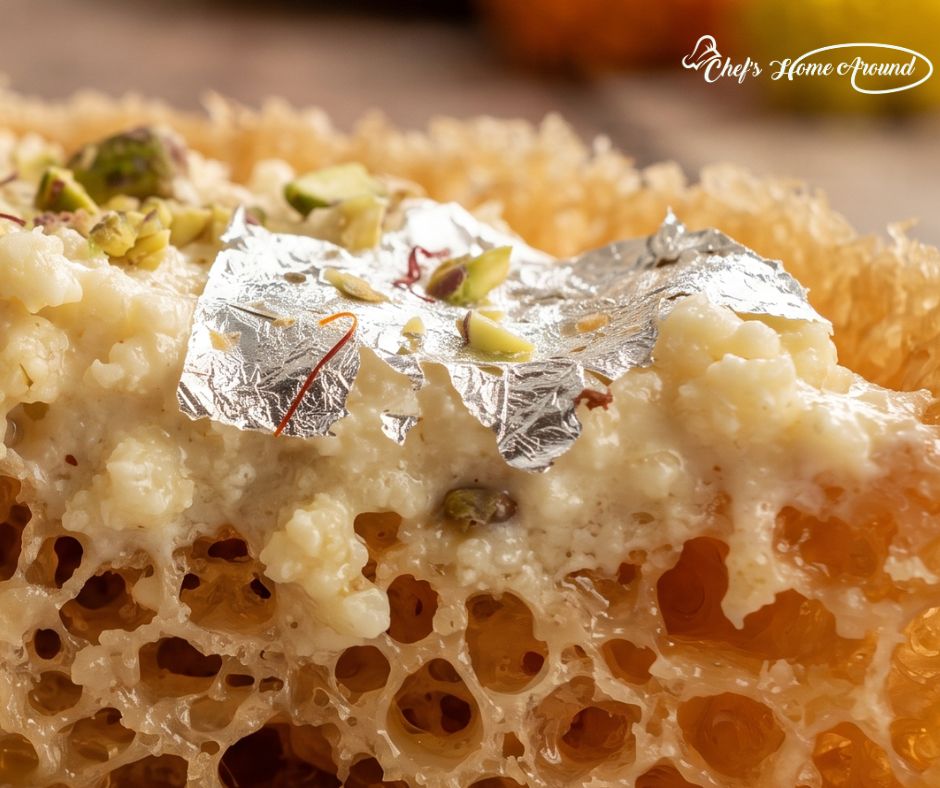
The delicate honeycomb texture, crispy edges, and perfect round shape make homemade ghewar seem like something only expert halwais can master. Once you understand a few simple techniques, it’s much easier than it looks.
At Chef’s Home Around, we believe festive recipes should bring joy, not stress. That’s why we’ve broken this Easy Ghewar Recipe into simple, beginner-friendly steps that anyone can follow. No confusing instructions, no fancy equipment—just practical tips that actually work.
Whether you’re on how to make ghewar journey for the very first time or looking for an authentic Rajasthani Ghewar Recipe that turns out crispy every time, this guide has you covered.
So grab your apron, clear a little space in the kitchen, and let’s make a festive dessert that will have everyone asking, “You made this at home?”
Trust us—ghar ki baat hi alag hai.
Why Ghewar is the Star of Teej & Raksha Bandhan
Every festival has that one dish people eagerly wait for.
Diwali has laddoos, Holi has gujiya, and when it comes to Teej and Raksha Bandhan, it’s undoubtedly ghewar.
Originating in Rajasthan, this crispy, honeycomb-shaped dessert has become a festive favourite across India. It is associated with shravana, the fifth month of hindu lunar calendar. It’s often given to loved ones during Teej, served on beautifully decorated festive platters, and enjoyed with chilled rabri during the rainy season.
What makes it so special isn’t just its appearance—it’s the combination of a light, airy texture, delicate sweetness, and rich toppings like rabri, saffron, and crunchy nuts.
The best part? You don’t have to wait in long queues at sweet shops anymore. With this Easy Ghewar Recipe, you can recreate that same festive magic in your own kitchen.
What Makes This Easy Ghewar Recipe Different?
There are plenty of recipes online, but many skip the tiny details that make all the difference.
This recipe is designed especially for beginners because it includes:
- A simple ingredient list that’s easy to find.
- Clear explanations for every important step.
- Tips to get the perfect honeycomb texture.
- Solutions to common mistakes before they happen.
- Easy alternatives if you don’t own a traditional ghewar mould.
Bas, that’s all you need to make a crispy homemade ghewar with confidence.
Ingredients You’ll Need
For the Ghewar Batter
- 1 cup all-purpose flour (maida)
- ¼ cup chilled ghee
- 2½ cups ice-cold water (adjust as needed)
- ¼ cup chilled milk
- Ice cubes
For Deep Frying
- Ghee, oil, or a mix of both
For the Sugar Syrup
- 1 cup sugar
- ½ cup water
- ½ teaspoon cardamom powder
- A few saffron strands (optional)
- 1 teaspoon lemon juice
For Garnishing
- Thick rabri
- Chopped almonds
- Pistachios
- Dried rose petals
- Silver leaf (optional)
Kitchen Equipment
Don’t let the equipment scare you.
You don’t necessarily need a traditional ghewar mould.
A deep saucepan, tall steel vessel, or deep kadhai works just as well.
You’ll also need:
- A ladle
- A long skewer or chopstick
- Cooling rack
- Mixing bowl
- Whisk
Simple, right?
Before You Begin: Read These 5 Tips
If there’s one section you shouldn’t skip, it’s this one.
These little tips can make the difference between a perfect Rajasthani Ghewar Recipe and a broken one.
1. Keep Everything Cold
Cold ghee, chilled milk, and ice-cold water help create the airy batter that gives ghewar its signature texture.
2. The Batter Should Be Thin
Think of buttermilk consistency.
A thick batter won’t spread properly, and you’ll miss those beautiful honeycomb holes.
3. Use a Deep Vessel
The batter needs enough depth to spread while frying.
A shallow pan won’t give you the classic shape.
4. Don’t Rush the Pouring
Pour a little batter at a time.
Wait for the bubbling to reduce before adding the next ladle.
Patience is the secret ingredient here.
5. Maintain Medium-High Heat
Oil that’s too hot will burn the ghewar.
Oil that’s too cool will make it oily instead of crispy.
Finding that sweet spot is the key.
Easy Ghewar Recipe (Step-by-Step)
Step 1: Make the Perfect Batter
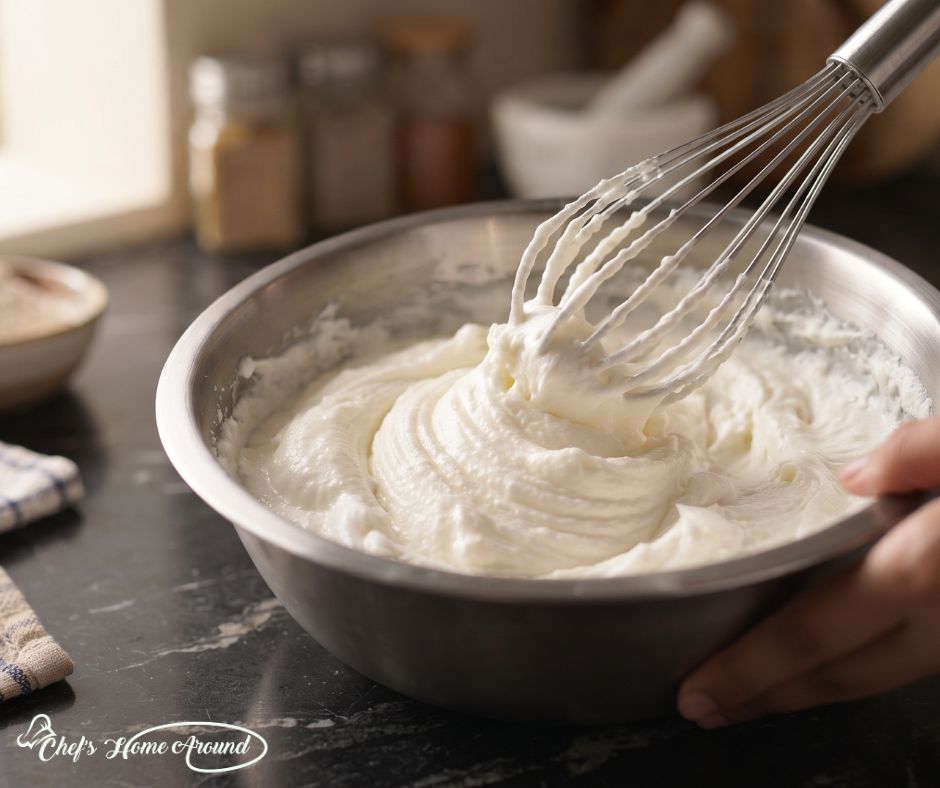
- Start by whisking chilled ghee until it turns light, creamy, and almost white.
- This step adds air to the batter and helps create the delicate texture that makes traditional ghewar so unique.
- Now gradually add the flour while whisking continuously.
- Slowly pour in the ice-cold water, followed by the chilled milk.
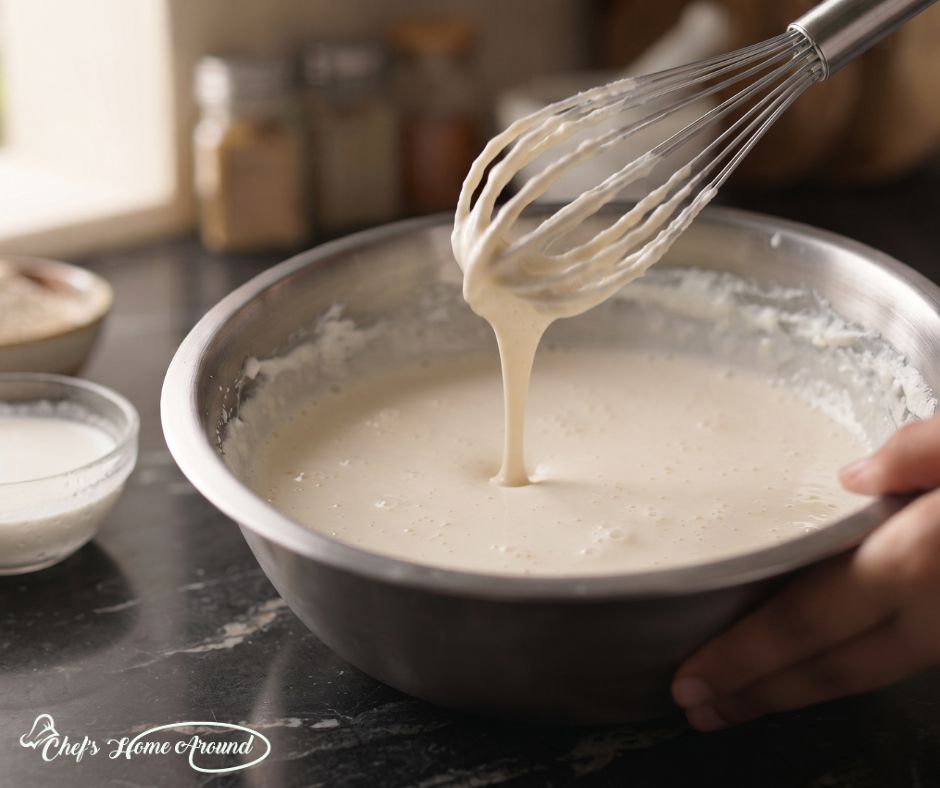
- Keep whisking until the batter is smooth, lump-free, and slightly thinner than pancake batter.
- If the batter coats the spoon heavily, it’s too thick.
- If it flows smoothly in a continuous stream, you’re ready to go.
Step 2: Prepare the Sugar Syrup
- While the batter rests, make the syrup.
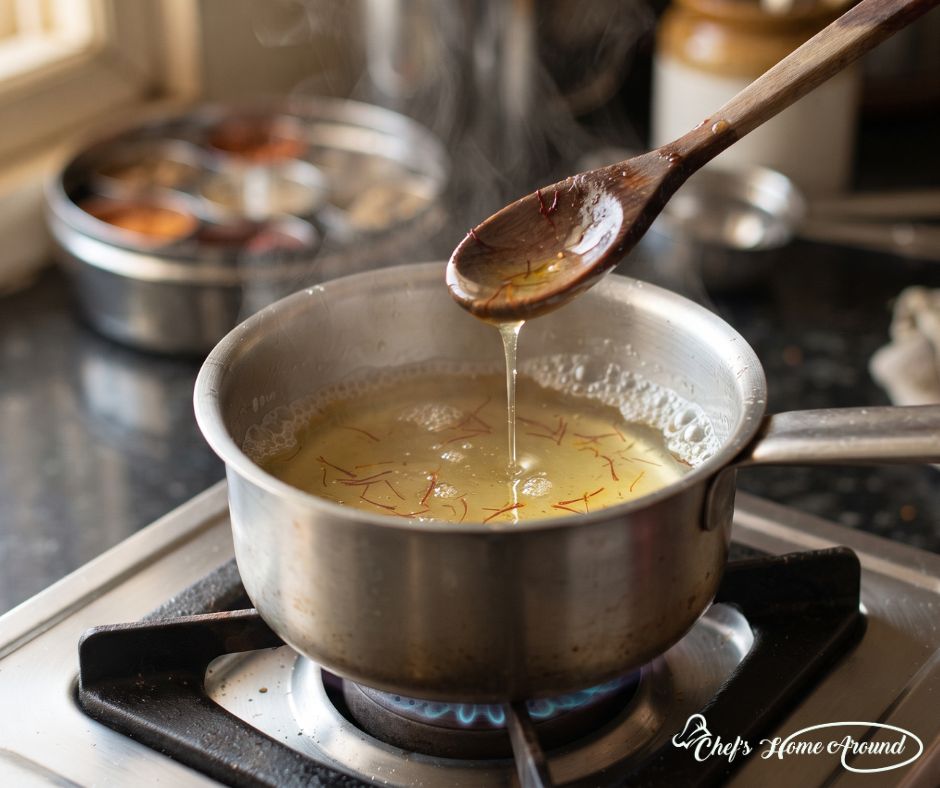
- Add sugar and water to a saucepan and bring it to a gentle boil.
- Stir until the sugar dissolves completely.
- Add cardamom powder, saffron strands, and a teaspoon of lemon juice.
- Cook until you get a light one-string consistency.
- Don’t make the syrup too thick—it should coat the ghewar without making it soggy.
- Set it aside and let it cool slightly.
Step 3: Heat the Oil
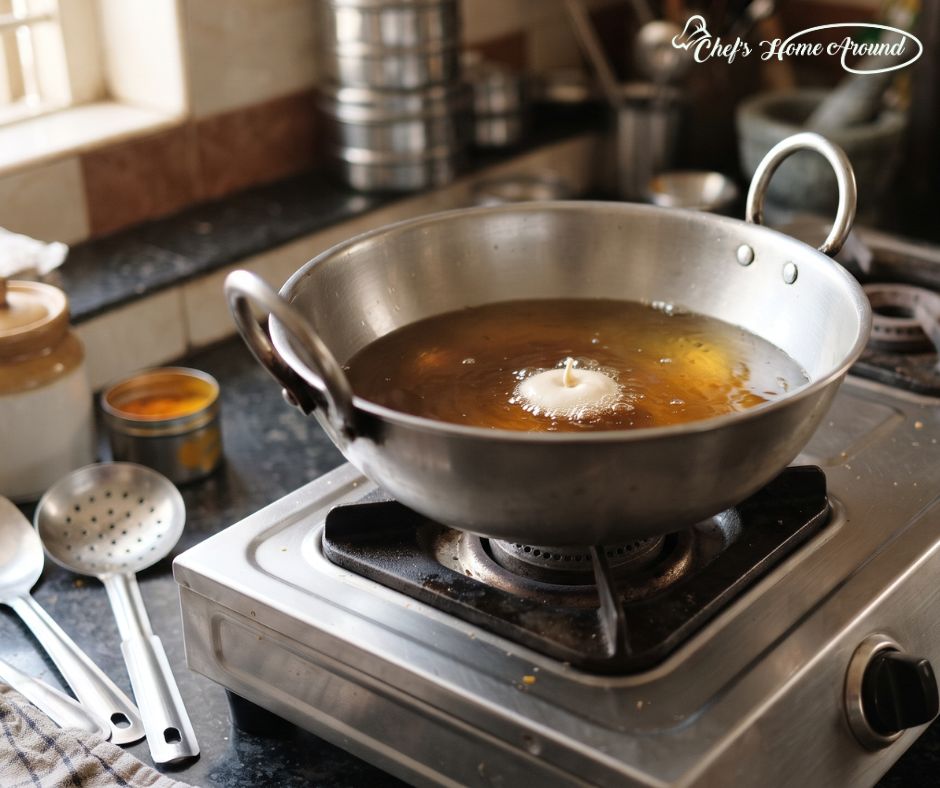
- Fill your deep vessel with enough oil or ghee.
- Heat it over medium-high flame.
- To test the temperature, drop a tiny bit of batter into the oil.
- If it immediately rises with lots of bubbles, you’re ready.
Step 4: Build the Honeycomb Layers
Here’s the step everyone worries about—but don’t overthink it.
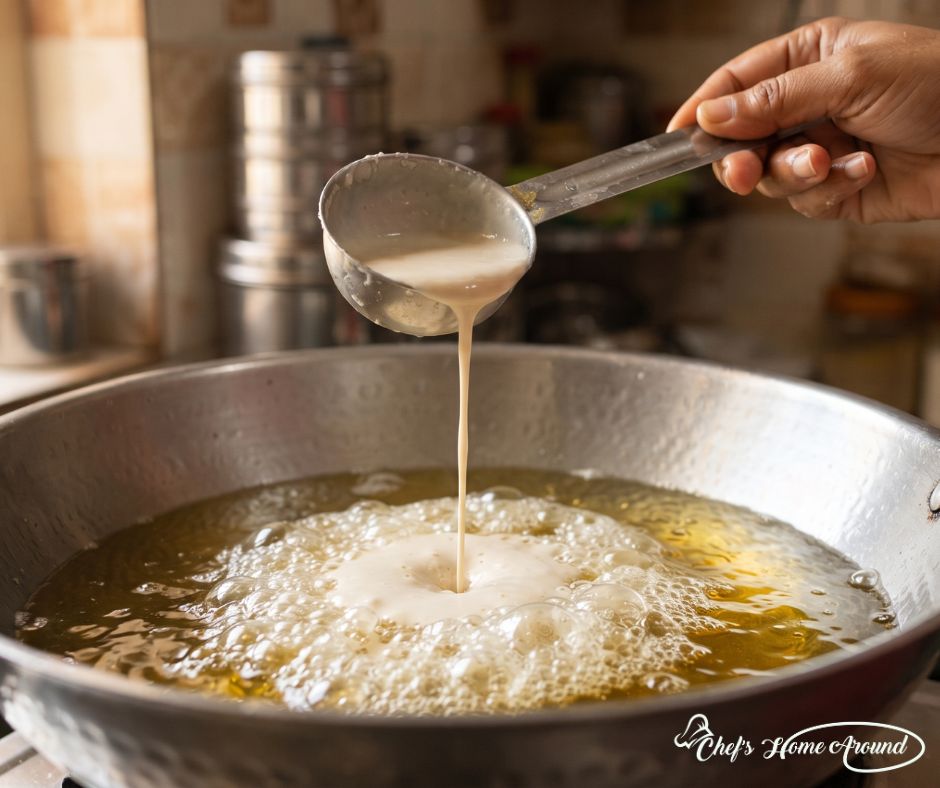
- Take one ladle of batter and pour it into the centre of the hot oil from about 8–10 inches above the vessel.
- You’ll hear a loud sizzle, and that’s exactly what you want.
- The batter will spread naturally and start forming tiny holes.
- Wait until the bubbling settles before pouring another ladle into the centre.
- Repeat this process six to eight times.
- With every pour, you’ll notice the layers becoming more defined.
- If the centre starts closing, gently create a small opening using a skewer or the back of a spoon.
Don’t panic if your first pour isn’t picture-perfect. Even experienced cooks take a couple of attempts to master it.
Step 5: Fry Until Golden
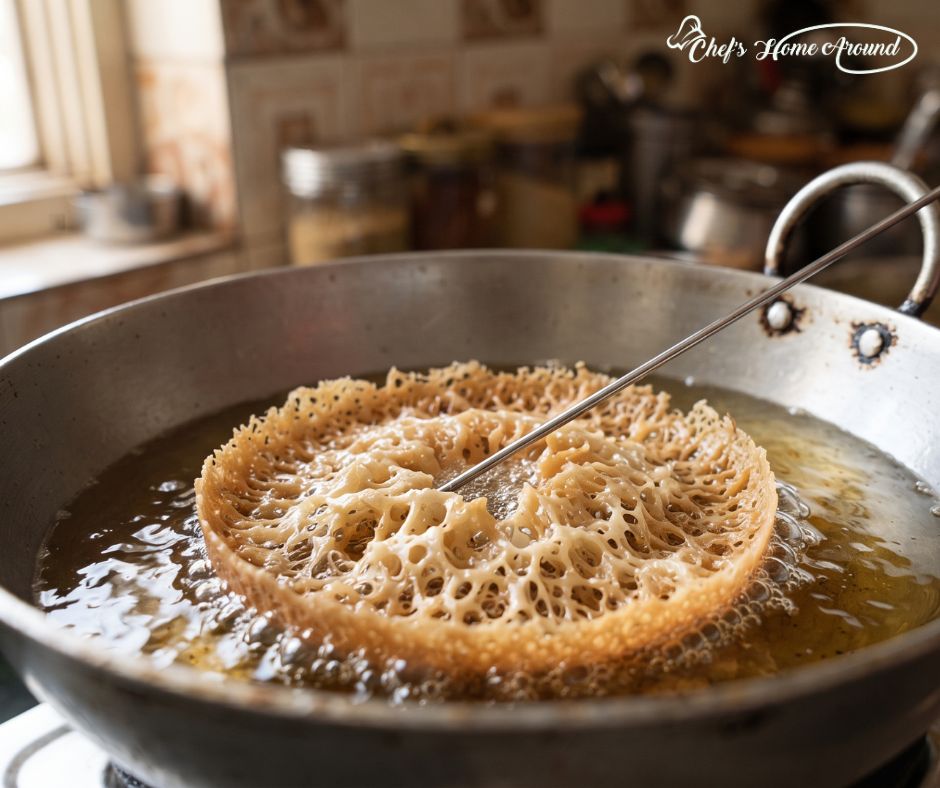
- Once you’ve added all the batter, let the ghewar cook undisturbed until it turns a beautiful light golden colour.
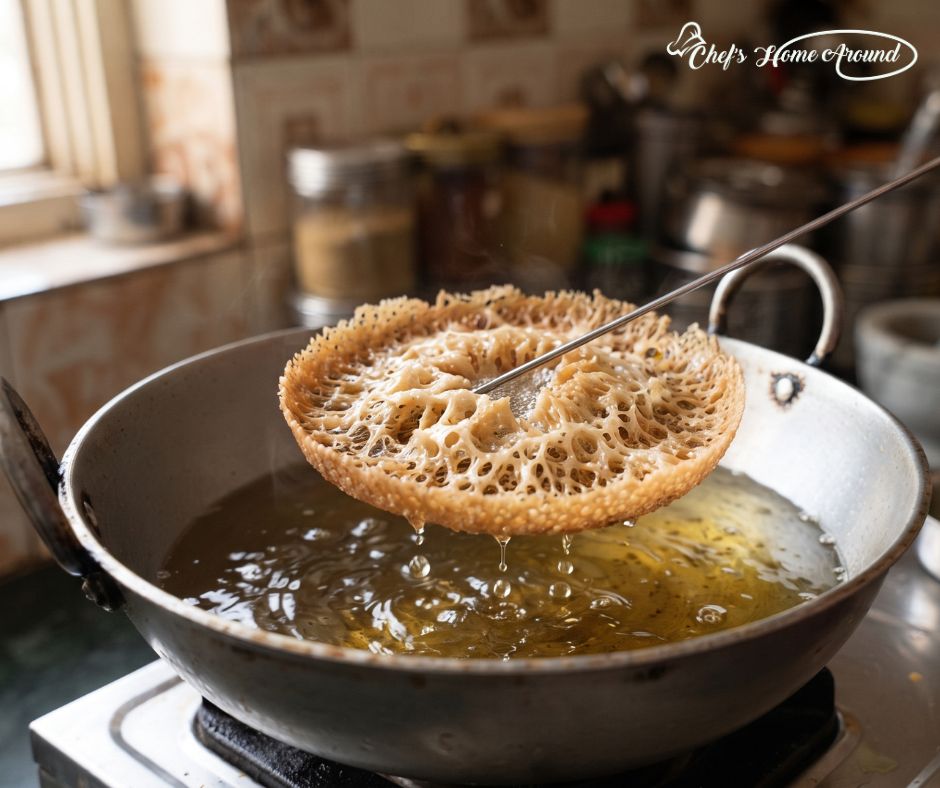
- Carefully lift it using a skewer or long spoon and let the excess oil drain completely.
- Place it on a wire rack to cool for a few minutes.
- A properly fried ghewar should feel light and crisp, not greasy.
Step 6: Dip the Ghewar in Sugar Syrup
- Once your ghewar has cooled slightly, it’s time to give it that signature sweetness.
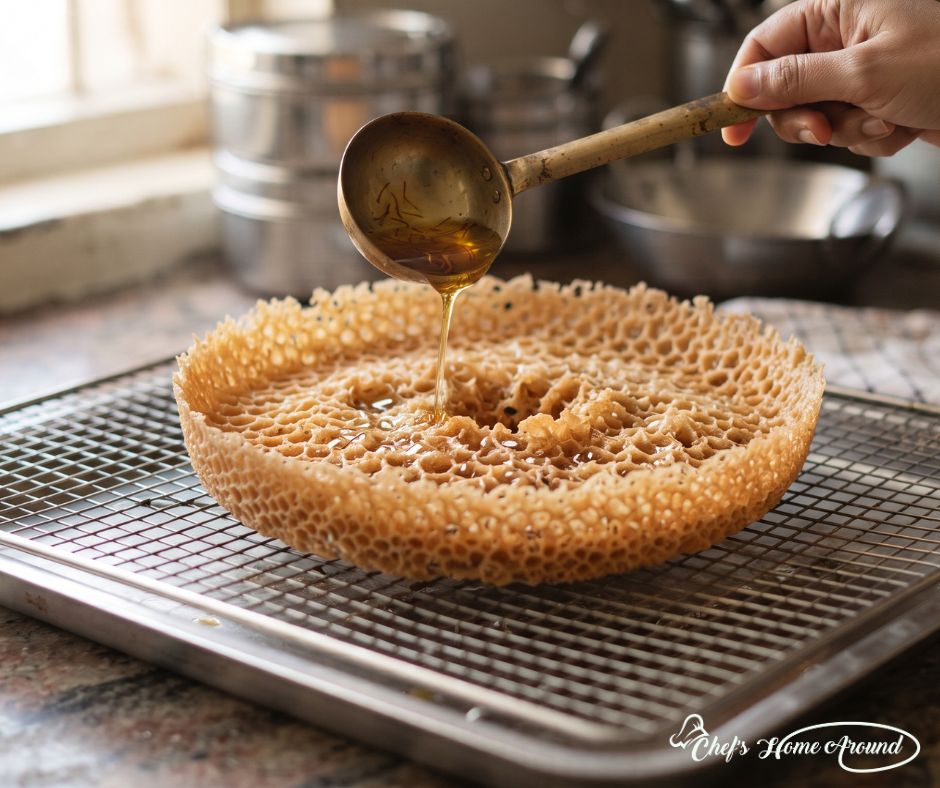
- Gently dip the ghewar into the warm sugar syrup for 20–30 seconds. You can also spoon the syrup over the top if you prefer a lighter sweetness.
- The goal is to coat the ghewar—not soak it completely. Too much syrup can soften its crispy texture, and we definitely don’t want that!
- Place it back on a wire rack for a few minutes so any extra syrup can drip away.
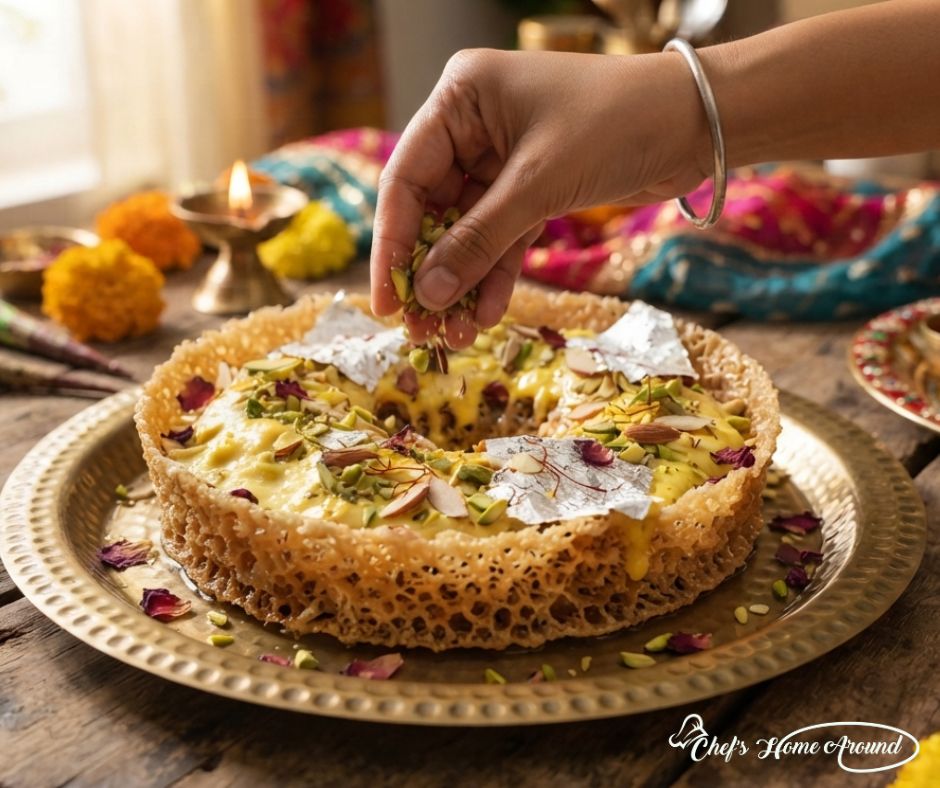
Step 7: Garnish and Serve
Now comes the best part—making your homemade ghewar look as beautiful as it tastes.
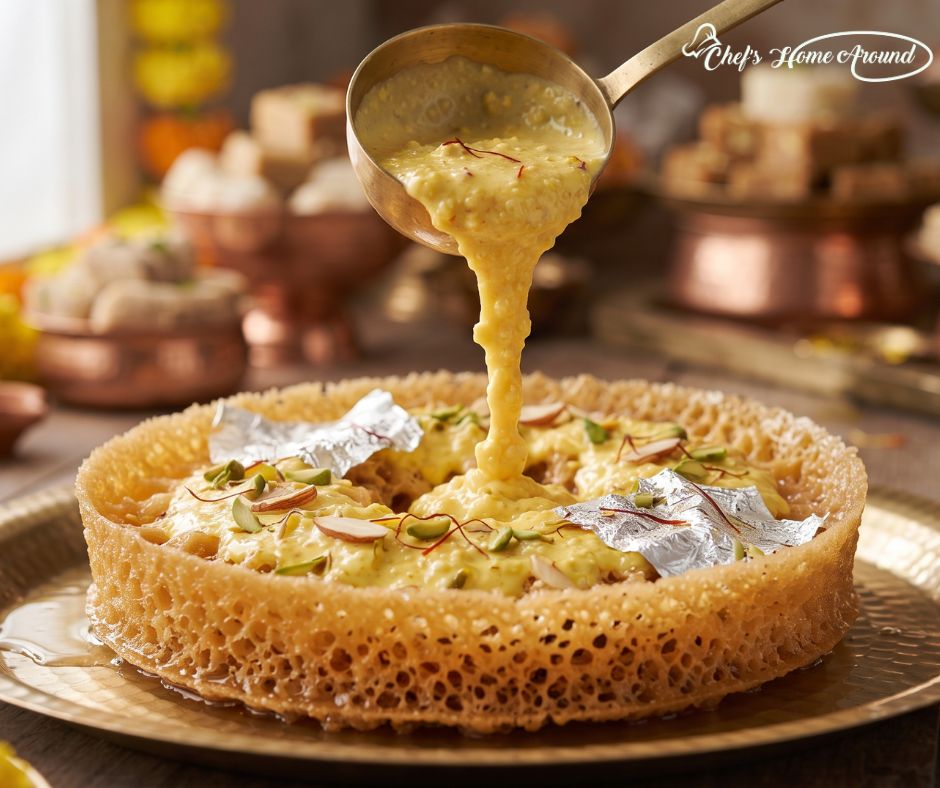
Spread a generous layer of chilled rabri over the top and finish with:
- Chopped almonds
- Pistachios
- A few saffron strands
- Dried rose petals
- Silver leaf (optional)
And just like that, your Easy Ghewar Recipe is ready to steal the show!
Serve it chilled or at room temperature with a cup of masala chai or after a festive meal. Dil khush ho jayega!
Chef’s Tips for a Perfect Crispy Ghewar
A few small tricks can make a big difference when making homemade ghewar.
Use Ice-Cold Ingredients
Cold ingredients help create the airy batter that’s responsible for those beautiful honeycomb holes.
Don’t Skip the Resting Time
Let the batter rest for about 10–15 minutes before frying. This helps the flour hydrate evenly.
Pour Slowly, Not All at Once
Building the layers gradually is what gives ghewar its signature texture.
Keep the Oil Temperature Consistent
If the oil gets too hot, the ghewar browns too quickly. Too cool, and it absorbs excess oil.
Cool Before Decorating
Always let the ghewar cool before adding rabri. Warm ghewar can melt the rabri and make it runny.
Common Ghewar Mistakes (And How to Fix Them)
Even if it’s your first time, don’t worry. Most mistakes are easy to fix once you know the reason.
My Ghewar Didn’t Get Holes
Your batter was probably too thick or the oil wasn’t hot enough.
Fix: Add a little more chilled water and check the oil temperature before frying.
My Ghewar Broke While Lifting
This usually happens when the layers haven’t cooked completely.
Fix: Let it fry a little longer before removing it from the oil.
My Ghewar Isn’t Crispy
Too much sugar syrup or low frying temperature can make ghewar soft.
Fix: Dip it briefly in the syrup and maintain medium-high heat while frying.
The Batter Stayed in One Place
A thick batter won’t spread properly.
Fix: Thin it slightly until it pours like buttermilk.
The Centre Closed Completely
The centre hole is what gives traditional ghewar its iconic look.
Fix: Use a skewer to gently keep the centre open after every few pours.
Delicious Variations to Try
Once you’ve mastered the basic Rajasthani Ghewar Recipe, don’t stop there!
Malai Ghewar
Top the ghewar with sweetened malai or thick rabri, saffron, pistachios, and almonds. It’s rich, creamy, and perfect for festive celebrations.
Mawa Ghewar
Spread a layer of sweetened mawa over the ghewar before adding nuts. This version is popular during Raksha Bandhan and Diwali.
Chocolate Ghewar
Looking for a modern twist? Drizzle melted dark or milk chocolate over the ghewar and sprinkle chopped hazelnuts or pistachios. Kids absolutely love this version.
Serving Suggestions
Ghewar is delicious on its own, but you can make it even more festive by serving it with:
- Chilled kesar rabri
- Vanilla ice cream for a fusion dessert
- Masala chai
- Saffron milk
- A handful of fresh berries for a modern presentation
How to Store Ghewar
If you’ve made extra (which honestly isn’t a bad idea!), here’s how to store it:
- Plain ghewar: Store in an airtight container at room temperature for up to 5 days.
- Rabri-topped ghewar: Refrigerate and enjoy within 2 days.
- Add the rabri just before serving if you’re making it ahead.
A quick tip: Always keep it away from moisture to maintain its crisp texture.
Approximate Nutrition (Per Serving)
Values may vary depending on the ingredients and portion size.
| Nutrient | Approximate Amount |
| Calories | 330 kcal |
| Carbohydrates | 42 g |
| Protein | 4 g |
| Fat | 16 g |
| Sugar | 24 g |
| Fibre | 1 g |
Remember, festive sweets are all about balance. Enjoy them as part of the celebration!
Frequently Asked Questions
1. What is Ghewar?
Ghewar is a traditional Rajasthani dessert made from a thin batter of flour, ghee, and chilled water. It’s deep-fried into a delicate honeycomb-shaped disc, soaked in sugar syrup, and often topped with rich rabri and nuts.
2. Why is Ghewar famous during Teej and Raksha Bandhan?
Ghewar has been associated with Teej celebrations in Rajasthan for generations and is commonly gifted during both Teej and Raksha Bandhan. Its festive appearance and rich flavour make it one of the most loved seasonal sweets.
3. Can beginners make this Easy Ghewar Recipe?
Absolutely! This recipe is written with beginners in mind. If you follow the batter consistency, oil temperature, and layering technique, you’ll be surprised at how achievable it is.
4. Can I make Ghewar without a mold?
Yes. A deep saucepan or kadhai works well. The key is using a deep vessel rather than a specific mould.
5. Why is my Ghewar not crispy?
The most common reasons are low oil temperature, a thick batter, or soaking the ghewar in sugar syrup for too long.
6. Which flour is used for Ghewar?
Traditional ghewar is made using all-purpose flour (maida), which gives it its light and delicate texture.
7. Can I use oil instead of ghee?
Yes. You can use oil or a combination of oil and ghee. Ghee adds a richer flavour, while oil makes the recipe more budget-friendly.
8. Can I prepare Ghewar in advance?
Yes. Make the plain ghewar a day or two ahead, store it in an airtight container, and add the sugar syrup and rabri closer to serving time for the best texture.
9. How long does homemade Ghewar stay fresh?
Plain ghewar stays fresh for up to 5 days at room temperature in an airtight container. Once topped with rabri, it’s best enjoyed within 2 days if refrigerated.
10. What’s the difference between Plain Ghewar and Malai Ghewar?
Plain ghewar is simply coated in sugar syrup, while Malai Ghewar is topped with creamy rabri or sweetened malai and garnished with nuts.
Celebrate the Season with Homemade Sweetness
Festivals have a beautiful way of bringing people together. Whether it’s siblings laughing over childhood memories on Raksha Bandhan or the joy of dressing up for Teej, the sweetest moments are often the ones shared around the dining table.
This Easy Ghewar Recipe isn’t just about making a festive dessert—it’s about creating memories in your own kitchen. Yes, the first attempt might not look exactly like the ones in the sweet shop, and that’s perfectly okay. Every pour teaches you something new, and every homemade ghewar carries a little extra love that no store-bought sweet can match.
So this festive season, challenge yourself to try something different. Gather your ingredients, enjoy the process, and don’t stress about perfection. By the time you drizzle that chilled rabri over your crispy homemade ghewar, you’ll realise that making this traditional Rajasthani sweet is far less intimidating than it seems.
If you give this recipe a try, we’d love to hear how it turned out! Share your experience, your tips, or even your first-attempt photos in the comments. And if this recipe helped you, don’t forget to share it with your friends and family—because good food tastes even better when it’s shared.
From all of us at Chef’s Home Around, wishing you a joyful Teej and a memorable Raksha Bandhan filled with love, laughter, and plenty of homemade sweetness. Stay tuned with us for more desserts recipes and festival special recipes blogs.